Sound Deadening Project Write Up

CLD mats are going to block sound because they're there, but they're not the best at it. It's like handing a sheet in the doorway; yes it'll work, but it's not the best solution.

MLV will block far more sound than CLD tiles will, and CLD you'll have to use a ton to accomplish what you're doing. CLD should have 25% surface-area coverage, anything more than that is un-necessary / exponentially-diminishing returns.

So yes, it'll work, but if you're going to go through all the effort of using a ton of CLD material to try and sound-deaden the doors, why not just use some CLD and a sheet of MLV that's been fitted?

Correct me if Im wrong, but you would also need to put CCF between the CLD and the MLV right? I'm just trying to get the best bang for my buck and time. If doing the CCF and MLV isn't going to be really noticeable then idk if its worth it entirely.
I'm probably only going to be doing the doors.
 
CLD tiles attach directly to metal body panels to reduce vibrations. They're not meant to span gaps, close holes, etc. Their only purpose is reducing resonance from metal surfaces.

CCF is a decoupling layer between MLV and whatever is above it (such as a door panel, trim panel, etc.). You don't need CCF when MLV is on the floor because the "panel" it touches at that point is carpet. MLV should be secured where-ever it's installed though
 
Mlv

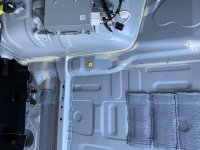
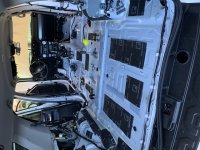
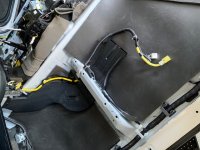
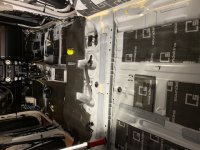
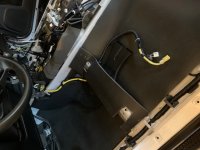
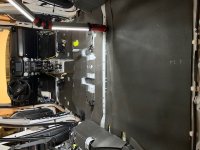
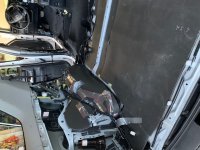
With few reasons to leave the house during COVID I took the time to complete sound dampening on my rig. I had already added constrained layer dampening (CLD) (Sound Skins Brand) to the doors but hadn't done anything to the rear hatch or the floor. Over the course of two weeks (more on this timing later) I applied both CLD and Mass Loaded Vinyl (MLV with closed cell foam (Second Skin brand Luxury Line Pro brand) below are my hind sight thoughts and details of my work.

Results / Thoughts On Impact
Adding CLD in doors and tailgate had a substantial impact on the sound quality of the stereo. I'd do this again in a heart beat. As I've mentioned previously, the CLD is NOT for reducing noise. It reduces vibration and improves sound of your stereo by creating stiffer surfaces for sound to bounce off of. If I was tackling this job again I'd do two things differently: 1. I wouldn't be overly concerned about having large or single sheets in the doors. It's a giant pain, and while it looks cool, it does not impact the sound quality. I'd cut reasonable pieces then cut smaller geometric shapes to fill in the gaps. 2. I would only cover at 35%-50%. You only need 35% coverage according to several manufacturers. I did about 80-85% in the doors. It needlessly adds weight and cost.

I had high hopes for MLV (rational or not). I really was hoping to block out 70%+ of road noise and have a quite ride. In retrospect I think this was an unreasonable goal. First off, I only did the floor. Second of all, the 4Runner is a brick pushing through the air. In my opinion even if you did the floor, doors, tailgate and ceiling you'd still have plenty of noise. The wind noise created by the shape of our vehicles, coming through the windows is SUBSTANTIAL. This is not to say there isn't a difference. The ride is quieter and because there is less road noise the stereo doesn't need to work as hard. Would I do it again? Maybe if there was another virus and I was sitting at home for weeks on end. I love that I now have a much better understanding of how the interior is put together. Its actually not that hard - just time consuming. The results are noticeable but not off the charts and it does take a long time.

What I learned / Tips and tricks
1. Taking the carpet and seats out its not hard, but you need to be careful of a few things.
2. If you remember nothing else, remember that you should ALWAYS hand tighten bolts, especially bolts for the seats first to ensure you don't cross thread them. Then finish them up with a torque wrench. Why do I say this - I cross threaded a bolt to the rear seat with a ratchet. When I tried to back the bold off I broke off the nut in the floor. The result was the bolt would spin but not come out. The Toyota dealership would not touch it. They said I had to go to a body shop - which I did. The body shop ended up cutting the bolt, drilling out the remainder, and installing a new nut. $180 later I feel safe having my kids in the back but my ignorance took this from a 4-5 evening project to two weeks of my car being out of commission.
3. Every bolt has a specified torque. The official Toyota repair guides ($1,400) will tell you many things, including these numbers. You can get a two day access for $20. Since I had to go to a shop anyway I got out of both.
4. To get the rear seats out you'll see obvious bolts on the floor. There is also a bolt in the seat that needs to be removed. To do this, flip up the back panel of the seat (there is a clip, you won't break it - just pull firmly) and you'll see it.
5. MLV with close cell foam attached is THICK. If you plan on using this type of product I would recommend not using a CLD with foam attached. I really like sound skins, but it adds thickness. I have serious doubts I could run MLV in the doors over Sound Skins CLD which includes foam.
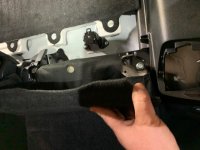
6. Getting the MLV under the venting in the foot area of the front seats can be done, but takes work. I ended up pushing / pulling it through then removing the connection between the two black plastic tubes.
7. I found it useful to tag every piece / bolt as I pulled it and keep bolts in Tupperware so I remembered where every piece goes. This tales time but is worth it.
8. YouTube is your friend for videos of removing things. I never found great videos of the rear panels there are several clips (six I believe), There are two bolts into the middle of the side panel that have plastic caps and are easy to find). There are two screws into the floor that you'll see when you pull the carpet. I believe there are two bolts up closer to the rear door that are pretty easy to find. If you have questions on pulling these pieces message me.
9. I found it helpful to use a sharpie to mark the spots on the floor / metal where the supports and edge of the carpet went.
10. I found it helpful to put masking tape and the visible side of the panels everywhere there was a clip on the back side. Then I knew just where to push when re-installing.
11. Disconnect your battery before pulling the front seats or you will likely have airbag issues.

I reserve the right to add 12 - 20 as I think more about this.

I hope this was helpful - please message me if you have questions.

 

Attachments

  • IMG_7470.jpg
    IMG_7470.jpg
    86 KB · Views: 1,512
  • IMG_7478.jpg
    IMG_7478.jpg
    117.2 KB · Views: 1,519
  • IMG_7399.jpg
    IMG_7399.jpg
    80.3 KB · Views: 1,474
  • IMG_7479.jpg
    IMG_7479.jpg
    103.4 KB · Views: 1,493
  • IMG_7483.jpg
    IMG_7483.jpg
    102.8 KB · Views: 1,499
  • IMG_7482.jpg
    IMG_7482.jpg
    79.2 KB · Views: 1,466
  • IMG_7488.jpg
    IMG_7488.jpg
    91.8 KB · Views: 1,491
  • IMG_7506.jpg
    IMG_7506.jpg
    103.5 KB · Views: 1,537
WOW!

Thank you so much for the update. It's been challenging for me to get accurate information and explanations of what the different materials do instead of "put this product here because it's the best in class (and also costs the most)."

Anyone reading this in the future, this is the TL;DR of SDing:

CLD - used to produce better audio, goes against the metal to prevent it from vibrating so the sound waves have something sturdy to project off of and not cancel out. Needs about 25% coverage to be effective, more material doesn't equal better performance.

CCF - only used as a layer between the CLD and MLV to separate them from touching each other, otherwise the sound/vibrations would transfer through the CLD to the MLV, it needs "air space" between those 2 materials to deaden the sound.

MLV - thick material that blocks sound waves, needs close to 100% coverage. It was illustrated to me with an open window: neighbor mowing yard, you close the window 50%...still noise....close 95%....noise still comes in. You need to close the window 100% to get the full potential of blocking the sound waves.

I started putting the CLD from Noico on my front doors on Monday, took me about 12 hours for both doors. Definitely has a learning curve, the 2nd door went much smoother than the 1st. After reading more about SDing, I feel like I just want to use up the CLD I have for the rear doors and hatch, then stop. I didn't realize that for actual sound blocking, CCF and MLV were needed. I redid my audio system completely so the sound quality definitely improved, but I didn't notice an immediate/clear difference after the CLD. The doors are heavier now...so I guess there's that......

I might have to bite the bullet and order some of the Luxery Liner Pro or something that has the CCF attached to the MLV; don't know if I want to spend time gluing the 2 together instead of having them arrive ready to put on. I saw a website that has velcro to attach to the door and CCF/MLV so it is possible to remove if work needs to be done to the window, etc. Also thinking about ordering some ABS to cover the holes in the doors, then adding the CCF/MLV on top of that. I'm going to research more and see if it would be worth my time or not to continue.
 
I’ve wanted to do this since I did it to my Jeep. Made a difference in the Jeep, but it only took a couple of hours. I don’t know if the time is worth the result on the 4R.
 
I’ve wanted to do this since I did it to my Jeep. Made a difference in the Jeep, but it only took a couple of hours. I don’t know if the time is worth the result on the 4R.

What process did you follow in your Jeep?

my 2¢:

I have seen SO MANY instruction videos saying to put the CLD on the outside skin to "stop resonance", then cover the skin that the vapor shield ENTIRELY with CLD (which seems the opposite of them saying that 25% coverage is needed), and finally treat the plastic door panel.

Then, only like 2 sources I found say to use CCF and MLV, which seem to be the actual material to block the sound. I can't find where the installation was where they cut 1 large piece of MLV and hung it with heavy duty velcro between the door and door panel. That to me seemed like a good idea since it is removable if service is needed. And yes, how many times have you had to get inside the door to service anything....but would you want to spend a couple hundred dollars getting your sound proofing perfect, then a shop needing to cut it all off bc you cant roll your window up anymore?
 
Anyone reading this in the future, this is the TL;DR of SDing:

CLD - used to produce better audio, goes against the metal to prevent it from vibrating so the sound waves have something sturdy to project off of and not cancel out. Needs about 25% coverage to be effective, more material doesn't equal better performance.
Great thread - and direct question on any guidance on 'what to buy' for those of us looking for a lighter project:

While I have the door panels removed to replace speakers (OEM+) a little CLD appears to be the best bang for buck. If I'm only aiming for 35%-ish coverage, and only want to do the doors and tailgate - how much Sq Ft would be needed?

*36 square feet of Kilmat CLD (47 sheets of 9.8x15.7") is about $60.00 on Amazon. Would that about cover me?
 
*36 square feet of Kilmat CLD (47 sheets of 9.8x15.7") is about $60.00 on Amazon. Would that about cover me?

That's what I'm aiming for (doors and tailgate). I didnt read about the 25% coverage until after I did ~99% coverage on my front doors. I still feel I could get good coverage on the back doors and maybe the tailgate, so if you don't do the wasteful coverage that I did, I'm sure you can get enough coverage with that kit.
 
I'm pretty sure that's the size of the kit that I got too.
I zagged on this one. I switched to the much more expensive Hushmat off a recommendation, and while leaving the vapor barrier intact, I dropped about 7 mats (7 sq ft) for each front door. Most of it on any bare metal I could find on the outer door - which I could reach almost all of though the speaker hole.

If I ever want a bigger project out of this, I'll come back and strip off the vapor barrier and hit the inner door. Door sounds much more solid, and the hushmat + OEM+ speaker sound great.
 
Not intending to stray too far off topic, but one recommendation I heard recently for soundproofing a room in a regular house was to essentially build a 2nd wall all around the room, separated from the existing walls by 1" of dead air space. Basically, a box inside a box. The 2nd, inner wall would have two layers of drywall on it. The dead air space apparently greatly reduces the noise level inside the room. (This is effective only if HVAC duct does not connect to or pass through the walls or ceiling of the room.)

In a 4Runner, maybe the layer of Mass Loaded Vinyl corresponds to the double layer of drywall, and the closed-cell foam corresponds to the dead air space. But the problem of installing a 2nd windshield, or a double-pane windshield, remains.
It isn't the dead air that kills the sound, it's that the two walls are limited in their physical connections. One could make an argument for further barrier boundaries at floor and ceiling of the inner wall. Vibration (sound wave) doesn't transfer well between medium changes & surfaces.
To wit: the military has found that if you're being bombed/depth charged while swimming, your best defense is floating on the water's surface.
 

Members online

Forum statistics

Threads
278,310
Messages
3,554,077
Members
248,016
Latest member
Advally Service

Trending content

Back
Top