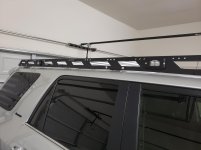
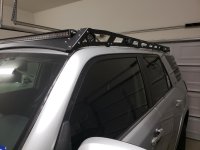
Southern Style Offroad Full Length Roof Rack

Rear Lights

Hi All - Just curious, anyone was able to mount rear lights while maintaining a flat profile? I am transporting sheets of plywood and other long materials, however I need rear lights for scene lighting.
 
Last edited:
Hi All - Just curious, anyone was able to mount rear lights while maintaining a flat profile? I am transporting sheets of plywood and other long materials, however I need rear lights from scene lighting.

Magnetic mounts might be a good idea since you would be able to take it on and off. I wouldn't want it damaging the lights if it moved around on the rack. I know they also sell battery powered scene lights with magnetic bases at harbor freight. This option wouldn't require wires to be routed.

If you're set on mounting the lights, rigid and other companies make relatively small scene lights that would theoretically be able to be mounted on the last, angled cross bar. You might be able to bend some mounts to make it relatively flush, but you would have to make sure that the rear lift gate doesn't hit it.
 
I had a Yakima fairing with super soft foamy pads on the fairing. Those super soft foamy pads wore through the paint. If I were to install a fairing which touches the paint, I would install a strip of clear-bra on the paint under the fairing. Or at least some clear vinyl stickers.
 
I have a [MENTION=110183]SouthernSS[/MENTION] full-length rack. Does anyone know if the C4 fab ladder will work?? I really don't want to take the back cross bar out. If I need to do that, the whole ladder idea is getting scrapped. The SSO rack didn't fit the shark fin with a 3x1 crossbar in back on my 2018 so they had to send me a 2x1 if that makes any difference at all...

Thanks!
NS
 
Last edited:
I had a Yakima fairing with super soft foamy pads on the fairing. Those super soft foamy pads wore through the paint. If I were to install a fairing which touches the paint, I would install a strip of clear-bra on the paint under the fairing. Or at least some clear vinyl stickers.

We thought of that, and include a strip of clear vinyl to apply to the roof under the wind fairing.
 
Side scene light wiring

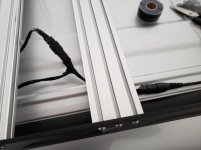
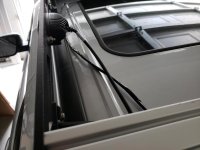
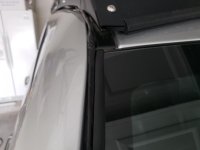
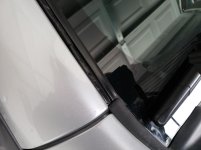
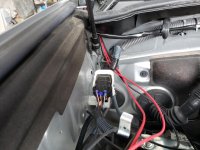
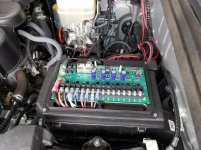
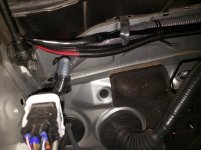
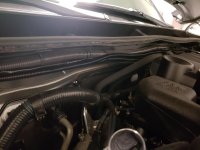
So I don't know how to attach pictures other than separately so I'll just describe what I did and upload pictures. I bought two pairs of the Rigid flush mount lights. I purchased Y-Shape Dual Outputs Deutsch DT DTP Adapters Connectors Splitters from Amazon to connect the two left lights together and the two right lights together. I ran the left side wires to the front, wrapped it in silicone tape and zip tied everything snug against the side of the rack. Then I ran the left side to the passenger side. I wrapped the passenger side wires with silicone tape and ran it to the front passenger side and married the left scene light wires and the right scene light wires together by silicone taping them together. The wires were then run down along the rubber gasket on the windshield and under the trim at the top of the hood and into the engine bay. The wires were then wrapped in a loom tubing and run along the firewall at the back and zip tied. The wires were then hooked up to my sPod.

The wiring came out pretty clean. Let me know if anyone has any input or comments on how I ran my wires. If there's a better way or if you foresee any issues by doing it this way, let me know. Thanks.
 

Attachments

  • sso1.jpg
    sso1.jpg
    110.6 KB · Views: 778
  • sso6.jpg
    sso6.jpg
    116.3 KB · Views: 779
  • sso2.jpg
    sso2.jpg
    110.8 KB · Views: 776
  • sso3.jpg
    sso3.jpg
    125.2 KB · Views: 790
  • sso4.jpg
    sso4.jpg
    129.8 KB · Views: 802
  • sso5.jpg
    sso5.jpg
    138.7 KB · Views: 785
  • sso8.jpg
    sso8.jpg
    128.4 KB · Views: 776
  • sso7.jpg
    sso7.jpg
    116.5 KB · Views: 782
And attached are pictures of the finished product.
 

Attachments

  • sso9.jpg
    sso9.jpg
    114 KB · Views: 841
  • sso10.jpg
    sso10.jpg
    117.6 KB · Views: 1,421
[MENTION=273299]dktxt4r[/MENTION] - Nice. I'm still waiting on the Rigid lights from SSO. Apparently they are on back order and was to be shipped direct from manufacturer. I've only installed the light bar. After seeing yours, can't wait to install mine.

As for wiring, I was concerned about the number of wires and pending on the gauge used, worried it be too thick to run down the space along the windshield. So what I did was run only the hot down to the engine into the sPod, fusing it before connecting (even though the sPod says it has current-sensing MOSFETs for protection). For the wire that ran along the windshield, I used a roll of shrink tubing to hide the color of the wire and to further protect from elements.

After checking for continuity, I grounded the light bar to the front mounting bolts. I did place a short length of wiring from sPod to a bolt on the frame which is also connected to the negative side of the battery. So far so good.

On your setup, you can further protect the connection/wiring by adding shrink tubing where it connects to the sPod.
 
Last edited:
[MENTION=273299]dktxt4r[/MENTION] - Nice. I'm still waiting on the Rigid lights from SSO. Apparently they are on back order and was to be shipped direct from manufacturer. I've only installed the light bar. After seeing yours, can't wait to install mine.

As for wiring, I was concerned about the number of wires and pending on the gauge used, worried it be too thick to run down the space along the windshield. So what I did was run only the hot down to the engine into the sPod, fusing it before connecting (even though the sPod says it has current-sensing MOSFETs for protection). For the wire that ran along the windshield, I used a roll of shrink tubing to hide the color of the wire and to further protect from elements.

After checking for continuity, I grounded the light bar to the front mounting bolts. I did place a short length of wiring from sPod to a bolt on the frame which is also connected to the negative side of the battery. So far so good.

On your setup, you can further protect the connection/wiring by adding heat to the connectors (U shape) where it connects to the sPod. Those are heat shrink connectors.

I was going to heat shrink the wires but it was a lot easier to wrap it with silicone tape. The only reason I didn't heat shrink the connectors at the sPod was because I forgot to add the heat shrink prior to crimping the connectors. I didn't feel like cutting it off and re-doing it...i may just wrap it with silicone tape as well.
 
Apologies if I missed this after going through all 25 pages of this thread:

How many additional crossbars do I need to order for full coverage? I have no sunroof. I know that the rack comes with 8.

Thanks!
 
Apologies if I missed this after going through all 25 pages of this thread:

How many additional crossbars do I need to order for full coverage? I have no sunroof. I know that the rack comes with 8.

Thanks!

You will need 3 additional crossbars for full coverage. I ordered two 3" and one 2" crossbars to complete the rack. This brings it to a total of eleven crossbars - two 2" and nine 3". For best fitment, the 2" crossbars should be installed fore and aft of the sharkfin antenna.

You can either order them directly from SSO or from tnutz.com. I ordered from SSO and didn't price compare vs. tnutz.com... probably could have saved some bucks but not a huge deal. I saved some on shipping since they combined the order with the flat shipping fee for the rack. They are 47" in length, I think - there should be references earlier in this thread.

Quick review here: Southern Style Offroad Full-Length Roof Rack — Sheldon Chu Photography
 
You will need 3 additional crossbars for full coverage. I ordered two 3" and one 2" crossbars to complete the rack. This brings it to a total of eleven crossbars - two 2" and nine 3". For best fitment, the 2" crossbars should be installed fore and aft of the sharkfin antenna.

You can either order them directly from SSO or from tnutz.com. I ordered from SSO and didn't price compare vs. tnutz.com... probably could have saved some bucks but not a huge deal. I saved some on shipping since they combined the order with the flat shipping fee for the rack. They are 47" in length, I think - there should be references earlier in this thread.

Quick review here: Southern Style Offroad Full-Length Roof Rack — Sheldon Chu Photography

Thanks! Do the additional SSO crossbars come with screws for mounting to the rack? What about if I purchase them from tnutz? Or does the rack already come with extra screws?
 
Thanks! Do the additional SSO crossbars come with screws for mounting to the rack? What about if I purchase them from tnutz? Or does the rack already come with extra screws?

If you order from SSO they will throw in the additional stainless or anodized black hardware (depending on what you order). Tnutz you have to order separately from the crossbars.

The rack only comes with enough hardware for the crossbars included in the order.
 
Does anyone have a photo of the attachment points for the light bars on the version with the cutouts or know about compatibility with other light bars? I was looking at the extreme LED X6S.

the outward mounting feet of the single LED light bar is 39-3/8". Also the wiring comes out of the side of the bar so I'm curious if it could be mounted or not.
 
Might sound crazy but I am curious to see someone make one of these with progressively shorter cross bars as they go back so that the side plates ran along the roofline strip, Im curious how that would look?

I would think it would add to the strength too since the side plates would stay right on top of the roof mounting bolts instead of offset.

Just a random thought that went thru my head lol That said Im getting my SSO rack ordered this week.

Selling my Baja rack right now
 

Members online

Forum statistics

Threads
278,317
Messages
3,554,128
Members
248,016
Latest member
Advally Service

Trending content

Back
Top