macshemi57
New member
Well guys,
i have no idea how else to title this thread and get some attention/help. I am in the middle of a front end overhaul on the 2002 and it seems to be a pretty typical thing to do on these third gens, ive been a lurker here for the last 2+ years ive owned my 4r and a member the last year now and have successfully completed the " classic 3rd gen" jobs such as..
-timing belt/wp
-tranny cooler
-egr
-sway bars
-feul pump
-diff. tranny. engine. ECT fluid changed.
Now ive done an absolute shit ton of searching on every portion of this project and are even going to provide pictures of my torn apart rig so people know im not just asking 'in preperation'. no i took the week of work to give my old rig some love and would consider myself almost completely torn down but im looking for some help/advice/and part number conformation for a few more uncommon pieces.
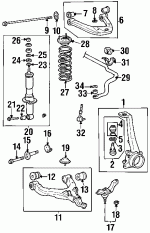
so due to some frozen cam sleeves and bolts ( also very common ) i had to chop my LCA's up and need new lower control arms but am confused with the camelback toyota ordering system since it says there is LCA's for vehicles that are 2wd and 4wd and vehicles with 15 and 16 inch rims.
my model is 4wd with 16 inch rims.
so could someone confirm the right and left LCA part number? there 170 a piece and dont want to order the wrong one even though im fairly certain there is only one part number.
in the picutres you can see that the rear cam bolt is still on there due to the rack being in my way, ive searched for decent thread to use on removing the rack since i will be doing ITRE and OTRE as well as a new rack guide and rack bushings at the same time as pulling the column to weld the slip joint how should i go about this? i know this job is a ***** from the little info ive gathered on the removal and yes i have seen the little and few pictured write up availible for this and heard the high and low pressure lines are impossible to remove.
any help on the removal of the rack and advice for the partsandplan portion of this job regarding the rack.
i have no idea how else to title this thread and get some attention/help. I am in the middle of a front end overhaul on the 2002 and it seems to be a pretty typical thing to do on these third gens, ive been a lurker here for the last 2+ years ive owned my 4r and a member the last year now and have successfully completed the " classic 3rd gen" jobs such as..
-timing belt/wp
-tranny cooler
-egr
-sway bars
-feul pump
-diff. tranny. engine. ECT fluid changed.
Now ive done an absolute shit ton of searching on every portion of this project and are even going to provide pictures of my torn apart rig so people know im not just asking 'in preperation'. no i took the week of work to give my old rig some love and would consider myself almost completely torn down but im looking for some help/advice/and part number conformation for a few more uncommon pieces.
so due to some frozen cam sleeves and bolts ( also very common ) i had to chop my LCA's up and need new lower control arms but am confused with the camelback toyota ordering system since it says there is LCA's for vehicles that are 2wd and 4wd and vehicles with 15 and 16 inch rims.
my model is 4wd with 16 inch rims.
so could someone confirm the right and left LCA part number? there 170 a piece and dont want to order the wrong one even though im fairly certain there is only one part number.
in the picutres you can see that the rear cam bolt is still on there due to the rack being in my way, ive searched for decent thread to use on removing the rack since i will be doing ITRE and OTRE as well as a new rack guide and rack bushings at the same time as pulling the column to weld the slip joint how should i go about this? i know this job is a ***** from the little info ive gathered on the removal and yes i have seen the little and few pictured write up availible for this and heard the high and low pressure lines are impossible to remove.
any help on the removal of the rack and advice for the partsandplan portion of this job regarding the rack.
![IMAG0272[1].jpg](/data/attachments/129/129724-f6eed291d7a3a466c8a42f0d5ac1b8aa.jpg?hash=3Ey3_Sbdze)
![IMAG0271[1].jpg](/data/attachments/129/129734-c6b96747bdd21c0ea415dbb606bd214a.jpg?hash=LC_ZcExuGG)