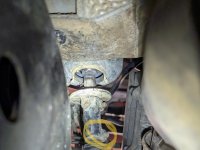
Throwing this out there for the few other members that may be going crazy trying to locate the slop/clunking noise with their steering wheels on these 4th gens.
For the past year and a half I have had a slight clunking noise (particularly when offroad at lower speeds going over uneven road with the wheel quickly bouncing left/right). Didn't hear it much on-road, but if you shook the wheel left/right you could feel a bit of slop and hear a bit of clunking coming somewhere out of the column.
It has been driving me nuts. I have searched every possible thread I could find and tried every fix. Initially I thought I hit gold when i found the video that tack welds the shafts together, but was disappointed to find out it wasnt applicable to the 4th gen 4runner..
I tightened every bolt, check the tilt ball, have a brand new lc200 steering rack, all new tie rods inner and outer, new LCA and UCA, so the noise couldn't be coming from any of that as I had originally thought. With all the parts replaced on my rig I knew it had to be somewhere between the steering wheel and the lower intermediate shaft that comes through the firewall.
I almost bought a lower intermediate shaft assembly thinking for sure my u-joint was shot, I'm glad I saved my $150. Moving the wheel just a bit with my hand on the u joint I could have sworn that was the issue. However, after removing this assembly and taking the U-joint piece off and clamping it in the vice I could confirm it was 100% solid. The noise was coming from further up the column.
I took it all apart and finally found what I believed was the issue.
As far as I can tell, most of the 4th gen's (except the 2004 sr5 maybe?) have a Tilting AND Telescoping wheel setup. To accomplish this, there is a tilt ball assembly that is spring loaded (that some folks claim fixes the noise when the insert a thin spacer between the halfs, I call bs..) and a 2 piece splined shaft assembly that allows it to slide in and out.
This is where the noise was coming from. The splines seemed to have worm themselves out a bit and developed some slop. There was some slop radially, and even more so when you just bent the shaft left right and did not rotate.
My solution to my problem came from something I never thought would work... I found something called Loctite M660 and Loctite M680 compounds that are meant to fix things like screwed up keyways, keep bearing races in place, etc. I decided to get both since the 660 is more of a paste, and I didn't know if I could get it down the splines enough with minimal space there. The 680 is more like their thread lock consistency and can seep into the openings a lot easier.
Please note, in order to have this compound fix this spline slop you will be losing your telescoping ability since it would shear the compound off and I don't believe it would work.
If attempting to do the same thing, make sure to mark all possible shaft/spline locations so that you can reassemble it 100% the way you took it off. I missed this part and guessed wrong which resulted in me having to take off an reclock my steering wheel a bit (no biggie, but can easily be avoided).
Before taking everything apart, make sure you are comfortable with the adjustment of the wheel so that you don't have to move it from this point. When you get the steering column out you can use a tape measure to pull a measurement from the tilt ball up to the edge of the steering shaft so that you can assemble it in place with the compound and not move it. My measurement was right at 18 inches from tip to tip of both shafts assembled together.
I left the assembly to cure with the compound for almost 2 full days to ensure there were no issues with it being partially cured. You also need to make sure you clean all of the splines completely of the grease that is on there to allow the compound to cure properly.
Rough break down of the process I used:
-remove steering wheel column 2-piece cover (3 screws holding it together, underneath, and 2 on either side, you need to turn the wheel left and right to expose these
-remove the factory lower panels. I only have 2 bolts holding this panel in place
-remove the metal bracket surround under the panel (1 or two 10mm bolts)
-unplug all of the 6 or 8 plugs (i lost count) going to and from the column. There is a large plastic piece that is clipped in to the column that you will have to unclip and remove.
-remove the 12mm bolt holding the lower u-joint assembly to the steering shaft so you can pull the entire shaft out and leave the lower portion in place
-remove the 4 14mm nuts holding the column in place from underneath.
-slide the column out of the lower u joint spline (ensure you either mark or note the position it needs to go back in in case it moves)
-to take the column apart tilt it all the way up to release tension on the springs
-remove the 2 springs
-with the wheel tiled, pull a measurement from edge of the shaft that surrounds the tilt ball to the tip of the splined shaft that came out of the u joint so you can match this length with it apart
-to remove the column from the wheel you will need to remove the 2 allen bolts holding it to the tilt ball assembly
-remove the small retaining clip holding the lower splined shaft to the column
-now you can pull the entire assembly out of the column. Again, note and mark the position so you don't miss by 180 degrees where it locks the key cylinder into the groove.
-mark the two shafts with an alignment mark before sliding them out from eachother.
-clean up all the grease thoroughly
-reinsert the shaft into the other, measure out the measurement you took previously and mark an insertion mark for ease of assembly later
-use the m660 and m680 compound to cover the threads and re-insert (i used the 660 on the lower portion, slid it around a couple of time, and then use the 680 near the top before securing it back in place
-reassemble the column assembly and install back onto the tilt ball
-reinstall the 2 allen keys & springs and leave it alone to sit for atleast 24 hours without disturbing it. I left mine for almost 2 days.
-re-install in reverse. The worst part is getting the shaft to fit into the splined u joint fitting with it all floating in the air, but it's very possible.
I will say that I haven't prove this long term, but for the time being it certainly fixed the slop I was seeing. I imagine it should probably be able to hold up long term as long as you dont telescope the wheel but time will tell.
Figured I would throw this out there even if it helps just a single person like myself that was going absolutely crazy trying to figure out the noise.


For the past year and a half I have had a slight clunking noise (particularly when offroad at lower speeds going over uneven road with the wheel quickly bouncing left/right). Didn't hear it much on-road, but if you shook the wheel left/right you could feel a bit of slop and hear a bit of clunking coming somewhere out of the column.
It has been driving me nuts. I have searched every possible thread I could find and tried every fix. Initially I thought I hit gold when i found the video that tack welds the shafts together, but was disappointed to find out it wasnt applicable to the 4th gen 4runner..
I tightened every bolt, check the tilt ball, have a brand new lc200 steering rack, all new tie rods inner and outer, new LCA and UCA, so the noise couldn't be coming from any of that as I had originally thought. With all the parts replaced on my rig I knew it had to be somewhere between the steering wheel and the lower intermediate shaft that comes through the firewall.
I almost bought a lower intermediate shaft assembly thinking for sure my u-joint was shot, I'm glad I saved my $150. Moving the wheel just a bit with my hand on the u joint I could have sworn that was the issue. However, after removing this assembly and taking the U-joint piece off and clamping it in the vice I could confirm it was 100% solid. The noise was coming from further up the column.
I took it all apart and finally found what I believed was the issue.
As far as I can tell, most of the 4th gen's (except the 2004 sr5 maybe?) have a Tilting AND Telescoping wheel setup. To accomplish this, there is a tilt ball assembly that is spring loaded (that some folks claim fixes the noise when the insert a thin spacer between the halfs, I call bs..) and a 2 piece splined shaft assembly that allows it to slide in and out.
This is where the noise was coming from. The splines seemed to have worm themselves out a bit and developed some slop. There was some slop radially, and even more so when you just bent the shaft left right and did not rotate.
My solution to my problem came from something I never thought would work... I found something called Loctite M660 and Loctite M680 compounds that are meant to fix things like screwed up keyways, keep bearing races in place, etc. I decided to get both since the 660 is more of a paste, and I didn't know if I could get it down the splines enough with minimal space there. The 680 is more like their thread lock consistency and can seep into the openings a lot easier.
Please note, in order to have this compound fix this spline slop you will be losing your telescoping ability since it would shear the compound off and I don't believe it would work.
If attempting to do the same thing, make sure to mark all possible shaft/spline locations so that you can reassemble it 100% the way you took it off. I missed this part and guessed wrong which resulted in me having to take off an reclock my steering wheel a bit (no biggie, but can easily be avoided).
Before taking everything apart, make sure you are comfortable with the adjustment of the wheel so that you don't have to move it from this point. When you get the steering column out you can use a tape measure to pull a measurement from the tilt ball up to the edge of the steering shaft so that you can assemble it in place with the compound and not move it. My measurement was right at 18 inches from tip to tip of both shafts assembled together.
I left the assembly to cure with the compound for almost 2 full days to ensure there were no issues with it being partially cured. You also need to make sure you clean all of the splines completely of the grease that is on there to allow the compound to cure properly.
Rough break down of the process I used:
-remove steering wheel column 2-piece cover (3 screws holding it together, underneath, and 2 on either side, you need to turn the wheel left and right to expose these
-remove the factory lower panels. I only have 2 bolts holding this panel in place
-remove the metal bracket surround under the panel (1 or two 10mm bolts)
-unplug all of the 6 or 8 plugs (i lost count) going to and from the column. There is a large plastic piece that is clipped in to the column that you will have to unclip and remove.
-remove the 12mm bolt holding the lower u-joint assembly to the steering shaft so you can pull the entire shaft out and leave the lower portion in place
-remove the 4 14mm nuts holding the column in place from underneath.
-slide the column out of the lower u joint spline (ensure you either mark or note the position it needs to go back in in case it moves)
-to take the column apart tilt it all the way up to release tension on the springs
-remove the 2 springs
-with the wheel tiled, pull a measurement from edge of the shaft that surrounds the tilt ball to the tip of the splined shaft that came out of the u joint so you can match this length with it apart
-to remove the column from the wheel you will need to remove the 2 allen bolts holding it to the tilt ball assembly
-remove the small retaining clip holding the lower splined shaft to the column
-now you can pull the entire assembly out of the column. Again, note and mark the position so you don't miss by 180 degrees where it locks the key cylinder into the groove.
-mark the two shafts with an alignment mark before sliding them out from eachother.
-clean up all the grease thoroughly
-reinsert the shaft into the other, measure out the measurement you took previously and mark an insertion mark for ease of assembly later
-use the m660 and m680 compound to cover the threads and re-insert (i used the 660 on the lower portion, slid it around a couple of time, and then use the 680 near the top before securing it back in place
-reassemble the column assembly and install back onto the tilt ball
-reinstall the 2 allen keys & springs and leave it alone to sit for atleast 24 hours without disturbing it. I left mine for almost 2 days.
-re-install in reverse. The worst part is getting the shaft to fit into the splined u joint fitting with it all floating in the air, but it's very possible.
I will say that I haven't prove this long term, but for the time being it certainly fixed the slop I was seeing. I imagine it should probably be able to hold up long term as long as you dont telescope the wheel but time will tell.
Figured I would throw this out there even if it helps just a single person like myself that was going absolutely crazy trying to figure out the noise.
Last edited: