antidentite
Member
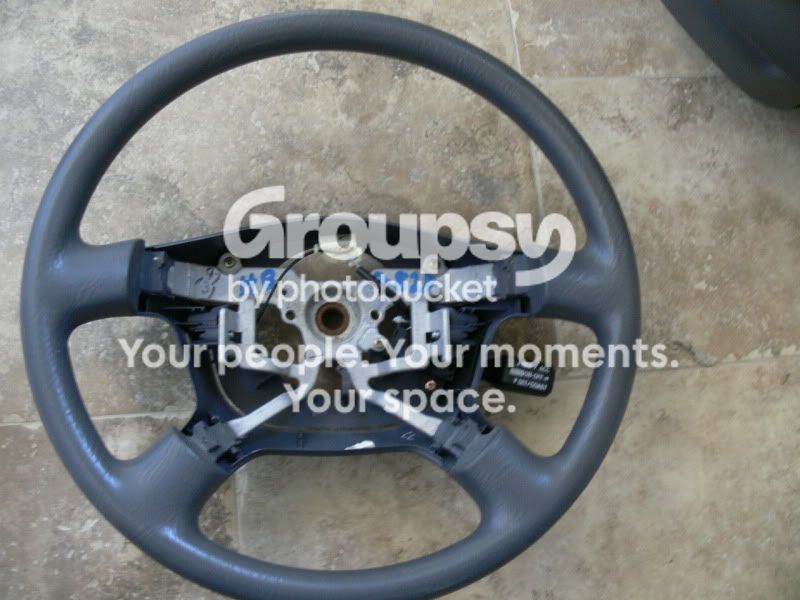
I have always hated the thin steering wheel on my 2004 SR5, so I've been driving it with a Wheel Skinz leather wrap for the last few years.
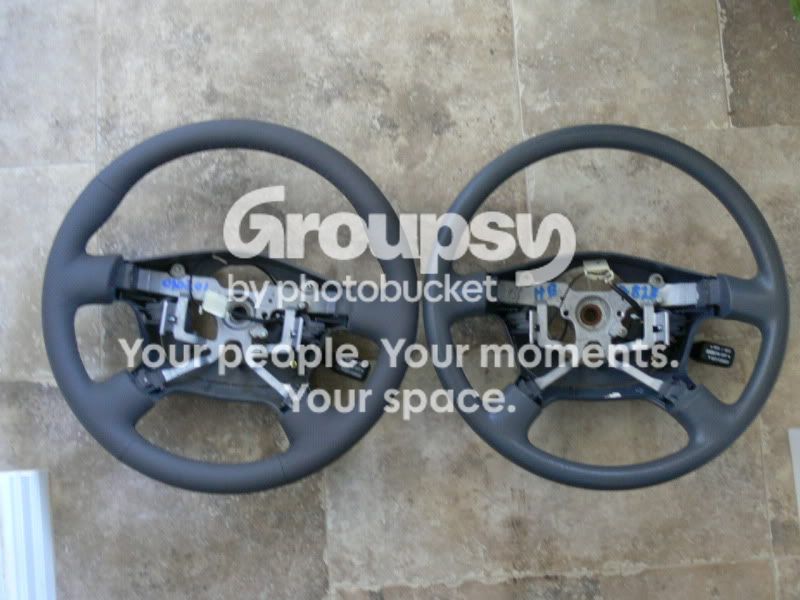
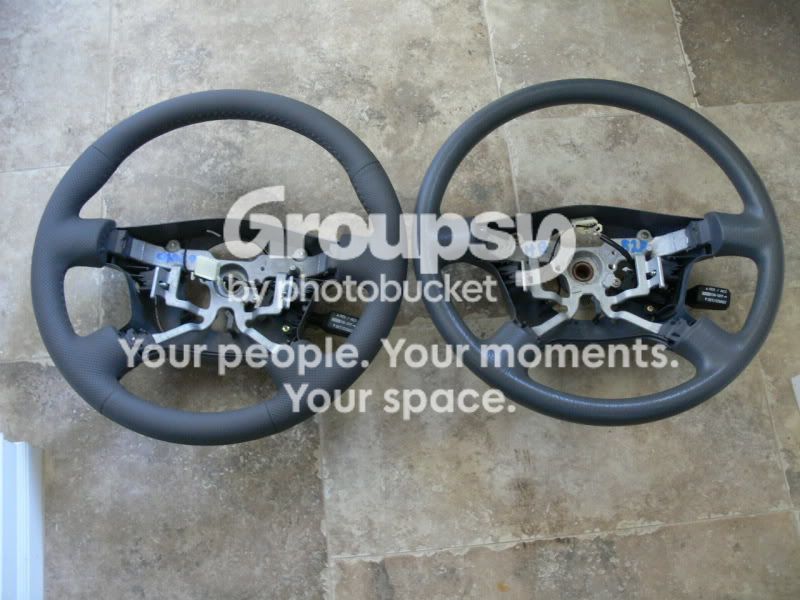
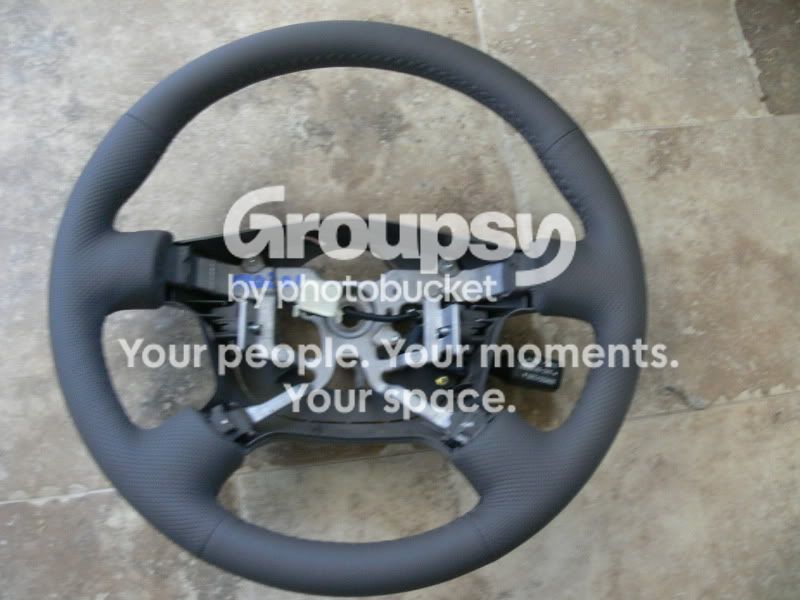
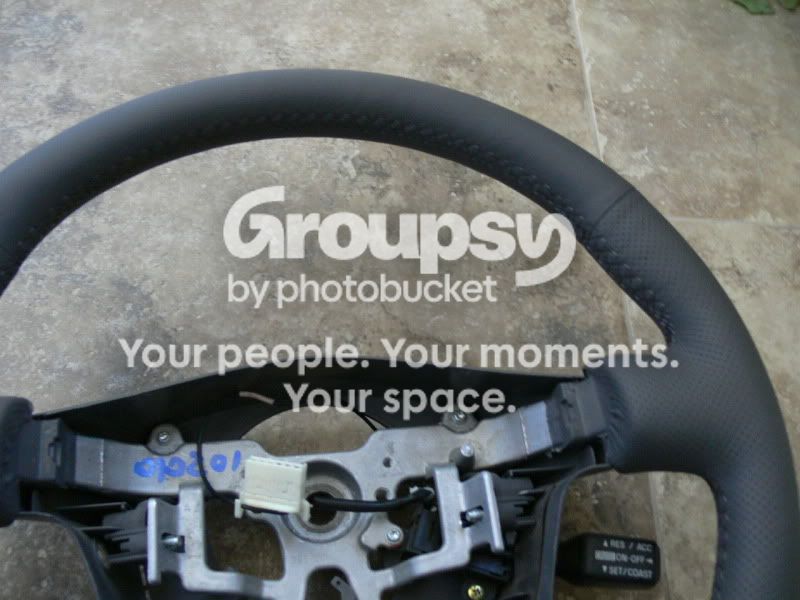
I then found a vendor that would re-wrap a used steering when in leather, with added padding underneath, then ship to me for installation. This adventure has not been cheap, nor has it been without issues. I worked without much prior information on how to do this, except for a very old thread from 2005 without pictures.
So hopefully this will help some of you considering doing something similar. The vendor where I purchased this from is Redline Accessories, which you can find here: http://www.redlinegoods.com/SteeringWheelCover.php.
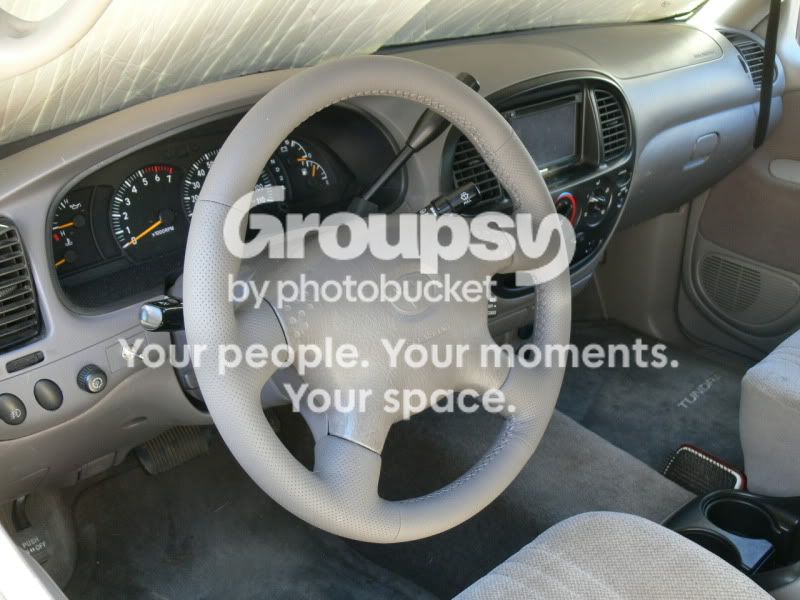
This is the final product. You'll notice that the wheel is not centered, which I've read is due to the manufacturing differences between steering wheels. I hope to remedy this with an alignment:
<a href="http://www.flickr.com/photos/jeremycollins/11343733586/" title="WP_20131212_12_40_22_Pro by Jeremy Collins, on Flickr"><img src="http://farm3.staticflickr.com/2872/11343733586_5d129b15ff.jpg" width="500" height="282" alt="WP_20131212_12_40_22_Pro"></a>
Step 1:
Disconnect the negative terminal on your battery. Some say this is optional, but since the airbag is an explosive device I would say this is mandatory. A 10mm wrench removes this bolt:
<a href="http://www.flickr.com/photos/jeremycollins/11343762654/" title="WP_20131208_10_13_09_Pro by Jeremy Collins, on Flickr"><img src="http://farm4.staticflickr.com/3671/11343762654_7800f5df4a.jpg" width="500" height="282" alt="WP_20131208_10_13_09_Pro"></a>
Step 2:
Remove the two covers on each side of the steering wheel by applying light pressure to the area where the arrow is pointing:
<a href="http://www.flickr.com/photos/jeremycollins/11343762764/" title="WP_20131208_10_02_30_Pro by Jeremy Collins, on Flickr"><img src="http://farm4.staticflickr.com/3708/11343762764_2902a0d914.jpg" width="500" height="282" alt="WP_20131208_10_02_30_Pro"></a>
Step 3:
Once the cover is removed, you'll see the two bolts holding the airbag to the steering wheel. This is a torx bolt, and required the largest one I had in order to remove. It was also on VERY tight, so some muscle helps to remove it:
<a href="http://www.flickr.com/photos/jeremycollins/11343733796/" title="WP_20131208_10_13_23_Pro by Jeremy Collins, on Flickr"><img src="http://farm8.staticflickr.com/7335/11343733796_8387599833.jpg" width="500" height="282" alt="WP_20131208_10_13_23_Pro"></a>
Step 4:
Removing the bolts in step 3 will allow the airbag to lift off the wheel. Disconnect the assemblies at the green and red arrows:
<a href="http://www.flickr.com/photos/jeremycollins/11343733706/" title="WP_20131208_10_24_10_Pro by Jeremy Collins, on Flickr"><img src="http://farm3.staticflickr.com/2828/11343733706_00ea289710.jpg" width="500" height="282" alt="WP_20131208_10_24_10_Pro"></a>
Step 5:
You'll want to remove these airbag connections while the steering wheel is connected to the vehicle. Use a small screwdriver to lift up on the yellow tab, which will then allow you to remove both connections:
<a href="http://www.flickr.com/photos/jeremycollins/11343733656/" title="WP_20131209_09_58_34_Pro by Jeremy Collins, on Flickr"><img src="http://farm4.staticflickr.com/3777/11343733656_dbe99fbdf0.jpg" width="500" height="282" alt="WP_20131209_09_58_34_Pro"></a>
Note: I did not remove these first, and ended up destroying the steering sub-assembly when removing the steering wheel. I learned this part is expensive, and is not something that most dealers stock!
Step 6:
With the airbag disconnected, you can now remove the bolt indicated by the purple arrow. This required a 19mm wrench and a lot of effort:
<a href="http://www.flickr.com/photos/jeremycollins/11343733706/" title="WP_20131208_10_24_10_Pro by Jeremy Collins, on Flickr"><img src="http://farm3.staticflickr.com/2828/11343733706_00ea289710.jpg" width="500" height="282" alt="WP_20131208_10_24_10_Pro"></a>
Step 7:
With the airbag removed, attach it to your new steering wheel. If you have buttons on your steering wheel, this is the time to switch them over:
<a href="http://www.flickr.com/photos/jeremycollins/11343804703/" title="WP_20131208_13_54_57_Pro by Jeremy Collins, on Flickr"><img src="http://farm4.staticflickr.com/3806/11343804703_8aef4644ab.jpg" width="500" height="282" alt="WP_20131208_13_54_57_Pro"></a>
Step 8:
Reverse the steps above to install your new wheel:
<a href="http://www.flickr.com/photos/jeremycollins/11343657305/" title="WP_20131208_13_44_15_Pro by Jeremy Collins, on Flickr"><img src="http://farm3.staticflickr.com/2887/11343657305_0abca2d081.jpg" width="500" height="282" alt="WP_20131208_13_44_15_Pro"></a>
Enjoy your thicker steering wheel! Mine is now about 4 inches in circumference, which is perfect for me.
<a href="http://www.flickr.com/photos/jeremycollins/11343733586/" title="WP_20131212_12_40_22_Pro by Jeremy Collins, on Flickr"><img src="http://farm3.staticflickr.com/2872/11343733586_5d129b15ff.jpg" width="500" height="282" alt="WP_20131212_12_40_22_Pro"></a>
I then found a vendor that would re-wrap a used steering when in leather, with added padding underneath, then ship to me for installation. This adventure has not been cheap, nor has it been without issues. I worked without much prior information on how to do this, except for a very old thread from 2005 without pictures.
So hopefully this will help some of you considering doing something similar. The vendor where I purchased this from is Redline Accessories, which you can find here: http://www.redlinegoods.com/SteeringWheelCover.php.
This is the final product. You'll notice that the wheel is not centered, which I've read is due to the manufacturing differences between steering wheels. I hope to remedy this with an alignment:
<a href="http://www.flickr.com/photos/jeremycollins/11343733586/" title="WP_20131212_12_40_22_Pro by Jeremy Collins, on Flickr"><img src="http://farm3.staticflickr.com/2872/11343733586_5d129b15ff.jpg" width="500" height="282" alt="WP_20131212_12_40_22_Pro"></a>
Step 1:
Disconnect the negative terminal on your battery. Some say this is optional, but since the airbag is an explosive device I would say this is mandatory. A 10mm wrench removes this bolt:
<a href="http://www.flickr.com/photos/jeremycollins/11343762654/" title="WP_20131208_10_13_09_Pro by Jeremy Collins, on Flickr"><img src="http://farm4.staticflickr.com/3671/11343762654_7800f5df4a.jpg" width="500" height="282" alt="WP_20131208_10_13_09_Pro"></a>
Step 2:
Remove the two covers on each side of the steering wheel by applying light pressure to the area where the arrow is pointing:
<a href="http://www.flickr.com/photos/jeremycollins/11343762764/" title="WP_20131208_10_02_30_Pro by Jeremy Collins, on Flickr"><img src="http://farm4.staticflickr.com/3708/11343762764_2902a0d914.jpg" width="500" height="282" alt="WP_20131208_10_02_30_Pro"></a>
Step 3:
Once the cover is removed, you'll see the two bolts holding the airbag to the steering wheel. This is a torx bolt, and required the largest one I had in order to remove. It was also on VERY tight, so some muscle helps to remove it:
<a href="http://www.flickr.com/photos/jeremycollins/11343733796/" title="WP_20131208_10_13_23_Pro by Jeremy Collins, on Flickr"><img src="http://farm8.staticflickr.com/7335/11343733796_8387599833.jpg" width="500" height="282" alt="WP_20131208_10_13_23_Pro"></a>
Step 4:
Removing the bolts in step 3 will allow the airbag to lift off the wheel. Disconnect the assemblies at the green and red arrows:
<a href="http://www.flickr.com/photos/jeremycollins/11343733706/" title="WP_20131208_10_24_10_Pro by Jeremy Collins, on Flickr"><img src="http://farm3.staticflickr.com/2828/11343733706_00ea289710.jpg" width="500" height="282" alt="WP_20131208_10_24_10_Pro"></a>
Step 5:
You'll want to remove these airbag connections while the steering wheel is connected to the vehicle. Use a small screwdriver to lift up on the yellow tab, which will then allow you to remove both connections:
<a href="http://www.flickr.com/photos/jeremycollins/11343733656/" title="WP_20131209_09_58_34_Pro by Jeremy Collins, on Flickr"><img src="http://farm4.staticflickr.com/3777/11343733656_dbe99fbdf0.jpg" width="500" height="282" alt="WP_20131209_09_58_34_Pro"></a>
Note: I did not remove these first, and ended up destroying the steering sub-assembly when removing the steering wheel. I learned this part is expensive, and is not something that most dealers stock!
Step 6:
With the airbag disconnected, you can now remove the bolt indicated by the purple arrow. This required a 19mm wrench and a lot of effort:
<a href="http://www.flickr.com/photos/jeremycollins/11343733706/" title="WP_20131208_10_24_10_Pro by Jeremy Collins, on Flickr"><img src="http://farm3.staticflickr.com/2828/11343733706_00ea289710.jpg" width="500" height="282" alt="WP_20131208_10_24_10_Pro"></a>
Step 7:
With the airbag removed, attach it to your new steering wheel. If you have buttons on your steering wheel, this is the time to switch them over:
<a href="http://www.flickr.com/photos/jeremycollins/11343804703/" title="WP_20131208_13_54_57_Pro by Jeremy Collins, on Flickr"><img src="http://farm4.staticflickr.com/3806/11343804703_8aef4644ab.jpg" width="500" height="282" alt="WP_20131208_13_54_57_Pro"></a>
Step 8:
Reverse the steps above to install your new wheel:
<a href="http://www.flickr.com/photos/jeremycollins/11343657305/" title="WP_20131208_13_44_15_Pro by Jeremy Collins, on Flickr"><img src="http://farm3.staticflickr.com/2887/11343657305_0abca2d081.jpg" width="500" height="282" alt="WP_20131208_13_44_15_Pro"></a>
Enjoy your thicker steering wheel! Mine is now about 4 inches in circumference, which is perfect for me.
<a href="http://www.flickr.com/photos/jeremycollins/11343733586/" title="WP_20131212_12_40_22_Pro by Jeremy Collins, on Flickr"><img src="http://farm3.staticflickr.com/2872/11343733586_5d129b15ff.jpg" width="500" height="282" alt="WP_20131212_12_40_22_Pro"></a>
Last edited: