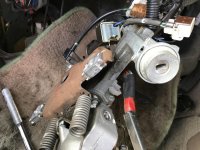
Today I went out to start my 4runner and I can't mice the key to accessory. No it wasn't the steering lock, flat ground and wheels straight forward. Highly inconvenient. After a quick search I found this thread:http://www.toyota-4runner.org/3rd-gen-t4rs/41345-key-keyhole-ignition-locks-up-wont-turn.html
Some good info some poor. Called the local locksmith who recommended calling toyota and replacing it with oem. A quote of 237 and I figured I'd try and fix it my self. Worst that can happen is I'd have to pay 237.
Now you will have slightly less security from thieves. But no one will know from the outside if done right. You will still have the coded key. Plan on 1hr start to finish. But you will likely take less time.
Tools needed:
10mm socket and ratchet
Philips screw driver
Flat screw driver
Small flat screw driver
1/8 drill bit
Drill
Small file
Snap ring pliers (or improvise)
Hammer
Needle nose pliers
Jb weld
It's pretty simple.
1: remove lower dash 4 10mm bolts
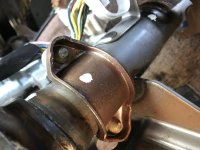
2: lower steering column and remove key surround.
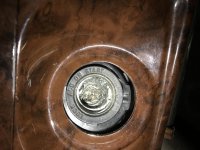
3: with the Philips screw driver remove the black key surround. It's only one screw.
4: put your key into the ignition and turn it to accessory. Won't turn right? Put the key 75% in lightly turn to accessory using the handle of the screwdriver tap the key in. Mine released. DO NOT TURN IT BACK TO OFF!!! It my work a few times or not at all. While it's running move the truck to your desired location. Once again you can turn the engine off but DO NOT TURN THE KEY TO OFF!!
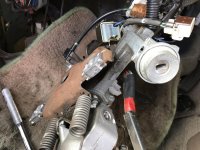
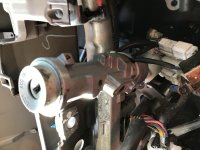
5: while the key in accessory there is a button that needs to be pressed in then you can pull the lock assembly out.
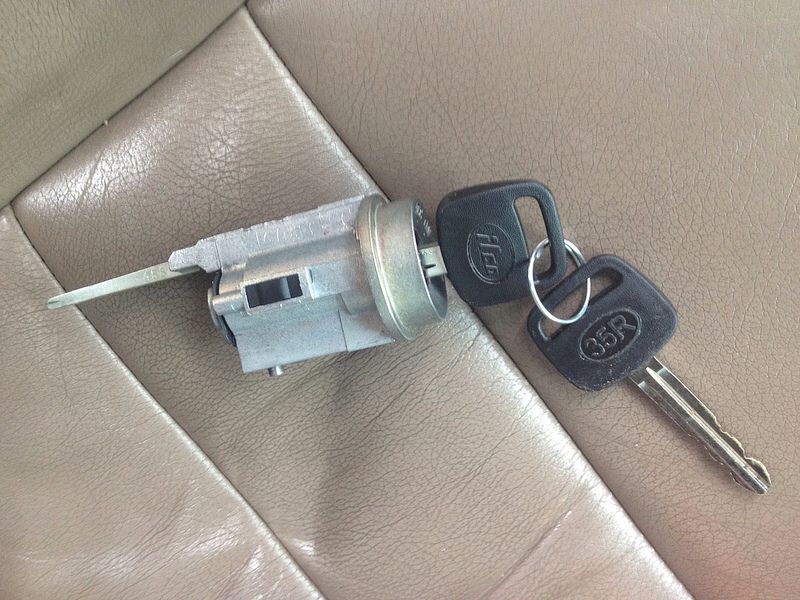
You can see the small button on the bottom side of the assembly.
6: remove the key
7: get your drill and bit out drill or file down the two tabs on the back of the facia. You don't need to drill through it just flush. This is made of aluminum so take it slow and be gentle as you don't want to destroy this. The bottom of the facia will then be held on by a small pin. I have no idea how to remove this so I used the drill yet again. Using the hammer and flat screw driver I was able to tap my way around the ack of the facia. Therefore removing it.

This is the back of the facia

8: remove the snap ring on the rear of the lock cylinder. When you rotate the cylinder to on it will be able to be removed. Exposing the wafers. The last two are the problem wafers. They are a split design and often hang up.
You will be left with this


You can see how they are uneven in the picture. That's the problem.
9 using needle nose pliers remove these last two wafers. Be sure to remove the springs as well.

No more wafers and springs.
10: reassemble in opposite order. I used a little jb weld on the tabs that I drilled and filed. Total cost was free or a tube of jb weld.
Enjoy never having this problem again!!
Anyone have anything to add?
Hey, I just got done with dealing with this exact issue in my 4Runner. 1997 SR5 140,000 miles. Mine started acting up a few months ago. I went and got a new key cut from the key code and this worked a little only that the key was almost inpossible to remove from the ignition. I kept using my old key that was easy to push in the ignition and remove from the ignition, but it would not turn most of the time. As time went on it got harder and harder to start / turn the ignition. It was to the point I thought it would not start and leave me stuck somewhere. Anyway, to get to the point, the ignition cylinder was worn out and needed to be replaced. The local dealership wanted $250-280 to replace it. They dont even do the work themselves, the sub it out to a lock smith. I ended up buying the ignition cylinder key set from the dealer for $104.62 before tax, you can find this part cheaper at Auto Zone or some other parts dealer, and I replaced it myself. If you have a Hanes or Chilton repair guide it will give you step by step instructions to replace it. It is very easy though. It took me about 10 minutes.
Step 1 - disconnect the battery so you do not risk setting off the air bags since you are workin gnear the steering column
Step 2 - remove the 4 bolts from the lower portion of the dash and drop the panel.
Step 3 - put the steering wheel in the lowest position
Step 4 - pop off the little bezel around the ignition
Step 5 - insert key and if possible turn it to the acc position
Step 6- insert a small screw driver in the hole in the underside of the ignition and pull out the entire assembly with the key.
Install of the new cylider is just the opposite.
Now, with the new ignition cylinder you will have new keys and it will not match your old key. The lock smith here in town told me he could rekey the ignition for $25. So, instead of being out $250-280 it cost about $113 for the ignition and $25 to rekey. `
Some good info some poor. Called the local locksmith who recommended calling toyota and replacing it with oem. A quote of 237 and I figured I'd try and fix it my self. Worst that can happen is I'd have to pay 237.
Now you will have slightly less security from thieves. But no one will know from the outside if done right. You will still have the coded key. Plan on 1hr start to finish. But you will likely take less time.
Tools needed:
10mm socket and ratchet
Philips screw driver
Flat screw driver
Small flat screw driver
1/8 drill bit
Drill
Small file
Snap ring pliers (or improvise)
Hammer
Needle nose pliers
Jb weld
It's pretty simple.
1: remove lower dash 4 10mm bolts
2: lower steering column and remove key surround.
3: with the Philips screw driver remove the black key surround. It's only one screw.
4: put your key into the ignition and turn it to accessory. Won't turn right? Put the key 75% in lightly turn to accessory using the handle of the screwdriver tap the key in. Mine released. DO NOT TURN IT BACK TO OFF!!! It my work a few times or not at all. While it's running move the truck to your desired location. Once again you can turn the engine off but DO NOT TURN THE KEY TO OFF!!
5: while the key in accessory there is a button that needs to be pressed in then you can pull the lock assembly out.
You can see the small button on the bottom side of the assembly.
6: remove the key
7: get your drill and bit out drill or file down the two tabs on the back of the facia. You don't need to drill through it just flush. This is made of aluminum so take it slow and be gentle as you don't want to destroy this. The bottom of the facia will then be held on by a small pin. I have no idea how to remove this so I used the drill yet again. Using the hammer and flat screw driver I was able to tap my way around the ack of the facia. Therefore removing it.
This is the back of the facia
8: remove the snap ring on the rear of the lock cylinder. When you rotate the cylinder to on it will be able to be removed. Exposing the wafers. The last two are the problem wafers. They are a split design and often hang up.
You will be left with this
You can see how they are uneven in the picture. That's the problem.
9 using needle nose pliers remove these last two wafers. Be sure to remove the springs as well.
No more wafers and springs.
10: reassemble in opposite order. I used a little jb weld on the tabs that I drilled and filed. Total cost was free or a tube of jb weld.
Enjoy never having this problem again!!
Anyone have anything to add?
Last edited: