Sway bar bushing install - Broken frame thread insert

Will816

New member
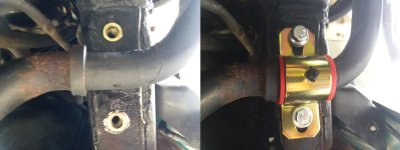
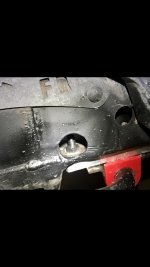
Hey guys. I got the Prothane bushings for my front sway bar and ran into a problem. For a little background, I bought this 4Runner in Salt Lake a couple weeks ago. Whatever creation of satan that they salt their roads with in the winter is just about the worst thing ever; it totally corrodes all the fasteners and makes everything impossible to unbolt. I hit the bolts with some WD40 and let it sit for a few hours, and while unscrewing the rear bolt from the driver side factory bushing/bracket, the bolt seemed to break. It spun freely, but was only about halfway backed out and wouldn't come out, which is what I would have expected if it just seized up and twisted off. So, after trying to figure it out, I removed all the other bolts, successfully, and got a better looks. It appears that there is a threaded insert that is welded to the inside of the frame, and I think the welds were corroded and the insert broke free. So the bolt is stuck, halfway out, and I can't tighten or loosen it. I installed the new bracket and bushing on the passenger side and tightened up the single working bolt on the driver's side, but I gotta do something to get the bolt with the broken thread insert fixed/replaced/tightened/whatever...

Does anyone have any suggestions? The only idea I have is to use a cutting wheel to cut off the bolt head, replace the bushing, and attempt to thread a nut onto the exposed threads of the bolt since the head will be gone. I definitely don't want to do that and lose that bolt inside the frame, though... I'll have that sucker rattling around inside the frame from here to eternity.
 
Register to hide this ad
You can try and slip a nut in from the other side. I used Rivnuts to replace the stripped out holes for my skidplates. They've held up well over the years, the key is proper drill bit diameter for the Rivnut insert and proper installation (you can make a tool from a long bolt, washers, and some nuts.)

I believe the thread pitch for the sway bar bolts should be M8x1.25 (easy to test, take a skid plat bolt and see if it threads in as those are M8x1.25).
 
You can try and slip a nut in from the other side. I used Rivnuts to replace the stripped out holes for my skidplates. They've held up well over the years, the key is proper drill bit diameter for the Rivnut insert and proper installation (you can make a tool from a long bolt, washers, and some nuts.)

I believe the thread pitch for the sway bar bolts should be M8x1.25 (easy to test, take a skid plat bolt and see if it threads in as those are M8x1.25).

I did the same thing this weekend snapping the welded nut off.

it would be great to have a followup on bolt size. I snapped my fronts using a 14mm socket so I was presuming they were 10mm bolts. rears presumably different?
 
This happened to me on the rear bolt on the drivers side. I cut the bolt off. Then I drilled a hole in the frame just big enough so I could get a nut in the frame and get it started on my new bolt. Then I wedged the nut with a screwdriver and tightened it up.

M10 -1.25 x 30 is the bolt size.
 
Last edited:
Hey guys. I got the Prothane bushings for my front sway bar and ran into a problem. For a little background, I bought this 4Runner in Salt Lake a couple weeks ago. Whatever creation of satan that they salt their roads with in the winter is just about the worst thing ever; it totally corrodes all the fasteners and makes everything impossible to unbolt. I hit the bolts with some WD40 and let it sit for a few hours, and while unscrewing the rear bolt from the driver side factory bushing/bracket, the bolt seemed to break. It spun freely, but was only about halfway backed out and wouldn't come out, which is what I would have expected if it just seized up and twisted off. So, after trying to figure it out, I removed all the other bolts, successfully, and got a better looks. It appears that there is a threaded insert that is welded to the inside of the frame, and I think the welds were corroded and the insert broke free. So the bolt is stuck, halfway out, and I can't tighten or loosen it. I installed the new bracket and bushing on the passenger side and tightened up the single working bolt on the driver's side, but I gotta do something to get the bolt with the broken thread insert fixed/replaced/tightened/whatever...

Does anyone have any suggestions? The only idea I have is to use a cutting wheel to cut off the bolt head, replace the bushing, and attempt to thread a nut onto the exposed threads of the bolt since the head will be gone. I definitely don't want to do that and lose that bolt inside the frame, though... I'll have that sucker rattling around inside the frame from here to eternity.
It's about time to remove the sway bar.

Sent from my SM-G930T using Tapatalk
 
This happened to me on the rear bolt on the drivers side. I cut the bolt off. Then I drilled a hole in the frame just big enough so I could get a nut in the frame and get it started on my new bolt. Then I wedged the nut with a screwdriver and tightened it up.

M10 -1.25 x 30 is the bolt size.

thanks for the followup. i like your approach i might try the same when the weather gets a little warmer here. cheers
 
If you haven't got the bolt out yet; wedge something between the frame and the bracket. This will apply enough pressure to keep the nut from spinning.

Save you factory brackets. The ones I used that came with the bushing eventually bent and caused clunking. I replaced them with moog ploy bushings that fit the factory brackets, and I added zerk fittings to the factory bracket.

Good luck.
 
I did the same thing. But I had a buddy who is a mechanic/welder. He jacked the car, then cut a small square window in the side of the frame aligned with the bolt using his welder. Put a wrench on the nut and then backed the bolt out. He then spot welded the factory nut back in place and welded a small patch back over the hole he cut. Sprayed black paint all over it and it was fixed. I bet it took him 20 minutes.

My buddy is a mechanic and he said they do stuff like this all the time. Just a thought if you don't want to screw around with this.
 
Last edited:
I did the same thing. But I had a buddy who is a mechanic/welder. He jacked the car, then cut a small square window in the side of the frame aligned with the bolt. Put a wrench on the nut and then backed the bolt out. He then spot welded the factory nut back in place and welded a small patch back over the hole he cut. Sprayed black paint all over it and it was fixed. I bet it took him 20 minutes.

My buddy is a mechanic and he said they do stuff like this all the time. Just a thought if you don't want to screw around with this.

Thanks for all the replies everyone

My dad is a lifelong mechanic, he had a similar suggestion to this one. My welder (previously his) is 220v and I don't have a 220v outlet in the garage of my new house so at some point I'll just drag it over to his house and we'll get it fixed
 
Digging up an old thread.

Just had this happen to me on Sunday, when trying to replace the bushings. I had my neighbor cut all 4 bolts at the frame. Then removed the sway bar links and now the sway bar is in my garage.

I like the idea of cutting a hole in the side of the frame and then welding the nut back in place. Thanks for the advice!

Now I need to buy new sway bar links and 4 new bolts.
 
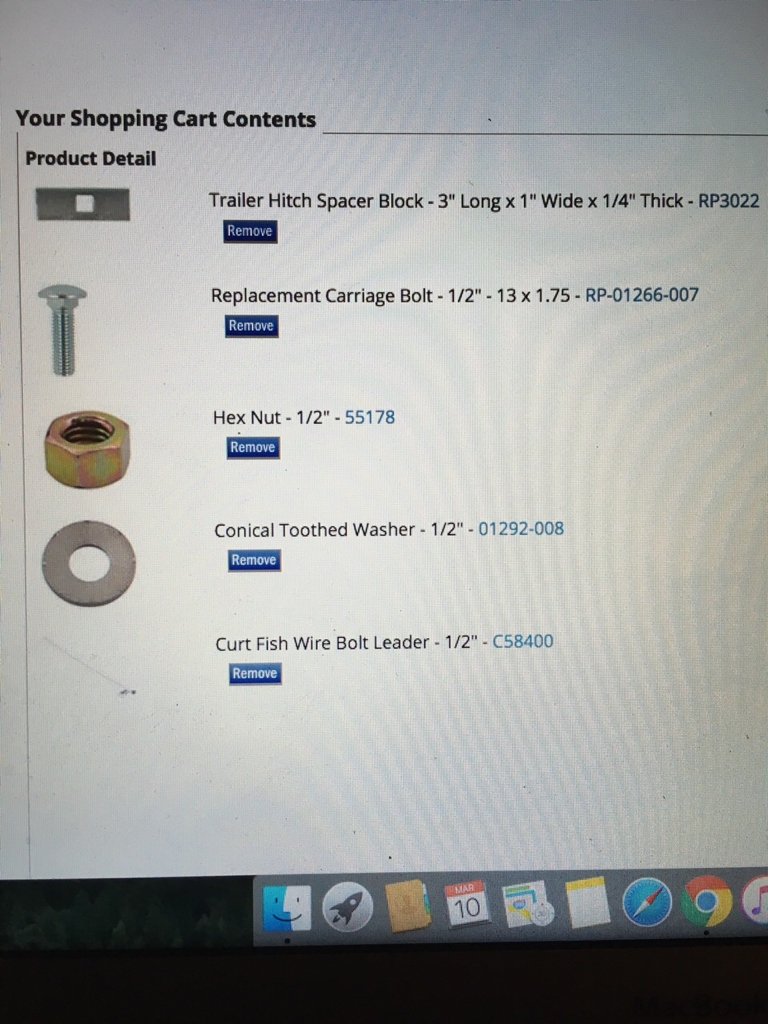
After doing some research, I found a possible solution following Curt Mfg’s advice for fixing the same issue for a trailer hitch. I’m having a local metal fab shop cut plates for a 3/8” (closest size to 10mm) carriage bolt. These are the similar parts sold by etrailer.com

2bfbf1970a65afd025e97f11a5f4d276.jpg
 
This happened to me as well. I just slowly drilled out the stuck bolt. Slowly got bigger and bigger with the drill bits until it came out. Then I drilled the hole a little bigger and put a bolt with a nut on the backside and called it a day. So I have to use a socket and wrench on one. No biggie.
 
I recently changed my front and rear sway bar bushings on my 2006 4runner sport. I broke (2) 10mm bolts in the front and (2) 8mm bolts in the back. I was able to fix this by using rivet nuts. You can buy the kit with the tool, or you can make your own tool with a long bolt and a nut. Find this on youtube. You need to get the brackets that are slotted on both sides. Here are the ones that I got(Prothane Front 30mm 19-1186. Rear 21mm 19-1164). They come with grease fittings. Be careful that are not all the same diameter. Match your vehicle. You need to step drill new holes avoiding the ones that you can no longer use. Remember there is a nut welded on the back side from the factory. Avoid this with the largest drill size for the rivet nut body. Also make sure they are not too close together so that the washer from the new bolts don't interfere with the bushing area of the bracket. If you buy new bolts make sure that the socket for the ratchet is the same as the factory. 14mm for the front 10mm bolts and 12mm for the 8mm bolts in the back. This will be more forgiving on the new bolt location. I found out that there are (2) different size hex bolt heads for the 8mm bolt. This made my new locations in the back difficult to install. I was going to drill through the existing bolt with a slightly smaller US size drill and tap. I was able to drill all the way through at one location. Then I found out about the rivet nut. It was a much easier way to go. Granted still no fun but less painful. See Attached
 

Attachments

  • RivetNutBushingFix.jpg
    RivetNutBushingFix.jpg
    95.1 KB · Views: 3,481
I recently changed my front and rear sway bar bushings on my 2006 4runner sport. I broke (2) 10mm bolts in the front and (2) 8mm bolts in the back. I was able to fix this by using rivet nuts. You can buy the kit with the tool, or you can make your own tool with a long bolt and a nut. Find this on youtube. You need to get the brackets that are slotted on both sides. Here are the ones that I got(Prothane Front 30mm 19-1186. Rear 21mm 19-1164). They come with grease fittings. Be careful that are not all the same diameter. Match your vehicle. You need to step drill new holes avoiding the ones that you can no longer use. Remember there is a nut welded on the back side from the factory. Avoid this with the largest drill size for the rivet nut body. Also make sure they are not too close together so that the washer from the new bolts don't interfere with the bushing area of the bracket. If you buy new bolts make sure that the socket for the ratchet is the same as the factory. 14mm for the front 10mm bolts and 12mm for the 8mm bolts in the back. This will be more forgiving on the new bolt location. I found out that there are (2) different size hex bolt heads for the 8mm bolt. This made my new locations in the back difficult to install. I was going to drill through the existing bolt with a slightly smaller US size drill and tap. I was able to drill all the way through at one location. Then I found out about the rivet nut. It was a much easier way to go. Granted still no fun but less painful. See Attached
Had this same thing happen to me over the weekend. Curious to see how the rivnut solution is holding up. [MENTION=422651]BS4RUNNER[/MENTION] have you had any issues?
 
I have had no issues. Working just fine. Another tip. I took a dremel tool with a metal cutting disk and cut through the slot on one side of all of the new brackets. Making the one end open. Instead of the closed slot.This enabled me to get one of the bolts started and slide the bracket into place. Good Luck.
Bill
 
I cut the bolt/Stud off with cutoff wheel. Then ran a tap in that would fit snuggly in the hole. Then bought a bolt of same thread as tap, cut the bolt head off so it would be a stud and coated threads very liberally with JB weld and turned it in several turns, let harden and been good for 2 years now.
I'm all on highway if that matters.
 
The same thing happened to me on Saturday. It was on the passenger side rear bolt. Was wondering what the heck happened as it looked like the frame itself was threaded but the bolt only coming half the way out. Had to pull out the bushing with pliers and jamb it back in with a screwdriver to get it all back together with only 3 bolts holding together.

I’ll order new bushings and take the advice from the thread to get the 4th one in and tightened. I’ll report back when I get it. Truck is a 2008 and came from NJ & PA with a good amount of rust and some terribly stubborn nuts and bolts. It has 154,000 and only had it a couple weeks.
 
Last edited:
count me in.
168k miles, clunking sound on potholes, worse on passenger side, while changing sway bar bushings, observed the bolts wudnt tighten snug, they did get tight..and then loose again....seems the inner rust has rusted through,
a search led me to this thread. considering cutting open the frame to weld a nut in there, would reseacrh on the rivet nut and see if its an easier option
 
count me in.
168k miles, clunking sound on potholes, worse on passenger side, while changing sway bar bushings, observed the bolts wudnt tighten snug, they did get tight..and then loose again....seems the inner rust has rusted through,
a search led me to this thread. considering cutting open the frame to weld a nut in there, would reseacrh on the rivet nut and see if its an easier option

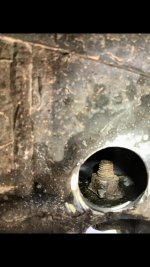
I just went through this. Thought about the Rivnut option but unless you did front and back it wouldn’t be level, then left side would be a different height too (probably doesn’t matter). I opted to drill my frame with graduating bits and used a Christmas tree bit. I had to dremel width wise a little more to get the open end of a wrench on since it’s a square nut.

I just bought a new nut and dropped it in, this way I could get a box end of a wrench on it. Considered maybe tack welding it in place and sealing the hole. For now just replaced and primed. Since I was replacing it I replaced my bushings with red energy poly Both front and back.
 

Attachments

  • A51FFA1D-77CD-4C91-B0D7-07ED34F13A5A.jpeg
    A51FFA1D-77CD-4C91-B0D7-07ED34F13A5A.jpeg
    30.8 KB · Views: 791
  • D2145E41-19A7-44C8-A87D-65F5C80FC0D0.jpg
    D2145E41-19A7-44C8-A87D-65F5C80FC0D0.jpg
    130.2 KB · Views: 706
  • 8A00BEFB-A45E-4D29-BC58-5842DBD61F10.jpg
    8A00BEFB-A45E-4D29-BC58-5842DBD61F10.jpg
    131.1 KB · Views: 770
Last edited:
I just went through this. Thought about the Rivnut option but unless you did front and back it wouldn’t be level, then left side would be a different height too (probably doesn’t matter). I opted to drill my frame with graduating bits and used a Christmas tree bit. I had to dremel width wise a little more to get the open end of a wrench on since it’s a square nut.

I just bought a new nut and dropped it in, this way I could get a box end of a wrench on it. Considered maybe tack welding it in place and sealing the hole. For now just replaced and primed. Since I was replacing it I replaced my bushings with red energy poly Both front and back.

Is there any reason we couldn't just drill all the way through the frame and use a really long bolt? I just stripped my threads as well and thought about using EZ-lok thread repair, but thought that there may not be enough material in the welded nut to drill out to 31/64" for tapping.
 

Members online

Forum statistics

Threads
278,307
Messages
3,554,050
Members
248,016
Latest member
Advally Service

Trending content

Back
Top