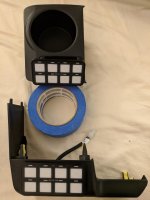
Switch-pro SP9100

Register to hide this ad
What mount will you be using and where will you place it?
Personally, I will be making myself a shelf like the one of power trays with Blue Sea connectors to make things simple and clean.
Keep us posted on your install and give us a quick review.
Thanks
 
What mount will you be using and where will you place it?
Personally, I will be making myself a shelf like the one of power trays with Blue Sea connectors to make things simple and clean.
Keep us posted on your install and give us a quick review.
Thanks

i bought the sdhq mount. its a good look, can probably diy, but i dont i wanted to get this in and out.

for the sp8100, i previously starting putting it in the coin holder in front of the shifter. had it mounted with a magnetic phone attachment.
 
What mount will you be using and where will you place it?
Personally, I will be making myself a shelf like the one of power trays with Blue Sea connectors to make things simple and clean.
Keep us posted on your install and give us a quick review.
Thanks

You're going to love the Switch Pro unit. I have the SP8100 and used the SDHQ mount for the actual switch panel unit. I have an installation guide here if that could be helpful to you.
http://www.toyota-4runner.org/5th-gen-t4rs/247222-sdhq-switchpros-mount.html
This was a great OEM like fitment and I've now had it installed for about 4 months with no issues.

As far as the engine bay mounting, putting it on a power tray will keep things nice and clean. I would have gone that same route if I didn't have my ARB compressor on a Slee mount which places it where you'd install the power tray. Good luck with the install!
 
Currently installing mine onto my new Power Tray main electrical panel, and I am doing a full write up that will be available soon. Functionally, there is little difference between the 8100 and the 9100. There is an increase in power over the previous unit, and some additional features such as multiple button panels per main unit. More info on their website for specifics. IMO the SDHQ mount looks very OEM, but it's low on the dash making it hard to use without taking your eyes completely off of the road. Just something to consider. I will update more with the install as I complete it.

28354399199_2769f34429_c.jpg
 
Currently installing mine onto my new Power Tray main electrical panel, and I am doing a full write up that will be available soon. Functionally, there is little difference between the 8100 and the 9100. There is an increase in power over the previous unit, and some additional features such as multiple button panels per main unit. More info on their website for specifics. IMO the SDHQ mount looks very OEM, but it's low on the dash making it hard to use without taking your eyes completely off of the road. Just something to consider. I will update more with the install as I complete it.

28354399199_2769f34429_c.jpg

looks awesome. Highly recommend this setup with the power trays. Makes installing anything electrical 10x easier. Heres my setup, using the 8100.

37447348072_e307d2e7a7_o.jpg
 
Currently installing mine onto my new Power Tray main electrical panel, and I am doing a full write up that will be available soon. Functionally, there is little difference between the 8100 and the 9100. There is an increase in power over the previous unit, and some additional features such as multiple button panels per main unit. More info on their website for specifics. IMO the SDHQ mount looks very OEM, but it's low on the dash making it hard to use without taking your eyes completely off of the road. Just something to consider. I will update more with the install as I complete it.

28354399199_2769f34429_c.jpg

This is indeed the nice way to install. What are you using the left fuse box for?
 
It fits perfectly in the lower factory switch spot with no cutting required

25023211128_3428c0e76d_o.jpg

I have some switches at this location already. Where did you relocate them (if youhad them in the first place)?
Apparently the SDHQ also has an OEM top part (where the mirror switches are) with a cutout at the top to fit in the remote.
 
Last edited:
This is indeed the nice way to install. What are you using the left fuse box for?

Accessories that are constant hot (additional USB/12V chargers, HAM radio, accessory lighting, etc) will be run through this fuse panel versus connecting to the battery directly. The idea is to have the least amount of connections at the battery and to provide a very clean way to make sure that all of my electrical accessories are fused properly versus an in-line fuse (nothing really wrong with an in-line, it just get spaghettiish under the hood after a while). All in an effort to have a clean, safe, easy to troubleshoot and alter electrical system for the 4Runner. No electrical gremlins for me!
 
I see. reduced spaghetti. I am guessing that if you have a compressor, it is directly connected to the battery (or + and - from the fuse box) as the fuse box 6 connections do not seem to handle more than 30amp.
Is there a fuse between the switch-pro and the battery or more precisely between the switch-pro and the + connector of the fuse box?
 
Last edited:
I have some switches at this location already. Where did you relocate them (if youhad them in the first place)?
Apparently the SDHQ also has an OEM top part (where the mirror switches are) with a cutout at the top to fit in the remote.

I moved the AC switch down below to the empty switch spot and the Wiper heater switch up above to the right which was an empty switch spot.
 
Just finished my 8100 install. Cleaned up the rat nest of wires I had in the engine bay. Powertrays is highly recommended. Was planning on adding the Blue Sea fuse block but I think I'll be using the space for ARB single compressor.

I have the SDHQ engine bay mount for the switch pro for sale if anyone is interested.

33d4df8a7e090a0ba42f73adeb43dead.jpg
91a8cebe0f2656272f82e82708418c6f.jpg
846860bc391d577273c4b548db925bb1.jpg
887fea4f22db7495aa1ddc823da3f18c.jpg
b369fb435277c92fa66c4c2965615ef6.jpg


Sent from my SM-G935T using Tapatalk
 
I like the different color leads coming out of the panel but i think the previous model looks a little cleaner with having all red. my opinion only :)

The all red is very clean. That could be fixed with a braided sleeve if desired. But it's nice to reference wires by color than having to trace them back to the plug to figure out which wire is which.
 
The all red is very clean. That could be fixed with a braided sleeve if desired. But it's nice to reference wires by color than having to trace them back to the plug to figure out which wire is which.

Agreed. Also having the distribution block takes care of the guess work. The wires are switches 1-8 from right to left. I can see how it may be confusing if you weren't running the block then the different colored wires would make more sense. Cant wait to see your install done.
 
Decided to use the sdhq mount. Instead of the one I rigged to for the 8100 I never used
 

Attachments

  • IMG_20180209_071434.jpg
    IMG_20180209_071434.jpg
    125.5 KB · Views: 3,885
Ignition wire connection

I just received my SP9100 and waiting for the ARB power tray (the only available right now) as I also want to attach the single ARB compressor.
I am still kind of suspicious about the compressor and its vibrations being on the same board as the electronics... will report later on about that (Trip organized for end of March).
I am wandering where are you (SP8100/sp9100) attaching the ignition lead from the switch-pro. I have seen one example where the wire was connected to a slot in the fusebox inside the cabin. Has anyone connected theirs inside the engine bay?
Thanks
Eric
 
I just received my SP9100 and waiting for the ARB power tray (the only available right now) as I also want to attach the single ARB compressor.
I am still kind of suspicious about the compressor and its vibrations being on the same board as the electronics... will report later on about that (Trip organized for end of March).
I am wandering where are you (SP8100/sp9100) attaching the ignition lead from the switch-pro. I have seen one example where the wire was connected to a slot in the fusebox inside the cabin. Has anyone connected theirs inside the engine bay?
Thanks
Eric

efi2 or ign in the engine fusebox should work
 

Members online

Forum statistics

Threads
278,307
Messages
3,554,053
Members
248,016
Latest member
Advally Service

Trending content

Back
Top