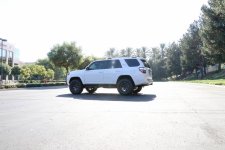
T.U.G.G. - 17 OF-Prem Super White

onepremiere

New member
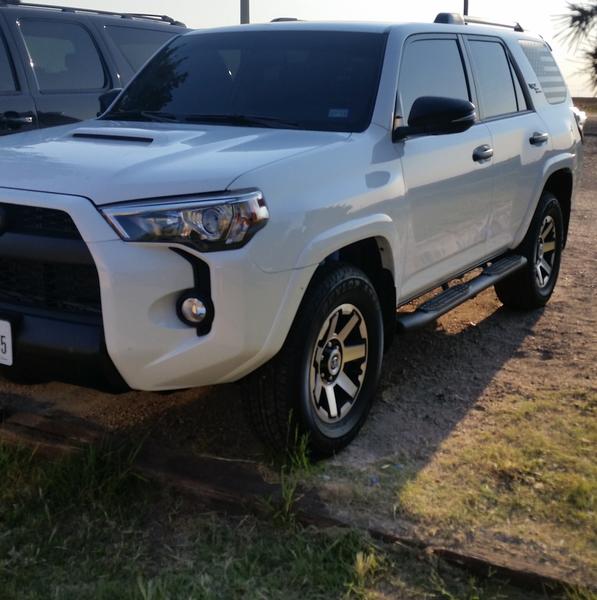
I want to introduce my new money pit. TUGG - Tactical Urban Grocery Getter.


2017 TRD-Off-Road Premium - Super White

- KDSS

- Sliding Rear Cago Deck

- Running Boards

- Remote Start, for you know those bitter Southern California winter mornings.


So I've been modifying Toyota Trucks for the better part of a century now. So I am always throwing different set-ups, parts, ect at each one. My most recent rig was a 2016 Tacoma TRD-Off-Road Short Bed 4x4. Nice truck, extremely capable just not the interior room I was looking for. So I decided to give the 4Runner a shot. Not only is this my first SUV in 14 Years, but its also my first white vehicle in about 10 years. Really happy with that so far. I am not having panic attacks every time I walk out to find my black truck dirty.


So I took delivery of the TUGG on Monday Aug 21, 17 with 2 Miles on the clock.


6a05273de65fc5f3a6d6b1eab2710a08.jpg
Wasted no time starting my attack.


Apperance

-Window Tint

o15% Classic Formula 1

oInstalled By Tint Pros, Huntington Beach, CA

f37bbb00687a7edc070f31687c704168.jpg

d1cb54ecac3fd0bf3f773a039de07b59.jpg

Suspension

-Dobinsons

oFront Coil: C59-302 (2.5”)

oRear Coil: C59-599 (.75”)

-Bilstein

oFront Strut: 5100 - Set at 0

oRear Shock: 5100

Notes: Yes, I am running OME Shocks with Dobinson Coils. This is just me being stubborn and trying new stuff. I was really impressed with the ride of my 2016 Tacoma running OME Coils and Shocks. So my attempt is to do that same with the 4Runner. However, OME does not offer the range of coil options front and rear that Dobinsons does (Specifically for the 4Runner). So I went with the Dobinsons coils to achieve the exact ride height I was looking for. Mike @ Dobinsons is a huge help and I respect him for putting up with me and most other Toyota owners like me who demand a whole lot of nonsense. If you value epic customer service to back up an already great product, talk to Mike @ Dobinsons. It’s pretty obvious how much effort he has poured into the development of suspension for the 4Runner to meet the expectations of all of us Toyota princess’.

Ride: I originally installed in the front coils with the Dobinson’s GS59-700 Strut. It was a just a bit too sharp for my liking. I’m sure if any one of you drove it, you’d tell me I am crazy, because I am. So take that for what it’s worth. When I compressed the OME and Dobi strut side by side you can see the OME has a slightly slower rebound, which with the kind of coil tension I was adding to the strut to achieve 2.5” of lift should help with control on the downward cycle of the suspension. End result, the OME felt more controlled and took away some of that sharpness I was feeling. A note to all this, I have not installed any rear shocks yet. Only the rear coil, so I suspect much of the sharpness I am feeling is the OE shocks trying to control larger heavier wheels and tires and a longer coil. So I will report back once I get the rear shocks on tonight.

Aside from all that, the 4Runner feels planted, and snappy. No excessive body roll, and no brake dive.

Install notes: KDSS – My first time. Really cool system, I do not regret it one bit. It does make suspension installs a bit more “fun”, but once you understand the system and how to work with it it’s very easy from that point forward. After I put the front end on jack stands so the front suspension is suspended, with the rear wheels on the ground I opened the KDSS valves. TIP: I drew a vertical line on the KDSS valve bolts prior to opening them so I could count my turns a little easier. I ended up doing a full 3 turns. Because the rear wheels are still on the ground, the system is partially loaded, the sway bars and the KDSS ram was still hard to move by hand. Solution: Piece of wood to compress the ram and a speed clamps (trigger clamps) to bring the sway part up against the lower arms/rear end. That made reinstalling the sway bars a piece of cake.


d7a2c60624ca8bfa7188d2e9766763bb.jpg

fc9b79640e39fa5c2c7f5c3c4b5fa006.jpg

348b8ede7b1e652bd28b8e2d18ebdd69.jpg


Wheels/Tires:

-Stealth Custom Series SR8 17x8.5

oGunmetal with Black Ring

-Nitto

oTerra Grappler 285/70/R17

I have been a Method guy for a long time. I’ve always love their wheels. However, I needed to change it up. That’s when I found the SCS wheels. Vin @ SCS is one the nicest guys I’ve meet. He is truly passionate about bringing a top quality, good looking product to the Toyota and Jeep markets. I couldn’t be happier with the wheels.

This will mark my 4th Set of Nitto tires, specially Terra Grapplers. I trust these tires like no other. I got caught in a nasty ice storm in our so cal mountains that swallowed about 300 cars. Every single turn out along the 38 to Big Bear had 10-12 cars in it that were either stuck or just gave up. I was watching cars slide off the road in front of me. I normally get excited in these situations, but this time I had precisous cargo on board and was a bit worried that we’d be spending the night in the truck or worse in a hospital. By the time we reached the city, it was me and 3 other trucks that made it, the rest of the cars behind and in front of us didn’t make it. I was driving a 2014 Crewmax Tundra with 4WD and a set of Nitto Terra Grapplers. A local behind me in a 4WD Excursion with BFG All-Terrains and chains on all 4 tires was shocked how well we were doing. His words while waiting for disabled cars to clear the road, “I’ve been watching your rear tires every time we got going to see how bad the ice was, I haven’t seen you slip once.” Immediately after this I fell flat on my ass standing next to my truck. You could ice skate down the 38 that night. Going down the hill was the same story. Cars sliding everywhere, bouncing off guard rails, ect. The mountain roads were closed at this point, so because of my new found confidence in my traction/tires I passed a couple miles of cars and got the hell out of there. Officially scarred my girlfriend from winter driving for good.


46b7f275493690c1297952c92bb8247e.jpg

a9c450baddad2ee5eeccf6fe56ae050a.jpg


Interior:

-Garmin

o65W Dash Cam

What a cool little dash cam. I opted for the optional “Parking Cable” which is essentially a hardwire cable. This camera has lane departure alerts, collision detection and alert, it will also yell at you in traffic when traffic starts to move again in case you are balls deep stalking your ex’s spacebook page on your phone. It is also voice activated, so you can give it commands to take a picture or save a video. On top of all that, it will record 30 second clips anytime there is motion in front of your car while it is parked. Really cool.

-JBL

oBass Pro SL

I’ve had the factory JBL Sound System in all of my previous trucks. The most frustration part about the 4Runner is the packages. Since I did not like the Limited Styling among many other things, I opted to uprgrade the sound system myself. Now I loathe car audio, and earth shaking sub’s. All I want is to relieve some of the bass pressure off my speakers and give the sound some depth. The Bass Pro SL is the perfect solution for that. It’s an AMP and 8” Sub all-in-one. Just add power and tap your speakers. It also does not require a “remote turn on” because it turns it’s self on and off by sensing the voltage to the factory speakers. Badass. I am very happy with the subtle, clean bass it provides.


55c018d0fe5d5127a6d5cc68df686f8c.jpg

ae073f39dda4459b75ec2825f20aa9d9.jpg

21a2cfabb711f36dd73a1907dfe570b1.jpg

17641091dc4d8fc282525137c8bc1bd3.jpg

e2bf0feb4927704cb0874b3f1786ce0c.jpg


That’s it for now!

Furture projects are coming and will update as they happen.

If you have any questions, or would like me to elaborate further on anything, please let me know.

Cheers,


Jeff
 
Last edited:
Register to hide this ad
Off to a good start, liking it.

Interesting, this is the first I have heard of opening the KDSS valves to ease installation. I was scared of messing up my new car so tried to avoid messing with the KDSS as much as possible.

I hate the new badges, you planning to keep them?
 
Got any before and after measurements of the 599 Dobinson rear coils? I've been on the fence about ordering these, as most of the rear lift coils give more than the advertised lift height.
 
How long did you have to wait for the SCS wheels? I've had my eye on them for awhile. Seems to always have a wait list.
 
Off to a good start, liking it.

Interesting, this is the first I have heard of opening the KDSS valves to ease installation. I was scared of messing up my new car so tried to avoid messing with the KDSS as much as possible.

I hate the new badges, you planning to keep them?

The badges I haven't decided what to do. I was thinking of just dropping the Off-Road and keeping TRD. I thought they might blend better if they were white. Still not sure.
 
Got any before and after measurements of the 599 Dobinson rear coils? I've been on the fence about ordering these, as most of the rear lift coils give more than the advertised lift height.

I have the measurement at stock height with stock wheels. I should have measured it with the stock wheels, but got too excited and slapped the wheels and tires on.

This is what I have:

Stock:
Front - 34"
Rear - 36.5"

After installing the front suspension I was .25" higher than the rear. Netting about 2.75", I am confident that has now settled to 2.5". After installing the rear springs I am .5" over the front end. Which was my target.
 
How long did you have to wait for the SCS wheels? I've had my eye on them for awhile. Seems to always have a wait list.

My timing must have been dead on, because it wasn't more than 3 weeks. I think they had a shipment come in right around the time I was shopping. I did start early though, I had them in the garage about a month before the 4Runner showed up.
 
The badges I haven't decided what to do. I was thinking of just dropping the Off-Road and keeping TRD. I thought they might blend better if they were white. Still not sure.

I purchased these

https://www.shapeways.com/product/R33EXWH6U/trail-emblem-revision-02?productConfiguration=55941395&etId=58571877&utm_source=automated-contact&utm_medium=email&utm_campaign=order-late-ship&utm_content=2

They are really nice, but still sitting in a bag because I kind of like the look without the side badges. Will probably put them on eventually though.
 
The badges I haven't decided what to do. I was thinking of just dropping the Off-Road and keeping TRD. I thought they might blend better if they were white. Still not sure.

Don't do that, there's nothing TRD on your truck except for the headrests and mats!
 
I purchased these

https://www.shapeways.com/product/R33EXWH6U/trail-emblem-revision-02?productConfiguration=55941395&etId=58571877&utm_source=automated-contact&utm_medium=email&utm_campaign=order-late-ship&utm_content=2

They are really nice, but still sitting in a bag because I kind of like the look without the side badges. Will probably put them on eventually though.

That's the first time I've seen those. A boat load of people think it's a Pro from a far... I bet that really makes the TRD Pro guys happy haha. (No Hate, I promise)
 
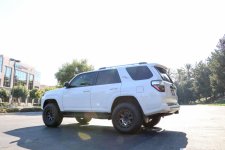
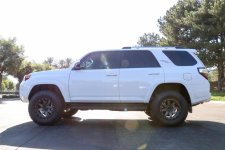
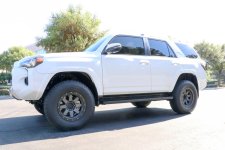
Side shot of the stance after 1300 miles. I have some stuff in the back that weighs about 50lbs and I am parked on a very slight incline.


Very happy with the ride.

1abd95accf86bd61c9ec0af927439bbf.jpg
 
Our 4runner

chamberstrd+orp-albums-2017+trd+orp-picture47967-4runner-handles.jpg


We recently purchased a 17' TRD ORP in super white so far blacked out the badges, roof rails, front grill, rear bumper section, door handles, and the mirror caps. We love it
 
Update: Photos Coming Soon

So I went on quite the suspension venture with this one. This 4Runner really tested my knowledge. Being a stubborn *******, I dismissed the advice of those who know there stuff (aka Scott @ Camburg). So below, I am going to share my experience so others dont have to spend 5 or 6 weekends in a row swapping shocks and springs. I've gotten my time down to 1.5 hours to swap front shocks and springs, including spring compression. Level: Master Builder.

I decided against coilovers because this thing is a pavement princess and will only see dirt 1% of the time. And when it does see dirt, I am not trying to keep up with a trophy truck through 3 foot holes where I have to worry about shock fade ect. I really question those who claim they are experiencing shock fade, because it takes a lot of speed for an extended period to get shocks hot enough to fade. Dont get me wrong though, coilovers out of the box are the best solution for these trucks, just a whole lot of overkill. I ran the first set of Fox Extended Length Resi Coilovers with an Upper Arm on a 2010 Tundra and they thing was like a boat on the morning glass.

1.
Front: Dobinsons 302 Coil / 700 Strut
Rear: Dobinsons 723 / Stock Shock

Lift Gains: 2.75"+ Front / 2.25"+ Rear (The rear sat about 1.5" higher than the front, measuring hub to fender)

The stuff from Dobinsons is heavy-duty. There coils have a few extra turns than most other products on the market. The wire is 17mm, and you can tell. The springs are heavy. I have no doubt in my mind that these would hold up over a very long time. If you beat the S out of your rig, you may want to give there stuff a shot. Especially the guys hauling a ton of extra weight. The on road feel was solid, not as comfortable as I had hoped for, but it definitely handled like a sports car. Low speed "sharp" bumps were a little rough, which is understandable considering how burly these springs are.

1A.

Front: Dobinsons 302 Coil / 700 Strut
Rear: Dobinsons 599 / Stock Shock

Lift Gains: 2.75"+ Front / 1.5"+ Rear (The rear sat about .5" higher than the front, measuring hub to fender)

I swapped the rear 723 Springs for the 599 Springs. Gave me a very even lift.

2.

Front: Dobinsons 302 Coil / OME 90010
Rear: Dobinsons 599 / OME 60080

Lift Gains: 2.75"+ Front / 1.5"+ Rear (The rear sat about .5" higher than the front, measuring hub to fender)

This time around, my general thought was shocks. The ride felt stiff with the previous set-up. I couldn't feel the suspension working. My thought was the stock rear shocks could not keep up with the new rear coil springs, and larger heavier tires. So I installed the OME 90010 up front and they 60080 out back. This was the set-up I ran on my Tacoma (Different Shock Numbers Obviously) and it rode like a dream. Not the case for the 4Runner. The front end felt more controlled paired with the Dobinsons 302 Coil Spring, the rear felt like I was running 2x4's in place of shocks. I thought my rig was going to buck me out. The rear OME shocks are definitely designed to haul 200+ lbs of extra weight. So those were out.

3.

Front: Dobinsons 302 Coil / Bilstein 5100 Set @ 0.
Rear: Dobinsons 599 / Bilstein 5100

Lift Gains: 2.75"+ Front / 1.5"+ Rear (The rear sat about .5" higher than the front, measuring hub to fender)

I will say this I was nervous about running the 5100. I used these on a 2014 Tundra and they didn't ride the way I had hoped. However, these worked the best thus far in my quest to find the ride I was looking for. They sharp bumps in the road were still there, but generally the ride dynamics had improved.

4.

Front: OME 2884 / Bilstein 5100 Set @ 0.
Rear: Wheelers T13 / Bilstein 5100

Lift Gains: 2.75"+ Front / 1"+ Rear (The rear sat a little less than .25" higher than the front, measuring hub to fender)

Still not satisfied, I tried the OME 2884 Spring and added the T13 spring out back. I was a lot closer at this point. The ride was really good for the amount of lift I was getting. The T13 is an excellent spring, felt like stock just with more lift. Really happy with these, Wheelers nailed it. Now I know with past Toyota trucks, they really dont like anything over 2.5" without an upper arm. They like a lot of droop! Knowing this, I knew the amount of lift I was getting in the front was too much and this was contributing to a pogo-stick like ride. Rather than the suspension moving the body was moving. NEXT.

5.

Front: OME 2883 / Bilstein 5100 Set @ 0.
Rear: Wheelers T13 / Bilstein 5100

Lift Gains: 2"+ Front / 1"+ Rear (The rear sat a little less than .5" higher than the front, measuring hub to fender)

So I swapped the 2884 for the 2883. I felt like this was it. The end of the road. The ride was the best it had been through out all of the suspension changes. It felt good. Stable at speed, cornering and braking all felt great. Thought there was still apart of me that thought "it could be better". At this point my neighbors were beginning to wondering if I was running an auto shop out of my garage. 5 Weekends of the worlds loudest air compressor and the sound of an impact grinding up a harbor freight spring compressor. (Note: If you are using a threaded rod spring compressor, get some High Pressure Lube used in machining applications, it will prolong the life of the tool. You only need a little amount, about the size of a pearl right at the nut on the threaded rod. Makes everything butter smooth and helps with the heat.)

Now prior to picking up the 4Runner, I had planned on running the Bilstein 6112 from the start. This was based off my research and the advice of those who had direct experience with them. However, Dobinsons was a new name and a new approach to dialing in Toyota suspension. I was hooked and wanted to give it a shot. The Dobinsons stuff is great, I think they are going to bring some killer products to the market in the future. You can tell they've put in a lot of R&D into their springs to bring a no-bullshit product to market. I was not given a discount, or anything for free I paid the same price anyone else would pay and I am saying this to add some integrity to my opinion. Though it didn't work for me, I really wanted it too! Those springs look really cool under the 4Runner.

So even though I was pleased with the 2883/5100 and T13 combo, I was still very curious about the 6112. Long story short, impulse kicked in and I had a box of the 6112's 24 hours later. The rear shocks 5160's are on order. I had to give them a shot.

6.

Front: Bilstein 6112 w/Included Spring Set @ 6th Perch (2.2") on bothsides
Rear: Wheelers T13 / Stock Shocks (5160's are on order)

Lift Gains: 2.2"+ Front / 1"+ Rear (The rear sat a little less than .5" higher than the front, measuring hub to fender)

This is the finish line. I made it. Holy guacamoley. The 6112 is the pinnacle of a non-coilover solution for the 4Runner. I was very skeptical because I've always created lift using longer springs, never by compressing the shit out of the stock spring. So the fact that Bilstein was using this method with a 600lbs spring I was having a lot of doubt. I was wrong. 110% Wrong. The ride is exactly what I was looking for. Like others have said, the ride is very controlled. It almost eliminates all of the sharp road bumps. There is no bounce (commonly felt among 5100's), the handling is perfect. Stable at speed and eats up any road imperfections with ease. Still a little brake dive but thats to be expected on a short wheel base, coil sprung rear rig like the 4Runner. I am only mentioning brake drive once in this post because honestly brake dive is normal for properly functioning suspension geometry. So the guys getting all crazy about brake dive need to understand what it is, and why it's happening before trying to eliminate it. Take a stock 4Runner to an alignment guy who uses a tape measure and not a laser and ask him to fix the brake dive, because a lot of it is in the geometry.

Bottom line: Happy, very happy. I invited those local to OC that are on the fence about suspension to come drive my 4Runner.

I know I am going long here, but I want to try and provide everything I learned in this process.

KDSS:

Now this is my first experience with KDSS and I am really impressed with it. I know there a lot of mixed reviews out there but if you looks at the engineering behind it, it's a really cool system.

I was a little troubled by all of spacer talk to correct the "lean" since there is a way to correct it without spacers. I have the 6112's set evenly. They are on the same perch side to side.

Each time I put the front end on jack stands I opened the KDSS valves 3 full turns. Now in order for this to be effective, you need to have all 4 wheels off the ground. Since I was too lazy to jack up the rear end, the KDSS rams are still hard to move. However, I was going to need to open them anyways to correct the lean. Once the 6112's were on, I dropped it back on the ground and it was leaning to the driver side. Before closing the valves I went over to the passenger side and stood on the running board evening out the stance. Yes, that's all it took. I closed the valves and drove it. As of writing this the stance is perfectly even side to side. So you can throw spacers at your truck all day long because every situation is different (added weight, ect.) I am just giving you my solution and results.

So tips for reinstalling the swaybar with KDSS:

(Note: this may not be the proper way, but it was the fastest easiest way for me)

1. Attach the passenger side or side opposite the ram first.

2. Use (2) speed clamps to pull the swaybar towards the arm.

3. Bolt the lower hole first.

4. Use a screw driver to align the braket with the top hole. (There are holes for a screw driver on the mounting surface and on the bracket for exactly this purpose)

5. Profit.

Last note:

This is likely a placebo, but I did a zero point calibration after all of this for good measure. I swear it helped. I was not having any traction control issues, just thinking about the change in ride height and how it affects the yaw sensor.

That's what I've got for now. I will likely add to this post as I find my grammar and general writing mistakes.

7.

Front: OME BP-51, No Pre-Load
Rear: OME 2895 Spring / OME BP-51

So after the 6112 I thought I was done. Seriously, I was happy. Then my curiosity started to wander. "It could be better" I woke up and there was ARB/OME boxes at my door step. So I know this is really going to disrupt my mini-rant regarding coil overs. I was dead set on making the coil and shock set-up work. After a trip out to a remote spot in the Grand Canyon carrying a passenger and the pup, plus food, tools, luggage, and camera gear, she was a heavy pig. I could feel it over big holes. There were a couple of holes that my dash cam saved as "incident" as if I was in an accident. I was going about 40mph over these holes, and it was a decent hit. The rear was the biggest issue, couldn't hold the weight, and this was before my rear bumper and spare tire. I had to back off the gas a bit and check up at bigger holes to keep the rear end from bouncing off the bump stops. Long story short, I needed more dampening. The 4Runner is my first SUV, it's been all Tundra's and Tacoma's up to this point. So I was approaching the 4Runner just as I had approached the Tacoma in the past. Only problem is, the 4Runner is nearly 1000 lbs heavier. I should have known that. This is the reason I was so adamant about making a coil and shock combo work. So now I've got coilovers, and they are glorious. I have not touched my suspension since they were installed. They work great. The most surprising feature is the rebound and compression adjustments. I didn't expect to feel any change after just one "notch" of adjustment, but I did. Shortly after installing my rear bumper and spare tire, the rear end was loose, scary loose. Added (2) notches of rebound, and problem solved smooth controlled ride. Below are some of my impressions from another post:

First Impressions


Huge. I know, thank you. These things are no joke. I seriously wondered if the front coil overs where going to fit in the bucket, because they are massive looking. The same applies to the rear, the shocks remind me of something you’d find on the back of a Class 1 car. In my head I was thinking, these are way too for this little baby 4Runner, it’s going to ride like a dump truck. – More on this later. The anodizing is very nice, all of the components look tough and durable. All of the hardware is black.


So if you’re familiar with my build thread you’ll know I have been through the 4Runner Suspension a few times. More than a few times. Enough times that I can change shocks, and coil springs on the front end in 1.5 hrs. using a floor jack and hand tools. (Patting myself on the back). This time around took me all day. Literally all day. Here’s why.


Prep


The BP-51 comes from the factory set to 20mm of preload.

I knew right away this was going to be too much lift for me. So I planned on taking 10mm of preload out. This required my trusty/sketchy Harbor-Freight Spring Compressor. I proceeded to attempt to compress the spring for about an hour. There is very little clearance between the body of the shock and coil spring. I chewed up the body of the shock pretty good and didn’t get very far. I was pretty upset. Before I did any more damage, I went to the Auto Parts store to get a different compressor. The spring compressor I got was a no go, same scenario. So I decided to take the “hooks” on the spring compressor and grind them down on a bench grinder for more clearance. This worked. I was able to compress the spring enough to adjust the collar without the hooks digging into the shock body.


Notes:

Use a lot of oil when making collar/ride height adjustments. On the threads, and especially between the spring and collar.


DO NOT back the pinch screw all the way out. If there is any tension on the collar while making the adjustments with a spanner wrench, the collar will skip/jump threads on the body of the shock. Loosen the bolt enough to allow the collar to spin.


Make sure your pinch bolt is positioned “out” so it is accessible once the coil over is mounted on the vehicle for future adjustments. Although from my experience, it is best to remove the shock.


Rebound and Compression Adjustments

I decided this was a good time to make changes to the rebound and compression while it was easily accessible. I adjusted all 4 shocks with 0

Comp / 4 Rebound.


For the Front OME Recommends

0-4 Compression (For Unloaded Vehicles)

4-8 Rebound (For Unloaded Vehicles)


Note: I made these adjustments off the vehicle, using a vice with soft jaws to hold the shock. Using the supplied spanner wrench it does take a little bit of force to turn the adjusting barrels. If you’re making adjustments while the shocks are installed, coil overs will be easy, rear shocks will be a little more difficult because they will want to spin. Tip: Use a leather belt wrapped around the body of the shock to hold the shock in place while you make the adjustments.


Install


Now all (4) Shocks were adjusted and ready to be installed. I tore down the front end and began installing.


Specific to the 4Runner, the Front “Fitting” Kit varies Left to Right. So it is important to follow the instructions. The same applies to the rear fitting kit.

Mounting the front coil over is straight forward. Mounting the reservoir takes some penitence. Unlike other manufactures, OME is using a really nice machined collar to mount the reservoir. The base of the collar has a t-slot that slides over the head of a 6mm bolt. Takes some finesse to get situated, and secured. The mounting position of the front coil over reservoir is outside the splash guard on the driver side and inside the splash guard on the passenger side.


On the right side, after install I noticed a bolt on the outside of the AC compressor was making contact with the reservoir when the engine was running. There wasn’t much I could to fix this (moving the reservoir forward or backward would not have made a difference). So I flipped the bracket, using one existing hole and drilling an additional 6mm hole I was able to make the reservoir mount outside the splash guard, similar to the driver side. There is less room inside the fender on the right side vs. the left side on the 4Runner. The right side houses a portion of the window washer tank. I addressed this issue with OME.


Note: OME emphasizes the proper position of the reservoir to avoid contact with the hose. So keep that in mind when mounting.

Mounting the rear shocks was pretty straight forward. The reservoir brackets mount under frame using existing 8mm bolt holes.

Again, the brackets are specific right to left.

Once the reservoir is mounted, check the clearance on your hose.


The Ride


Most peoples first and only question.

Adding large, heavier, stiffer tires to any vehicle is going to significantly reduce the on road comfort. Adding a suspension system capable of handling those larger wheels and tires is the key. I think I’ve found that with the BP-51.


I started with the settings Front: Comp: 0 Rebound 4 Rear: Comp: 0 Rebound: 4. This gave me a very plush ride. The suspension absorbed everything. The rear carried on a bit after larger bumps so I knew right away I was going to need more rebound. After I made the adjustment, it was pretty amazing to be able to feel just (1) incremental adjustment. The rear was much more controlled now. I will likely increase by rebound in the rear by (1) more, putting the rear rebound adjustments at (6) and increase the front rebound by (1) putting the rebound adjustments at (5)


The 4Runner feels very controlled and planted now. It handles all road imperfections with ease. Doesn’t toss you all over the road or the cab. The 4Runner feels flat in the corners, I am much more confident carrying a little more speed around corners knowing I am not going to get thrown around. Basically, I can’t hear anything rattling inside the cab any more (The sound of plastic interior panels shaking/rattling over rough terrain).


All of these observations were made on the road, I have not taken it in the dirt-yet.


The biggest improvement is the compression dampening. You can feel the shock working. You can feel the suspension compress. You can feel it absorb the road bumps.


While driving a rough freeway, I tilted my mirror down to watch the rear tires, I was amazed at how much the suspension was moving, and how almost none of the movement was being transferred into the body. Basically the suspension was doing its job.
 
Last edited:
Awesome write up, I have been in search of a very detailed account of installation experiences and no BS reviews of mentioned products. Thanks for all the info, it really makes a difference when having to filter through the forum. The rig looks killer, love the look of the wheel/tire combination, in my opinion it really is the perfect wheel to wrap up the overall look.
 
It's good to hear your insight about the dobinson setup. Now I know that I'm not crazy thinking that my Dobinson setup rides a little rough. Will probably look into a 6112/5160 setup like yourself.
 
Here are some photos of the 6112/5160 with T13 Rear Coil.

6112 is set at the 6th notch (2nd from the top) on both sides.
 

Attachments

  • IMG_2174.jpg
    IMG_2174.jpg
    132.6 KB · Views: 1,197
  • IMG_2175.jpg
    IMG_2175.jpg
    135.3 KB · Views: 1,188
  • IMG_2193.jpg
    IMG_2193.jpg
    136.6 KB · Views: 1,187
  • IMG_2171.jpg
    IMG_2171.jpg
    136.9 KB · Views: 1,175
Whats your opinion on the 5100 vs the 5160 in the rear? From what I can gather the valving is close to the same for both shocks. You just get the benefit of the better cooling with the 5160.
 

Members online

Forum statistics

Threads
278,317
Messages
3,554,128
Members
248,016
Latest member
Advally Service

Trending content

Back
Top