T4rchadly's "RADRNR" build thread (IFS wannabe rock crawler on 37s)

new rear coils

ive been having issues with my ride quality in the rear, weird lift, and a broken spring that pops out every here in there. my buddy ian sent me some dobinson c59-210V springs from a land cruiser. i should've taken measurements of before and after but i was excited lol. it rides way better i need to match my front end now. thats a whole nother project im working on and will make an update when i get everything in. in regular chad fashion, im not so happy with things going on up front:whip2:

before and afters of 7 1/2 wrap LC springs (48131-6A570), and dobinson c59-210v


<a data-flickr-embed="true" href="https://www.flickr.com/photos/181664286@N04/52569677057/in/dateposted-public/" title="IMG_8600"><img src="https://live.staticflickr.com/65535/52569677057_6649d987a6_z.jpg" width="640" height="480" alt="IMG_8600"></a><script async src="//embedr.flickr.com/assets/client-code.js" charset="utf-8"></script>
<a data-flickr-embed="true" href="https://www.flickr.com/photos/181664286@N04/52570415889/in/dateposted-public/" title="IMG_8601"><img src="https://live.staticflickr.com/65535/52570415889_e026f84ede_z.jpg" width="640" height="480" alt="IMG_8601"></a><script async src="//embedr.flickr.com/assets/client-code.js" charset="utf-8"></script>
<a data-flickr-embed="true" href="https://www.flickr.com/photos/181664286@N04/52570140366/in/dateposted-public/" title="IMG_8602"><img src="https://live.staticflickr.com/65535/52570140366_0af7c3ce9e_z.jpg" width="640" height="480" alt="IMG_8602"></a><script async src="//embedr.flickr.com/assets/client-code.js" charset="utf-8"></script>
<a data-flickr-embed="true" href="https://www.flickr.com/photos/181664286@N04/52569676867/in/dateposted-public/" title="IMG_8603"><img src="https://live.staticflickr.com/65535/52569676867_f803a6c885_z.jpg" width="640" height="480" alt="IMG_8603"></a><script async src="//embedr.flickr.com/assets/client-code.js" charset="utf-8"></script>
<a data-flickr-embed="true" href="https://www.flickr.com/photos/181664286@N04/52570670533/in/dateposted-public/" title="IMG_8682"><img src="https://live.staticflickr.com/65535/52570670533_9f992d22a1_z.jpg" width="640" height="480" alt="IMG_8682"></a><script async src="//embedr.flickr.com/assets/client-code.js" charset="utf-8"></script>
<a data-flickr-embed="true" href="https://www.flickr.com/photos/181664286@N04/52570587205/in/dateposted-public/" title="IMG_8698"><img src="https://live.staticflickr.com/65535/52570587205_a8dc3624d5_z.jpg" width="640" height="480" alt="IMG_8698"></a><script async src="//embedr.flickr.com/assets/client-code.js" charset="utf-8"></script>


and, included ski pictures. utah has been having several big storms ive beeen taking advantage of
 
small stuff nothing cool

oil change @ 305k, a little secret is to use this oil filter from a 1995 ford taurus 3.0, it has 48% more filter area. with how hard i am on the engine i wanted more filtration


<a data-flickr-embed="true" href="https://www.flickr.com/photos/181664286@N04/52649535765/in/dateposted-public/" title="IMG_9768"><img src="https://live.staticflickr.com/65535/52649535765_f64c522acb_z.jpg" width="640" height="480" alt="IMG_9768"></a><script async src="//embedr.flickr.com/assets/client-code.js" charset="utf-8"></script>
<a data-flickr-embed="true" href="https://www.flickr.com/photos/181664286@N04/52649362729/in/dateposted-public/" title="IMG_9771"><img src="https://live.staticflickr.com/65535/52649362729_6ab3389873_z.jpg" width="640" height="480" alt="IMG_9771"></a><script async src="//embedr.flickr.com/assets/client-code.js" charset="utf-8"></script>


i've been having issues with spark plug wires going bad so i ended up buying NGK wires. theyre a little thicker than the toyota ones i bought when i first purchased lucy, and no more misfire.


<a data-flickr-embed="true" href="https://www.flickr.com/photos/181664286@N04/52649536030/in/dateposted-public/" title="IMG_9617"><img src="https://live.staticflickr.com/65535/52649536030_57b0d2c015_z.jpg" width="640" height="480" alt="IMG_9617"></a><script async src="//embedr.flickr.com/assets/client-code.js" charset="utf-8"></script>


got grilles??:cowboy: i am now running the 99-200 oem grille


<a data-flickr-embed="true" href="https://www.flickr.com/photos/181664286@N04/52649535935/in/dateposted-public/" title="IMG_9642"><img src="https://live.staticflickr.com/65535/52649535935_936871920f_z.jpg" width="640" height="480" alt="IMG_9642"></a><script async src="//embedr.flickr.com/assets/client-code.js" charset="utf-8"></script><a data-flickr-embed="true" href="https://www.flickr.com/photos/181664286@N04/52649576888/in/dateposted-public/" title="IMG_9622"><img src="https://live.staticflickr.com/65535/52649576888_952a930da0_z.jpg" width="640" height="480" alt="IMG_9622"></a><script async src="//embedr.flickr.com/assets/client-code.js" charset="utf-8"></script>


prepping for new cv axles, i never knew you were suppose to cut these ridged off until the other week...:rockthrow: im waiting on the 930 porsche boots and i wanted to do some science so i measued both cut and uncut and its a 4 degree difference, from a maximum angle of 26 degrees, to 30 degree angle. is 4 degrees a lot? it doesnt seem like it. i need new boots regardless so i will let you know the differenced of down travel after i get these on


<a data-flickr-embed="true" href="https://www.flickr.com/photos/181664286@N04/52648597292/in/dateposted-public/" title="IMG_9757"><img src="https://live.staticflickr.com/65535/52648597292_54c4922f3c_z.jpg" width="640" height="480" alt="IMG_9757"></a><script async src="//embedr.flickr.com/assets/client-code.js" charset="utf-8"></script>
<a data-flickr-embed="true" href="https://www.flickr.com/photos/181664286@N04/52648597337/in/dateposted-public/" title="IMG_9756"><img src="https://live.staticflickr.com/65535/52648597337_dbb91d70cf_z.jpg" width="640" height="480" alt="IMG_9756"></a><script async src="//embedr.flickr.com/assets/client-code.js" charset="utf-8"></script>
<a data-flickr-embed="true" href="https://www.flickr.com/photos/181664286@N04/52649362864/in/dateposted-public/" title="IMG_9754"><img src="https://live.staticflickr.com/65535/52649362864_53f752fc15_z.jpg" width="640" height="480" alt="IMG_9754"></a><script async src="//embedr.flickr.com/assets/client-code.js" charset="utf-8"></script>


removed diff drop. when i did the custom bumper setup i had to use my jack to bend the skit plate upwards to mount it and i cant do that on the trail so i took the diff drop out and its fine now. it will also provide better lubrication on the pinion bearings now that its pointed down. i need to fix an oil leak coming from one of the hoses of the front differential. im a little stumped on why its throwing so much oil out, hoping i dont have to take it out again and anorther rebuild. time will tell


<a data-flickr-embed="true" href="https://www.flickr.com/photos/181664286@N04/52649536355/in/dateposted-public/" title="IMG_9692"><img src="https://live.staticflickr.com/65535/52649536355_f935963aa3_z.jpg" width="640" height="480" alt="IMG_9692"></a><script async src="//embedr.flickr.com/assets/client-code.js" charset="utf-8"></script>


lastly, i installed turn signal lights into my corner housings. i didnt want to run an external turn signal so i modified this using a dremel, a 1/4" drill bit, and a 5/8 drill bit. i forgot to take pictures of the wiring all cleaned up but it looks factory, and no condensation leaking into the housings


<a data-flickr-embed="true" href="https://www.flickr.com/photos/181664286@N04/52649576753/in/dateposted-public/" title="IMG_9597"><img src="https://live.staticflickr.com/65535/52649576753_953c4b4fd1_z.jpg" width="640" height="480" alt="IMG_9597"></a><script async src="//embedr.flickr.com/assets/client-code.js" charset="utf-8"></script>
<a data-flickr-embed="true" href="https://www.flickr.com/photos/181664286@N04/52648597702/in/dateposted-public/" title="IMG_9600"><img src="https://live.staticflickr.com/65535/52648597702_4dcb6a3382_z.jpg" width="640" height="480" alt="IMG_9600"></a><script async src="//embedr.flickr.com/assets/client-code.js" charset="utf-8"></script>
<a data-flickr-embed="true" href="https://www.flickr.com/photos/181664286@N04/52649536175/in/dateposted-public/" title="IMG_9602"><img src="https://live.staticflickr.com/65535/52649536175_c905356d1a_z.jpg" width="640" height="480" alt="IMG_9602"></a><script async src="//embedr.flickr.com/assets/client-code.js" charset="utf-8"></script>
<a data-flickr-embed="true" href="https://www.flickr.com/photos/181664286@N04/52649092126/in/dateposted-public/" title="IMG_9606"><img src="https://live.staticflickr.com/65535/52649092126_0bddace85a_z.jpg" width="640" height="480" alt="IMG_9606"></a><script async src="//embedr.flickr.com/assets/client-code.js" charset="utf-8"></script>
<a data-flickr-embed="true" href="https://www.flickr.com/photos/181664286@N04/52649576608/in/dateposted-public/" title="IMG_9608"><img src="https://live.staticflickr.com/65535/52649576608_d12e011051_z.jpg" width="640" height="480" alt="IMG_9608"></a><script async src="//embedr.flickr.com/assets/client-code.js" charset="utf-8"></script>
<a data-flickr-embed="true" href="https://www.flickr.com/photos/181664286@N04/52649536085/in/dateposted-public/" title="IMG_9611"><img src="https://live.staticflickr.com/65535/52649536085_932f1e3b09_z.jpg" width="640" height="480" alt="IMG_9611"></a><script async src="//embedr.flickr.com/assets/client-code.js" charset="utf-8"></script>


i now have the upper sockets as parking lights, and the bottom sockets used as turn signals. i just brought the turn signal wiring up to the parking light harness
 
Last edited:
oil change @ 305k, a little secret is to use this oil filter from a 1995 ford taurus 3.0, it has 48% more filter area. with how hard i am on the engine i wanted more filtration

I recently decided to bump up to a bigger filter as well...a cheaper alternative you might consider is Toyota YZZD3. I think it was ~$5. though I'm unsure of the actual filter difference. How often do you replace it?
 
[MENTION=373029]T4Rchadly[/MENTION] Dude your rig is sweet. I will take the time to read through all of it when I have more downtime and not half asleep, but seriously. Beautiful rig!

Sent from my SM-S908U using Tapatalk
 
I recently decided to bump up to a bigger filter as well...a cheaper alternative you might consider is Toyota YZZD3. I think it was ~$5. though I'm unsure of the actual filter difference. How often do you replace it?

i use to do oil changes every 7k when i first got the truck, but for the last year and a half all this truck does is see rev limiter so i change oil and filter every 5k now! not necessary but its peace at mind for me with her being at 305k now, it really seems to be in healthy condition and had great compression last time i checked not too long ago
 
thanks joe, its definitely been a journey and you'll be able to tell it went into an uncontrolled spiral the moment i moved down to the states :rofl:
 
[MENTION=373029]T4Rchadly[/MENTION] Dude your rig is sweet. I will take the time to read through all of it when I have more downtime and not half asleep, but seriously. Beautiful rig!

Sent from my SM-S908U using Tapatalk

Def worth it. Probably my favorite 3rd gen build.
 
lookin' good as always!

Just to confirm, are you using a total of 4 running light units? 2 original & 2 spliced into the turn signal circuit?
That looks like you have a good bit more room vs. using the actual turn signal bulb/socket (which is what I attempted)
 
lookin' good as always!

Just to confirm, are you using a total of 4 running light units? 2 original & 2 spliced into the turn signal circuit?
That looks like you have a good bit more room vs. using the actual turn signal bulb/socket (which is what I attempted)

thanks ghost!

i couldve been a little more detailed and i will edit my post. i now have a total of 4 parking light sockets, 2 of them being my parking lights, and 2 of them being turn signals. the top socket is parking light, the bottom socket is my new turn signal. i used OEM sockets just because i want them removable and to have a factory feel to them. i cut a few extras out from the junkyard and added it to the turn signal circuit
 
moab prep

been steady grinding on lucy. just wanted to account for how good its looking right now


<a data-flickr-embed="true" href="https://www.flickr.com/photos/181664286@N04/52691485043/in/dateposted-public/" title="IMG_9817 2"><img src="https://live.staticflickr.com/65535/52691485043_7d1cc7f8e2_z.jpg" width="640" height="357" alt="IMG_9817 2"></a><script async src="//embedr.flickr.com/assets/client-code.js" charset="utf-8"></script>
<a data-flickr-embed="true" href="https://www.flickr.com/photos/181664286@N04/52691412605/in/dateposted-public/" title="IMG_9819"><img src="https://live.staticflickr.com/65535/52691412605_b70fefba89_z.jpg" width="640" height="348" alt="IMG_9819"></a><script async src="//embedr.flickr.com/assets/client-code.js" charset="utf-8"></script>


Ive been tired of this heim steering situation and my friends that i play with dont even have heim steering so i wanted to go back to a traditional tie rod. i purchased Solo Motorsports TRE's and i got OEM tacoma outer tie rods, this is what it looks like compared to the heim steering


<a data-flickr-embed="true" href="https://www.flickr.com/photos/181664286@N04/52690476447/in/dateposted-public/" title="IMG_0095"><img src="https://live.staticflickr.com/65535/52690476447_faca8a7234_z.jpg" width="640" height="480" alt="IMG_0095"></a><script async src="//embedr.flickr.com/assets/client-code.js" charset="utf-8"></script>
<a data-flickr-embed="true" href="https://www.flickr.com/photos/181664286@N04/52690994401/in/dateposted-public/" title="IMG_0098"><img src="https://live.staticflickr.com/65535/52690994401_724b85a7eb_z.jpg" width="640" height="480" alt="IMG_0098"></a><script async src="//embedr.flickr.com/assets/client-code.js" charset="utf-8"></script>


and CV's are rebooted and done; i need 2 more spare cups as my older ones are useless condition


<a data-flickr-embed="true" href="https://www.flickr.com/photos/181664286@N04/52691485638/in/dateposted-public/" title="IMG_0072"><img src="https://live.staticflickr.com/65535/52691485638_1350708bb2_z.jpg" width="640" height="480" alt="IMG_0072"></a><script async src="//embedr.flickr.com/assets/client-code.js" charset="utf-8"></script>
<a data-flickr-embed="true" href="https://www.flickr.com/photos/181664286@N04/52691485558/in/dateposted-public/" title="IMG_0074"><img src="https://live.staticflickr.com/65535/52691485558_505b030215_z.jpg" width="640" height="480" alt="IMG_0074"></a><script async src="//embedr.flickr.com/assets/client-code.js" charset="utf-8"></script>


i want to do some measuring too and try to fix some suspension related stuff. lets get down to it


<a data-flickr-embed="true" href="https://www.flickr.com/photos/181664286@N04/52691485323/in/dateposted-public/" title="IMG_0101"><img src="https://live.staticflickr.com/65535/52691485323_cbe0e78e71_z.jpg" width="640" height="480" alt="IMG_0101"></a><script async src="//embedr.flickr.com/assets/client-code.js" charset="utf-8"></script>
<a data-flickr-embed="true" href="https://www.flickr.com/photos/181664286@N04/52690994346/in/dateposted-public/" title="IMG_0099"><img src="https://live.staticflickr.com/65535/52690994346_655f4d9bf6_z.jpg" width="640" height="480" alt="IMG_0099"></a><script async src="//embedr.flickr.com/assets/client-code.js" charset="utf-8"></script><a data-flickr-embed="true" href="https://www.flickr.com/photos/181664286@N04/52691412800/in/dateposted-public/" title="IMG_0130"><img src="https://live.staticflickr.com/65535/52691412800_c75bfa300c_z.jpg" width="640" height="480" alt="IMG_0130"></a><script async src="//embedr.flickr.com/assets/client-code.js" charset="utf-8"></script>
<a data-flickr-embed="true" href="https://www.flickr.com/photos/181664286@N04/52691265019/in/dateposted-public/" title="IMG_0102"><img src="https://live.staticflickr.com/65535/52691265019_61f39d772b_z.jpg" width="640" height="480" alt="IMG_0102"></a><script async src="//embedr.flickr.com/assets/client-code.js" charset="utf-8"></script>


i thought my ITR's were completely shot but they're actually in good condition with no play. the pass side has SLIGHT bend but nothing concerning enough for me to do something immediately, i want to install my (hopefully) last steering rack until i tear IFS out. after testing the JD kits travel with the new cut CV axles. the kit pulls 8 7/8" travel from what they give you..:ak472: HORRIBLE. the cup bottoms our far before the CV axle binds, and the coilover mount they provide you with is 1.25" longer than the solo motorsports LT mount which is absurd i have no clue why they made them so tall. i am in the middle of designing new mounts. anyway, im pretty unimpressed with the JD kit as ive said a couple times.

i wanted to fix this steering issue ive also had with the JD kit, my cut up tacoma balljoints limit my steering because they blow into the LCA. these are before and afters, along with reasoning i am running tacoma steering/ suspension


<a data-flickr-embed="true" href="https://www.flickr.com/photos/181664286@N04/52690476177/in/dateposted-public/" title="IMG_0120"><img src="https://live.staticflickr.com/65535/52690476177_662f369dd7_z.jpg" width="640" height="480" alt="IMG_0120"></a><script async src="//embedr.flickr.com/assets/client-code.js" charset="utf-8"></script>
<a data-flickr-embed="true" href="https://www.flickr.com/photos/181664286@N04/52691264094/in/dateposted-public/" title="IMG_0122"><img src="https://live.staticflickr.com/65535/52691264094_9d830a099c_z.jpg" width="640" height="480" alt="IMG_0122"></a><script async src="//embedr.flickr.com/assets/client-code.js" charset="utf-8"></script>
<a data-flickr-embed="true" href="https://www.flickr.com/photos/181664286@N04/52690476997/in/dateposted-public/" title="IMG_0116"><img src="https://live.staticflickr.com/65535/52690476997_9901ce3982_z.jpg" width="640" height="480" alt="IMG_0116"></a><script async src="//embedr.flickr.com/assets/client-code.js" charset="utf-8"></script>
<a data-flickr-embed="true" href="https://www.flickr.com/photos/181664286@N04/52690994956/in/dateposted-public/" title="IMG_0123"><img src="https://live.staticflickr.com/65535/52690994956_78574271ec_z.jpg" width="640" height="480" alt="IMG_0123"></a><script async src="//embedr.flickr.com/assets/client-code.js" charset="utf-8"></script>
<a data-flickr-embed="true" href="https://www.flickr.com/photos/181664286@N04/52691485158/in/dateposted-public/" title="IMG_0161"><img src="https://live.staticflickr.com/65535/52691485158_7421e9b741_z.jpg" width="640" height="360" alt="IMG_0161"></a><script async src="//embedr.flickr.com/assets/client-code.js" charset="utf-8"></script>


i had to grind a lot off of the tacoma joint so it wont contact the LCA, along with grinding quite a bit on the LCA itself. you can then notice the size differenced of the tie rods on the tacoma joints. you do have to cut quite a bit off to make it all work out though.


<a data-flickr-embed="true" href="https://www.flickr.com/photos/181664286@N04/52691413395/in/dateposted-public/" title="4c9b330f-9401-44a9-a07f-6b437400af71"><img src="https://live.staticflickr.com/65535/52691413395_5696903f37_z.jpg" width="640" height="480" alt="4c9b330f-9401-44a9-a07f-6b437400af71"></a><script async src="//embedr.flickr.com/assets/client-code.js" charset="utf-8"></script>
 
Moab prep 1

me and my pal working on his 80

i found out im suppose to be able to have 2 LoLo and its pretty easy to get it.

1. take out this flage with the 5 bolts. take out the snap ring


<a data-flickr-embed="true" href="https://www.flickr.com/photos/181664286@N04/52690476837/in/dateposted-public/" title="IMG_0037"><img src="https://live.staticflickr.com/65535/52690476837_668944427f_z.jpg" width="640" height="480" alt="IMG_0037"></a><script async src="//embedr.flickr.com/assets/client-code.js" charset="utf-8"></script>
<a data-flickr-embed="true" href="https://www.flickr.com/photos/181664286@N04/52690476752/in/dateposted-public/" title="IMG_0038"><img src="https://live.staticflickr.com/65535/52690476752_165c732c30_z.jpg" width="640" height="480" alt="IMG_0038"></a><script async src="//embedr.flickr.com/assets/client-code.js" charset="utf-8"></script>

2. take out the 12 12mm


<a data-flickr-embed="true" href="https://www.flickr.com/photos/181664286@N04/52691264694/in/dateposted-public/" title="IMG_0039"><img src="https://live.staticflickr.com/65535/52691264694_2f4a5aac85_z.jpg" width="640" height="480" alt="IMG_0039"></a><script async src="//embedr.flickr.com/assets/client-code.js" charset="utf-8"></script>
<a data-flickr-embed="true" href="https://www.flickr.com/photos/181664286@N04/52691413235/in/dateposted-public/" title="IMG_0041"><img src="https://live.staticflickr.com/65535/52691413235_07d0d7d1d4_z.jpg" width="640" height="480" alt="IMG_0041"></a><script async src="//embedr.flickr.com/assets/client-code.js" charset="utf-8"></script>


3. this pin will fall out. you do not need it. clean surfaces, RTV, and reassemble
 
Last edited:
I had the same issues with the upper c/o mounts not maximizing my up travel. I cycle 12” before bumping and limit strapping it. If you come up with a new design or can point me in the direction of someone who does, I’d like to get something figured out.

I also had my LBJ steering stops digging into my LCA. I did the same thing and clearanced it with an angle grinder. That’s with OEM 4Runner LBJ cores that were uniball converted and drilled out to the larger tacoma bolt size in order to accept heimed steering. No other issues after grinding the steering stops down but I swear even after doing that I lost a little but of turning radius. Hard to tell, to be honest.

Totally feel your pain on some of the JD kit’s shortcomings.
 
I had the same issues with the upper c/o mounts not maximizing my up travel. I cycle 12” before bumping and limit strapping it. If you come up with a new design or can point me in the direction of someone who does, I’d like to get something figured out.

I also had my LBJ steering stops digging into my LCA. I did the same thing and clearanced it with an angle grinder. That’s with OEM 4Runner LBJ cores that were uniball converted and drilled out to the larger tacoma bolt size in order to accept heimed steering. No other issues after grinding the steering stops down but I swear even after doing that I lost a little but of turning radius. Hard to tell, to be honest.

Totally feel your pain on some of the JD kit’s shortcomings.

i keep forgetting youre also on the JD kit dezert! its pretty frustrating you have to make it into a full uptravel setup.its okay with rock crawling but i definetly atleast want another inch or two of down travel.. i will probably be making my own upper arm and depending if i like it or not id be able to make a set for you as well. i just need to make a jig. i think i will turn it into a heim setup for the UCA pivot so there is adjustability. its weird how their other kits are so well developed but the 3g/1g kits are plain not thought out
 
moab prep 2

i designed these cam tabs so i can dial in my camber a little better, and wanted to sell a kit to people up until i saw someone had already done this before me :laugh: theyre just octogons and add 2 more "positions" to your adjustment. i really need to get thicker tabs i will probably try to design my own versus buying a TC one (i am trying to get better at cad). anyway, this is my journey on that.


<a data-flickr-embed="true" href="https://www.flickr.com/photos/181664286@N04/52697384136/in/dateposted-public/" title="IMG_5480"><img src="https://live.staticflickr.com/65535/52697384136_197065b43b_z.jpg" width="640" height="480" alt="IMG_5480"></a><script async src="//embedr.flickr.com/assets/client-code.js" charset="utf-8"></script>
<a data-flickr-embed="true" href="https://www.flickr.com/photos/181664286@N04/52697384506/in/dateposted-public/" title="IMG_5519"><img src="https://live.staticflickr.com/65535/52697384506_ec2e0ef1b8_z.jpg" width="640" height="480" alt="IMG_5519"></a><script async src="//embedr.flickr.com/assets/client-code.js" charset="utf-8"></script>
<a data-flickr-embed="true" href="https://www.flickr.com/photos/181664286@N04/52697641649/in/dateposted-public/" title="IMG_5521"><img src="https://live.staticflickr.com/65535/52697641649_6c618339f4_z.jpg" width="640" height="480" alt="IMG_5521"></a><script async src="//embedr.flickr.com/assets/client-code.js" charset="utf-8"></script>
<a data-flickr-embed="true" href="https://www.flickr.com/photos/181664286@N04/52696865462/in/dateposted-public/" title="IMG_5524"><img src="https://live.staticflickr.com/65535/52696865462_9bfa6b34e8_z.jpg" width="640" height="480" alt="IMG_5524"></a><script async src="//embedr.flickr.com/assets/client-code.js" charset="utf-8"></script>
<a data-flickr-embed="true" href="https://www.flickr.com/photos/181664286@N04/52697384411/in/dateposted-public/" title="IMG_5525"><img src="https://live.staticflickr.com/65535/52697384411_4637cb2070_z.jpg" width="640" height="480" alt="IMG_5525"></a><script async src="//embedr.flickr.com/assets/client-code.js" charset="utf-8"></script>


I am trying to make my build thread look like an older 2004 pirate 4x4 build thread including changing my appearence and parts into an early 2000s style build. i got this 10MP point and shoot camera and been loving how bad the picture quality is compared to todays standards haha.


i also got my winch back in and running


<a data-flickr-embed="true" href="https://www.flickr.com/photos/181664286@N04/52697641419/in/dateposted-public/" title="IMG_5470"><img src="https://live.staticflickr.com/65535/52697641419_018b0e2dcd_z.jpg" width="640" height="480" alt="IMG_5470"></a><script async src="//embedr.flickr.com/assets/client-code.js" charset="utf-8"></script>
<a data-flickr-embed="true" href="https://www.flickr.com/photos/181664286@N04/52697802570/in/dateposted-public/" title="IMG_5473"><img src="https://live.staticflickr.com/65535/52697802570_dd38305a95_z.jpg" width="640" height="480" alt="IMG_5473"></a><script async src="//embedr.flickr.com/assets/client-code.js" charset="utf-8"></script>
<a data-flickr-embed="true" href="https://www.flickr.com/photos/181664286@N04/52697641359/in/dateposted-public/" title="IMG_5477"><img src="https://live.staticflickr.com/65535/52697641359_932101c050_z.jpg" width="640" height="480" alt="IMG_5477"></a><script async src="//embedr.flickr.com/assets/client-code.js" charset="utf-8"></script>
<a data-flickr-embed="true" href="https://www.flickr.com/photos/181664286@N04/52696865162/in/dateposted-public/" title="IMG_5478"><img src="https://live.staticflickr.com/65535/52696865162_593c1e676d_z.jpg" width="640" height="480" alt="IMG_5478"></a><script async src="//embedr.flickr.com/assets/client-code.js" charset="utf-8"></script>
 
i designed these cam tabs so i can dial in my camber a little better, and wanted to sell a kit to people up until i saw someone had already done this before me [emoji23] theyre just octogons and add 2 more "positions" to your adjustment. i really need to get thicker tabs i will probably try to design my own versus buying a TC one (i am trying to get better at cad). anyway, this is my journey on that.


<a data-flickr-embed="true" href="https://www.flickr.com/photos/181664286@N04/52697384136/in/dateposted-public/" title="IMG_5480"><img src="https://live.staticflickr.com/65535/52697384136_197065b43b_z.jpg" width="640" height="480" alt="IMG_5480"></a><script async src="//embedr.flickr.com/assets/client-code.js" charset="utf-8"></script>

<a data-flickr-embed="true" href="https://www.flickr.com/photos/181664286@N04/52697384506/in/dateposted-public/" title="IMG_5519"><img src="https://live.staticflickr.com/65535/52697384506_ec2e0ef1b8_z.jpg" width="640" height="480" alt="IMG_5519"></a><script async src="//embedr.flickr.com/assets/client-code.js" charset="utf-8"></script>

<a data-flickr-embed="true" href="https://www.flickr.com/photos/181664286@N04/52697641649/in/dateposted-public/" title="IMG_5521"><img src="https://live.staticflickr.com/65535/52697641649_6c618339f4_z.jpg" width="640" height="480" alt="IMG_5521"></a><script async src="//embedr.flickr.com/assets/client-code.js" charset="utf-8"></script>

<a data-flickr-embed="true" href="https://www.flickr.com/photos/181664286@N04/52696865462/in/dateposted-public/" title="IMG_5524"><img src="https://live.staticflickr.com/65535/52696865462_9bfa6b34e8_z.jpg" width="640" height="480" alt="IMG_5524"></a><script async src="//embedr.flickr.com/assets/client-code.js" charset="utf-8"></script>

<a data-flickr-embed="true" href="https://www.flickr.com/photos/181664286@N04/52697384411/in/dateposted-public/" title="IMG_5525"><img src="https://live.staticflickr.com/65535/52697384411_4637cb2070_z.jpg" width="640" height="480" alt="IMG_5525"></a><script async src="//embedr.flickr.com/assets/client-code.js" charset="utf-8"></script>


I am trying to make my build thread look like an older 2004 pirate 4x4 build thread including changing my appearence and parts into an early 2000s style build. i got this 10MP point and shoot camera and been loving how bad the picture quality is compared to todays standards haha.


i also got my winch back in and running


<a data-flickr-embed="true" href="https://www.flickr.com/photos/181664286@N04/52697641419/in/dateposted-public/" title="IMG_5470"><img src="https://live.staticflickr.com/65535/52697641419_018b0e2dcd_z.jpg" width="640" height="480" alt="IMG_5470"></a><script async src="//embedr.flickr.com/assets/client-code.js" charset="utf-8"></script>

<a data-flickr-embed="true" href="https://www.flickr.com/photos/181664286@N04/52697802570/in/dateposted-public/" title="IMG_5473"><img src="https://live.staticflickr.com/65535/52697802570_dd38305a95_z.jpg" width="640" height="480" alt="IMG_5473"></a><script async src="//embedr.flickr.com/assets/client-code.js" charset="utf-8"></script>

<a data-flickr-embed="true" href="https://www.flickr.com/photos/181664286@N04/52697641359/in/dateposted-public/" title="IMG_5477"><img src="https://live.staticflickr.com/65535/52697641359_932101c050_z.jpg" width="640" height="480" alt="IMG_5477"></a><script async src="//embedr.flickr.com/assets/client-code.js" charset="utf-8"></script>

<a data-flickr-embed="true" href="https://www.flickr.com/photos/181664286@N04/52696865162/in/dateposted-public/" title="IMG_5478"><img src="https://live.staticflickr.com/65535/52696865162_593c1e676d_z.jpg" width="640" height="480" alt="IMG_5478"></a><script async src="//embedr.flickr.com/assets/client-code.js" charset="utf-8"></script>

Mission accomplished, I'd say. Sweet looking rig for sure. And noticeable difference with your newly installed custom cam tabs?

Sent from my SM-S908U using Tapatalk
 
thanks joe. i havent put it on the allignment rack yet put so far my camber is exactly where i want it, should help a lot with wear and a bit better traction driving on the snow. i am very curious to see where my caster is currently at as ive been just using toe plates to set allignment unknowing of my caster. wanting something in the 2.6-3.5 range
 
more wheeling prep

nothing too fancy. got my ruffstuff poly engine mounts in, and it was a PITA lol. getting the mounts off was pretty quick and smooth going but the driver side engine mount has little to no room and the fitment was a little weird so we had to play around a bit with angles, bolts, etc. it ended up bolting in and all good after persuation. the vibration is honestly not bad! you definetly feel in when its cold at idle but thats about it. driving on freeway is great and load feels good. my old engine mounts were definetly getting tired and pretty loose after testing with a pry bar. i dont think it wouldve taken much time to rip an engine mount with the dual cases. not too much left to go other than putting my truck on my allignment machine at work, and making a quick coilover mount similar to solo motorsports if time allows. it would be nice to have that 1.5" of up travel over an easy task. truck is running and driving good at this time although i need another daily driver, its getting old driving the 4runner. ive been saving for the perfect ls430 but i might end up getting another 2wd tacoma soon, id even like to find a 4x4 single cab 1g tacoma


<a data-flickr-embed="true" href="https://www.flickr.com/photos/181664286@N04/52712958674/in/dateposted-public/" title="IMG_5536"><img src="https://live.staticflickr.com/65535/52712958674_73e00546ff_z.jpg" width="640" height="480" alt="IMG_5536"></a><script async src="//embedr.flickr.com/assets/client-code.js" charset="utf-8"></script>
<a data-flickr-embed="true" href="https://www.flickr.com/photos/181664286@N04/52713172673/in/dateposted-public/" title="IMG_5537"><img src="https://live.staticflickr.com/65535/52713172673_8599a81efc_z.jpg" width="640" height="480" alt="IMG_5537"></a><script async src="//embedr.flickr.com/assets/client-code.js" charset="utf-8"></script>
<a data-flickr-embed="true" href="https://www.flickr.com/photos/181664286@N04/52713172593/in/dateposted-public/" title="IMG_5538"><img src="https://live.staticflickr.com/65535/52713172593_eb54671e08_z.jpg" width="640" height="480" alt="IMG_5538"></a><script async src="//embedr.flickr.com/assets/client-code.js" charset="utf-8"></script>
 
nothing too fancy. got my ruffstuff poly engine mounts in, and it was a PITA lol. getting the mounts off was pretty quick and smooth going but the driver side engine mount has little to no room and the fitment was a little weird so we had to play around a bit with angles, bolts, etc. it ended up bolting in and all good after persuation. the vibration is honestly not bad! you definetly feel in when its cold at idle but thats about it. driving on freeway is great and load feels good. my old engine mounts were definetly getting tired and pretty loose after testing with a pry bar. i dont think it wouldve taken much time to rip an engine mount with the dual cases. not too much left to go other than putting my truck on my allignment machine at work, and making a quick coilover mount similar to solo motorsports if time allows. it would be nice to have that 1.5" of up travel over an easy task. truck is running and driving good at this time although i need another daily driver, its getting old driving the 4runner. ive been saving for the perfect ls430 but i might end up getting another 2wd tacoma soon, id even like to find a 4x4 single cab 1g tacoma


<a data-flickr-embed="true" href="https://www.flickr.com/photos/181664286@N04/52712958674/in/dateposted-public/" title="IMG_5536"><img src="https://live.staticflickr.com/65535/52712958674_73e00546ff_z.jpg" width="640" height="480" alt="IMG_5536"></a><script async src="//embedr.flickr.com/assets/client-code.js" charset="utf-8"></script>
<a data-flickr-embed="true" href="https://www.flickr.com/photos/181664286@N04/52713172673/in/dateposted-public/" title="IMG_5537"><img src="https://live.staticflickr.com/65535/52713172673_8599a81efc_z.jpg" width="640" height="480" alt="IMG_5537"></a><script async src="//embedr.flickr.com/assets/client-code.js" charset="utf-8"></script>
<a data-flickr-embed="true" href="https://www.flickr.com/photos/181664286@N04/52713172593/in/dateposted-public/" title="IMG_5538"><img src="https://live.staticflickr.com/65535/52713172593_eb54671e08_z.jpg" width="640" height="480" alt="IMG_5538"></a><script async src="//embedr.flickr.com/assets/client-code.js" charset="utf-8"></script>

I just threw in some motor mounts from solid offroad. I agree that the vibrations aren't too bad at all, I feel it most at a stoplight (through the steering wheel), my wife didn't notice any change at all as a passenger. But it feels way better to drive, I went up the pass to go snow wheeling and it was so much nicer pulling hills. Install was a pain in the rear though. It took me forever to get that top bolt threaded on the driver side, not sure why. Passenger wasn't too bad, just time consuming.
 
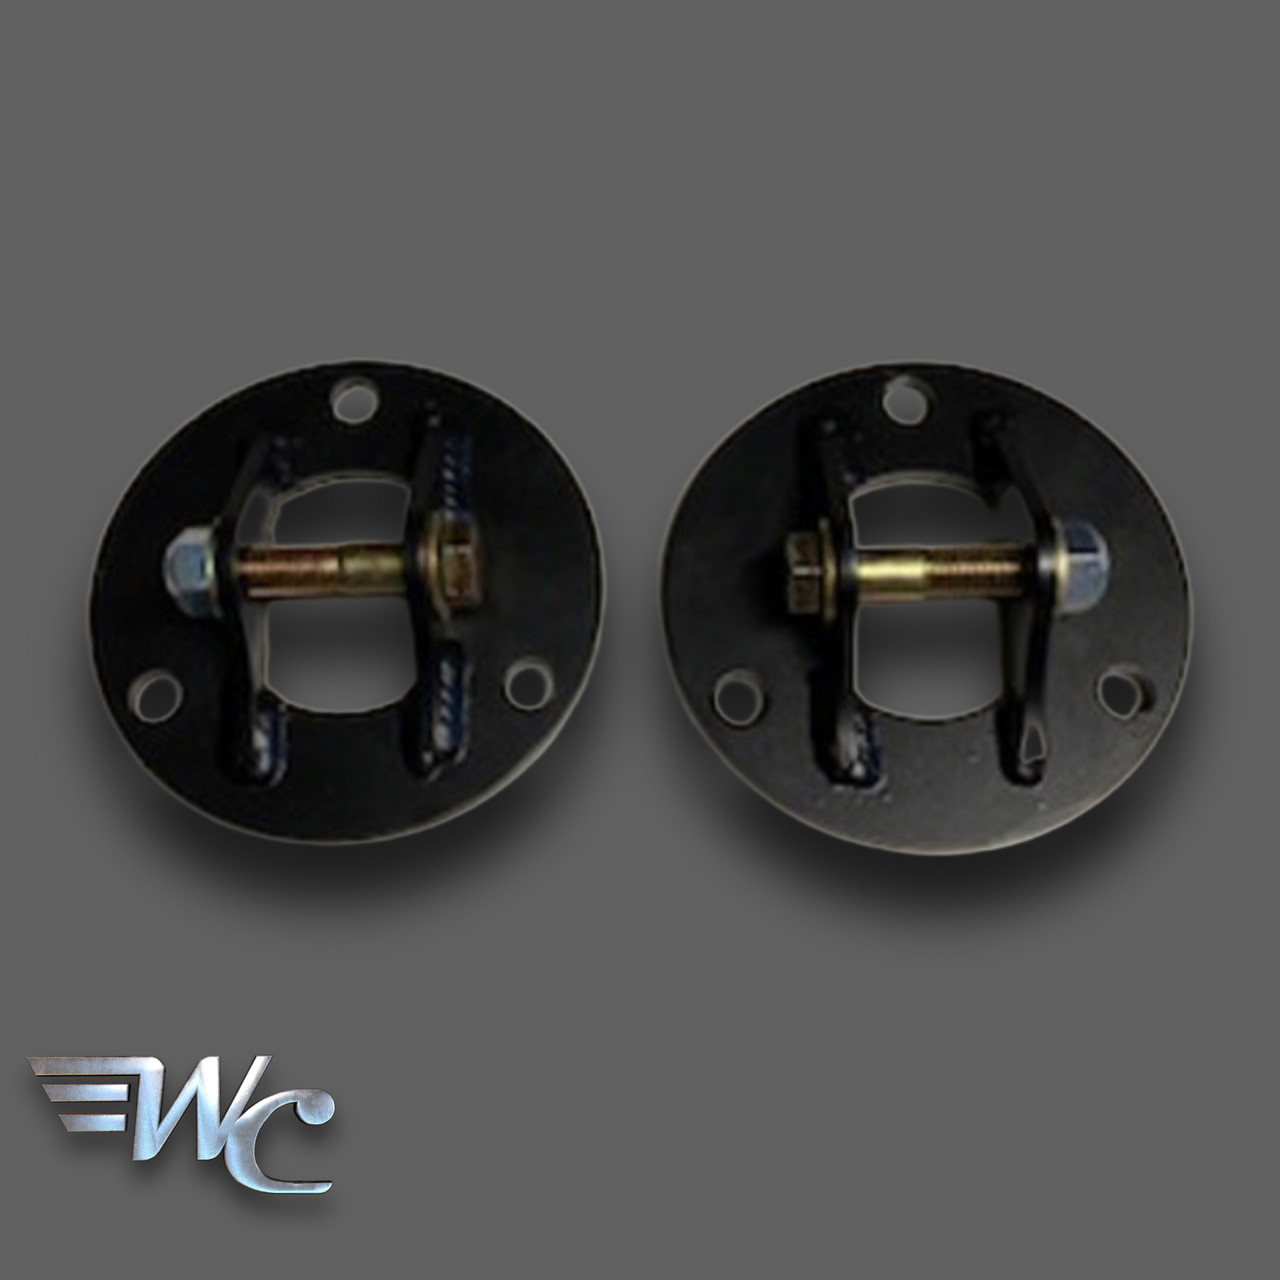
and making a quick coilover mount similar to solo motorsports if time allows. it would be nice to have that 1.5" of up travel over an easy task.

If what I think you're saying is correct, wicked offroad makes some for $100/pair and they seem pretty low profile to give you max up travel at ride height.

402EB2A3-C02F-4A18-97A8-C521EF0191F9__63180.1677540094.jpg


WC 3rd Gen (1996 - 2002) Toyota Bucket Shock Mount
 
first 2023 moab trip

moab trip was great! we did coyote canyon, pritchett, kane creek, cliffhanger, trifecta trails, hells/f&t, and adventured thru lockhart. coyote canyon was suuuch an intense trail (its moabs hardest trail rated a 10.5) but lucy did GREAT up until i blew up another ADD shaft and 2 CV's! we put me on a super bad line and it went downhill from there. we had to leave the 4runner overnight and go back to get it out which it was already at the very top anyways so it was a matter of putting another cv back in and taking it easy back down the hill.


<a data-flickr-embed="true" href="https://www.flickr.com/photos/181664286@N04/52757423086/in/dateposted-public/" title="IMG_5581"><img src="https://live.staticflickr.com/65535/52757423086_3c91f300f7_z.jpg" width="640" height="480" alt="IMG_5581"/></a><script async src="//embedr.flickr.com/assets/client-code.js" charset="utf-8"></script>
<a data-flickr-embed="true" href="https://www.flickr.com/photos/181664286@N04/52757904823/in/dateposted-public/" title="IMG_5598"><img src="https://live.staticflickr.com/65535/52757904823_6438b9d4b8_z.jpg" width="640" height="480" alt="IMG_5598"/></a><script async src="//embedr.flickr.com/assets/client-code.js" charset="utf-8"></script>
<a data-flickr-embed="true" href="https://www.flickr.com/photos/181664286@N04/52757669579/in/dateposted-public/" title="IMG_5604"><img src="https://live.staticflickr.com/65535/52757669579_99a0e69ff8_z.jpg" width="640" height="480" alt="IMG_5604"/></a><script async src="//embedr.flickr.com/assets/client-code.js" charset="utf-8"></script>
<a data-flickr-embed="true" href="https://www.flickr.com/photos/181664286@N04/52757829125/in/dateposted-public/" title="IMG_5639"><img src="https://live.staticflickr.com/65535/52757829125_8e763474cd_z.jpg" width="640" height="480" alt="IMG_5639"/></a><script async src="//embedr.flickr.com/assets/client-code.js" charset="utf-8"></script>
<a data-flickr-embed="true" href="https://www.flickr.com/photos/181664286@N04/52757904393/in/dateposted-public/" title="IMG_5649"><img src="https://live.staticflickr.com/65535/52757904393_f3d486a284_z.jpg" width="640" height="480" alt="IMG_5649"/></a><script async src="//embedr.flickr.com/assets/client-code.js" charset="utf-8"></script>
<a data-flickr-embed="true" href="https://www.flickr.com/photos/181664286@N04/52756885332/in/dateposted-public/" title="IMG_5651"><img src="https://live.staticflickr.com/65535/52756885332_97d211f029_z.jpg" width="640" height="480" alt="IMG_5651"/></a><script async src="//embedr.flickr.com/assets/client-code.js" charset="utf-8"></script>


i have more pictures on my phone but i need to figure out how to get them on my camera in not insanely computer savvy. anyways coyote was an awesome and tight trail, id like to do it again other than the crazy body damage i got doing it, including blowing out a window. i changed my ADD shaft with my spare and rebuilt another cv so i still had 2 more spares. after this trip, i am focusing on getting another daily driver so i can start a solid axle swap and ditch the IFS. im pretty tired of breaking so much stuff. that being said, the long travel was good enough to keep me content and is loads better wheeling than the mid travel aside from the garbage numbers the JD kit pulls.


<a data-flickr-embed="true" href="https://www.flickr.com/photos/181664286@N04/52756885262/in/dateposted-public/" title="IMG_5720"><img src="https://live.staticflickr.com/65535/52756885262_37cab4aa34_z.jpg" width="640" height="480" alt="IMG_5720"/></a><script async src="//embedr.flickr.com/assets/client-code.js" charset="utf-8"></script>
<a data-flickr-embed="true" href="https://www.flickr.com/photos/181664286@N04/52757668969/in/dateposted-public/" title="IMG_5724"><img src="https://live.staticflickr.com/65535/52757668969_dcdef90dfa_z.jpg" width="640" height="480" alt="IMG_5724"/></a><script async src="//embedr.flickr.com/assets/client-code.js" charset="utf-8"></script>
<a data-flickr-embed="true" href="https://www.flickr.com/photos/181664286@N04/52756885072/in/dateposted-public/" title="IMG_5735"><img src="https://live.staticflickr.com/65535/52756885072_b9afe9f9d9_z.jpg" width="640" height="480" alt="IMG_5735"/></a><script async src="//embedr.flickr.com/assets/client-code.js" charset="utf-8"></script>
<a data-flickr-embed="true" href="https://www.flickr.com/photos/181664286@N04/52757422111/in/dateposted-public/" title="IMG_5753"><img src="https://live.staticflickr.com/65535/52757422111_b0844b6bcb_z.jpg" width="640" height="480" alt="IMG_5753"/></a><script async src="//embedr.flickr.com/assets/client-code.js" charset="utf-8"></script>
<a data-flickr-embed="true" href="https://www.flickr.com/photos/181664286@N04/52757903823/in/dateposted-public/" title="IMG_5757"><img src="https://live.staticflickr.com/65535/52757903823_ed65a67036_z.jpg" width="640" height="480" alt="IMG_5757"/></a><script async src="//embedr.flickr.com/assets/client-code.js" charset="utf-8"></script>
<a data-flickr-embed="true" href="https://www.flickr.com/photos/181664286@N04/52757903738/in/dateposted-public/" title="IMG_5772"><img src="https://live.staticflickr.com/65535/52757903738_ebb5922bc1_z.jpg" width="640" height="480" alt="IMG_5772"/></a><script async src="//embedr.flickr.com/assets/client-code.js" charset="utf-8"></script>
<a data-flickr-embed="true" href="https://www.flickr.com/photos/181664286@N04/52757828285/in/dateposted-public/" title="IMG_5779"><img src="https://live.staticflickr.com/65535/52757828285_fae86b1c3c_z.jpg" width="640" height="480" alt="IMG_5779"/></a><script async src="//embedr.flickr.com/assets/client-code.js" charset="utf-8"></script>


we did a bunch of more mellow trails up until it was time to do pritchett. there was 3 of us vehicles that went and i am ECSTATIC on how lucy did! i only had to winch up chewy and axle hill, which im fine with from how gnarly it has gotten over last year with the flooding. the biggest thing im stoked on was the shimmy line on rocker knocker which i walked the truck all the way to the pinch and it came up with zero issue with the help of great spotting. no breakages and we made it out clean. it was a great trip
 

Members online

Forum statistics

Threads
278,317
Messages
3,554,129
Members
248,016
Latest member
Advally Service

Trending content

Back
Top