The 3.4L TRD Supercharger Thread

So what is the metal behind my seal? Could it be the old OEM seal or is it part of the Supercharger housing? I bought this unit rebuilt so not sure how the person rebuilt the nose cone. Maybe he accidentally left the old seal in there?

I think the metal in your pic is part of the seal, The stuff you pealed off looks to be the coating. I've never worked on one of these, hopefully someone who has jumps in to help.
 
My progress so far. Dont know why this is in there so good!


Did you buy a new seal. What's the new one look like. I agree with ^^^ him. Your not through it. Behind that is the bearing. I think you need to drill into that face and pull it out.


Sent from my iPhone using Tapatalk
 
Here is the new seal i ordered from rolling preformance. It looks to be the same seal im removing as the PO rebuilt the super. I sure hope thst metal behind the seal is the original oem seal as this can more along much quicker. Just want to be 100% before i drill holes in a now $700 nose cone. Anyone have a picture of the oem seal removed or on? I cant find it on google.


It's seriously in there good. You'll need to drill a SHALLOW hole (don't drill the bearing behind it) and pull it out. Needlenose pliers did it for me, I literally had one foot on the bumper and was pulling with all of my might. Keep the charger on the vehicle though. Careful not to score the housing though...

P.S. that brown rubber isn't the seal. The aluminum thing behind it is.

I think the metal in your pic is part of the seal, The stuff you pealed off looks to be the coating. I've never worked on one of these, hopefully someone who has jumps in to help.

Did you buy a new seal. What's the new one look like. I agree with ^^^ him. Your not through it. Behind that is the bearing. I think you need to drill into that face and pull it out.


Sent from my iPhone using Tapatalk

Here is the new seal i ordered from rolling preformance. It looks to be the same seal im removing as the PO rebuilt the super. I sure hope thst metal behind the seal is the original oem seal as this can more along much quicker. Just want to be 100% before i drill holes in a now $700 nose cone. Anyone have a picture of the oem seal removed or on? I cant find it on google.

The brown rubber part is just the coating. The aluminum layer you're at is the seal. That's what we all are saying :) The stock seal doesn't have the rubber coating, it's just the aluminum seals which is why it leaks sometimes. By the way... the supercharger installation manual says that there's a "break-in" period in which the nose cone often leaks but will stop after about 500-1000 miles on the charger. I replaced the nose cone but the leak never stopped so I had to replace the seal.

I have no photos, but if you remove the seal you'll see about 6 larger ball bearings in a casing, those are the bearings. The supercharger oil flows into the bearings to keep them lubricated.

P.S. the side with the spring goes in the back, I put mine in backwards LOL but it doesn't leak so it's all good.
 
Thank you for the response [MENTION=115347]gamefreakgc[/MENTION]. A few questions/opservations. First i see the roller bearrings about 1/4-1/2 inch behind the metal seal. The rubber type seal i have been attempting to remove is an exact match to the seal I'm hopping to install. My seal has no metal structure. Only the rubber and a small spring. Should mine have come with the metal? If not how does this seal mount/ stay in place? From my observations it looks as if the metal is the thing this seal mounts to?
 
Thank you for the response [MENTION=115347]gamefreakgc[/MENTION]. A few questions/opservations. First i see the roller bearrings about 1/4-1/2 inch behind the metal seal. The rubber type seal i have been attempting to remove is an exact match to the seal I'm hopping to install. My seal has no metal structure. Only the rubber and a small spring. Should mine have come with the metal? If not how does this seal mount/ stay in place? From my observations it looks as if the metal is the thing this seal mounts to?

Oh, I see what you are saying! The person who "rebuilt" your supercharger did it wrong. Instead of replacing the old stock seal they just put one on top of it! Geez... I hope you didn't pay too much for it.

You need to remove the leaking stock seal still then. Get it out so all you see is the bearings and then put the new on you have in place. Be very careful not to mar the aluminum housing or scratch it since it may not seal completely. If you do just sand it very lightly with very high grit sandpaper to smooth it out as best you can.

Not my photo but the bearings are in the middle of the photo. That's what you should be seeing if you look into the snout with the seal gone.

image_zpscde513d7.jpeg~original
 
Last edited:
Ok the supercharger arrived! I bought used as it was $220 shipped to my place, but you can find completely remanufactured ones for $700 all over the place ($500 + $200 core charge). I went used because this was an experiment and I didn't want to pay a $100+ restocking fee if it didn't work out. Also you should be able to find these any salvage yards all over the place as they aren't a highly sought after SC. Based on first impressions and review it looks like this will work perfectly. It is indeed a M62 and looks to be the right dimensions and an exact copy of the 1st gen SC. Also, even better news, the nose cone and drive direction of the Pontiac SC is the same as the TRD. That means you simply just pull the rotor pack and nose cone out of the Pontiac SC and place it right into the TRD SC. No other modifications needed.

I will be doing a full test fit this weekend and verify my findings, but this could be a very beneficial route for anyone with a 1st gen supercharger as nose cones are discontinued and rotor packs are only available rebuilt and expensive.

Details on the supercharger:
Pontiac Bonneville 1992-1995 (this is important as they switched to the M90 in 1996)

There may be other years/models of Buicks and Pontiacs that run this SC, but I'll have to do some research.


Very interested in what you find! Keep us posted!
 
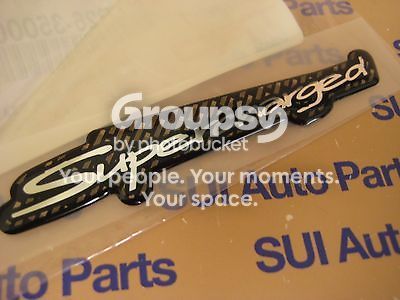
Let me know if anyone wants a set of TRD/Supercharged badges. I ordered one of each the day I swapped mine on, but [MENTION=82154]GSPRunner[/MENTION] was nice enough to give me his set that he never put on his rig.

Paying it forward, so free to whoever wants them. I'll even ship them to you.

*the TRD badge will no arrive until next week, so I wouldn't send them out until then*

_1_zpsbq6cgwwv.jpg~original
 
Last edited:
Let me know if anyone wants a set of TRD/Supercharged badges. I ordered one of each the day I swapped mine on, but [MENTION=82154]GSPRunner[/MENTION] was nice enough to give me his set that he never put on his rig.

Paying it forward, so free to whoever wants them. I'll even ship them to you.

*the TRD badge will no arrive until next week, so I wouldn't send them out until then*

_1_zpsbq6cgwwv.jpg~original


I'll take it pn sending


Sent from my iPhone using Tapatalk
 
Let me know if anyone wants a set of TRD/Supercharged badges. I ordered one of each the day I swapped mine on, but [MENTION=82154]GSPRunner[/MENTION] was nice enough to give me his set that he never put on his rig.

Paying it forward, so free to whoever wants them. I'll even ship them to you.

*the TRD badge will no arrive until next week, so I wouldn't send them out until then*

_1_zpsbq6cgwwv.jpg~original

That's funny, I just removed mine because I don't like the old stock supercharger badges LOL! I replaced it with the more modern TRD logo just a month ago. But for those who like the original look they are nice. There were in bad spots on my 4Runner though.
 
I just posted this in the Transgo kit thread but thought I'd also post here since it's very relevant to us supercharger folks. I finished the valve body kit install over the holiday weekend and have been trying it out since. Dispells some of the myths about "needing a valve body upgrade" I see from time to time, think of it more as tuning your transmission than a must-have.

Ok, had it on for a few days now and I'm learning how to drive with it both with ECT on and off (hopefully this helps for those who don't have ECT Power). For reference, this was done on a supercharged engine running at 10 PSI max, 50% higher than a stock supercharger with fuel mods.

Normal driving around town and in traffic, etc there's little change which is a good thing. Shifts are quiet and smooth, no noticeable difference for the average driver. The 2-3 shift is a bit quicker but it feels the same. ECT on makes it hold the RPM's a bit higher than usual, close to 3k RPM but nothing crazy since it did that before.

At about 1/2 or more throttle is when you notice the change. The shift is very quick and there's a little "jolt" snapping into the next gear. Acceleration is a bit of a jump but once again nothing crazy. The difference here is that with the ECT Power off (or for those that don't have it) the transmission shifts at higher RPM's and doesn't bog down at low RPM's. Those without a supercharger won't know quite what I'm talking about here but that's ok. Basically it acts as if you had ECT power on, without it on. And with it on, it revs about 3k RPM before shifting, allowing you to use more of the power band.

WOT runs - This is where it is noticed the most. I used the "truck" settings not the "hot rod" because I didn't want it to shift funny at normal driving speeds for my wife. She drives pretty conservative anyway. At wide-open-throttle, this kit shifts VERY fast. My 1-2 shift didn't change a ton, but it no longer jumps around searching for a gear like it did before with not ECT Power on. I basically always kept ECT on, since without it the gears would not downshift and it would bog down at sub-3k RPM's and not respond well. Now it act like it should. Once again, not sure if those without a supercharger will know what I mean by this but those that do will understand. This also helps eliminate the "low RPM ping" that many complain about since it won't stay at low RPM's with any substantial boost. With ECT Power on at WOT - I have yet to try this more. The few times I did it responded nicely and rev'd very high and used all of the power band, which it USUALLY did before but once again, the stock transmission acts funny sometimes and once in a while it would upshift then immediately downshift again, which basically robbed power and make for a very jerky ride. It has yet to do this and shifts fast (read: it jerks because it shifts so fast!). I don't have any times to share comparisons though and a video does not do the kit any justice since it is felt by the driver, not observed.

My conclusion - This kit does not magically "unlock tons of HP" or something like that. What it does is shorten shift times and gets rid of lazy shifts especially going from 2-3 but also 1-2, and helps hold a gear higher under more normal/aggressive driving. Of course, if you are on a track quicker shifts equals faster times but that's not what I was after.

Contrary to what you'll read online about Gadget's thoughts on a valve body upgrade being necessary (some of you will recognize his site here:Transmission Modifications) the stock transmission works fine. As long as you have an external cooler on it or change the fluid regularly there's no issues. Performance wise it acts funny, especially once you go beyond just a stock supercharger since it'll search for gears sometimes but nothing that threatens the integrity of the transmission. Those with ECT Power will notice it cleans it up a bit, but not entirely. This kit makes it work in sync with the extra power nicely. However, being that we have only a 4 speed transmission and in WOT situations you're only using 3 gears, this only is affecting two shifts. That's why it's not a huge game-changer. If we had a 5-speed or 6-speed, this would be a whole different story!

This is not for the average DIY'er, which I consider myself to be. Without the help here on the forums I would not have been able to successfully complete the job and I almost took on more than I could handle. Do this upgrade at your own risk and have a contingency plan if your transmission doesn't work right after the install.

 
That's funny, I just removed mine because I don't like the old stock supercharger badges LOL! I replaced it with the more modern TRD logo just a month ago. But for those who like the original look they are nice. There were in bad spots on my 4Runner though.

I totally agree with you that they are a dated look. I came close to buying different ones with a more modern feel. But in the end, my nostalgia won out.
 
Ok the supercharger arrived! I bought used as it was $220 shipped to my place, but you can find completely remanufactured ones for $700 all over the place ($500 + $200 core charge). I went used because this was an experiment and I didn't want to pay a $100+ restocking fee if it didn't work out. Also you should be able to find these any salvage yards all over the place as they aren't a highly sought after SC. Based on first impressions and review it looks like this will work perfectly. It is indeed a M62 and looks to be the right dimensions and an exact copy of the 1st gen SC. Also, even better news, the nose cone and drive direction of the Pontiac SC is the same as the TRD. That means you simply just pull the rotor pack and nose cone out of the Pontiac SC and place it right into the TRD SC. No other modifications needed.

I will be doing a full test fit this weekend and verify my findings, but this could be a very beneficial route for anyone with a 1st gen supercharger as nose cones are discontinued and rotor packs are only available rebuilt and expensive.

Details on the supercharger:
Pontiac Bonneville 1992-1995 (this is important as they switched to the M90 in 1996)

There may be other years/models of Buicks and Pontiacs that run this SC, but I'll have to do some research.


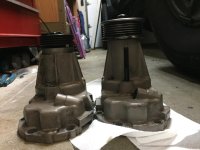
Update, I got the Buick SC apart and the rotor pack fits like a glove lines up perfectly and drops right in correctly to the TRD housing. The nose cone is also the right rotational direction and thus no need to repress and gears. One thing about the nose cone is the shell is shaved down at the top by the pulley. Not sure the reasoning but the Buick is a complete shell and this may cause rubbing on the pulley potentially, will find out tomorrow. Also the shaft looks longer since it has a larger pulley but my busted TRD nose cone isn't a good judge for that.

Overall though, they are a great source for rotor packs and should work perfectly with the nose cone.
 

Attachments

  • IMG_7581.jpg
    IMG_7581.jpg
    124.6 KB · Views: 2,747
That's some good info! I've spent a few hours scouring craigslist for a supercharger and you can find the 3.8 Buick charger all day for 200 bucks! Now if only I can find a TRD one for under a grand
 
Can someone with a 1st gen measure from the base of the nose cone (where it meets the rotor pack) to the tip of the shaft (just the tip though, to see how it feels...). The TRD nose cone I have is welded onto the pulley so I can't get an accurate measurement. The Buick shaft looks longer but hard to tell.
 
For anyone looking to add methanol injection to their 4Runner: if you can get a bigger tank and find a place to mount it.

Granted I've been heavy-footed to test it out, but have gone through 2 1/2 gallons in about 1 month. The stock reservoir holds about 3/4 of a gallon and I'm still to install a low-level sensor that actually works so I've run out on 2 occasions, which is not a good thing for the life of the pump.
 
Hey Guys, i just had a 2gen Trd supercharger installed on my 01 4runner. Very cool and what a game changer it is. After 400miles, check engine, VSC light came on. I check the code and it's saying that BANk 1 is running lean. What is the fix for it? It was running smooth before and not its rough. Thanks
 
Hey Guys, i just had a 2gen Trd supercharger installed on my 01 4runner. Very cool and what a game changer it is. After 400miles, check engine, VSC light came on. I check the code and it's saying that BANk 1 is running lean. What is the fix for it? It was running smooth before and not its rough. Thanks

400 miles is pretty good to get the computer to relearn its fuel trims..
you can pull the small 15 (ish) amp fuse under the hood for 30-60 seconds and it will clear your check engine light.

the car does take some time to learn fuel trims on what to do. Also you may be lean at high rpm which is common,

What elevation are you at?
 

Members online

Forum statistics

Threads
278,316
Messages
3,554,105
Members
248,016
Latest member
Advally Service

Trending content

Back
Top