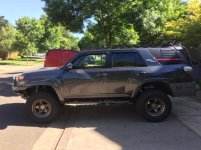
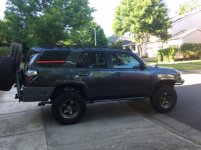
The Grey Ghost Build Thread

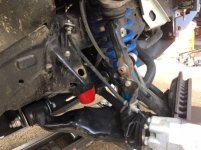
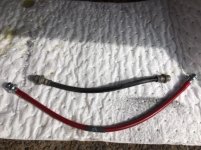
I threw in some Crown Performance extended braided brake lines. You can see in the one pic at full droop the factory brake line was stretching. SO I ordered up 4 inch extended lines for the front and rear.

I also had to upgrade my 3 inch lift coils from the Dobinsons C59-675V to the C59-677V because I realized with my rear bumper weight I was still sagging an inch.
 

Attachments

  • length comparison.jpg
    length comparison.jpg
    52.3 KB · Views: 759
  • stock front stretched.jpg
    stock front stretched.jpg
    49.8 KB · Views: 766
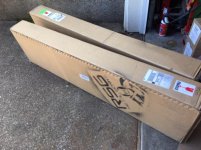
I sold my baja roof rack and metaltech sliders. I ordered a SSO roof rack and RSG sliders, so now the waiting game to see how it looks.

Also decided to try powder coating things to match the body color.
 
first was Duratracs and TRD wheels. I know its been done 100 times but I have some secret sauce planned this year that I havn't seen anybody do yet. And for now I went ahead and threw a 3"/2" spacer lift until I get my King suspension setup ordered

What spacer lift did you go with.. It has been a while since you installed it but looking back how was the ride and would you do it again before going to another suspension?
 
How do you have your tablet mounted like that?

That pic is the stock pic from the arclight webpage lol Ive never used a tablet lol sorry

As far as spacers I just used a $200 spacer kit from the dealer, ride was fine. But nothing compares to the dampening of a KING suspension though
 
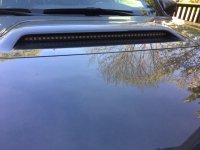
So this is just a fun little project I did because I'm a nerd and grew up watching Knight Rider lol

And before the haters start whining I am perfectly aware of the legal issues with having a red flashing light on front of a vehicle. Its for "offroad" use only don't try this at home LMAO.

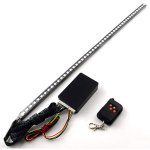
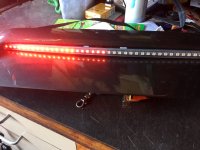
So I bought this cheap $15 led scanner light on amazon

https://www.amazon.com/Astra-Depot-...+scanner+led&qid=1556150924&s=gateway&sr=8-11

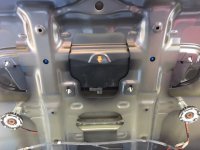
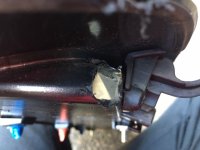
I removed my hood scoop, cut a hole on each end of opening to slide this light thru, I had to flex and bend it slightly to get it thru.

It was way too long since the light is 22 inches and the scoop opening is roughly 17 inches so I had to cut a few inches of the circuit board off the end. I sealed the end with some gasket material.

Then I stuck double sided tape on back side once I was happy with placement and tested it first.
 

Attachments

  • amazon light.jpg
    amazon light.jpg
    60 KB · Views: 693
  • underhood1.JPG
    underhood1.JPG
    95.6 KB · Views: 700
  • hole in side of scoop.JPG
    hole in side of scoop.JPG
    83.5 KB · Views: 691
  • final mounting2.JPG
    final mounting2.JPG
    97.3 KB · Views: 665
  • test on desk.JPG
    test on desk.JPG
    118.3 KB · Views: 658
Here is a video of it to test it out. For some reason in the video it looks like its moving choppy but in person it is smooth flowing back and forth

YouTube
 
LEDs usually don’t video correct it’s the frame rate. Looks awesome very fun mod.


Sent from my iPhone using Tapatalk
 
I went through your build log and the amount of know how that is in your mind is crazy! Also lots of money spent to make that beast into a one of a kind rig. Like you said, no one has red alligator inside their 4Runner
 
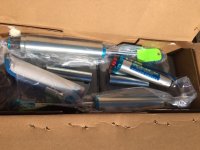
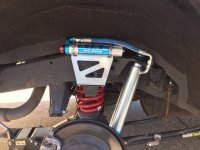
Thank you to my local Casino for buying my rear shocks for me LOL and my SSO roof rack which should be here soon....
 

Attachments

  • rearbox.JPG
    rearbox.JPG
    111.1 KB · Views: 580
  • rear installed.JPG
    rear installed.JPG
    109.1 KB · Views: 587
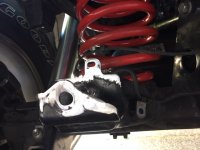
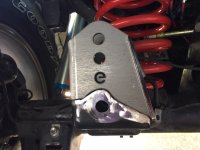
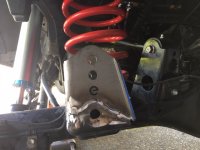
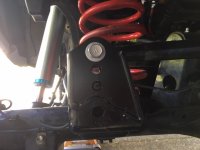
I had been trying to figure out how to correct my panhard bar level since doing the 3 inch lift. Well I found it on this forum and ordered the bracket.

https://www.toyota-4runner.org/for-sale-suspension-wheels-tires/230779-fs-eimkeith-pck-panhard-correction-kits-3rd-gen-$89-4th-5th-gen-$93-50-a.html

I received it today and was super easy install. Ground off paint, the bracket fit really nice. Welded it up and put my bar up to the top hole and wow it drove way nicer over bumps. More stable at high speed hitting bumps too
 

Attachments

  • 1.JPG
    1.JPG
    90.5 KB · Views: 964
  • 2.JPG
    2.JPG
    97.6 KB · Views: 972
  • 3.JPG
    3.JPG
    98.6 KB · Views: 968
  • 4.JPG
    4.JPG
    83.2 KB · Views: 973
Last edited:
Something arrived today and I took it straight to the powder coaters with the supposedly color matching powder for the toyota Magnetic grey. We will see how they turn out
 

Attachments

  • delivered.jpg
    delivered.jpg
    52.1 KB · Views: 920
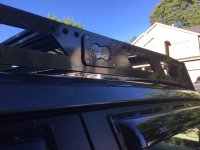
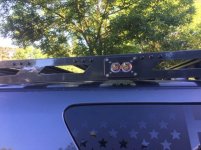
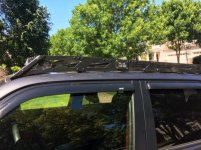
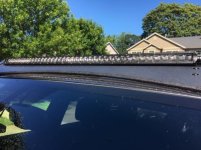
Oh I got my SSO roof rack and had it powder coated to try and match the metallic grey its not perfect but pretty close. Still looks good though. I also like the cut outs for the baja S2 lights in the sides and the fact that I could remove the front face of the lights to powder coat them to match.
 

Attachments

  • driver3.jpg
    driver3.jpg
    54 KB · Views: 851
  • light close.JPG
    light close.JPG
    96.7 KB · Views: 828
  • light close2.jpg
    light close2.jpg
    53 KB · Views: 823
  • passenger side rack.jpg
    passenger side rack.jpg
    49.7 KB · Views: 870
A couple more pics with a cheap light bar mounted and the baja lights mounted in the side rail
 

Attachments

  • IMG_1263.jpg
    IMG_1263.jpg
    64.5 KB · Views: 787
  • IMG_1264.jpg
    IMG_1264.jpg
    49.7 KB · Views: 777
Nice work man. Those s2's are pretty dope. we used ours for the first time this weekend camping, lit up a HUGE area.

Thanks, yea Ive only got the friver side wired so far, still need to run wires for the passenger side, They seem super bright for sure.

In the future I want to replace the cheap light bar with a KC flex system, they look awesome and they are intense lol
 
Well, sorry guys. I was missing my Dodge RAM cummins truck so much I ended up trading in the 4runner for another Cummins with all the best features. Loving the cooled vented sets lol and loving the power of the diesel. SO long for now
 

Members online

Forum statistics

Threads
278,307
Messages
3,554,048
Members
248,016
Latest member
Advally Service

Trending content

Back
Top