The Grey Ghost Build Thread

57buick

New member
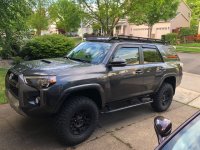
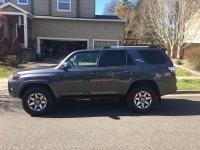
So over the next few months I am going to document all the upgrades and changes I have planned for my new 2018 TRD Premium.

But I couldn't let it leave the dealership on the stock wheels and tires so the dealer took care of that right away. Otherwise I would never let a dealer shop work on my vehicles. Most of them are incompetent and wouldn't be able to fix anything that isn't spelled out in their book. Plus I have done so many things to my vehicles in the past that the techs tell me was impossible lol Like I did with my 2015 Dodge Ram

So subscribe and be patient as I document stuff in the next few weeks and months.
 

Attachments

  • stockheight1.jpg
    stockheight1.jpg
    137.7 KB · Views: 5,561
  • duratracs1.jpg
    duratracs1.jpg
    137.6 KB · Views: 5,535
Register to hide this ad
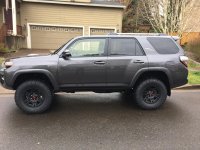
first was Duratracs and TRD wheels. I know its been done 100 times but I have some secret sauce planned this year that I havn't seen anybody do yet. And for now I went ahead and threw a 3"/2" spacer lift until I get my King suspension setup ordered
 
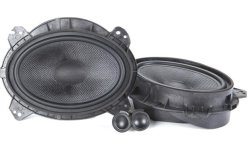
One thing I found is that the factory headunit is horrible!!! I havn't heard that bad of sound in a long time from a factory radio. So first thing I did was replace the speakers with the FOCAL component set made just for 4runner. They were a simple bolt in and sound great. Took longer to take the door panel off than it did to install them.

model- Focal IS 690TOY

https://www.crutchfield.com/p_091IS...qJYlYbqGVUYiktljrMo-eDPwubeI88-RoCZHoQAvD_BwE
 

Attachments

  • g091iS690TY-F.jpg
    g091iS690TY-F.jpg
    30 KB · Views: 5,425
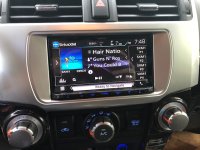
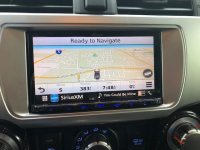
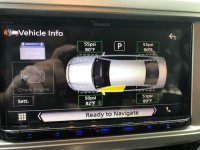
Next, I installed a Kenwood 994s headunit, it is "dashcam ready" and has two inputs for rearview and frontview cameras also.

Using the integrated dashcam I can easily look at videos or just turn on front facing camera at anytime and best of all it plugs directly into headunit and I dont have to fiddle with stupid little buttons directly on a dashcam and remember how to use them. I can just easily watch the videos directly on the headunit and change settings etc...

Oh and once you use a Garmin GPS headunit you will wonder how you got by with the factory one. Factory one has so much lag, is not intuitive.

KENWOOD 994S

DNX994S | eXcelon | CAR ENTERTAINMENT | KENWOOD USA

Kenwood DRV-N520 dashcam

https://www.amazon.com/Kenwood-DRV-N520-Recorder-select-receivers/dp/B0711CB4M1
 

Attachments

  • headunit1.jpg
    headunit1.jpg
    88.8 KB · Views: 5,431
I used the Scorche radio install bezel made for the 4runner. unfortunately they only make it in silver so I will go back later and wrap it in carbon fiber vinyl to match the shifter console.

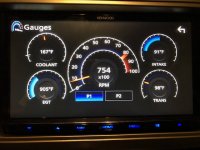
I also wired in a MAESTRO module behind the headunit so all my steering wheel controls work plus you can even program steering wheel buttons to do extra things. Like I programmed my back button on steering wheel if I hold it down for 3 seconds it will pop up on the headunit my Gauges creen. If I hold the next button for 3 seconds it will pop up my tire pressures screen.

It gives you the option to choose from like 20 or 30 types of gause to show on the screen from transmission temps and EGT temps to RPM or even show your 0-60 times or 1/4 mile times.

The other great feature is it lets me program all sorts of vehicle functions on the headunit screen like windows down with key, windows down with remote, doors lock when shifted into drive or into park unlock. Change the door lock beep functions etcc among other things.
 

Attachments

  • headunit2.jpg
    headunit2.jpg
    87 KB · Views: 5,646
  • tpms1.jpg
    tpms1.jpg
    88.2 KB · Views: 7,992
  • updated.jpg
    updated.jpg
    106.7 KB · Views: 4,968
Last edited:
Today I installed the 12voltsolutions plug and play remote start kit. Super easy only took 20 minutes to plug stuff in and program, one wire that had to be spliced onto a blue wire. started right up the first time I tried it and it stays on when you open the door and get in

https://www.12volt.solutions/produc...-key?rq=yr_2018~mk_toyota~md_4runner~rn_g-key

it cost $350 but I left it in the cart for a couple days and they sent me a 10% off code to complete the transaction. This is a TRD offroad premium WITHOUT push start like the limited models so I had been waiting for someone to make a kit for our regular runners. If your key has a G stamped on it this will work
 
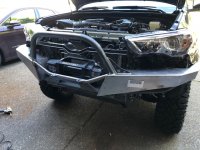
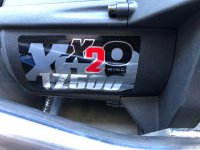
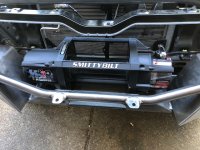
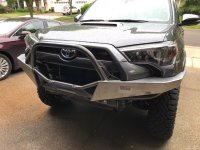
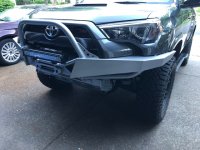
My addicted offroad Bumper arrived finally! Need to test fit it and see if I can make my 17K winch fit.

A couple people have told me it was crazy to install a 17k winch. But the dimensions were just a little bigger and it fits. It just means the winch won't have to work as hard and it cost the same as the 10k winch.
 

Attachments

  • fullshot1.jpg
    fullshot1.jpg
    121.4 KB · Views: 5,140
  • winch2.jpg
    winch2.jpg
    80.7 KB · Views: 5,136
  • winch1.jpg
    winch1.jpg
    119.8 KB · Views: 5,188
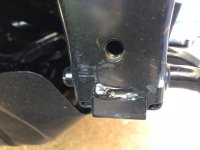
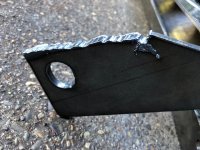
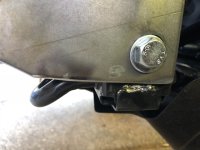
First issue I ran into was the side plates for the crossmember are too tall and dont clear the factory weld. I got the plasma torch and cut a 1/4" sliver off each side.
 

Attachments

  • factory weld.jpg
    factory weld.jpg
    61.7 KB · Views: 5,111
  • crossmember cutting.jpg
    crossmember cutting.jpg
    100.8 KB · Views: 5,118
Then ground my cuts smooth again to look like it was cut that way in the first place.
 

Attachments

  • crossmembercut cleaned.jpg
    crossmembercut cleaned.jpg
    77.6 KB · Views: 5,098
I also found 3 of the 6 nuts they welded in the crossmember to attach the bumper to the crossmember had weld slag in the threads and could not get a bolt even started in them. Had to go find a 1/2"-13 tap and recut the threads out then it all bolted up ok. Can't seem to get the bumper perfectly level the same on both sides. the various wholes they drilled in manufacturing were not dead on so had to open some of the holes up more.
 
Set my big ass winch in there. Had to drill 4 new holes for the mounting feet. They were the same spec but the size of the winch meant they just needed move back a couple inches.

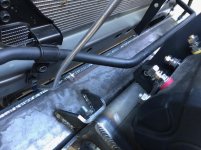
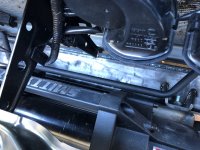
Also looks like the power steering cooler line just barely clears which is good. I'll be installing the 4x4labs power steering line relocate kit anyway though. Also the AC line just took a slight two way tweak to clear the crossmember no biggie.

I ended up installing the 4x4 labs power steering cooler mod kit to make a little more clearance and eliminate that line running so close to the back of the winch.
 

Attachments

  • AC line clearance.jpg
    AC line clearance.jpg
    83.8 KB · Views: 5,110
  • PS line clearance.jpg
    PS line clearance.jpg
    107.1 KB · Views: 5,103
  • coolerkit2_1024x1024.jpg
    coolerkit2_1024x1024.jpg
    137.4 KB · Views: 3,858
Last edited:
trimmed the plastic bumper and reinstalled. Looking good. Now to tear it all apart and send to the powder coaters.

Think Im gonna do all my accessories in a silver to contrast the gray 4runner paint
 

Attachments

  • plastic trimmed.jpg
    plastic trimmed.jpg
    111.7 KB · Views: 5,033
I have 3"/2" lift spacers on for now. But just ordered the King suspension and am currectly running 285/70/17 duratrac tires on TRD wheels. Havnt had any rubbing issues even when bumper stock.

But with the added weight I'm looking forward to a better suspension. KING isn't more than a couple hundred more than ICON or others and KING is far superior in performance so don't understand why people even buy the others.
 
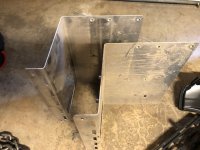
Sorry im bad about not stopping to take pics while im working. But I also found these large scrap aluminum brackets at work in the scrap metal bin. I brought them home thinking they would be perfect for making brackets and things.

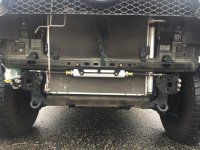
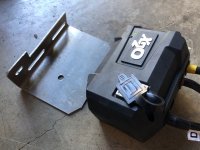
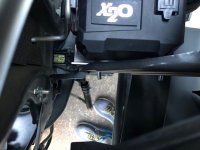
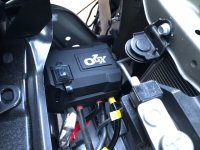
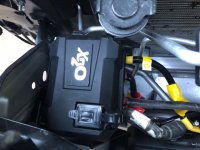
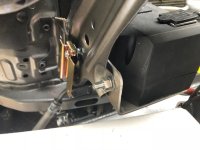
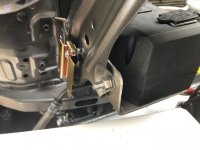
Sure enough I need to mount the solenoid pack for the winch somewhere when I remembered those brackets. They were like 24 inches long so I cut a small section of out with the 90 degree bend already in it and holes for bolts.

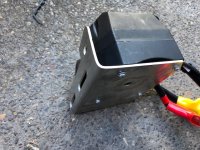
Then I used one factory hole and drilled a second hole on this factory bracket to mount my new bracket too. Worked out perfectly. solid and looks good.
 

Attachments

  • scrap.jpg
    scrap.jpg
    93.3 KB · Views: 4,922
  • bracket1.jpg
    bracket1.jpg
    90.6 KB · Views: 4,955
  • bracket2.jpg
    bracket2.jpg
    112.8 KB · Views: 4,909
and here is the final mounting of the custom bracket and solenoid.
 

Attachments

  • bracket3.jpg
    bracket3.jpg
    74.3 KB · Views: 2,352
  • bracket4.jpg
    bracket4.jpg
    97.4 KB · Views: 2,356
  • bracket5.jpg
    bracket5.jpg
    92.2 KB · Views: 2,341
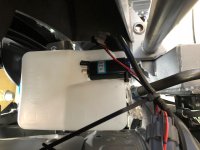
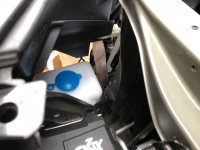
I also needed to reloacte the washer bottle. I didn't want to pay almost $300 for the 4runner specific kit out there. Seems pretty high. Plus their kit puts right in the way for the future ARB air compressor. So decided to mount it behind the bumper.

I bought a universal washer bottle kit on Amazon for $18 it came with a mounting bracket. I put the bracket right onto the bolt I already had hanging there for my winch solenoid bracket. SCORE! didnt have to drill another hole or anything. Hung perfectly there.
 

Attachments

  • bracket1.jpg
    bracket1.jpg
    68.5 KB · Views: 2,321
  • bracket2.jpg
    bracket2.jpg
    68.5 KB · Views: 2,286
  • bottle1.jpg
    bottle1.jpg
    75.4 KB · Views: 2,314
  • bottle2.jpg
    bottle2.jpg
    66.6 KB · Views: 2,276
Last edited:
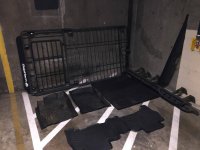
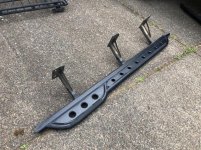
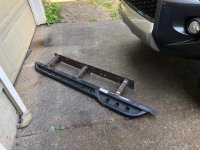
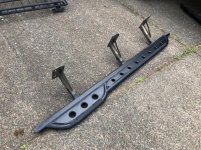
SCORE!! I picked up a set of sliders and a full length BAJA rack from a guy on craigslist for $700. They were on a 2012 4runner that got wrecked.

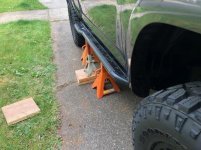
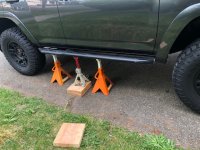
The sliders which were made my metaltech 4x4 were for a limited or sr5 so they hung down too low. So I started by cutting the legs off. and making new legs out of thick 2x2 tubing, I think 1/4" wall so even more stout than the original legs are started mocking it up to fit tight to the body.
 

Attachments

  • 00808_5XHgIwnZyir_1200x900.jpg
    00808_5XHgIwnZyir_1200x900.jpg
    82 KB · Views: 2,240
  • sliders1.jpg
    sliders1.jpg
    98.2 KB · Views: 2,185
You can see in this pic how much lower thery sit on a limited with the lower rocker trim. that wasnt gonna cut it. legs cut off and mocking up begun
 

Attachments

  • 4runner.jpg
    4runner.jpg
    136.1 KB · Views: 2,657
  • slider test fit 2.jpg
    slider test fit 2.jpg
    88.8 KB · Views: 2,240
  • slider test fit1.jpg
    slider test fit1.jpg
    123.4 KB · Views: 2,234
Here is a pic of my finished legs rewelded. I also extended the base feet to be one solid long piece of 1/4 inch plate instead of 3 individual feet. That allowed me to use twice as many holes in the frame for added strength.
 

Attachments

  • slider passenger side welded up.jpg
    slider passenger side welded up.jpg
    129.9 KB · Views: 2,238
  • sliders1.jpg
    sliders1.jpg
    98.2 KB · Views: 2,152

Members online

Forum statistics

Threads
278,307
Messages
3,554,055
Members
248,016
Latest member
Advally Service

Trending content

Back
Top