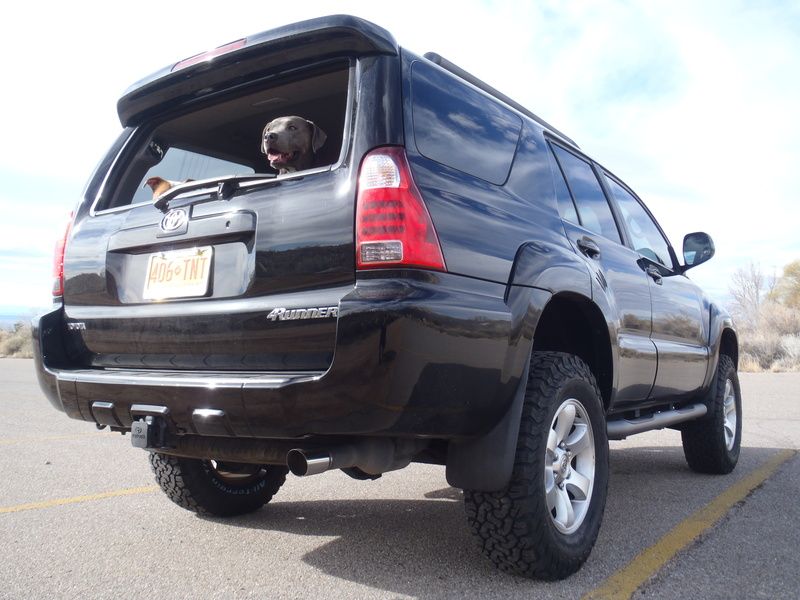
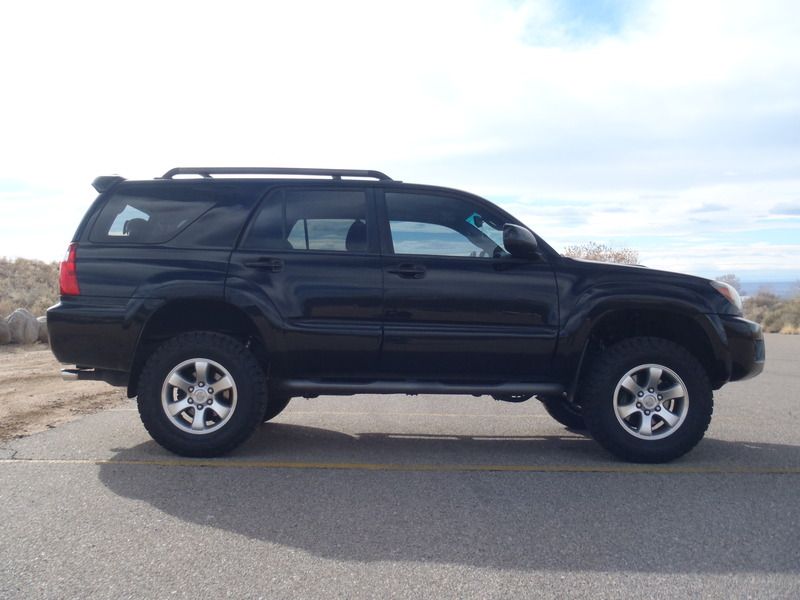
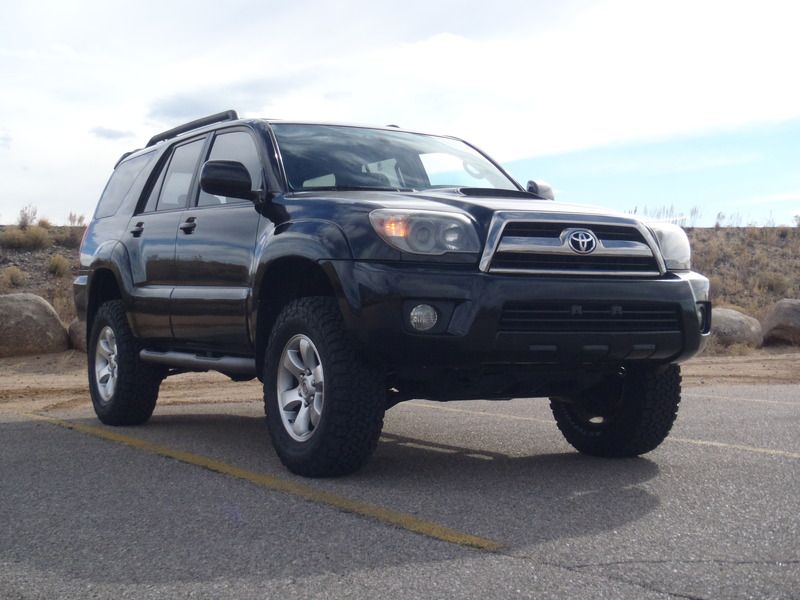
The Grocery Getter: Mrs. Bigfish's 2008 Sport Edition V6 4wd

BigFishAllDay

New member
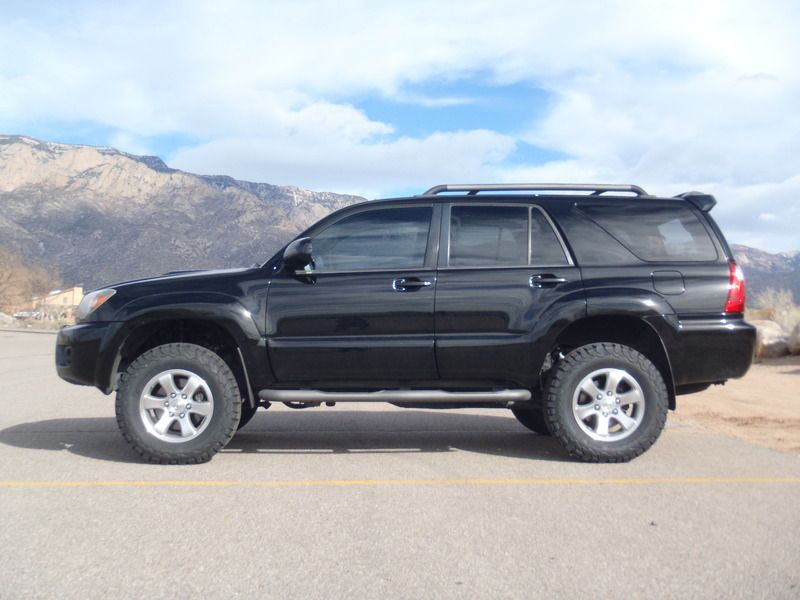
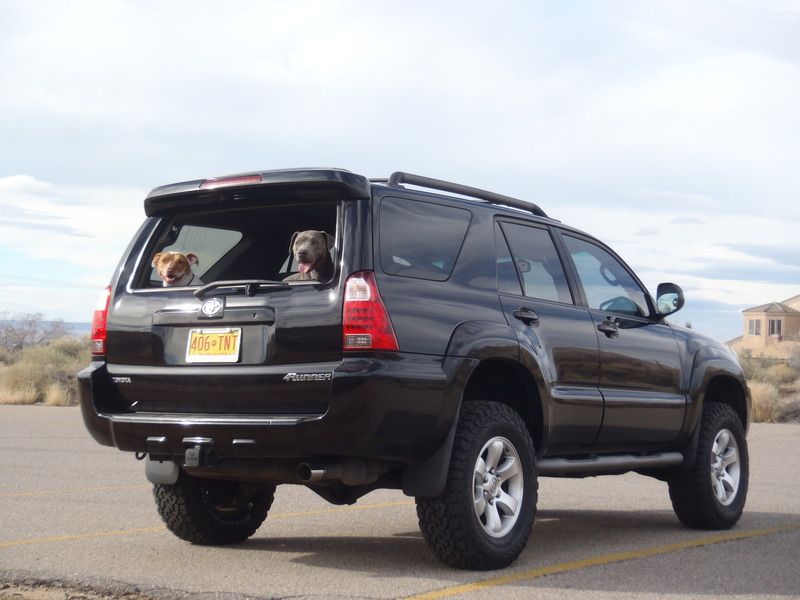
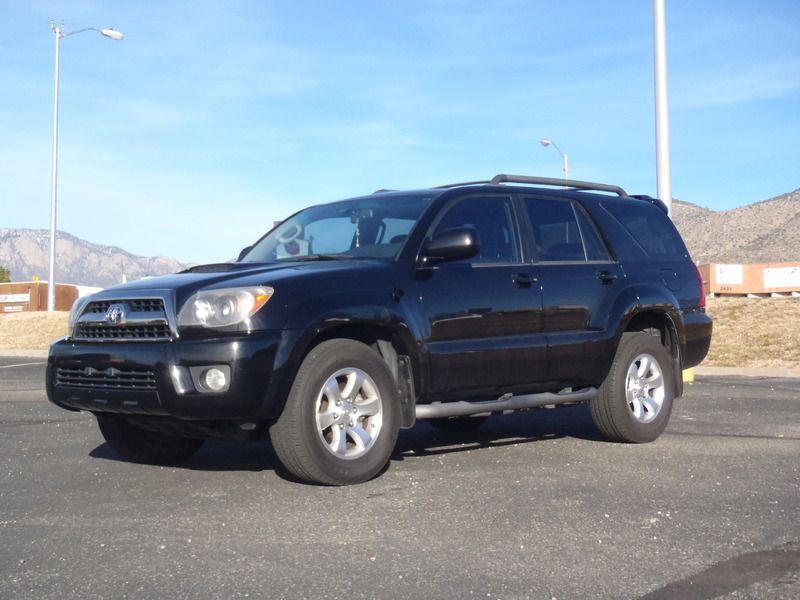
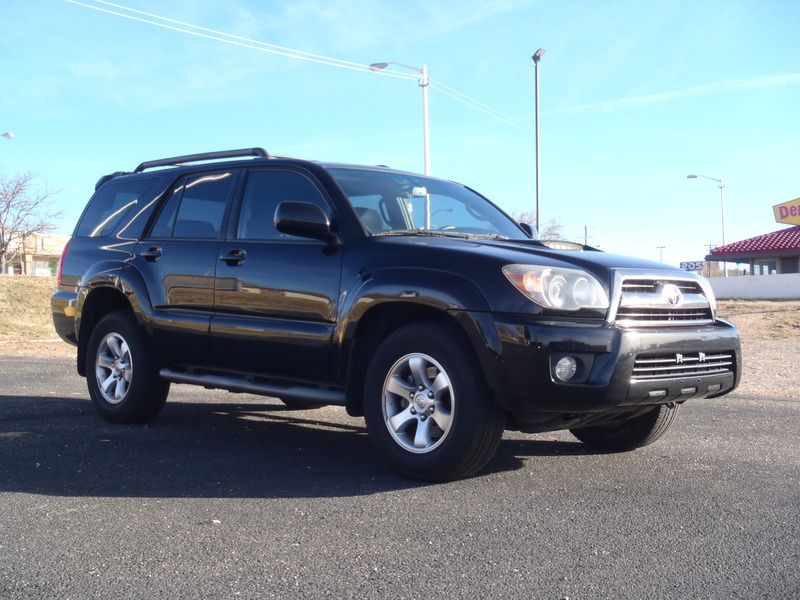
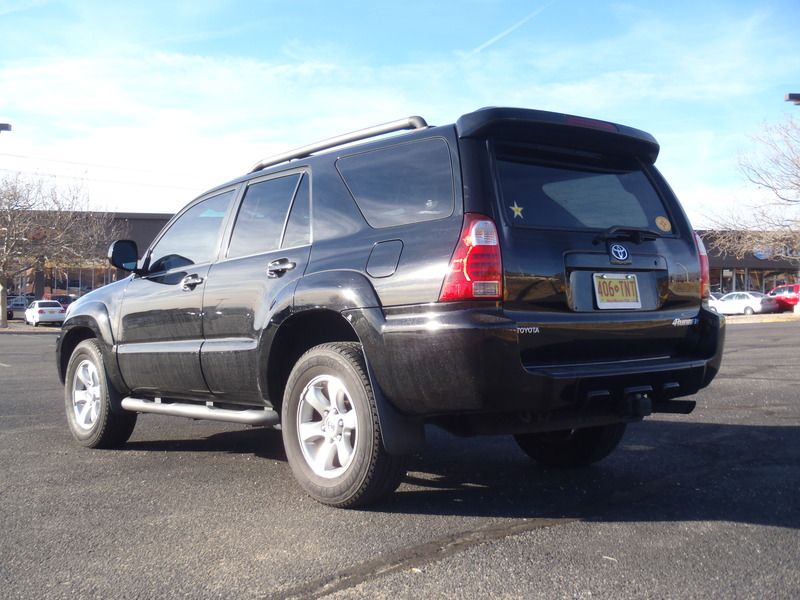
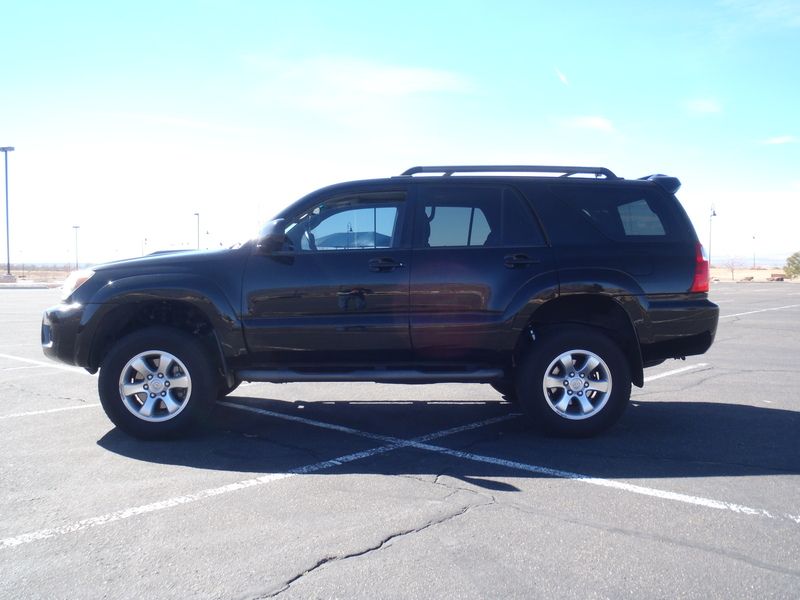
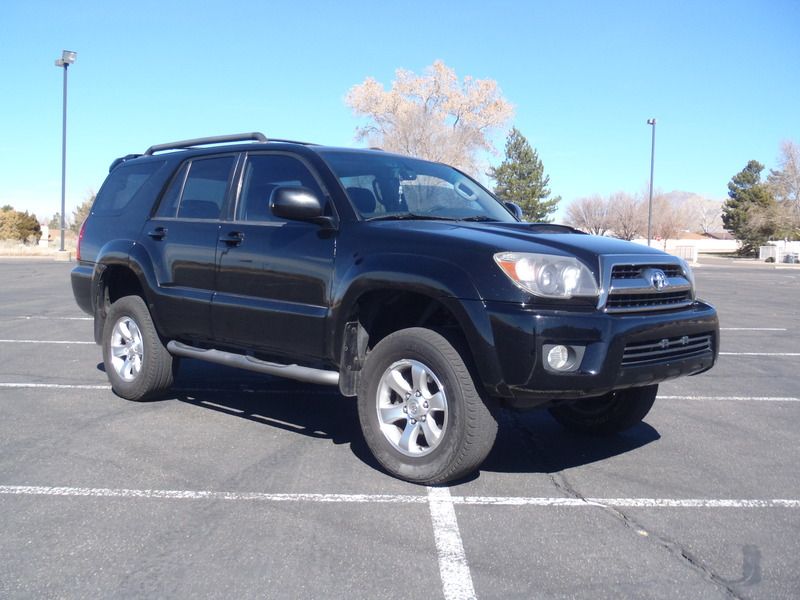
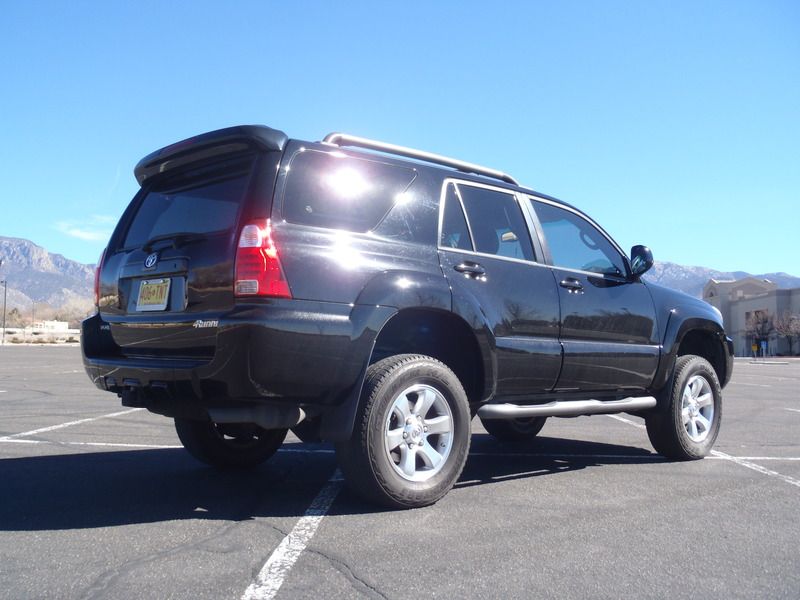
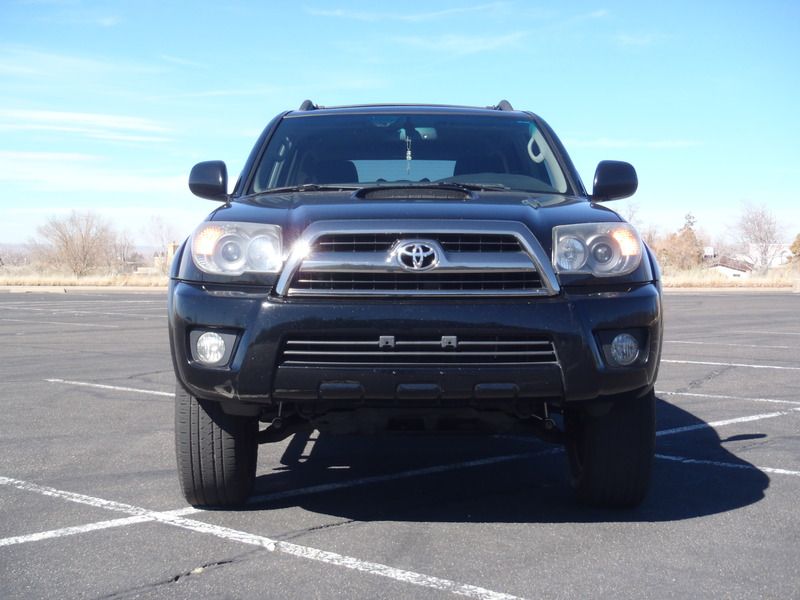
I recently completed a simple build up of my wife's 2008, so I figured I'd start a thread to keep track of the modifications/upgrades/maintenance done on it. The goal was to set the vehicle up as a comfortable OEM+ daily driver, that can take my wife and family wherever they need to go safely and reliably.

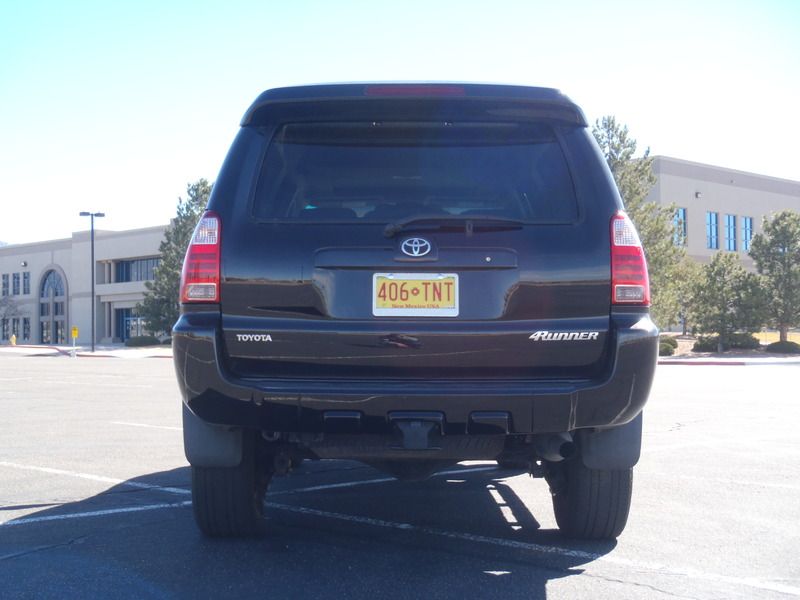
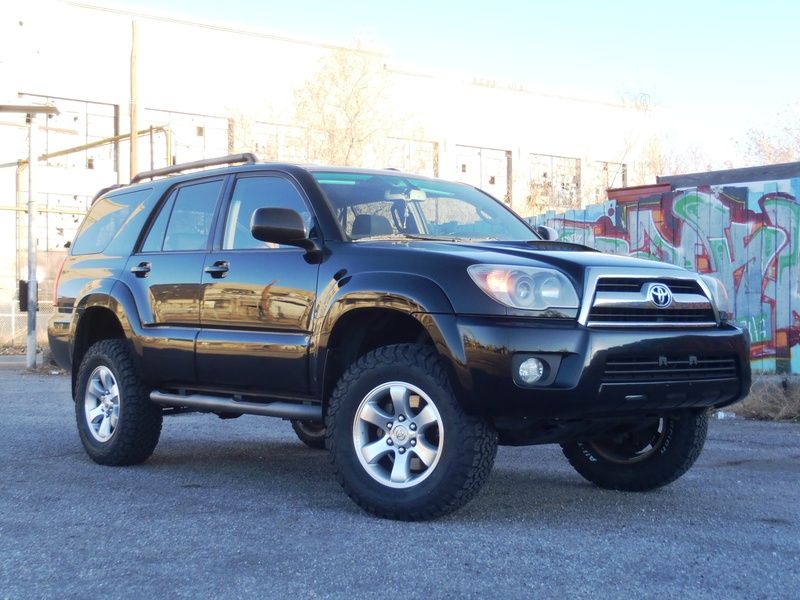
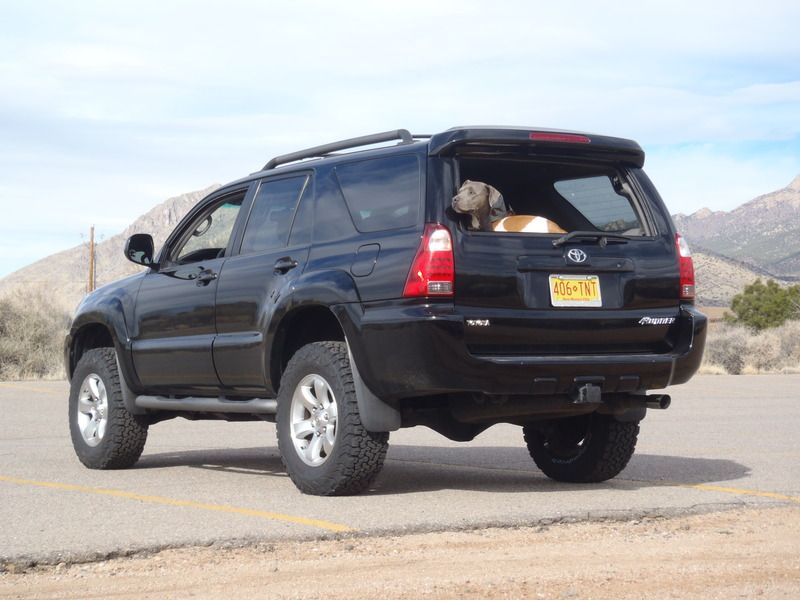
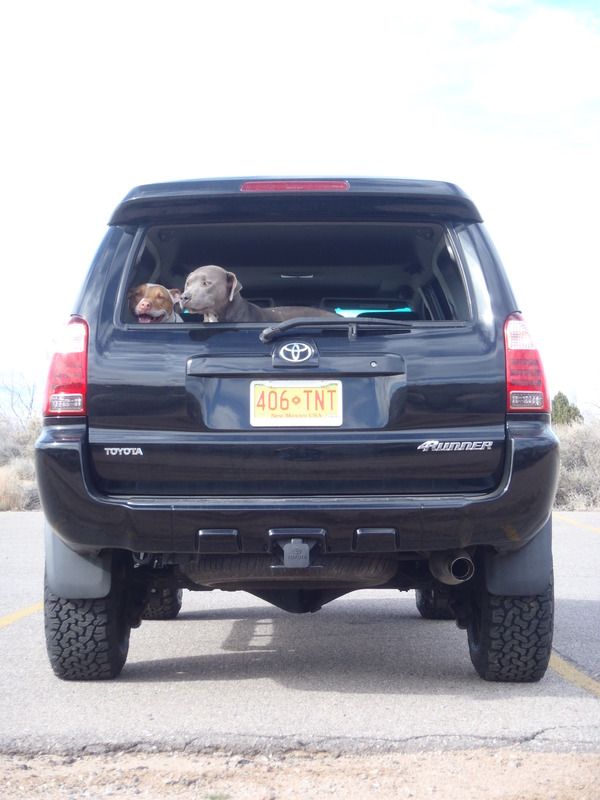
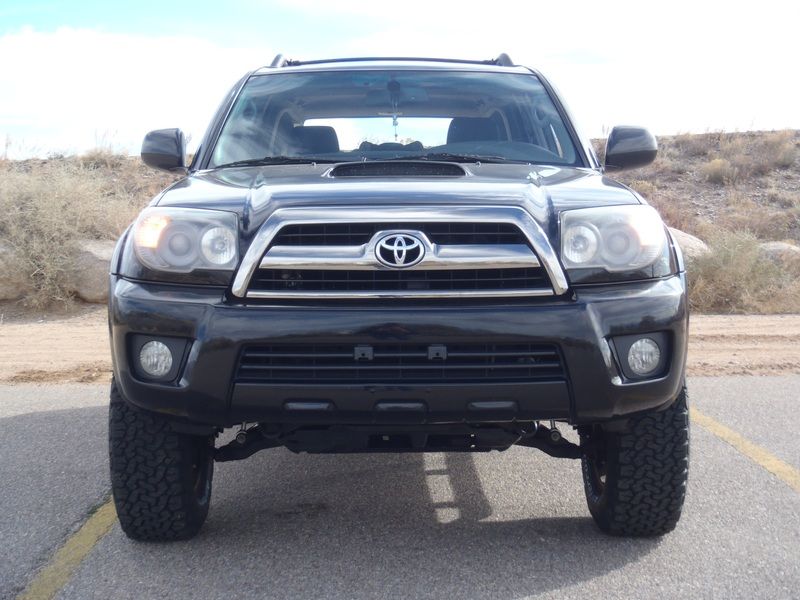
How it sits as of February 2017, 134K miles:
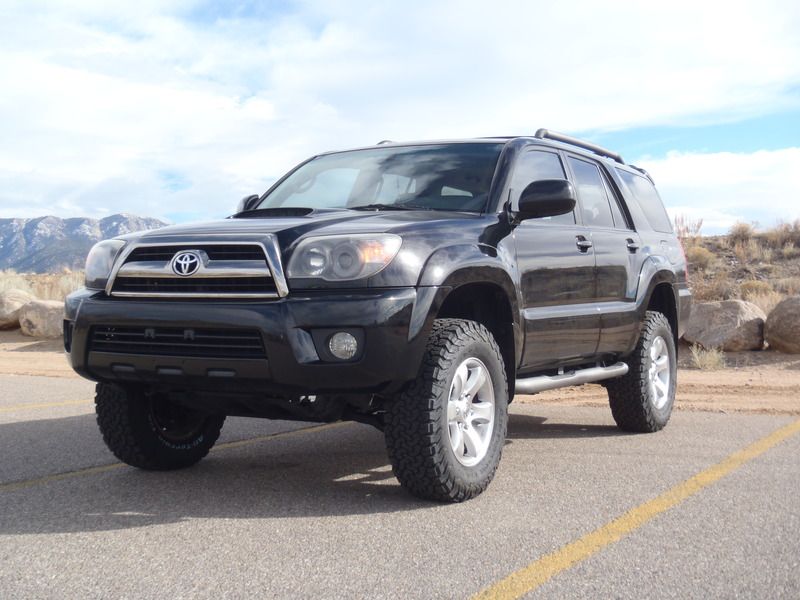
P2171585_zpsbcw9pnl6.jpg~original


P2171587_zps5egpw0zp.jpg~original


P2171581_zps7noryfld.jpg~original


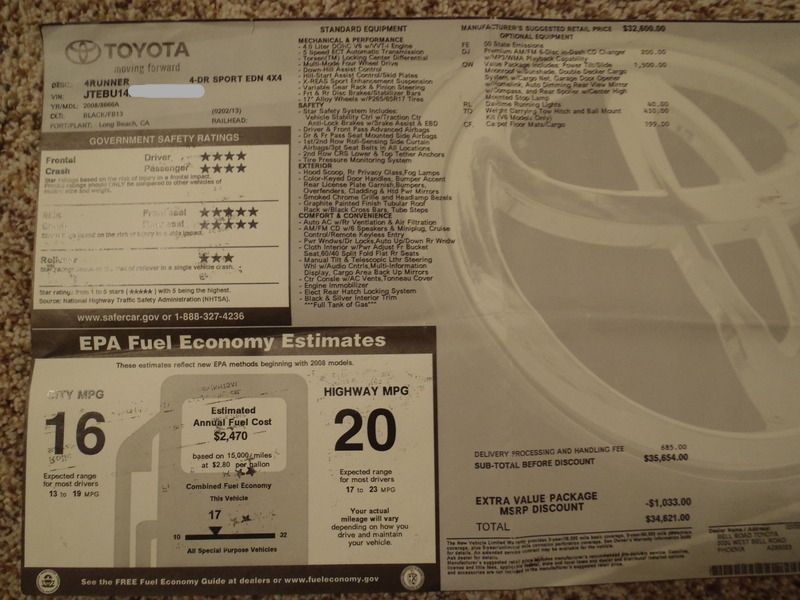
We purchased the vehicle on May 10, 2016 out of Phoenix, AZ for $15,300 with 127K on the odometer. I contacted the owner the day the ad went up, purchased a one way plane ticket to Phoenix, then flew out and drove it back the next day. We had been looking for months in several markets (ABQ, PHX, and DEN) and had a few slip through our fingers before we found this one. It is a one owner vehicle (prior to us), with a thorough and well documented maintenance history, no accidents, in excellent condition, and being from the desert... zero rust.

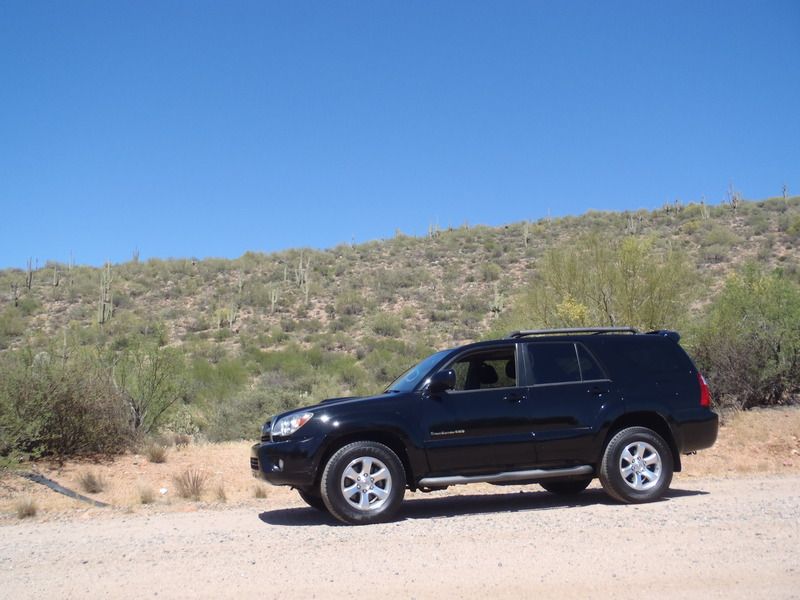
Stopped during the drive home, on the northern outskirts of Phoenix...
P5100586_zps7q9xzvnr.jpg~original


The facts...

1e1424fc-f9f8-43ca-8865-76ed7a8b1756_zps1qpk6xuv.jpg~original


After getting the 2008 home, we had to sell my wife's 3rd gen. We owned it for 8 years and it was an excellent vehicle, but she was ready for something newer.

Link to the thread for the 2000 > http://www.toyota-4runner.org/3rd-g...unner-behind-my-wifes-4runner-mini-build.html

P7141135_zpshn865kwi.jpg~original


P7141142_zpsz3fzvmxg.jpg~original


I began devouring info on the 4th gen platform, staying up late on the computer to learn from the successes and failures of others who cared to share their work on the web. Early Craigslist searches turned up some 4th gen gold in the form of a full set of black WeatherTech liners and a grey Husky cargo liner, all for $100.

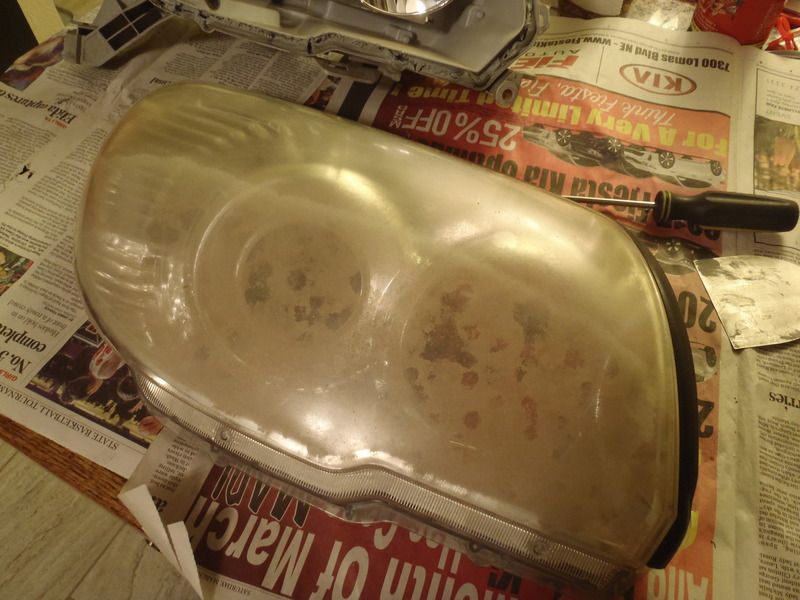
The look of the "Black Headlight Mod" seemed to suit the black 4th gens particularly well, so I gave it a go. I found a set of neglected headlights on Craigslist for $50 and figured I could trash them if things went awry. The seller had obviously stored them outside after they were removed, where they filled with dirt and rainwater.

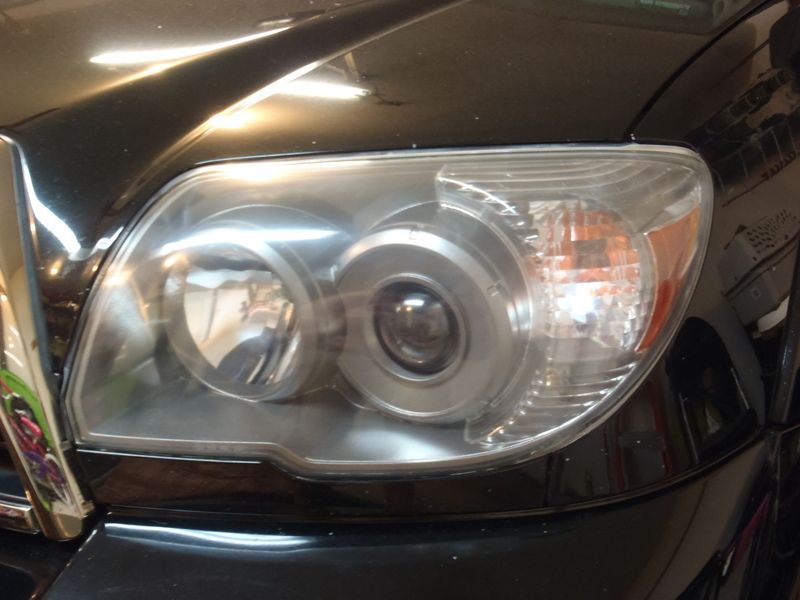
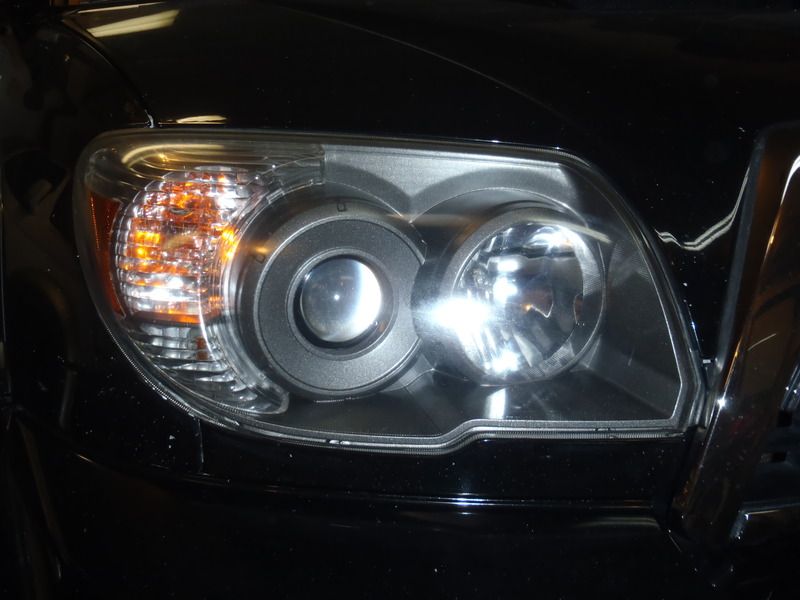
Instead of going black on the paint, I chose a graphite color instead, using VHT wheel paint. I used Easy Off oven cleaner to remove all the chrome from the housings before painting, per the info I found in some write-ups.

Before... yuk.
P6220976_zpspfvaeowv.jpg~original


After... not perfect, but better... I could not restore the lenses to full clarity due to mineral deposits from the rainwater.
P6290981_zpsuggpsk6u.jpg~original


Camera flash made them look clearer...
P6290982_zpsa9opclrz.jpg~original


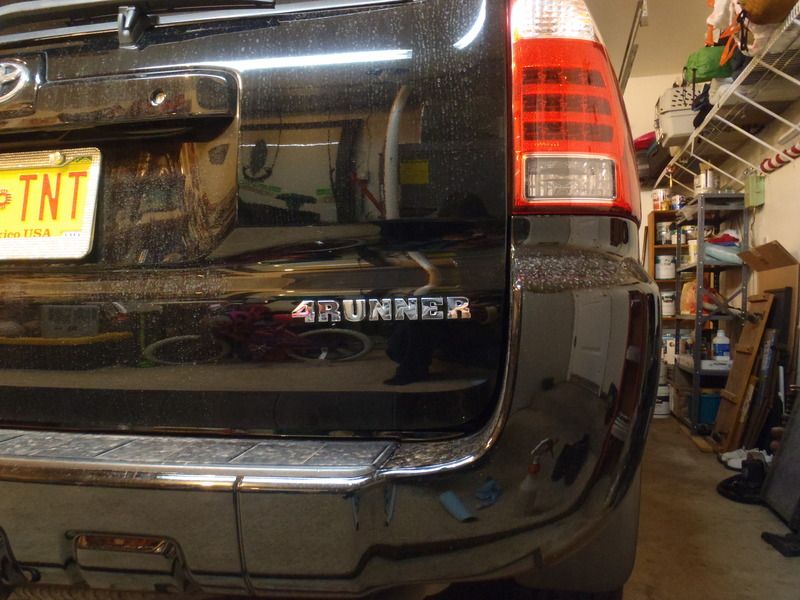
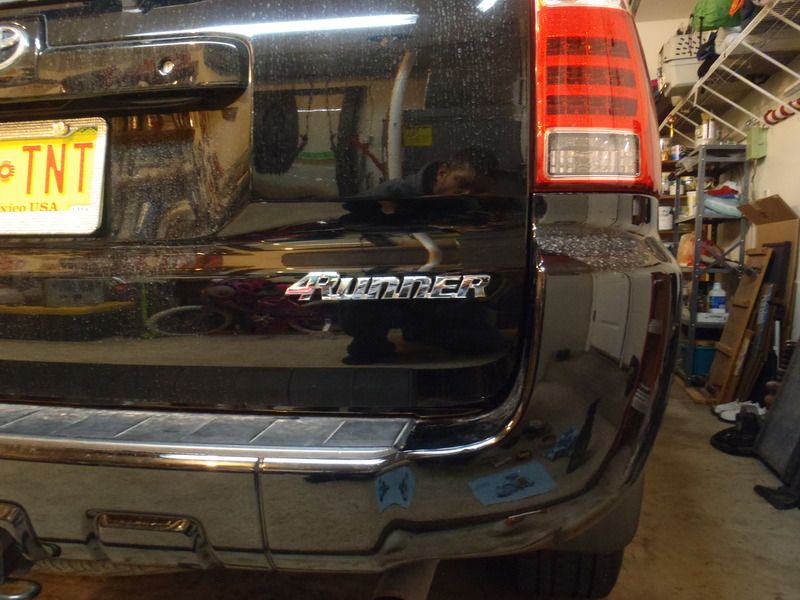
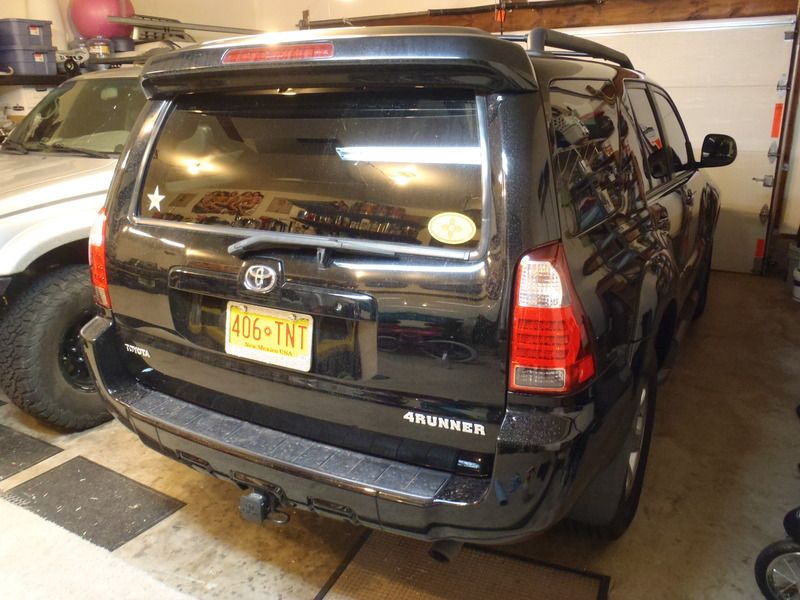
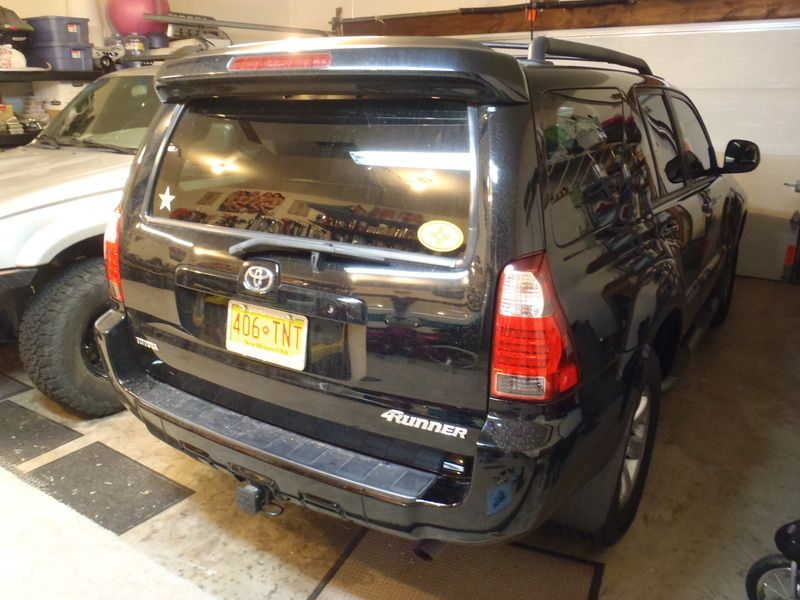
After the headlights were complete, I de-badged the front doors. The "Old West" style lettering that they used for the badging on 4th gens is hideous and I couldn't look at it. I left the "4Runner" badging on the tailgate until I had what I needed to try something different back there.

Life got in the way, and I didn't have time to work on the 4Runner again until January. In the meantime, the only change was that my wife ordered a sparkly diamond gemstone license plate frame. After I installed it, I got a few interesting looks while out driving the 4Runner by myself.

The plan for the rear hatch finally came to fruition... 3rd gen 4Runner badging to replace the last of the ugly wild west business...
P1191443_zpsgjluhufp.jpg~original


P1191446_zps04ko24rm.jpg~original


P1191444_zps5pcmtsfp.jpg~original


P1191445_zpswmu1z37j.jpg~original


At the same time I popped in a factory tow hitch plug, disabled the seat belt chime/reminder, and replaced some burned out bulbs in the center stack. The following write-ups came in handy for those tasks:

Center Console Lights

http://www.toyota-4runner.org/4th-gen-t4rs/182647-hvac-info-center-bulb-information.html

http://www.toyota-4runner.org/4th-gen-t4rs/38804-how-turn-off-seatbelt-chime.html

http://www.toyota-4runner.org/4th-gen-t4rs/137363-seat-belt-warning-off.html

The stack of parts in the garage started to grow in the following weeks, as I prepared to know the 2008 more intimately.
 
Last edited:
Register to hide this ad
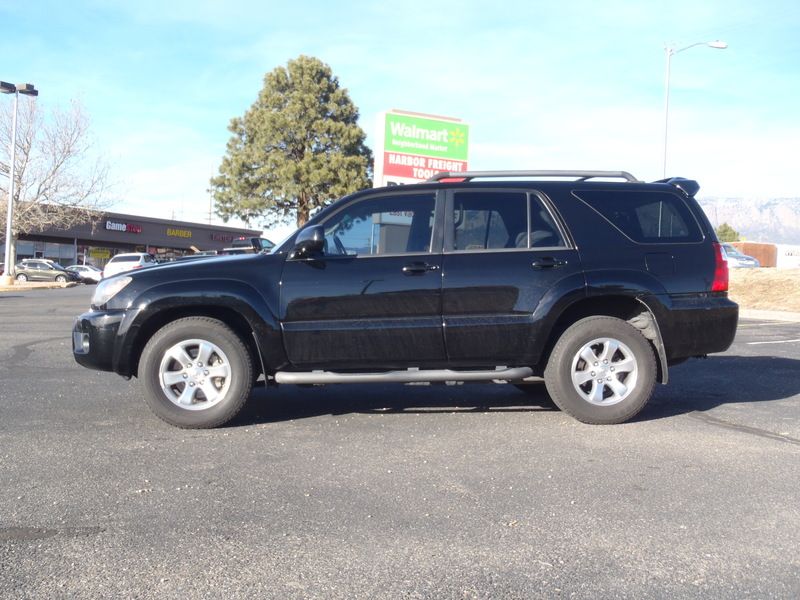
With all the parts lined up, I took a ride to Harbor Freight to buy one of their $40 electric impact wrenches. I figured it would help in speeding up the removal of larger fasteners... it served its purpose well and makes wheel/tire removal a breeze. While I was there I took a few "before" shots of the '08.

All my friends love the lowrider...

P2011472_zpsc46aaytp.jpg~original


P2011473_zps7kwi2tde.jpg~original


P2011474_zpsvndz5xto.jpg~original


P2011476_zpsximwjfbj.jpg~original


I took some quick ride height measurements (on flat, level pavement in my garage) before I got started from the ground to the lip of each fender...

DS Front > 33"
PS Front > 33"
DS Rear > 35"
PS Rear > 35"

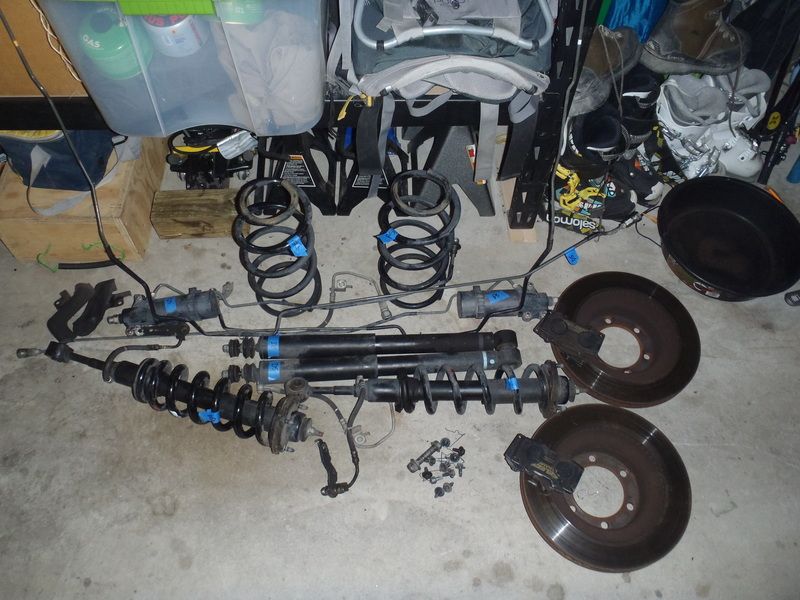
It sat nice and level side to side, with some rake to it, and rode fairly well. It definitely cornered better than any of my previous 4Runners. The front XREAS shocks had been replaced with OE equipment by the PO in 2014, so I knew the system had been opened, but I wasn't sure whether they'd followed Toyota procedures to avoid losing fluid in the system. The work was done at an independent shop. Three of the four shocks were leaking when we purchased the vehicle, and after debating the pros/cons of sticking with the XREAS system, my wife gave the go ahead to tear it out.

I disconnected everything at the proper disconnect points per the FSM, and lost 6 drops of fluid during the removal process. If anyone wants the old stuff, let me know.

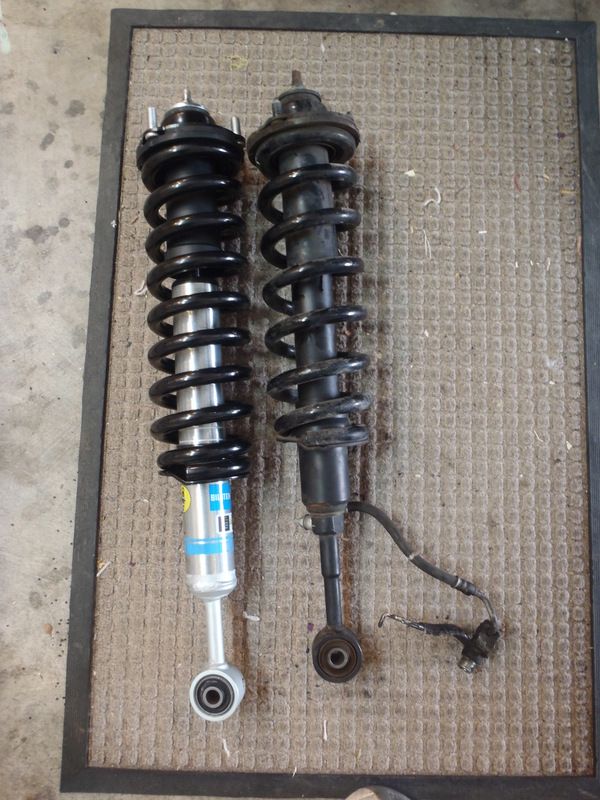
After looking into the "no spring compressor" method for the front suspension, I decided to have a local shop assemble the struts for $45, just to save some hassle. It was a good move. That choice also dictated that I replace the top mounts on the struts, so I went with new KYB mounts & bushings.

5100s set on the lowest perch, 884s, KYB top mounts, Wheelers Superbumps, and a 1/4" top plate spacer on driver side up front... the Bilsteins are definitely an "extended travel" shock and are considerably longer than the factory setup.

P2021477_zps81lotmo2.jpg~original


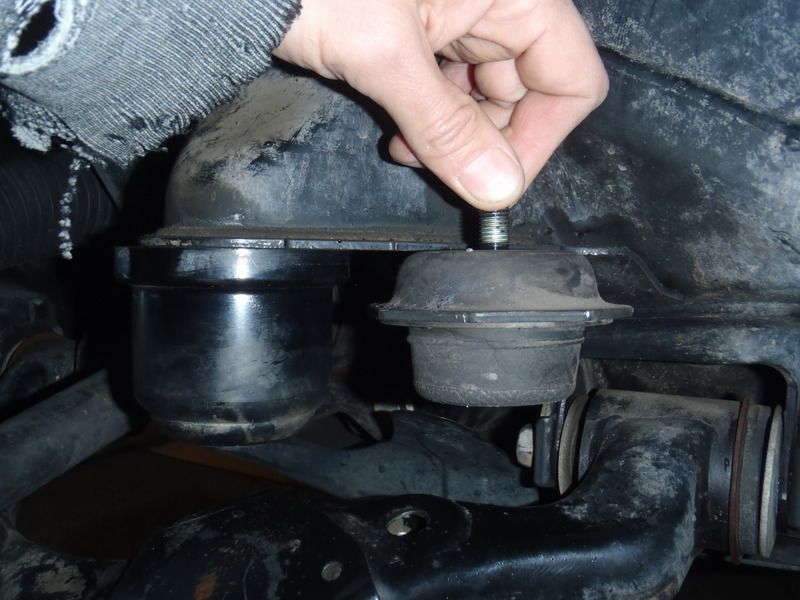
The superbumps... as I was removing the old bump stops I could tell the vehicle had been riding them quite a bit from the missing paint on the LCA.

P2121520_zpsav0ualcj.jpg~original


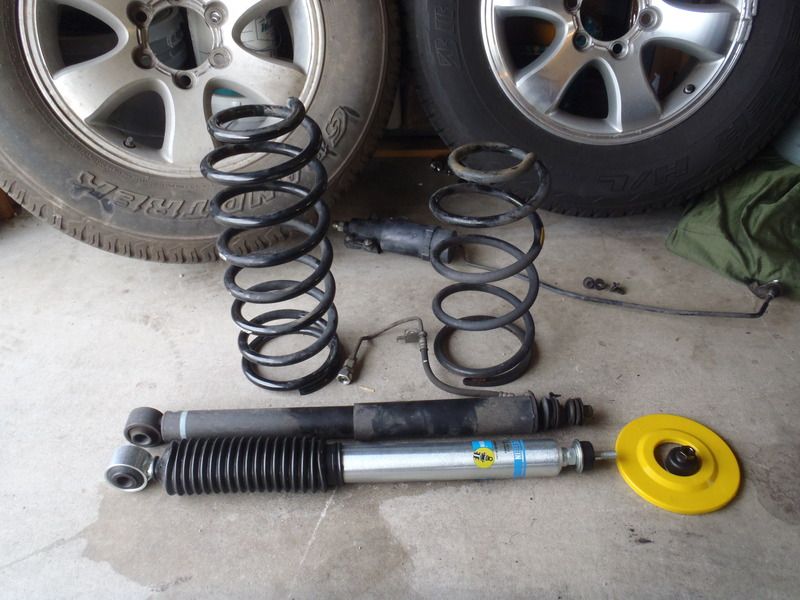
5100s, Toytec Superflex RCC2.0, and a 10mm OME trim packer on the driver side out back...

P2031481_zpss5iu3hah.jpg~original


While I had the front end torn down I replaced the front brakes. The vehicle had new pads on it (cheap parts store variants), however when I went through the service records I found multiple receipts showing the front rotors being turned, but never replaced. We were getting some brake pulsation and steering wheel vibes while braking, so I just did the whole thing with new Toyota parts... rotors, pads, shims, and anti-rattle springs. As I suspected, when I pulled the rotors, they measured below min. thickness.

Old parts...

P2051482_zpsyzt6sddl.jpg~original


Looking a little better... measurements after ~100 miles of driving were:

DS Front > 36.75"
PS Front > 37"
DS Rear > 38.5"
PS Rear > 38.5"

I got 4 inches of lift in the front, and 3.5 out back. I thought that was funny considering that the 884s are spec'd as a 1" lift coil and the superflex are spec'd at 2". The factory springs must have been a little tired / saggy. I'm hoping everything will settle about an inch. The top plate spacer & trim packer almost completely eliminated the lean to the driver side.

P2101496_zpsu9itycev.jpg~original


P2101493_zpsvy6udy0x.jpg~original


P2101491_zpsusu052uu.jpg~original


The track was looking a little narrow once I got it off the ground...

P2101494_zpszl430st5.jpg~original


P2101498_zpstckzuims.jpg~original


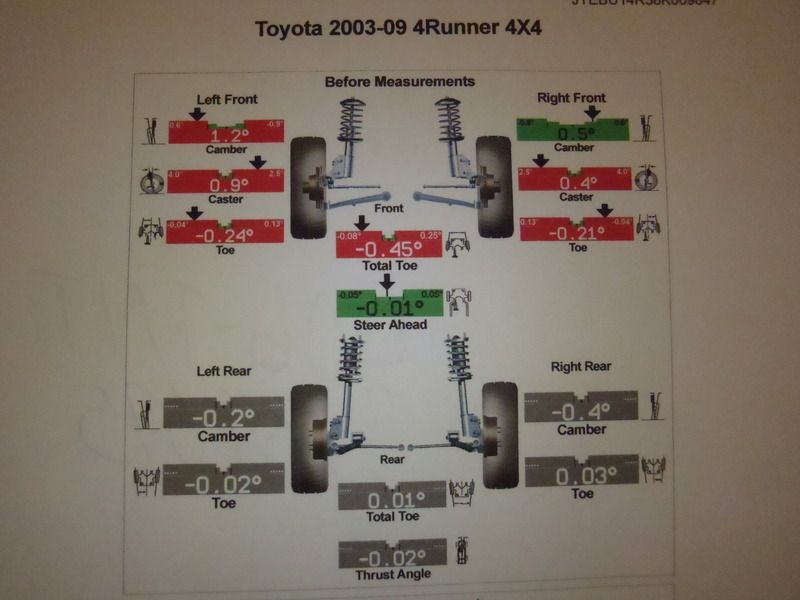
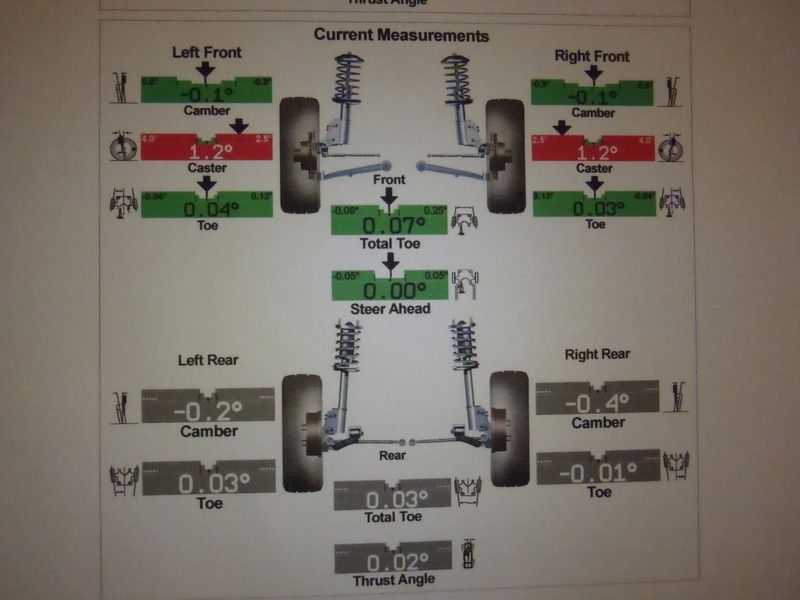
I went and had it aligned, and the caster numbers we were able to achieve were less than optimal, as expected. I've been using the same alignment guy for 17 years, and these days I just go out in the bay with him while he does the work and BS. We played with the cams a bit, but there is no getting around the issue when you lift an IFS Toyota.

I was surprised that the before measurements were not further off spec considering the amount of lift I got...

P2201598_zpssgromsln.jpg~original


Looks like some UCAs will be in order.

P2201599_zpsunjgo2n2.jpg~original


Overall, the suspension and front brakes went smoothly. The bolts on the lower shock mounts were installed in the wrong direction, and one of them had a non OEM nylon locknut on it, which I replaced with OEM hardware.

There is definitely a learning curve coming from the 3rd gen platform. Everything on a 3rd gen is behind the control arms, while everything on a 4th gen is ahead of the control arms. The front driver side suspension took me about 3 hours as I used all the tips/tricks I could think of from my research to try and get the longer assembly in place. I started off thinking I could get by with just pulling the OTRE. I fought that for awhile, using a bottle jack on the UCA to push the UCA/LCA down to make room for the new assembly... no luck. I finally pulled the two bolts from the LBJ bracket, and loosened the LCA mounting bolts/cams and the bilstein/884 combo went right in. The passenger side took less than an hour.

The rear was a piece of cake, thanks to the improved setup on the upper shock mount on the 4th gen. It was nice to have the access, versus working blind on the upper mount on a 3rd gen. The DS rear spring was tough to get in with only the sway bar links disconnected. Pulling the bolt on the axle side of the panhard bar would have made it easier.

The FSM is available online, and was worth its weight in gold working on a new platform for the first time:

Index of /Vidpics/4Runner Repair Manual/2006

Some suspension links I found helpful:

http://www.toyota-4runner.org/4th-gen-t4rs/206735-diy-front-strut-replacement.html

Daystar (Spacer) installation on 4Runner with XREAS - Toyota 120 Platforms Forum

OME Install - no spring compressor - Toyota 120 Platforms Forum

Toyota 120 Platforms Forum - View Single Post - OME Prado 120 Lift on 4th Gen

XREAS info:

http://www.top4runners.com/ja/2007/lift/suspension.pdf

http://www.top4runners.com/ja/2007/lift/xreas.pdf

http://www.shockwarehouse.com/news/toyota-4runner-xreas-suspension-replacement-diy-instructions.pdf
 
Last edited:
Looks great man!

I just sold my 3rd gen for a GX and I freaking love this thing. My 3rd gen was an incredible vehicle but the GX is just amazing.

Any plans OTHER THAN making it reliable? Any toys?

I, and my dogs, miss the rear window... My pointer just cries while she presses her nose against it waiting for it to roll down.
 
Nice looking truck. I have a 2003, about to get same suspension, though 885 instead of 884.

The 265s look nice, though contemplating 285, 275 and the skinny 255!
 
Looks good! Those are some of the best looking Toyota wheels IMHO, I just wish they had less backspacing. I guess the outline of the letters weren't etched into the paint like mine when you removed them? I like that 3rd gen badge on the tailgate.
 
Thanks for starting this thread [MENTION=44220]BigFishAllDay[/MENTION]!

Looks super clean and the headlights turned out good. Sure is amazing how well it cleans up the truck with some fresh lenses... Oh and nice 4Runner badge. I literally had that written down in my notes for my 05' - you beat me to the punch!

Side note, any offroad trips planned for this year?
 
so much lift, im planning to get bilstiens and moogs all around and front at .85 this saturday, hopefully it dont make my truck super high with all that wheel gap.
 
Looks great man!

I just sold my 3rd gen for a GX and I freaking love this thing. My 3rd gen was an incredible vehicle but the GX is just amazing.

Any plans OTHER THAN making it reliable? Any toys?

I, and my dogs, miss the rear window... My pointer just cries while she presses her nose against it waiting for it to roll down.

Hey Alex. I've been following your thread and saw that you listed / sold the 4Runner. I didn't post in the thread because half the forum was already having a cry fest about the sale. I do think you may regret it some day. The 4th gens are definitely more comfy than the 3rds, and ride nicer (I can only imagine the GX is another cut above), with more room for occupants. I still prefer the electronic / mechanical simplicity of the 3rd gen though.

There might be a few toys in the future. I keep telling my wife to back into parking spots, hoping someone will clip her front bumper and buy us a Demello front bumper.

Upon reading about your intention to sell, I immediately felt bad for your dogs due the loss of the roll down rear window.

Good looking truck, keep us posted on how those KO2s treat you

They'll be more than sufficient for this rig. The C load range version is very quiet, more so than the E range.

I have a set in 295/75/16 on my 3rd gen and I have run them in Moab, the trails around Ouray, and several local areas. They do okay on slick rock and sandstone, but don't hook up as well as the Duratracs I had previously. They are great in snow, and easily compete with the GYs there. I have had no sidewall issues, even on the sharp talus rock at higher elevations. Wet performance is good, and they are quiet on the highway. In mud they kind of suck... the tread doesn't clear well and they become almost like slicks in sticky mud.

I did notice that they went to a softer compound versus the original KO and the new version chunks much easier on the sharp edges of the tread blocks. After my first wheeling trip on the new KO2s I noticed all the front facing edges were torn up and showing wear, with some visible chunking.

My 3rd gen, just for kicks..

P9291186_zps1swvdtqe.jpg~original


OP, this is exactly how I want mine to look. Well done!

Thanks. It's a pretty easy setup to get right, rides as nice as stock, and it is wallet friendly. Go for it.

Nice looking truck. I have a 2003, about to get same suspension, though 885 instead of 884.

The 265s look nice, though contemplating 285, 275 and the skinny 255!

Thanks, Kyle. If you've got the V8, the 885s should treat you well. If you've got a V6 and no weight up front, you'll be sky high.

With the 265s in LR C, it's hard to tell you are not riding stock tires. Acceleration, braking, ride quality, etc. all feel essentially unchanged. That was the deciding factor, being that maximum sidewall strength is not required for this rig.

Looks good! Those are some of the best looking Toyota wheels IMHO, I just wish they had less backspacing. I guess the outline of the letters weren't etched into the paint like mine when you removed them? I like that 3rd gen badge on the tailgate.

Thanks, Ron. I've been through the build thread for your '08 front to back... TWICE. Thanks for taking the time to put a lot of good info in there. It also really helped to visualize things seeing various mods on another black rig.

When I de-badged, there was no paint etching whatsoever. I considered that prospect carefully after reading about it in your thread. I still hope to wheel with you someday via one of the NM adventure series outings over on TW.

Thanks for starting this thread BigFishAllDay!

Looks super clean and the headlights turned out good. Sure is amazing how well it cleans up the truck with some fresh lenses... Oh and nice 4Runner badge. I literally had that written down in my notes for my 05' - you beat me to the punch!

Side note, any offroad trips planned for this year?

They headlights came out okay. They are good from far, but far from good as some say. I wish I had started with the ones that came on the vehicle rather than the beat up craigslist set.

You and I have always had a similar mindset with regard to mods, so I'm not surprised you were sniffing out unique badging options.

This year is going to be tough as far as taking big trips. Our family has some challenging matters to deal with, including health issues and a new baby on the way, so we'll see.

so much lift, im planning to get bilstiens and moogs all around and front at .85 this saturday, hopefully it dont make my truck super high with all that wheel gap.

I was surprised about the amount of lift myself. You won't see nearly as much using moog OE replacement coils and the 0.85 setting on the Bilsteins. The wheel gap looked pretty crazy until we got bigger tires installed. It looks perfect now, IMO.
 
Last edited:
We gave it a week after the alignment to make sure the suspension had settled out, then made a stop at Discount Tire for some new rubber.

I had a conversation with my wife where I asked her to rank the importance of ride quality, performance, fuel mileage, fitment (cutting vs. not cutting on the vehicle), appearance, and off road performance. While I was leaning toward a 285/70, it was clear that it would be the wrong choice based on her priorities. We ended up going with BFG KO2s LT265/70R17 in load range C. At just 45lbs per tire, they were only 3-4lbs heavier than stock.

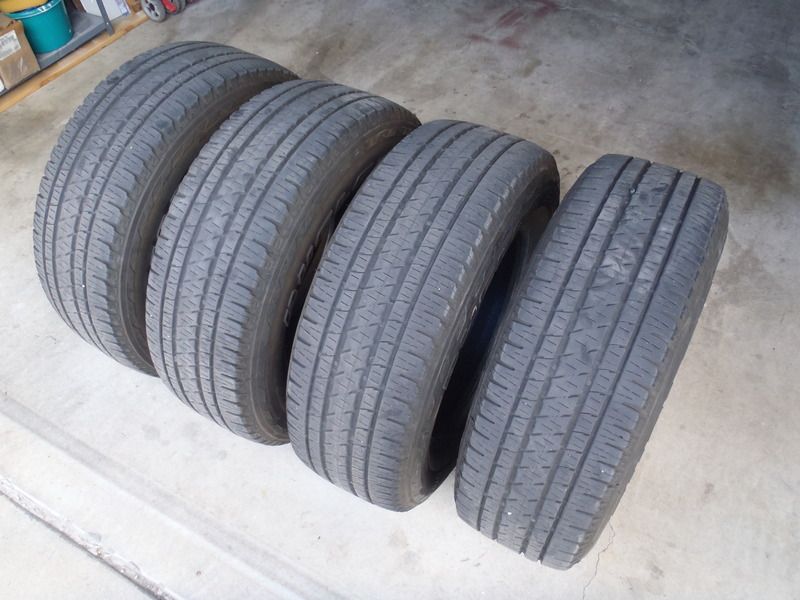
When I got home, I put the old tires on Craigslist for $100 and they were gone by 10am the next day. Total net cost of the BFGs was $720.

Final lift height measurements after tires... we got another 1/2" from the bigger rubber.

DS Front > 37.25"
PS Front > 37.5"
DS Rear > 38.75"
PS Rear > 38.75"

The old tires, still in decent shape... better to take them home and pocket something on a sale than pay a tire shop a disposal fee...

P2101500_zpsogjbsw4q.jpg~original


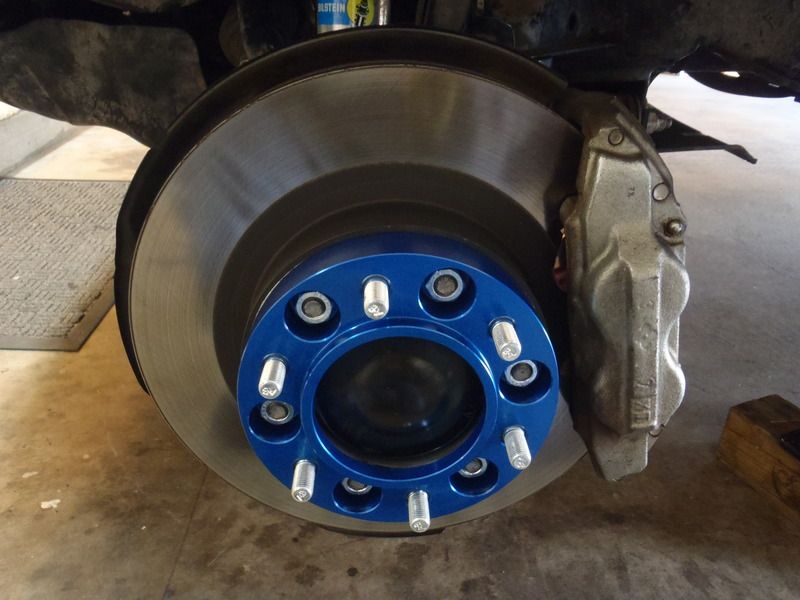
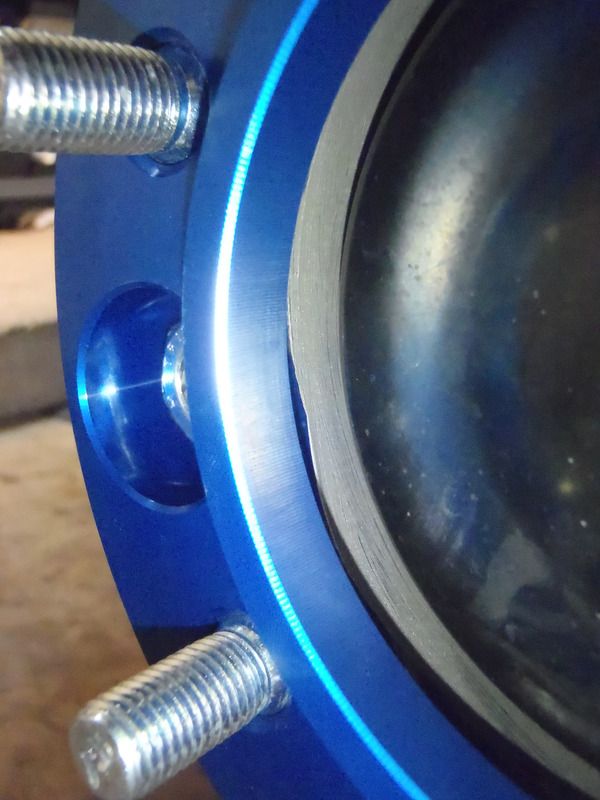
With the tires sorted out, it was time to add the Spidertrax 1.25" wheel spacers.

P2121517_zpskhrnscgv.jpg~original


P2161566_zpsich6kvzu.jpg~original


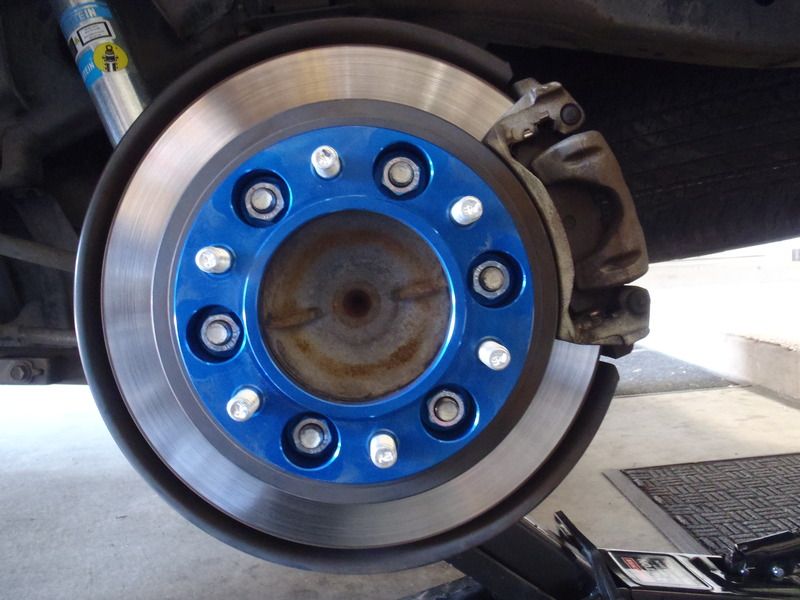
The spacers were installed with a coating of aluminum anti-seize lubricant on the back face and inside the hub bore. Lugs on the spacers were installed with the supplied Red Loctite and tightened to 85ft.lbs per the instructions, then re-torqued at 75ft.lbs after 56 miles.

Spidertrax install instructions > https://system.na2.netsuite.com/cor...7654&c=407909&h=d9bfd331cf327ecdd54e&_xt=.pdf

While re-torquing the rear spacers, I installed new Toyota brake pads and all new hardware (shims, pad support plates, etc). The rear rotors were in good shape.

P2121518_zpsmzee2a3u.jpg~original


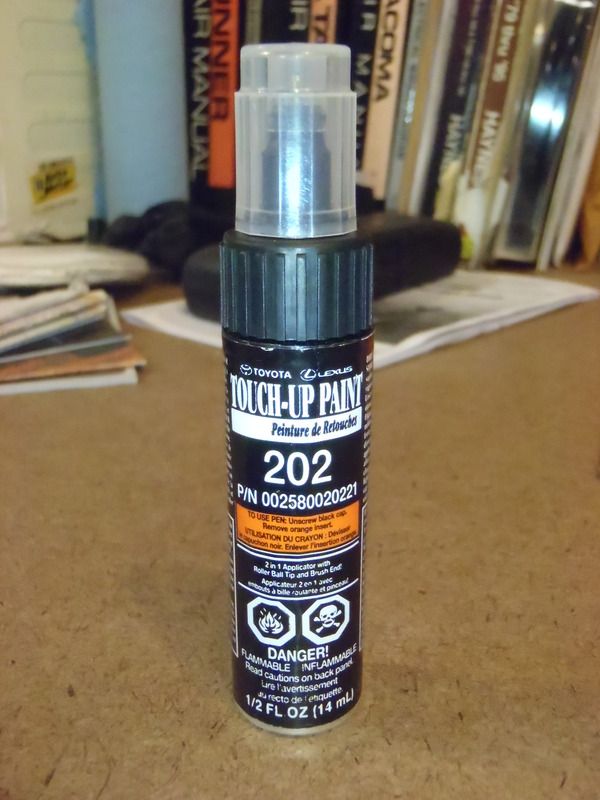
Rock chips stand out on black paint, so we picked up some of this... It made a big difference in the appearance up close.

P2121525_zps0bpcvuje.jpg~original


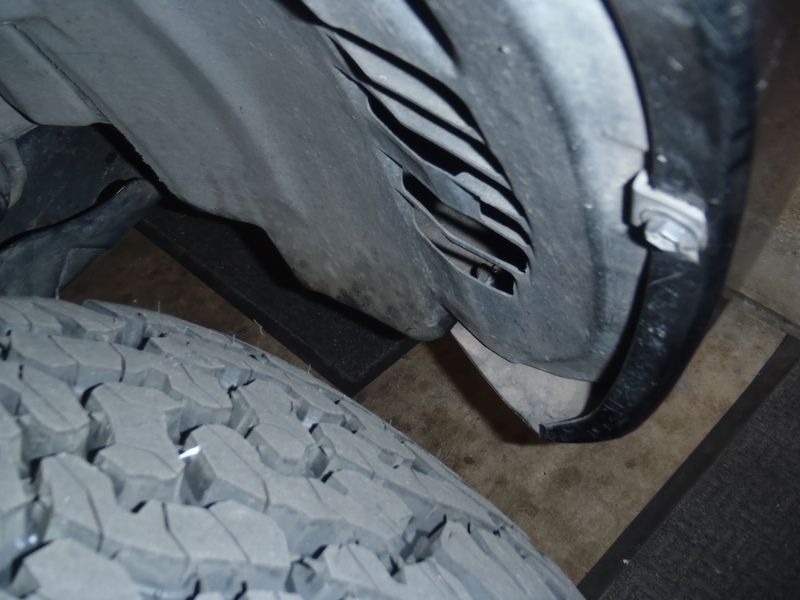
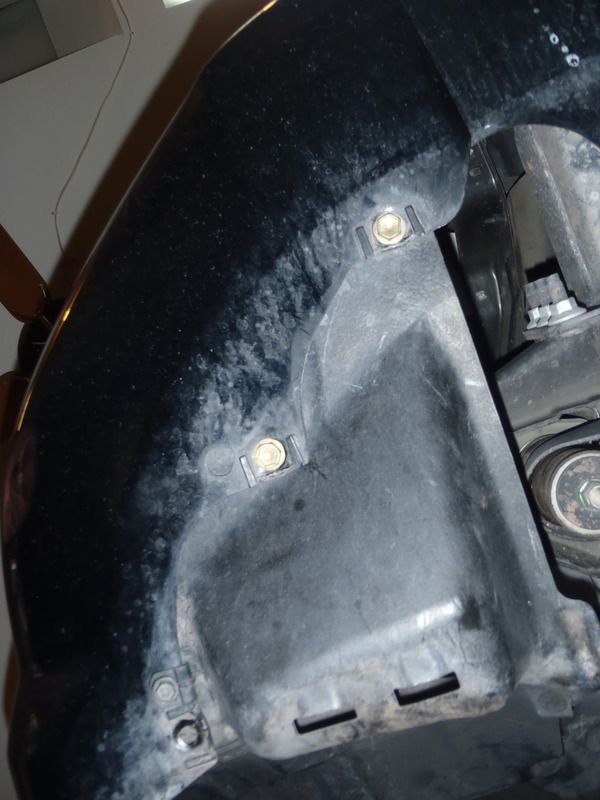
There was no tire rub prior to the spacers, but afterward they rubbed on the fender liner at the front of both wheel wells and on a tiny portion of the lower rear corner of the front bumper. A quick trim on the bumper with a Dremel cut off wheel and some re-positioning of the liners took care of the problem.

P2121527_zpsvn8yimsi.jpg~original


On some of the fender liner mounting points I was able to re-use the stock fasteners and mounting holes by changing the location of the fasteners on the bumper... on others I drilled new holes in the liner and used a nut/bolt to replace the factory screw/clip.

P2121534_zpsn0vbkdqj.jpg~original


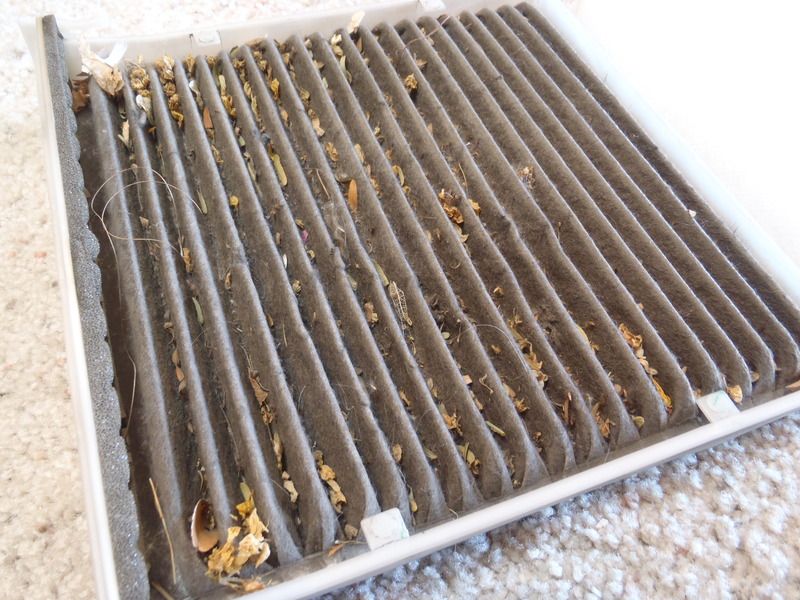
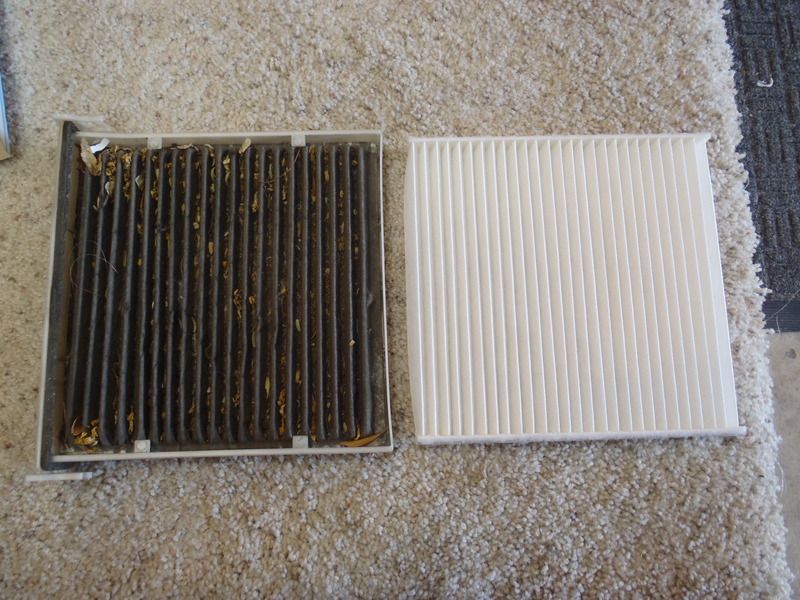
The cabin air filter was filthy, so I replaced that...

P2161563_zps5f4ulzev.jpg~original


P2161562_zpsvgi8txaz.jpg~original


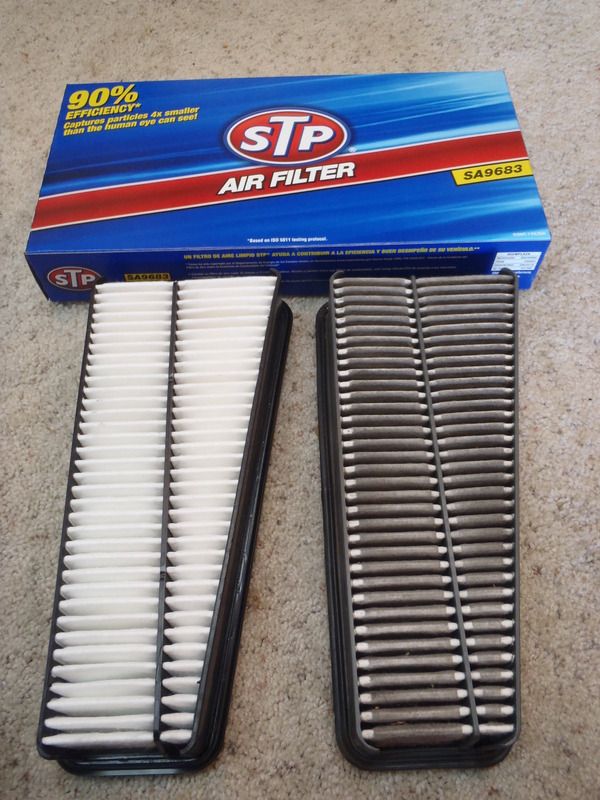
Same with the engine air filter...

P2161564_zpsthebliuj.jpg~original


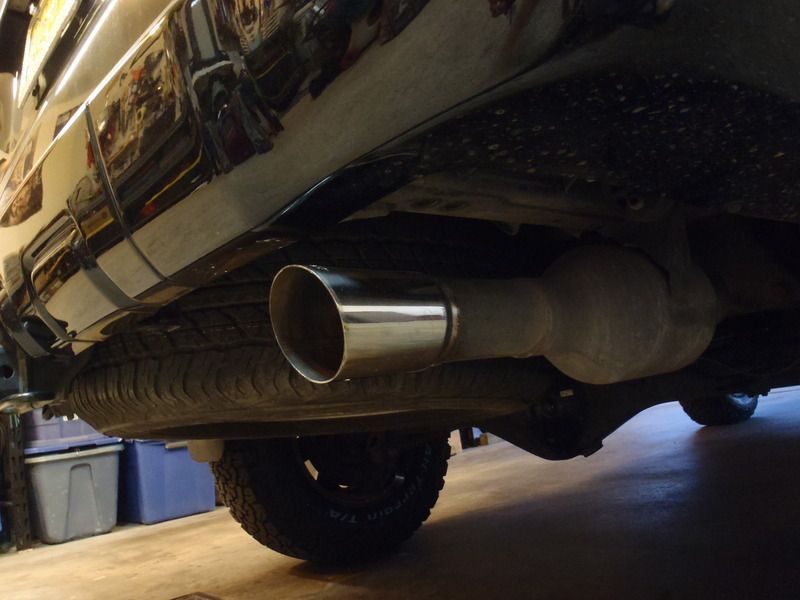
I had a spare Magnaflow exhaust for my Tacoma with broken studs at the O2 sensor port. I decided to cut the tip off, polish it, and install it on the 4Runner. I cut the stock tailpipe back about 4", ground the inside diameter of the tip to where it was a very tight slip fit on the stock piping (tap it on with a rubber hammer tight), and then placed a short weld at the top and bottom to hold it in place.

P2161567_zpsyv8bkg9z.jpg~original


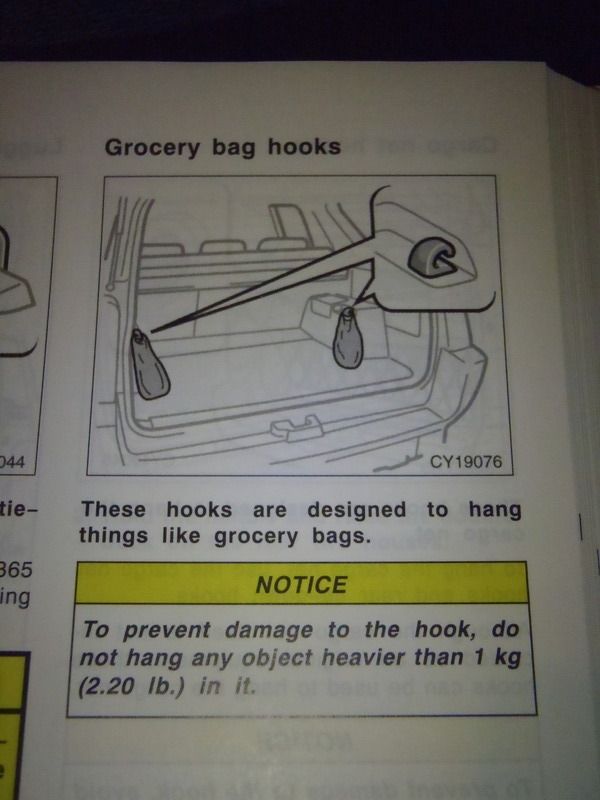
One night, I read the entire owners manual to completely familiarize myself with the vehicle, and this page stood out to me...

P2201595_zpsqyaqlru9.jpg~original


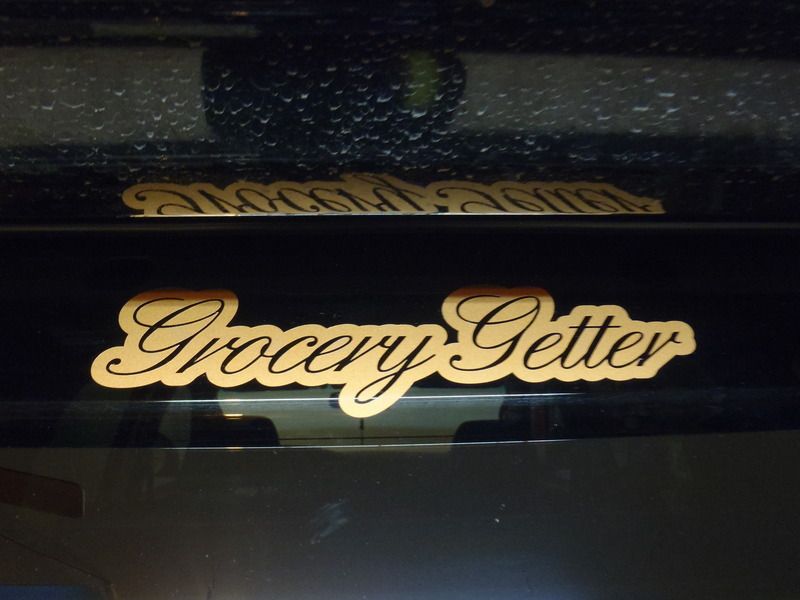
Coming from 3rd gens I always gave people with 4th gens a hard time, calling them "Mini Vans", "Soccer Mom" vehicles, and "Grocery Getters". Since the vehicle actually had two features (grocery bag hooks and cargo net) purposely designed to facilitate getting groceries, and will be commonly used for that purpose, I thought this was appropriate...

P2111516_zpsnxn1tafz.jpg~original


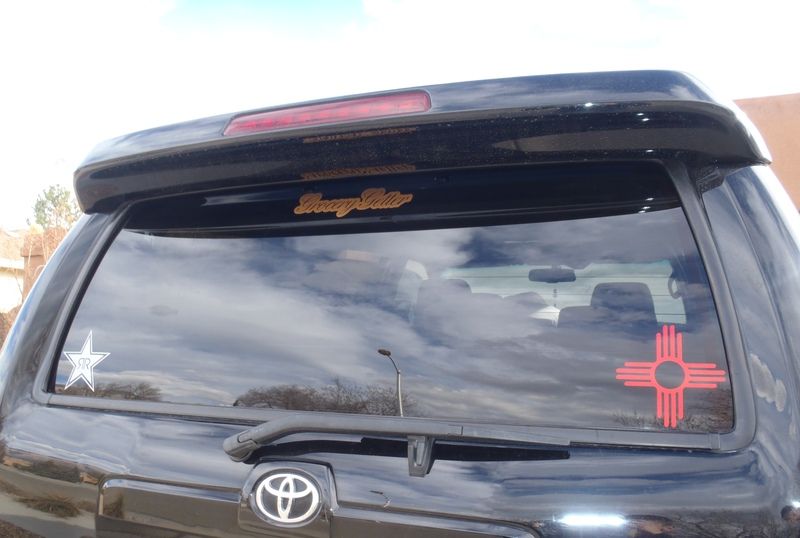
In keeping with my wife's sticker tradition, she had to have a Zia symbol and a Rockstar logo on her back window. She had some (ugly) yellow versions of both on there, which I replaced with more subtle looking vinyl off Ebay.

P2171592_zpslanmtngr.jpg~original


Since the grocery shopping has to get done one way or another, she may as well do it in style with a nice Toyota, right?

Will-Smith-I-Make-This-Look-Good-Men-in-Black_zpsnu1yfkxf.gif~original


Somewhere in there I also did a gearbox service and changed the gear oil in the front/rear differentials and the transfer case. The drain plug on the front diff was seized and the hex socket warped while breaking it loose, so I had to replace the plug. I went with basic Valvoline dino gear oil in 75w90 for the front diff & t-case and 80w90 for the rear diff. The gear oil that came out of all three was still transparent and looked nearly new... a good sign that this thing saw easy driving and regular maintenance.

While out and about, it seemed like a good time for a picture...

P2151557.1_zpsf5crzoto.jpg~original
 
Last edited:
For reference, this is the parts list used to date:

Maintenance, Fluids, and Miscellaneous

75445-35060 Nameplate “4Runner”
PT228-35960-HP Receiver Tube Hitch Plug
00258-00202-21 Touch Up Paint, Black Onyx
90010-09015 Bulb (Climate Controls)
90010-09017 Bulb (Climate Controls)
90010-09018 Bulb (Climate Controls)
90010-09019 Bulb (Climate Controls)
90915-YZZD3 Oil Filter
90341-24014 Front Differential Drain Plug
6 Quarts Mobil 1 Synthetic 5w30
STP CAF1766 Cabin Air Filter
STP SA9683 Engine Air Filter
4 Quarts Valvoline 80w90 Dino Gear Oil
3 Quarts Valvoline 75w90 Dino Gear Oil
Used set of OEM Headlights for BHLM
WeatherTech Floor Liners (1st and 2nd Row, Black)
Husky Cargo Area Liner (Gray)
2” adhesive backed Blind Spot Mirrors
Bosch Icon 22A/20A Windshield Wipers (DS/PS)
53735-35150 Front shield, Right
53736-35150 Front shield, Left
53886-35020 Rear shield Left / Right x 2
90919-01235 Spark plug x 6 (Denso K20HR-U11)
17801-0P010 Engine Air filter (OEM)
85214-22440 Rear wiper blade refill
12204-31030 PCV valve
Group 24F Interstate Battery (700CCA/875CA/130RC)
VANITY_2_W_5K VLEDs Vanity Bulbs x 2
74_3_W_5K VLEDs Glove Box Bulb
194_4_RB_5K_LL-CO VLEDs License Plate Bulb x 2
Yorkim T10 194 Bulbs x 6 (Map Lights, Door Lights)
Ebay 48 SMD LED Panels w/adapters x 2 (Dome Lights)
T107Y Lamin-X Yellow Fog Light Covers
1 Gallon Valvoline MaxLife Dex3 ATF (P/S Flush)

Brake Job

43512-60151 Disc, Front x 2
04465-35290 Pad Kit, Disc Brake (Front)
04945-35120 Shim Kit, Fr Disc
04947-35050 Fitting Kit, Disc (Front, anti rattle springs)
04466-60090 Pad Kit, Disc Brake (Rear)
04946-30010 Shim Kit, Rear Disc
04947-22050 Fitting Kit (Rear, pad support plates)

Suspension & Tires

KYB SM5640 Mount Kit (Includes front shock bushing kit)
Bilstein 24-239370 5100 series front shock absorber (no bushings) x2
Bilstein 33-187174 5100 series rear shock absorber (bushing kits included) x2
OME2884 Old Man Emu Lift Coils (Stock, Light Load)
RCC2.0 Toytec Superflex 2” Rear Lift Coils
OME150PR10 Coil Spring Packer, Rear
TP14 Toytec Front Top Plate Spacer (1/4” thick)
WHS007 Spidertrax Toyota 6 on 5 ½”, 1.25” Thick Wheel Spacer Kit (Pair) x 2
Wheelers OffRoad SuperBumps (Front)
Daystar KU09014BK 3" Poly Bump Stops (Rear)
90105-14104 Lower control arm mount bolt
BF Goodrich LT265/70R17 Tire, All-Terrain T/A KO2 Load Range C – 66255 x 4
Used Hankook Dynapro AT-M P265/70R17 Tire X 1 (Spare)

--------------------------------------------------------------------------

That gets me caught up. There a few things left to do, after which this 4Runner will simply be driven, enjoyed, and maintained. For now, these are the future plans:

Transmission Fluid Flush (using cooler lines)
Brake Fluid Bleed/Flush
SPC Upper Control Arms
New Windshield
Color Matched OEM Limited Grille (maybe)
Extended Rear Brake Lines (maybe)
New Battery (DONE, installed 3/28/17)
Swap back to stock headlights (DONE, stock lights polished and reinstalled 3/24/17)
Spark Plugs & PCV Valve (DONE, installed 3/23/17)
OEM Engine Aprons (DONE, installed 3/9/17)
Extended Rear Bump Stops (DONE, installed 3/6/17)
New Wipers / Blades F + R (DONE, F = Bosch Icon 22A/20A 3/1, R = OEM insert 3/8)
Purchase a decent used 265/70/17 A/T tire for Spare (DONE, mounted & balanced 2/27)

Last, a full walk around set of current pics...

P2171583_zps1cuuxp5g.jpg~original


P2171585_zpsbcw9pnl6.jpg~original


P2171587_zps5egpw0zp.jpg~original


P2171580_zps8fvq2iwm.jpg~original


P2171582_zpsvgbokez8.jpg~original


P2171581_zps7noryfld.jpg~original


P2171589_zpsyngq2rei.jpg~original


P2171590_zpsjn34vdoi.jpg~original


P2171584_zpsewt2um5r.jpg~original


Thanks for reading!
 
Last edited:
Thanks, Ron. I've been through the build thread for your '08 front to back... TWICE. Thanks for taking the time to put a lot of good info in there. It also really helped to visualize things seeing various mods on another black rig.

When I de-badged, there was no paint etching whatsoever. I considered that prospect carefully after reading about it in your thread. I still hope to wheel with you someday via one of the NM adventure series outings over on TW.

Yeah, we definitely need to get together and do some wheeling! Unfortunately, a lot of those TW wheeling trips have fallen on days I can't get off work.

--------------------------------------------------------------------------

That gets me caught up. There a few things left to do, after which this 4Runner will simply be driven, enjoyed, and maintained. For now, these are the future plans:

SPC Upper Control Arms
Color Matched OEM Limited Grille
OEM Engine Aprons
Extended Rear Bump Stops
Extended Rear Brake Lines (maybe)
Swap back to stock headlights
Purchase a decent used 265/70/17 A/T tire for Spare

I have a P265/70/17 Hankook AT that was under my 4th gen (as a spare) for a few years but was never run on the road. I purchased it new, it still has all the nubs. $50 if you're interested. I'm heading to ABQ today in the afternoon as well.
 
Last edited:
Yeah, we definitely need to get together and do some wheeling! Unfortunately, a lot of those TW wheeling trips have fallen on days I can't get off work.

I have a P265/70/17 Hankook AT that was under my 4th gen (as a spare) for a few years but was never run on the road. I purchased it new, it still has all the nubs. $50 if you're interested. I'm heading to ABQ today in the afternoon as well.

I know how that goes. Shift work changes your lifestyle... even more so if your co-workers often don't feel like coming to work.

Yeah, I think I'll take that tire off your hands. I saw your post in the NM Flea Market thread when you listed it... has it been dismounted from that Tacoma wheel? We have appointments today at 15:30 and 16:00, but will be available before and after. I'll PM you my contact info.

Also, how old is the tire?
 
I know how that goes. Shift work changes your lifestyle... even more so if your co-workers often don't feel like coming to work.

Yeah, I think I'll take that tire off your hands. I saw your post in the NM Flea Market thread when you listed it... has it been dismounted from that Tacoma wheel? We have appointments today at 15:30 and 16:00, but will be available before and after. I'll PM you my contact info.

Also, how old is the tire?

Yeah, shift work does change your life. Just got off graveyard a little while ago in fact.

I'll text you the rest of the details about the tire.
 
Thanks for continuing to build rigs that I can aspire to! This is one sweet 4th gen. I've often thought about a 4th gen as a secondary vehicle / more comfy highway cruiser. So I'll definitely be following you and [MENTION=63060]rickashay[/MENTION] down that road sometime in the future I'm sure. These trucks aren't getting any older though, hard to find these in lower mileages. For now, I'll keep driving the 3rd wherever it'll go!

As I mentioned before - - sweet work with the badging! Really really like the look of this - looks stock and OEM, my favorite look. The graphite headlights is killer with the black paint.

Keep it up! and congrats on the baby on the way! :) best wishes my friend.
 
Thanks to [MENTION=32290]gm350reratliff[/MENTION] for a good deal on a matching size spare. I got it mounted and balanced yesterday and it fits under the 4Runner just fine.

Thanks for continuing to build rigs that I can aspire to! This is one sweet 4th gen. I've often thought about a 4th gen as a secondary vehicle / more comfy highway cruiser. So I'll definitely be following you and rickashay down that road sometime in the future I'm sure. These trucks aren't getting any older though, hard to find these in lower mileages. For now, I'll keep driving the 3rd wherever it'll go!

As I mentioned before - - sweet work with the badging! Really really like the look of this - looks stock and OEM, my favorite look. The graphite headlights is killer with the black paint.

Keep it up! and congrats on the baby on the way! :) best wishes my friend.

Thanks for taking the time to follow the builds, Jon. I'm glad you tracked down the thread and had a look.

Driving and working on this vehicle has made me want a 4th gen of my own, although I'd go for a V8 (even harder to find with low mileage). However, I think a quad cab 1st gen Tundra will be my next Toyota. I like having a truck again and with kiddo #2 on the way, I need more room than the Tacoma provides.

Thanks for the compliments on the badging and headlights. I've tried to add a few touches that set this 4Runner apart from the rest of them driving around ABQ.
 
Today I took care of more maintenance. Oil changes on the 1GR are ridiculously easy. :banana:
P3011658_zpsjjo2yq6r.jpg~original


This oil filter location and the oil catch are genius. A 32oz Gatorade bottle is a perfect fit for catching old oil from the filter via the drain nipple. Pouring in the new oil was a breeze too, thanks to the extended filler neck. I wish the 5VZ had these features.

P3011659_zpsw0ldv0cq.jpg~original
 
Today I took care of more maintenance. Oil changes on the 1GR are ridiculously easy. :banana:

P3011658_zpsjjo2yq6r.jpg~original


This oil filter location and the oil catch are genius. A 32oz Gatorade bottle is a perfect fit for catching old oil from the filter via the drain nipple. Pouring in the new oil was a breeze too, thanks to the extended filler neck. I wish the 5VZ had these features.

P3011659_zpsw0ldv0cq.jpg~original

I also appreciate how easy it is to change the oil on my 2008. Toyota did their homework on that design. However, on the current generation 1GR they went the other way and made it a pain in the ass again by relocating the oil filter down low in front of the engine and changed it to a cartridge type. You now have to remove the skid plate every time you change it unless you get a aftermarket skid plate (RCI) with a filter door like I did.
 

Members online

Forum statistics

Threads
278,315
Messages
3,554,132
Members
248,016
Latest member
Advally Service

Trending content

Back
Top