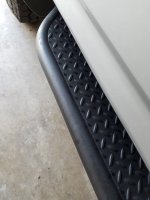
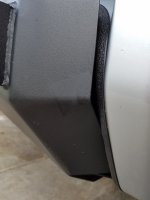
The Idiot Thread

Wow, those KO2s look like they have a ton of tread left. Can you elaborate on the wet traction issues please?

Yeap, 12-13/32 of tread left, so they at least wear well. The wet weather concerns are in the 21k mi review of them I posted the other day.

I think he's expecting too much from a tire that's on the MT side of AT.

That may be possible, the only AT tire comparison I have is the old style Dick Cepek FC II's that were on my Bronco. I would consider them more MT style than the KO2 though. The FC-II didn't feel slick while cornering/braking on wet asphalt the way the KO2'S did, they didn't fair nearly as well on ice though.
 
XenonDepot HID Xtreme Conversion

11/8/2016 51,938 mi

Reference: HID upgrade, which one to go with?
Part(s):XenonDepot's H11 Xtreme HID Conversion Kit +Philips 4300k Bulbs, no CANbus
Time: 1-3 Hours (depending on your cable management needs)
Cost: $180
Tools: Hook pick, 10mm box wrech, 10 & 12mm socket, 6+" socket extension, drill w/1" hole saw or dremel, small wire snips
Shop supplies: Zip ties, Extreme Velcro


Let's just say this mod was done as a result of seeing other pictures online, and feeling a lack of illumination when out in the middle of nowhere. Hence this is just step one in generating more light to project, some will be on road legal, some will not be.

I'd read good things about XenonDepot's H11 Xtreme HID Conversion Kit in the reference thread above, they always seem to be on sale and more than willing to support customers. I called twice with questions before ordering a kit, and then once when looking at the rather nondescript instructions included in the package. Every time I called, I was able to speak with a person during normal business hours and all my questions were answered with intelligent and in depth answers.
EDIT: I installed the XenonDepot HID kit in the Outbacks my mom & sister have, one of which didn't want to wait for the back-ordered Philips 4300k Bulbs. There's a noticeable difference in them. The Philips are brighter and the pattern more full, worth the extra money IMHO. [/edit]

So here goes, start by removing the radiator cover (step 1 one most anything on this truck). I'm getting better and better at it, using a small curved pick tool to pull up on the center tabs so that they are easy to reuse. Disconnect and remove battery (10mm wrench), unscrewed the weather covers over the headlight bulbs.
Drill a 1" diameter hole in roughly the center of the weather cover. I used a hole saw, but only because I had one in my toolbox, otherwise a dremel/rotozip might work well.
Drill.jpg


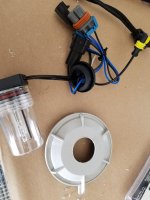
Do not touch the glass of bulb with anything, if you do wipe it off with rubbing/isoprophyl alcohol. Remove the plastic protection case and spacer from the bulb, run through weather cover, and install all in vehicle. The rubber grommet on the bulb wiring fits nicely in the 1" hole, but a 7/8" hole might be a more secure fit.
Driver bulb.jpg


Now there are a thousand possibilities as to where to install your wiring. The Xtreme Kit includes the bulb/rubber grommet wiring, a ballast (grey metal electronic box), and a relay (small black plastic) (other users say this is optional).
Correct wiring (each side):
Factory plug to blue/black grommet wiring (inside weather cover)
Blue/Black grommet wiring (outside weather cover) to white/black wiring on relay
Relay connector to ballast connector
Ballast 2 piece connectors to bulb
The relay also has ring connectors to go to Battery Positive, and Body Ground

I strongly suggest connecting everything once bulbs are installed and verifying that it all works before continuing with mounting or using zip ties. I had no troubles, but better to find them before you get everything permanently mounted.

I decided I wanted to hide as much of the upgrade as possible. Out of curiosity I removed the rubber seal and plastic trim piece from the fender on both sides and found plenty of unused space to hide everything. To remove theses you need to slide them towards the windshield and gently pull a little to get the corners from under the lip of the fender. The retainer closest to the windshield in the wiper tray is the toughest, but still easy enough.

EDIT: How to remove/reinstall the fender trim/hood seal pieces
Removal
1) Remove radiator cover, the big plastic piece on top of the radiator
2) The very front of the hood seal tucks under the fender, push down on it and slide it towards the center of the vehicle. You just need to get it out from under the fender.
3) Then there's a recessed part of the plastic trim piece closest to the windshield, slide that towards the windshield first then up.
4) Slide the remainder of the hood seal piece towards the windshield

Reinstallation
1) Start with the recessed piece closest to the windshield, slide it on the post
2) The remainder of the long plastic trim, slide onto the 3 posts. It's ok for it to flex a little. It's also fine if you need to gently push aside the rubber hood seal to see and line them up. I found it's best to start closest the windshield and work forward. It may take a little sliding back and forth with pressure in the right areas to keep it down on the posts. Usually I will just barely start the rear post, and push down on the others to get them past the top of the post and started. Then pull the whole piece forward.
3) Don't forget to tuck the front end back under the fender
4) Reinstall Radiator Cover [/edit]

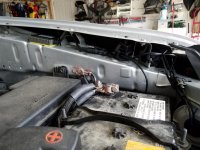
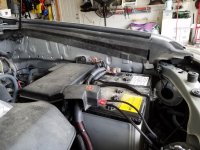
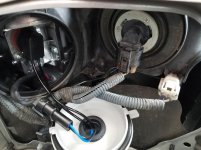
Then it's just a matter of connecting everything and running the wires where you want them. I elected to use the relays and connect the batt+ and body ground to them, even though other users suggest they aren't required. There's two body grounds (10mm) easy to get at on the driver's side next to the battery, so that side went very easily. From windshield to front, ballast, relay, and ballast bulb side box. The whole install is all but completely hidden once the fender seals were put back in place.
Driver Wiring.jpg
Driver Final.jpg


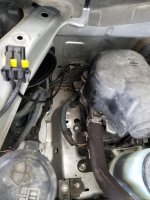
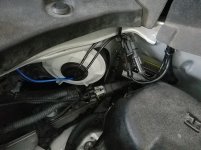
The passenger side body ground is a royal PITA with that pump in the way. So I used the 12mm socket and extension to remove the bolts holding the pump in place, and lifted it out of the way until my install was complete on that side. Reinstall the bolt at the fender windshield side first when putting it back in. Also have a magnetic retrieval tool ready in case it drops down underneath the tray the pump is mounted on. The passenger side not as hidden because of the run to the batt+. I elected to run mine across the back side of the center bumper instead of along the radiator support, heat and wires are a bad combination. So the relay is hidden using extreme velcro underneath the radiator support near the rubber bump stop for the hood. That limited where I would put the ballast, although I used the same location for the ballast bulb side box as I did on the driver's side. Zip ties on supports are easier and cheaper than extreme velcro.
Pax Ground.jpg
Pax Final.jpg
 

Attachments

  • Drill.jpg
    Drill.jpg
    130.9 KB · Views: 5,827
  • Driver bulb.jpg
    Driver bulb.jpg
    132.1 KB · Views: 5,807
  • Driver Wiring.jpg
    Driver Wiring.jpg
    136.6 KB · Views: 6,707
  • Driver Final.jpg
    Driver Final.jpg
    137.2 KB · Views: 6,710
  • Pax Ground.jpg
    Pax Ground.jpg
    132.5 KB · Views: 5,775
  • Pax Final.jpg
    Pax Final.jpg
    134.3 KB · Views: 5,796
Last edited:
HID Conversion Before & After

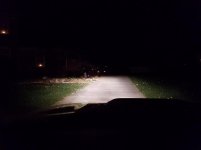
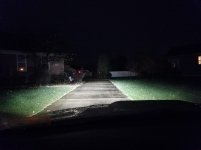
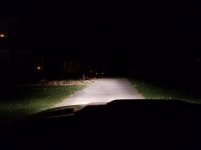
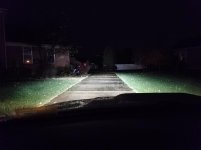
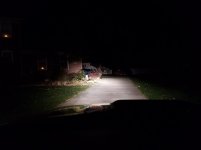
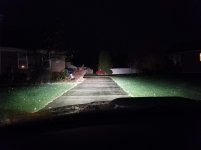
Since I knew I was going to be doing this I stopped the previous night at the mouth of the driveway with the front wheels in the gutter pushing against the curb. The lights are aimed low that way, but it gave me a physical feel to get to the same spot for a follow up picture. I didn't get the aim point exactly the same on before and after, but the distance should be the same to a few inches.

The pics are cell phone pics, but you can see there's a difference. The amount of that difference won't come through with auto exposure, so you're going to have to take my word it's more than what you see here.
Sorry I can't help the weather. It was cloudy and rainy for the after pics, also meaning there's some city light reflecting off of the clouds making it not as dark as the before pics.


Pics in order top to bottom
Stock Low
XD HID Low
Stock Low + Fog
XD HID Low + Stock Fog
Stock Low + High
XD HID Low + Stock High


Stock Low.jpg
XD HID Low.jpg
Stock Low + Fog.jpg
XD HID Low + Stock Fog.jpg
Stock Low + High.jpg
XD HID Low + Stock High.jpg
 

Attachments

  • Stock Low.jpg
    Stock Low.jpg
    59.8 KB · Views: 5,476
  • XD HID Low.jpg
    XD HID Low.jpg
    103.8 KB · Views: 5,466
  • Stock Low + Fog.jpg
    Stock Low + Fog.jpg
    57.1 KB · Views: 5,462
  • XD HID Low + Stock Fog.jpg
    XD HID Low + Stock Fog.jpg
    89.1 KB · Views: 5,487
  • Stock Low + High.jpg
    Stock Low + High.jpg
    61.2 KB · Views: 5,443
  • XD HID Low + Stock High.jpg
    XD HID Low + Stock High.jpg
    100.1 KB · Views: 5,451
I did the same kit with the philips bulbs too. Could not be happier. I did have to aim them down a bit as I was getting flashed way too often.

Sent from my SM-N910V using Tapatalk
 
Lifted!

11/17/2016 52,274mi

As posted above, I did end up ditching the E load KO2's and got a set of C load Disco AT3's instead. Since mounting them, on cold mornings on a rough section of road I'd noticed a large vibration at 60mph. I did have the shop re-balance the tires again (one had thrown a weight), but the vibration still existed. A bad shock was the only thing I could think of that would produce that much vibration, luckily I had already ordered the below. This weekend should tell whether or not a strut/shock was the problem.
EDIT: Strut/Shock was not problem, still have a wicked vibration at 60mph when tires aren't warm. Now I have to get up and go to Discount Tire early tomorrow to get them balanced for the 3rd time.

While I had previously been going down the road of some Pro-Comp 2.25" spacers for the front to eliminate the rake, I wasn't sure that was right for me. After some good discussion with [MENTION=105481]3wbdriver[/MENTION] I was planning on going the OME route (shocks & 884's). But this level of suspension work is above my comfort level and tools I have on hand. I talked with a couple different local lift shops, none of which would install an internet purchased set nor carried OME. So instead I ended up with a new set of Rancho struts & shocks.

Rancho QuickLIFT RS999913/RS999914 for 2" of front lift
Rancho RS999305 for the rear shocks
Rancho rear spacer kit not ordered/installed due to the Air Lift kit I had already installed, which allows height/spring rate adjustment based on load.

Leaving my daily driver and only vehicle with the shop for a day I can deal with. Unfortunately one of the shop mechanics pretty much abandoned his job, leaving the shop behind schedule. They didn't even start on my truck until after noon the day after I dropped it off. So after several unplanned Uber rides for previous engagements, I managed to pick up the truck from the shop after hours last night. I then drove it up the highway 20 miles for an evening out, blinding people with headlights that just got the HID conversion and hadn't been adjusted for the lift.

I'm not going to comment much on ride difference until I have some miles on these. I'll be driving down to the TN mountains for the holiday and trying to break them in on a couple "roads" while there. The truck definitely sits better and rides differently. The nose dive tendency is diminished, and I feel a little odd not looking down at the road anymore.
The truck does pull to the left a little, and an alignment was first on the list of things to do today. Apparently Firestone Complete Auto Care is doing a big sale and it's going to be Saturday before I can get the truck in there.
Thanks to this thread for keeping me from flipping through the manual trying to figure out how to aim the headlights. I aimed them down at least 4" while in a shady spot, I'll check aim again in the dark after work tonight.

EDIT: 1k mi Ride quality update
Taking a few things into account here:
-the front struts are adjustable and were installed at the stiffest setting
-the front springs were replaced with the struts and are probably still not yet broken in
-rear springs were not replaced
I expect this will actually be a good modification for the truck. I like the front lift and level look, and this is the first vehicle I've ever done it to. The ride in the rear (empty or loaded) is very nice, stiffer than stock with less sag under weight, yet still responsive and smooth. The front is still stiff for the previously mentions reasons, however, I did feel a difference in ride after turning the struts to the lowest (softest) setting. I don't know that I would be able to feel a difference between any intermediate settings, but going stiffest to softest setting is noticeable. Given the performance of the similar series shocks on the rears, I expect the front will be similar and I will enjoy it even more once the springs wear in a little more. Until then there's still an occasionally jarring hit on a pothole, and some stiffness. I would compare it to going from the stock P Dueler's to an E load tire at 42psi.

20161117_104951.jpg
20161117_105006.jpg
20161117_105030.jpg
20161117_105054.jpg
 

Attachments

  • 20161117_104951.jpg
    20161117_104951.jpg
    137.1 KB · Views: 5,396
  • 20161117_105006.jpg
    20161117_105006.jpg
    136.6 KB · Views: 5,205
  • 20161117_105030.jpg
    20161117_105030.jpg
    139.2 KB · Views: 5,194
  • 20161117_105054.jpg
    20161117_105054.jpg
    135.1 KB · Views: 5,265
Last edited:
Took mom out for a peaceful drive through the deserted mountains of TN, even let her drive a bit of the easy downhill stuff. We both had a good time, at least until we got back to her house and had to pull half of a tree out of the driveway to get home (too dark for pics).
Google Route by no means a challenge for the 4Runner or me, but nice to get out and exercise the 4WD and 4Lo for a bit.

d134013790f0436790d970b552d38d73.jpg

15ff4a57a353c002f1450d2758b015f9.jpg

bfae50de5c5b0b4d8cdd5904e936434d.jpg

0836db31148ac29759f8869c96117008.jpg

686cafd11ec93b50044e41ebf977201b.jpg

6ec564249e9321b77d9fda742713af2b.jpg

272bcf0b50f467ea508fc63dd8fbc3bb.jpg

1de1dbaaa4874113915d22e40cec15f7.jpg


Sent from my SM-G930V using Tapatalk
 
Last edited:
I pulled some things off the dashcam after the trip to TN

Driving along the light trails from the previous post, I wanted to test the 4LO settings. Although it looked a little steep, it was very dry, so it turned out to be much easier than anticipated, no slipping or spinning.


Just for reference this is coming down my parents' driveway daytime, then night. Night has a stop in the middle where mom picked me up after clearing some downed branches. Headlights are XenonDepot Xtreme HID and PIAA Xtreme White halogens for highbeam.

 
12/26/2016 54,292 mi
[MENTION=110183]Southern Style Offroad[/mention]
2014+ Slimline Bumper

[MENTION=87816]Baja Designs[/MENTION]
OnX6 20" Driving/Combo (#452003)
Toyota Fog Light Kit (#447110)
Squadron-R Sport Wide/Amber (#587815)

I finally got a day where I had help, space, tools, and even warm weather to install the SSO bumper I picked up out of the last group buy. I've wanted one of these bumpers for about a year, and while there's no pressing NEED for one, who in this forum really NEEDS half of what we put on our trucks. That said I'm very pleased with the look and fit of the bumper. I didn't have time to fiddle with running the harness through the firewall for the OnX6, so it's not connected yet.
EDIT: BD Wiring harness switch install

I did get a jump start on the install, putting the light bar into the bumper a couple days before, along with a parts inventory. This meant I only had to bug someone for help for as long as it took to install the actual bumper. The OnX6 is a deep light bar, and I have some concerns about how close it may be to the winch when I get it. But I'll cross that bridge when I get to it. The guys at SSO were great at answering questions from pre-purchase through issues and install, even calling me Friday before Christmas after I had written an email late Thursday night. I'm always worried about how things will go when making a major purchase from an online company I haven't dealt with before, but can honestly say that SSO stands behind their product, and is great about product support too! A great big thank you to everyone at [MENTION=110183]SouthernSS[/MENTION] I really wish that everyone would do business like they do!

The SSO directions did seem a little vague at times, and of course I also elected not to follow them at other times. [MENTION=139970]greatape[/MENTION], Removal of the existing plastic bumper is not optional, but it is a little easier than the instructions make it to be. Mine popped right off the truck as soon as I got the both corners near the wheel wells free. Reinstalling was a little more complicated, but basically it was just line up about there it goes and push the tabs you can't see back into place until they click. That part actually wasn't that difficult using the headlights as a guide for reattachment. I did end up removing and reinstalling the bumper a couple times due errors in my fog light installation, it looks no worse for the wear.

Check for all of your tools before starting. I managed to leave my dremel tool at my apartment 90 minutes away from my sister's house where I was doing the install. (I had used it to polish the trigger on a friend's AR) I realized this the night before my install and managed to borrow my brother's Dremel Trio. Unfortunately it didn't have the proper shim for the 1/8" shank for the ripsaw blades. I ended up putting the bit into a regular drill and dealing with it instead of running to the store to buy another dremel or adapter. [MENTION=127037]NutZac[/MENTION] This made me more nervous about cutting the bumper, I certainly would have felt better if I had a proper dremel.
There were some things that helped with the nerves, make a few mental decisions prior to even putting the ripsaw blade into motion:
1- Plan a practice cut in the bumper, in the blank area behind what would be covered by the Silver Trail valance (sorry SR5 guys, not an option). That way if it wasn't controllable or really ugly I could always put the bumper cover back on and put it back together.
2- Cut small, cut inside of your marking, not on or outside of it. It's always easier to take more off than it is to try and put some back!
3- Only aim to cut about 2-3" at a time. This makes it easier instead of trying to worry about how straight that long cut will be.
4- Also consider that there will be some small errors which would be easily covered by the trim piece included in the kit.
5- I considered a glass of whiskey before cutting, but decided against it better to keep my fine motor control.

EDIT: As an extra precaution, I didn't cut a single thing until I already had the SSO bolted to the truck. That way if there were any issues with fitment or alignment I could remove it and reinstall everything OEM and deal with the bumper itself and not have a gaping hole in the front of my truck. You should also take a wire brush and a bottle of dish soap solution and clean out the front your A/C condenser while you have the bumper off.

The hardest part of cutting was actually the vertical cut along the edge of the bumpout. I made the cut, then went back and cut again and again to free the center section. Then had to flip the bumper back to the front and clean up the ragged cut. I would suggest adding a razor blade or sharp knife to the tools needed in order to clean up the rough edges, melted plastic, and smooth out any cuts that don't come out straight the first time. Most of all, go slowly! It's easier to make multiple cuts than to have the saw go wild and end up with a gouge somewhere you didn't want one. I thought about sanding the edge a little smoother, but didn't waste the time since it was covered by the edge trim.

I removed the baffles for the A/C condenser, and had every intention of cutting the bottom of them off so that they would work with the bumper. Unfortunately by the time I had remembered that I'd already put away my cutting tool. So I left them off completely. They weren't very simple to get off, there's a plastic pop-rivet in the inside center of each one that I didn't see until I went hunting with a flashlight for how to get them off. They also have two tabs each that go towards the rear of the vehicle to hold them in place. Also be careful because those lines in front of the condenser bend out of place very easily, I could see them breaking if you're too rough getting the baffles out.

EDIT: Take the time and cut the the baffles! After a year without them in my wheel well liners were getting pushed into the wheel well by the extra airflow resulting in tire rub. The A/C also runs cooler with them in place. You will need to trim off the entire lower arm for the passenger side, about 1/3rd of the lower section on the driver's side, and both sides require some trimming at the bottom rear (towards the frame and bumper mount). See this post for more information and pictures.

I had posted the question to SouthernSS about installing the steel bumper before re-installing the plastic bumper. They said that it is possible to do steel before plastic, but doing so increases the chances of scratching the factory paint. This is especially important if you ordered the bumper with a hoop. As I elected not to have the hoop, I thought I'd give it a try. It turned out to be much simpler to put the bumper in place and torque the bolts to spec without the plastic bumper in the way. I would certainly consider this route for any install, especially if you don't have the hoop to contend with. The reasons for doing this are mostly easier access to: The 4th (inside) bolt to the frame rails, side L-brackets and bolts. Honestly even with the hoop, as long as you keep the bumper upright and with the trim molding on, you shouldn't scratch the paint.

I had the shipping issue where the radiator bracket arms arrived slightly bent, but a big rubber mallet fixed that in a couple swings. I did discover that the bumper did not easily swing up and into place as described in the instructions if you put the radiator arm bolts into place first. I had to un-bolt them and remove the bumper. To install we had to slide the bumper almost into place, a little high, hang it on the small hooks on top of the flanges. Doing it this way also meant that the truck almost immediately took all of the weight of the bumper instead of having to wait to get a couple bolts in first. Then we just had to adjust the bumper a little here and there to line up the holes enough to start the bolts. I don't see that type of install going well with the factory bumper already back in place.

Where things got vague was the instruction for the included L-brackets. On each side of the bumper there are two threaded holes, the short sides of the L-shaped brackets bolt to those using the 3/8" flanged bolts (long side down). The long sides of the L-brackes should taper back and out towards the front wheels. The remaining 3/8" flanged bolts will bolt through the fender liner and factory plastic bumper holes into the threaded holes in the long side of the bracket. This requires that you remove the small plastic clip from the outside hole in order to have a hole big enough for the 3/8" bolt. It may take some fiddling to get them lined up, I had a heck of a time getting the outside bolts in (because the fender liner is a smaller hole), so I'd say start with these first. Honestly once you get to that point in the instructions you're pretty much done and it should be pretty simple to figure out, provided your alcohol consumption hasn't been too great!

Here's where I finally went back and mounted the cut factory bumper back on the truck finishing things out, leaving the fender corners undone. While the factory bumper was removed, my dad had unscrewed the factory fog light mounts and put on the Baja Designs kit. I hadn't tightened the mounting kit all the way to the light because I knew I had to aim them. This also required me to ops check the lights before putting everything back into place. My dad had wired the plug incorrectly for the one side, so we had to pull the adapter, re-wire it and put it back before aiming. I aimed them just below the headlights, and was surprised how easy this was to do. A little push at the top or bottom of the light to adjust while it was slightly lose, and the aiming point would change enough to see because I went with amber lights instead of standard white. I imagine you'd have to disconnect the headlights if you wanted to aim a set of white lights. Once aimed, just reached under with the allen wrench and tightened the mountings, then put the bumper all together. My dad joked about the seemingly massive heatsink on the back of the Squadron-R's but after having them on for a few minutes to adjust them those heatsinks were starting to get a little warm. The lights throw an impressive amount of light, easily dwarfing the stock fog lights, and easily visible even below the XenonDepot HID headlight conversion. The wide pattern is great for fogs. I now have to go do [MENTION=65614]Antman[/MENTION]'s Fog Light Isolation Mod. For what it's worth the plastic housing that was over the stock fog light on the passenger side had no hope of fitting with the BD kit.

I was relieved when the truck was all back together, and had to triple check that I hadn't forgotten something. With the removal of that much of the factory bumper, cross member, and air dam (above the skid plate), I ended up with quite a bit of leftover hardware and parts. Overall the installation was simpler than I had expected, but that's no reason to go rushing things. I could see doing it as a one man job, with the exception of putting the steel bumper on the truck (hey neighbor, want a beer?). Having a second person around to help did make things go quicker handling the wide plastic factory bumper, as well as accomplishing multiple tasks at once.

[MENTION=150371]Wavechaser[/MENTION] I had posted several options here in the original group buy thread. I considered several, but since I wasn't installing a winch or fairlead (yet) that left few options. I could have installed a fairlead and plate mounting bracket behind it, but couldn't make up my mind on which ones before the bumper arrived. So instead I went a simple route that would work without any special mounts.
2xK&J Magnetics Plastic Coated Countersunk Magnet
2x #10-32 3/4" Stainless Machine Screws
2x #12 Stainless Washers
2x #10-32 Nylon Lock Nuts
1x Piece of Black Felt
Machine screws go through the magnets, license plate, washers, and into nylon lock nuts. Then hot glue the felt to the back of the magnet over top of the bolt head. The magnets are strong (20lbs of pull each), but I don't know that I'd trust it to stay while going off-road. Magnetic means it's easy to remove, or re-position though. For now it also covers the fairlead hole until I find the winch I want to throw on there. I ordered the plastic coated magnets and used stainless hardware because I'm in the Rust-Belt and it's winter time.

6963479818863be85c523c54f4edeb39.jpg

18299f147771bad8d30ab24a569b5d2a.jpg

16fd8a8871e5d909f4a39897fa231d6d.jpg

e7302ae83661b6c4a52c187b52e0105e.jpg

9140a66815b6eee93541f2a3ad974301.jpg
 
Last edited:
12/26/2016 54,292 mi
[MENTION=110183]Southern Style Offroad[/mention]
2014+ Slimline Bumper

[MENTION=87816]Baja Designs[/MENTION]
OnX6 20" Driving/Combo (#452003)
Toyota Fog Light Kit (#447110)
Squadron-R Sport Wide/Amber (#587815)

I finally got a day where I had help, space, tools, and even warm weather to install the SSO bumper I picked up out of the last group buy. I've wanted one of these bumpers for about a year, and while there's no pressing NEED for one, who in this forum really NEEDS half of what we put on our trucks. That said I'm very pleased with the look and fit of the bumper. I didn't have time to fiddle with running the harness through the firewall for the OnX6, so it's not connected yet.

I did get a jump start on the install, putting the light bar into the bumper a couple days before, along with a parts inventory. This meant I only had to bug someone for help for as long as it took to install the actual bumper. The OnX6 is a deep light bar, and I have some concerns about how close it may be to the winch when I get it. But I'll cross that bridge when I get to it. The guys at SSO were great at answering questions from pre-purchase through issues and install, even calling me Friday before Christmas after I had written an email late Thursday night. I'm always worried about how things will go when making a major purchase from an online company I haven't dealt with before, but can honestly say that SSO stands behind their product, and is great about product support too! A great big thank you to everyone at [MENTION=110183]SouthernSS[/MENTION] I really wish that everyone would do business like they do!

The SSO directions did seem a little vague at times, and of course I also elected not to follow them at other times. [MENTION=139970]greatape[/MENTION], Removal of the existing plastic bumper is not optional, but it is a little easier than the instructions make it to be. Mine popped right off the truck as soon as I got the both corners near the wheel wells free. Reinstalling was a little more complicated, but basically it was just line up about there it goes and push the tabs you can't see back into place until they click. That part actually wasn't that difficult using the headlights as a guide for reattachment. I did end up removing and reinstalling the bumper a couple times due errors in my fog light installation, it looks no worse for the wear.

Check for all of your tools before starting. I managed to leave my dremel tool at my apartment 90 minutes away from my sister's house where I was doing the install. (I had used it to polish the trigger on a friend's AR) I realized this the night before my install and managed to borrow my brother's Dremel Trio. Unfortunately it didn't have the proper shim for the 1/8" shank for the ripsaw blades. I ended up putting the bit into a regular drill and dealing with it instead of running to the store to buy another dremel or adapter. [MENTION=127037]NutZac[/MENTION] This made me more nervous about cutting the bumper, I certainly would have felt better if I had a proper dremel.
There were some things that helped with the nerves, make a few mental decisions prior to even putting the ripsaw blade into motion:
1- Plan a practice cut in the bumper, in the blank area behind what would be covered by the Silver Trail valance (sorry SR5 guys, not an option). That way if it wasn't controllable or really ugly I could always put the bumper cover back on and put it back together.
2- Cut small, cut inside of your marking, not on or outside of it. It's always easier to take more off than it is to try and put some back!
3- Only aim to cut about 2-3" at a time. This makes it easier instead of trying to worry about how straight that long cut will be.
4- Also consider that there will be some small errors which would be easily covered by the trim piece included in the kit.
5- I considered a glass of whiskey before cutting, but decided against it better to keep my fine motor control.

The hardest part of cutting was actually the vertical cut along the edge of the bumpout. I made the cut, then went back and cut again and again to free the center section. Then had to flip the bumper back to the front and clean up the ragged cut. I would suggest adding a razor blade or sharp knife to the tools needed in order to clean up the rough edges, melted plastic, and smooth out any cuts that don't come out straight the first time. Most of all, go slowly! It's easier to make multiple cuts than to have the saw go wild and end up with a gouge somewhere you didn't want one. I thought about sanding the edge a little smoother, but didn't waste the time since it was covered by the edge trim.

I removed the baffles for the A/C condenser, and had every intention of cutting the bottom of them off so that they would work with the bumper. Unfortunately by the time I had remembered that I'd already put away my cutting tool. So I left them off completely. They weren't very simple to get off, there's a plastic pop-rivet in the inside center of each one that I didn't see until I went hunting with a flashlight for how to get them off. They also have two tabs each that go towards the rear of the vehicle to hold them in place. Also be careful because those lines in front of the condenser bend out of place very easily, I could see them breaking if you're too rough getting the baffles out.

And here's where I took a turn away from the instructions. I had posted the question to SouthernSS about installing the steel bumper before re-installing the plastic bumper. They said that it is possible to do steel before plastic, but doing so increases the chances of scratching the factory paint. This is especially important if you ordered the bumper with a hoop. As I elected not to have the hoop, I thought I'd give it a try. It turned out to be much simpler to put the bumper in place and torque the bolts to spec without the plastic bumper in the way. I would certainly consider this route for any install, especially if you don't have the hoop to contend with. The reasons for doing this are mostly easier access to: The 4th (inside) bolt to the frame rails, side L-brackets and bolts. Honestly even with the hoop, as long as you keep the bumper upright and with the trim molding on, you shouldn't scratch the paint. This may be different if there's a winch in place though.
I had the shipping issue where the radiator bracket arms arrived slightly bent, but a big rubber mallet fixed that in a couple swings. I did discover that the bumper did not easily swing up and into place as described in the instructions if you put the radiator arm bolts into place first. I had to un-bolt them, remove the bumper. To install we had to slide the bumper almost into place, a little high, hang it on the small hooks on top of the flanges. Doing it this way also meant that the truck almost immediately took all of the weight of the bumper instead of having to wait to get a couple bolts in first. Then we just had to adjust the bumper a little here and there to line up the holes enough to start the bolts. I don't see that type of install going well with the factory bumper already back in place.

Where things got vague was the instruction for the included L-brackets. On each side of the bumper there are two threaded holes, the short sides of the L-shaped brackets bolt to those using the 3/8" flanged bolts (long side down). The long sides of the L-brackes should taper back and out towards the front wheels. The remaining 3/8" flanged bolts will bolt through the fender liner and factory plastic bumper holes into the threaded holes in the long side of the bracket. This requires that you remove the small plastic clip from the outside hole in order to have a hole big enough for the 3/8" bolt. It may take some fiddling to get them lined up, I had a heck of a time getting the outside bolts in (because the fender liner is a smaller hole), so I'd say start with these first. Honestly once you get to that point in the instructions you're pretty much done and it should be pretty simple to figure out, provided your alcohol consumption hasn't been too great!

Here's where I finally went back and mounted the cut factory bumper back on the truck finishing things out, leaving the fender corners undone. While the factory bumper was removed, my dad had unscrewed the factory fog light mounts and put on the Baja Designs kit. I hadn't tightened the mounting kit all the way to the light because I knew I had to aim them. This also required me to ops check the lights before putting everything back into place. My dad had wired the plug incorrectly for the one side, so we had to pull the adapter, re-wire it and put it back before aiming. I aimed them just below the headlights, and was surprised how easy this was to do. A little push at the top or bottom of the light to adjust while it was slightly lose, and the aiming point would change enough to see because I went with amber lights instead of standard white. I imagine you'd have to disconnect the headlights if you wanted to aim a set of white lights. Once aimed, just reached under with the allen wrench and tightened the mountings, then put the bumper all together. My dad joked about the seemingly massive heatsink on the back of the Squadron-R's but after having them on for a few minutes to adjust them those heatsinks were starting to get a little warm. The lights throw an impressive amount of light, easily dwarfing the stock fog lights, and easily visible even below the XenonDepot HID headlight conversion. The wide pattern is great for fogs. I now have to go do [MENTION=65614]Antman[/MENTION]'s Fog Light Isolation Mod. For what it's worth the plastic housing that was over the stock fog light on the passenger side had no hope of fitting with the BD kit.

I was relieved when the truck was all back together, and had to triple check that I hadn't forgotten something. With the removal of that much of the factory bumper, cross member, and air dam (above the skid plate), I ended up with quite a bit of leftover hardware and parts. Overall the installation was simpler than I had expected, but that's no reason to go rushing things. I could see doing it as a one man job, with the exception of putting the steel bumper on the truck (hey neighbor, want a beer?). Having a second person around to help did make things go quicker handling the wide plastic factory bumper, as well as accomplishing multiple tasks at once.

[MENTION=150371]Wavechaser[/MENTION] I had posted several options here in the original group buy thread. I considered several, but since I wasn't installing a winch or fairlead (yet) that left few options. I could have installed a fairlead and plate mounting bracket behind it, but couldn't make up my mind on which ones before the bumper arrived. So instead I went a simple route that would work without any special mounts.
2xK&J Magnetics Plastic Coated Countersunk Magnet
2x #10-32 3/4" Stainless Machine Screws
2x #12 Stainless Washers
2x #10-32 Nylon Lock Nuts
1x Piece of Black Felt
Machine screws go through the magnets, license plate, washers, and into nylon lock nuts. Then hot glue the felt to the back of the magnet over top of the bolt head. The magnets I don't know that I'd trust it to stay while going off-road but magnetic means it's easy to remove. For now it also covers the fairlead hole until I find the winch I want to throw on there. I ordered the plastic coated magnets and used stainless hardware because I'm in the Rust-Belt and it's winter time.
6963479818863be85c523c54f4edeb39.jpg

18299f147771bad8d30ab24a569b5d2a.jpg

16fd8a8871e5d909f4a39897fa231d6d.jpg

e7302ae83661b6c4a52c187b52e0105e.jpg

9140a66815b6eee93541f2a3ad974301.jpg


Nice write up! The T4R is looking great.
Let us know how you like the lights at night.

Thank You,
Bailey, Baja Designs
 
Great job and nice write up. You're one of the only guys I've seen without the hoop on the slimline. Looks great! Thanks for the inspiration!


Sent from my iPhone using Tapatalk
 
17 Jan 2017 55,135 mi
Today was the wrap up on a couple mods I needed to go back to and touch up or finish properly.
First up was to secure the spacers which are below the airbags but above the rear axle inside the springs. They kept shifting any time the truck was on a lift for service. So I put the rear frame up on jackstands, removed rear tires, and set to work. The air bags do not move, even empty I couldn't budge them to realign or shift them. But there was still a little space between the bag and spacer to work. First clean the spacer and top of axle, then dry it, then applied some LocTite outdoor double sided tape. I figured that should be good enough because all it's doing is holding the spacer in place, when the weight of the truck isn't on the bags.
2a8e3310d078075f81b720925597bae8.jpg


After that was done, spun the truck around and set to wiring up the Baja Designs OnX6 light bar in the bumper. When in for the 55k oil change, I had the dealership run the switch part of the harness through firewall and the rubber grommet which also has the main harness. Their 1/2 hour of labor was worth the time and frustration of trying to do it by myself.
I started to run the harness first, but decided that routing wires and using zip ties is easy, better to start with the switches. That ended up being a good call. The BD harness has 2 switches on it, one toggle for on/off and a momentary button for switching to medium or strobe modes.
I considered using AOB or other switches, but never got around to picking out some Iiked, they aren't exactly cheap either. I wanted to at least attempt to adapt the BD switches into a couple of the factory blanks. Ideally I would also put the momentary button and toggle next to each other as well. Toyota didn't make that simple. When you remove the lower dash, blanks, and switches, you can see each position is keyed as of sort with different notches cut out of the side to fit specific Toyota switches. I'm sure it's to keep things simple for the assembly line people, but for those who would like to relocate a couple switches it's a PITA!
e355bb5f17d93c04b3989caf8c01d75a.jpg

d373991e182f4451f09a3c3e9f3d0c71.jpg


After playing around with several different switches and positions, I discovered that the blank to the right of the panel dimmer switch was almost the right key for the inverter switch. A little work with a file to the hole in the dash and it fit just fine. That leaves me with 3 blanks to the right of the wiper warmer button. I started with the round momentary button, thinking just a big drill bit would work. And mostly it did, actually being pretty easy compared to the toggle switch.
44c072370429ddc5fdcc1ad541c1c3b5.jpg


The toggle switch was almost as big as the blank itself. Big enough that I basically had to cut the entire back of the blank of, just leaving the front to drill a hole through. Thankfully the switch is just big enough to hold the blank in place in the dash. There's also a nut that holds the faceplate to the switch. I think it will hold, as long as I don't go jumping the truck or hit too many of those man sized potholes that are cropping up now that the weather is destroying the roads. I didn't know that the toggle was illuminated when on, which is actually pretty cool. Here's the dash reassembled with everything on. Not as slick looking as some flush back-lit AOB switches, but works for me. I can always do other switches later if I have problems.
fb56e9553c7c8b49803911f1d30273b5.jpg


And of course pictures with the lights working! I promise other downrange shots in the dark for comparison.
acc3921500067768e81fe9de08fe8bb9.jpg

cd932f42765e1a58ddd99cc5f9cfb37f.jpg


Sent from my SM-G930V using Tapatalk
 
Last edited:
Can you enlighten me what the spacers are for? To protect the bags, or the air line?
Switches look clean!
Pretty sure the spacers are there to give support to the bags. Where they would sit on the axle inside of the spring would cause the bags to roll over the edge of the small platform there. Don't think it's the air line because I've heard people mount the bags with feeder line up, which pretty much means the line gets crushed by the remains of the rubber stopper on the frame. I didn't want to take the chance of breaking a hose, so I didn't mount them that way. There's even a drain hole in the piece of the axle that the spacers go on top of, works great for running the air hose through so it can't be crushed.

Sent from my SM-G930V using Tapatalk
 
Like a kid at Christmas, I had to go play with my new toy. It really needed to be dark to properly aim the light bar.... yea, we'll go with that excuse! Now these are crappy cell phone pics, but to give you some idea of how much the aperture had to change look at how the scattered light is shown in the bottom left corner

In order top to bottom: Low, High, Low+Fog, Low+High+Med Bar, Low+High+High Bar, Strobe video.
78e536d579e5e5ed9e3e9350ed09f8a9.jpg

7105ea69200efc1fdbcbea18986e20db.jpg

b7190a53849023b3567217b0b115566e.jpg

f713e36b1ad15f9b2c0fc123b691f94d.jpg

3ac95628a9666d576167d410f8cb2157.jpg


And of course.... "Don't go into the light....!"
f4544d5359fb0b7c9ec0c900caf17ca3.jpg


Sent from my SM-G930V using Tapatalk
 
Last edited:
17 Jan 2017 55,135 mi
Today was the wrap up on a couple mods I needed to go back to and touch up or finish properly.
First up was to secure the spacers which are below the airbags but above the rear axle inside the springs. They kept shifting any time the truck was on a lift for service. So I put the rear frame up on jackstands, removed rear tires, and set to work. The air bags do not move, even empty I couldn't budge them to realign or shift them. But there was still a little space between the bag and spacer to work. First clean the spacer and top of axle, then dry it, then applied some LocTite outdoor double sided tape. I figured that should be good enough because all it's doing is holding the spacer in place, when the weight of the truck isn't on the bags.
2a8e3310d078075f81b720925597bae8.jpg


After that was done, spun the truck around and set to wiring up the Baja Designs OnX6 light bar in the bumper. When in for the 55k oil change, I had the dealership run the switch part of the harness through firewall and the rubber grommet which also has the main harness. Their 1/2 hour of labor was worth the time and frustration of trying to do it by myself.
I started to run the harness first, but decided that routing wires and using zip ties is easy, better to start with the switches. That ended up being a good call. The BD harness has 2 switches on it, one toggle for on/off and a momentary button for switching to medium or strobe modes.
I considered using AOB or other switches, but never got around to picking out some Iiked, they aren't exactly cheap either. I wanted to at least attempt to adapt the BD switches into a couple of the factory blanks. Ideally I would also put the momentary button and toggle next to each other as well. Toyota didn't make that simple. When you remove the lower dash, blanks, and switches, you can see each position is keyed as of sort with different notches cut out of the side to fit specific Toyota switches. I'm sure it's to keep things simple for the assembly line people, but for those who would like to relocate a couple switches it's a PITA!
e355bb5f17d93c04b3989caf8c01d75a.jpg

d373991e182f4451f09a3c3e9f3d0c71.jpg


After playing around with several different switches and positions, I discovered that the blank to the right of the panel dimmer switch was almost the right key for the inverter switch. A little work with a file to the hole in the dash and it fit just fine. That leaves me with 3 blanks to the right of the wiper warmer button. I started with the round momentary button, thinking just a big drill bit would work. And mostly it did, actually being pretty easy compared to the toggle switch.
44c072370429ddc5fdcc1ad541c1c3b5.jpg


The toggle switch was almost as big as the blank itself. Big enough that I basically had to cut the entire back of the blank of, just leaving the front to drill a hole through. Thankfully the switch is just big enough to hold the blank in place in the dash. There's also a nut that holds the faceplate to the switch. I think it will hold, as long as I don't go jumping the truck or hit too many of those man sized potholes that are cropping up now that the weather is destroying the roads. I didn't know that the toggle was illuminated when on, which is actually pretty cool. Here's the dash reassembled with everything on. Not as slick looking as some flush back-lit AOB switches, but works for me. I can always do other switches later if I have problems.
fb56e9553c7c8b49803911f1d30273b5.jpg


And of course pictures with the lights working! I promise other downrange shots in the dark for comparison.
acc3921500067768e81fe9de08fe8bb9.jpg

cd932f42765e1a58ddd99cc5f9cfb37f.jpg


Sent from my SM-G930V using Tapatalk


Fine. Fine. Fine.... Since you have proven yourself. I will let you do the same thing to my truck.

For the glory of the Empire! Qapla!
 
front licence plate

nice write up , how did you mount your front license plate to the ss front bumper ?
( to the fairlead )
thanks shai
 
nice write up , how did you mount your front license plate to the ss front bumper ?
( to the fairlead )
thanks shai

I had posted several options here in the original group buy thread. I considered several, but since I wasn't installing a winch or fairlead (yet) that left few options. I could have installed a fairlead and plate mounting bracket behind it, but couldn't make up my mind on which ones before the bumper arrived. So instead I went a simple route that would work without any special mounts.
2x K&J Magnetics Plastic Coated Countersunk Magnet
2x #10-32 3/4" Stainless Machine Screws
2x #12 Stainless Washers
2x #10-32 Nylon Lock Nuts
1x Piece of Black Felt
Machine screws go through the magnets, license plate, washers, and into nylon lock nuts. Then hot glue the felt to the back of the magnet over top of the bolt head. The magnets are strong (20lbs of pull each), but I don't know that I'd trust it to stay while going off-road. Magnetic means it's easy to remove, or re-position though. For now it also covers the fairlead hole until I find the winch I want to throw on there. I ordered the plastic coated magnets and used stainless hardware because I'm in the Rust-Belt and it's winter time.
Turns out the magnets are more secure than I thought. I've bounced some hard potholes, had the truck up to 80mph with 30mph of headwind, and it still doesn't move an inch. I've not dared to run it through an automatic car wash, but it's easy enough to pull off beforehand. If I knew that I wasn't fording water, I'd say it's safe for offroad use too, it holds that well! I really like that I can also move it easily to the side or down when I get a winch and don't have to buy a fairlead mount type. Total spent was about $40 including $24 +S/H for the magnets.

EDIT 26Jun17: Well, I was right, these will not hold against fording water/mud. I forgot to remove the license plate, so a deep mud hole on the trail removed it for me. In fairness, I did hit the mud a little hard in hopes to carry more momentum. When I discovered it missing, I hoped that it only displaced it to something else metal under the truck, like the gas tank skid, but no such luck. Even with this in mind, I'm probably going to order another set of magnets and find the leftover hardware from the first install. Only cost me $15 for a replacement plate, and that's surely cheaper than the bent wheel, bent running board, and some damage others suffered with different lines through that mud hole!
 
Last edited:
4/10/17 58,370mi

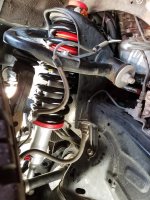
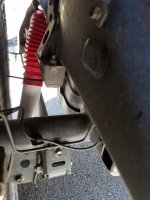
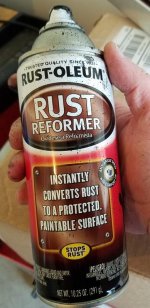
After giving the truck a good exterior wash yesterday, I finally got around to something that's been bothering me for a while. Here in the Rust Belt, any scrape or ding to the undersides quickly becomes a host for you guessed it... RUST! This is a bad thing, not only does it look unsightly, but it can cause problems. So I grabbed a can of Rustoleum at Home Depot at set to work. I'm very surprised how easily it blends in with matte black powdercoat.

I was having trouble with my BudBuilt sliders in the small areas between the tread and the tubing that were starting to look nasty. I specifically asked about this when I was getting them installed at Bud Built's shop in NC because I'd seen similar issues in this forum. Sadly even though I was reassured, it doesn't look like the issue was resolved. I think it's more that water will sit in this small channel instead of drain away from it. There were also some places on the frame, trailer hitch (very bad), and rock chips in the SSO Bumper. An hour with a spray can and I can see where I hit, but I wasn't being particularly careful about blending as much as I was trying to coat the hell of out the problem areas and keep from spraying the areas which were silver (truck color). Instead of taking time to tape everything off properly, I just cut a slot in a piece of paper and moved it frequently with every spray. Not the most scientific, or cleanest method, but simple.

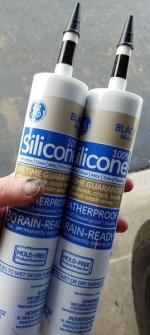
I also picked up some black silicone. The idea is to put a thick bead on top of the tubing but under the tread plate on the bottom side of the sliders. If I can get a nice smooth lay on the top, I'll use it there too. I'm hoping this will keep water from sitting in the sliders, and thereby reducing rust in the places the powdercoat couldn't be sprayed very well. I'll try to post this up when I get to it.

Aside from that, there's just been normal type adventures, commuting to work, and moving across town. At least I finally get to keep the truck in a garage overnight again. I hope to tackle the fog light isolation mod, rear facing LED floodlights, and maybe the horn this summer. I also need to having a little welding done to the boat trailer then sandblast, paint, and rewire it with LED's too.

20170410_174901.jpg20170410_180229.jpg
20170410_174907.jpg
20170410_181053.jpg
 

Attachments

  • 20170410_174901.jpg
    20170410_174901.jpg
    58.8 KB · Views: 2,881
  • 20170410_174907.jpg
    20170410_174907.jpg
    122.2 KB · Views: 2,944
  • 20170410_181053.jpg
    20170410_181053.jpg
    79 KB · Views: 2,869
  • 20170410_180229.jpg
    20170410_180229.jpg
    76.2 KB · Views: 2,898

Members online

Forum statistics

Threads
278,307
Messages
3,554,053
Members
248,016
Latest member
Advally Service

Trending content

Back
Top