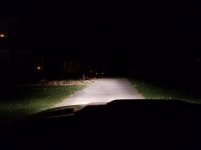
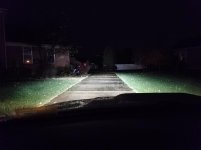
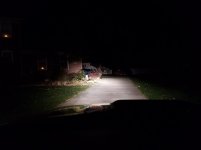
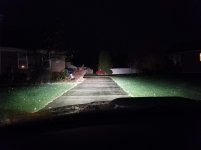
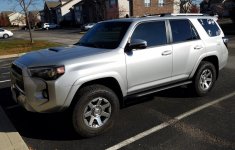
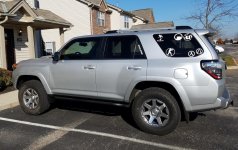
12/26/2016 54,292 mi
[MENTION=110183]Southern Style Offroad[/mention]
2014+ Slimline Bumper
[MENTION=87816]Baja Designs[/MENTION]
OnX6 20" Driving/Combo (#452003)
Toyota Fog Light Kit (#447110)
Squadron-R Sport Wide/Amber (#587815)
I finally got a day where I had help, space, tools, and even warm weather to install the SSO bumper I picked up out of the
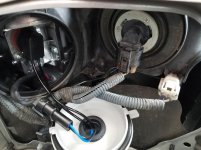
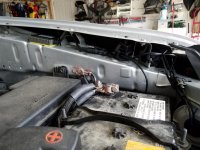
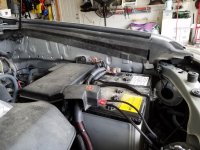
last group buy. I've wanted one of these bumpers for about a year, and while there's no pressing NEED for one, who in this forum really NEEDS half of what we put on our trucks. That said I'm very pleased with the look and fit of the bumper. I didn't have time to fiddle with running the harness through the firewall for the OnX6, so it's not connected yet.
I did get a jump start on the install, putting the light bar into the bumper a couple days before, along with a parts inventory. This meant I only had to bug someone for help for as long as it took to install the actual bumper. The OnX6 is a deep light bar, and I have some concerns about how close it may be to the winch when I get it. But I'll cross that bridge when I get to it. The guys at SSO were great at answering questions from pre-purchase through issues and install, even calling me Friday before Christmas after I had written an email late Thursday night. I'm always worried about how things will go when making a major purchase from an online company I haven't dealt with before, but can honestly say that SSO stands behind their product, and is great about product support too! A great big thank you to everyone at [MENTION=110183]SouthernSS[/MENTION] I really wish that everyone would do business like they do!
The SSO directions did seem a little vague at times, and of course I also elected not to follow them at other times. [MENTION=139970]greatape[/MENTION], Removal of the existing plastic bumper is not optional, but it is a little easier than the instructions make it to be. Mine popped right off the truck as soon as I got the both corners near the wheel wells free. Reinstalling was a little more complicated, but basically it was just line up about there it goes and push the tabs you can't see back into place until they click. That part actually wasn't that difficult using the headlights as a guide for reattachment. I did end up removing and reinstalling the bumper a couple times due errors in my fog light installation, it looks no worse for the wear.
Check for all of your tools before starting. I managed to leave my dremel tool at my apartment 90 minutes away from my sister's house where I was doing the install. (I had used it to polish the trigger on a friend's AR) I realized this the night before my install and managed to borrow my brother's Dremel Trio. Unfortunately it didn't have the proper shim for the 1/8" shank for the ripsaw blades. I ended up putting the bit into a regular drill and dealing with it instead of running to the store to buy another dremel or adapter. [MENTION=127037]NutZac[/MENTION] This made me more nervous about cutting the bumper, I certainly would have felt better if I had a proper dremel.
There were some things that helped with the nerves, make a few mental decisions prior to even putting the ripsaw blade into motion:
1- Plan a practice cut in the bumper, in the blank area behind what would be covered by the Silver Trail valance (sorry SR5 guys, not an option). That way if it wasn't controllable or really ugly I could always put the bumper cover back on and put it back together.
2- Cut small, cut inside of your marking, not on or outside of it. It's always easier to take more off than it is to try and put some back!
3- Only aim to cut about 2-3" at a time. This makes it easier instead of trying to worry about how straight that long cut will be.
4- Also consider that there will be some small errors which would be easily covered by the trim piece included in the kit.
5- I considered a glass of whiskey before cutting, but decided against it better to keep my fine motor control.
The hardest part of cutting was actually the vertical cut along the edge of the bumpout. I made the cut, then went back and cut again and again to free the center section. Then had to flip the bumper back to the front and clean up the ragged cut. I would suggest adding a razor blade or sharp knife to the tools needed in order to clean up the rough edges, melted plastic, and smooth out any cuts that don't come out straight the first time. Most of all, go slowly! It's easier to make multiple cuts than to have the saw go wild and end up with a gouge somewhere you didn't want one. I thought about sanding the edge a little smoother, but didn't waste the time since it was covered by the edge trim.
I removed the baffles for the A/C condenser, and had every intention of cutting the bottom of them off so that they would work with the bumper. Unfortunately by the time I had remembered that I'd already put away my cutting tool. So I left them off completely. They weren't very simple to get off, there's a plastic pop-rivet in the inside center of each one that I didn't see until I went hunting with a flashlight for how to get them off. They also have two tabs each that go towards the rear of the vehicle to hold them in place. Also be careful because those lines in front of the condenser bend out of place very easily, I could see them breaking if you're too rough getting the baffles out.
And here's where I took a turn away from the instructions. I had posted the question to SouthernSS about installing the steel bumper before re-installing the plastic bumper. They said that it is possible to do steel before plastic, but doing so increases the chances of scratching the factory paint. This is especially important if you ordered the bumper with a hoop. As I elected not to have the hoop, I thought I'd give it a try. It turned out to be much simpler to put the bumper in place and torque the bolts to spec without the plastic bumper in the way. I would certainly consider this route for any install, especially if you don't have the hoop to contend with. The reasons for doing this are mostly easier access to: The 4th (inside) bolt to the frame rails, side L-brackets and bolts. Honestly even with the hoop, as long as you keep the bumper upright and with the trim molding on, you shouldn't scratch the paint. This may be different if there's a winch in place though.
I had the shipping issue where the radiator bracket arms arrived slightly bent, but a big rubber mallet fixed that in a couple swings. I did discover that the bumper did not easily swing up and into place as described in the instructions if you put the radiator arm bolts into place first. I had to un-bolt them, remove the bumper. To install we had to slide the bumper almost into place, a little high, hang it on the small hooks on top of the flanges. Doing it this way also meant that the truck almost immediately took all of the weight of the bumper instead of having to wait to get a couple bolts in first. Then we just had to adjust the bumper a little here and there to line up the holes enough to start the bolts. I don't see that type of install going well with the factory bumper already back in place.
Where things got vague was the instruction for the included L-brackets. On each side of the bumper there are two threaded holes, the short sides of the L-shaped brackets bolt to those using the 3/8" flanged bolts (long side down). The long sides of the L-brackes should taper back and out towards the front wheels. The remaining 3/8" flanged bolts will bolt through the fender liner and factory plastic bumper holes into the threaded holes in the long side of the bracket. This requires that you remove the small plastic clip from the outside hole in order to have a hole big enough for the 3/8" bolt. It may take some fiddling to get them lined up, I had a heck of a time getting the outside bolts in (because the fender liner is a smaller hole), so I'd say start with these first. Honestly once you get to that point in the instructions you're pretty much done and it should be pretty simple to figure out, provided your alcohol consumption hasn't been too great!
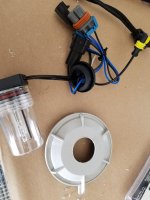
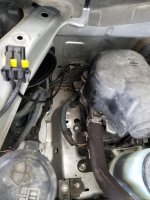
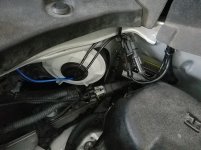
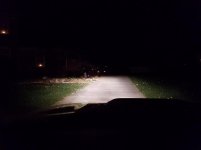
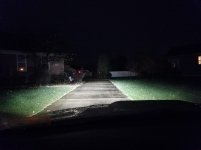
Here's where I finally went back and mounted the cut factory bumper back on the truck finishing things out, leaving the fender corners undone. While the factory bumper was removed, my dad had unscrewed the factory fog light mounts and put on the Baja Designs kit. I hadn't tightened the mounting kit all the way to the light because I knew I had to aim them. This also required me to ops check the lights before putting everything back into place. My dad had wired the plug incorrectly for the one side, so we had to pull the adapter, re-wire it and put it back before aiming. I aimed them just below the headlights, and was surprised how easy this was to do. A little push at the top or bottom of the light to adjust while it was slightly lose, and the aiming point would change enough to see because I went with amber lights instead of standard white. I imagine you'd have to disconnect the headlights if you wanted to aim a set of white lights. Once aimed, just reached under with the allen wrench and tightened the mountings, then put the bumper all together. My dad joked about the seemingly massive heatsink on the back of the Squadron-R's but after having them on for a few minutes to adjust them those heatsinks were starting to get a little warm. The lights throw an impressive amount of light, easily dwarfing the stock fog lights, and easily visible even below the XenonDepot HID headlight conversion. The wide pattern is great for fogs. I now have to go do [MENTION=65614]Antman[/MENTION]'s
Fog Light Isolation Mod. For what it's worth the plastic housing that was over the stock fog light on the passenger side had no hope of fitting with the BD kit.
I was relieved when the truck was all back together, and had to triple check that I hadn't forgotten something. With the removal of that much of the factory bumper, cross member, and air dam (above the skid plate), I ended up with quite a bit of leftover hardware and parts. Overall the installation was simpler than I had expected, but that's no reason to go rushing things. I could see doing it as a one man job, with the exception of putting the steel bumper on the truck (hey neighbor, want a beer?). Having a second person around to help did make things go quicker handling the wide plastic factory bumper, as well as accomplishing multiple tasks at once.
[MENTION=150371]Wavechaser[/MENTION] I had
posted several options here in the original group buy thread. I considered several, but since I wasn't installing a winch or fairlead (yet) that left few options. I could have installed a fairlead and plate mounting bracket behind it, but couldn't make up my mind on which ones before the bumper arrived. So instead I went a simple route that would work without any special mounts.
2x
K&J Magnetics Plastic Coated Countersunk Magnet
2x #10-32 3/4" Stainless Machine Screws
2x #12 Stainless Washers
2x #10-32 Nylon Lock Nuts
1x Piece of Black Felt
Machine screws go through the magnets, license plate, washers, and into nylon lock nuts. Then hot glue the felt to the back of the magnet over top of the bolt head. The magnets I don't know that I'd trust it to stay while going off-road but magnetic means it's easy to remove. For now it also covers the fairlead hole until I find the winch I want to throw on there. I ordered the plastic coated magnets and used stainless hardware because I'm in the Rust-Belt and it's winter time.