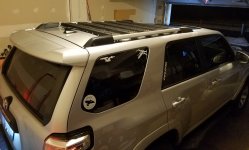
The Idiot Thread

28Apr17 58,912mi
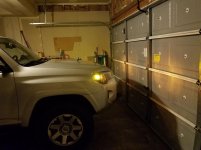
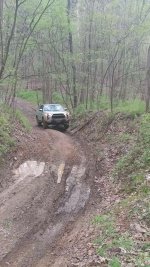
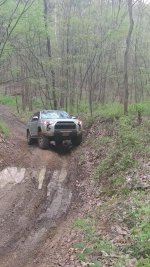
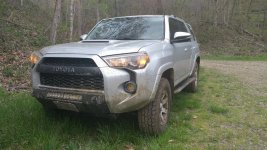
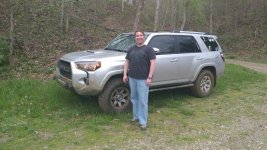
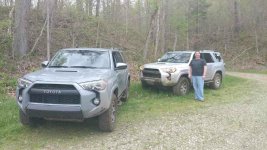
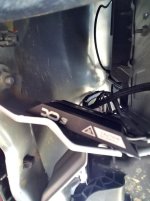
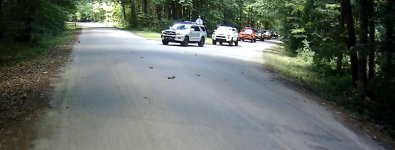
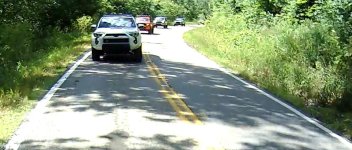
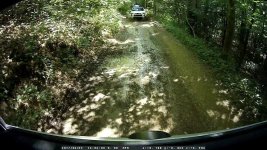
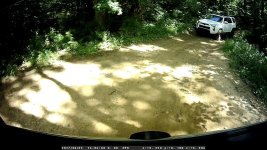
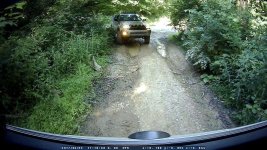
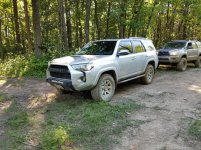
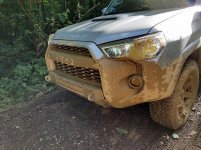
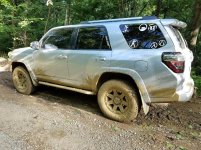
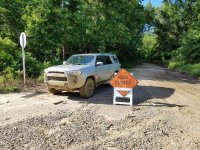
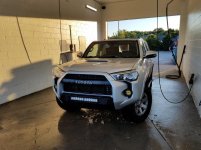
Made new friends [MENTION=168818]Ghost120[/MENTION], tried a new trail, got the truck dirty, and earned some pinstripes!

18121961_10211964958173810_1690074185485321961_o.jpg
18216472_10210124657926075_6660287910544577866_o.jpg
18121984_10211964958013806_1660922657497865918_o.jpg
18156387_10211964958973830_4016180229948497077_o.jpg
18208969_10211964959373840_3431125212640574973_o.jpg
18237745_10211964959773850_8415961427716669845_o.jpg


Attachments

  • 18121961_10211964958173810_1690074185485321961_o.jpg
    18121961_10211964958173810_1690074185485321961_o.jpg
    154.2 KB · Views: 2,951
  • 18121984_10211964958013806_1660922657497865918_o.jpg
    18121984_10211964958013806_1660922657497865918_o.jpg
    128.7 KB · Views: 5,228
  • 18156387_10211964958973830_4016180229948497077_o.jpg
    18156387_10211964958973830_4016180229948497077_o.jpg
    138.4 KB · Views: 2,924
  • 18208969_10211964959373840_3431125212640574973_o.jpg
    18208969_10211964959373840_3431125212640574973_o.jpg
    133.8 KB · Views: 2,893
  • 18237745_10211964959773850_8415961427716669845_o.jpg
    18237745_10211964959773850_8415961427716669845_o.jpg
    121.7 KB · Views: 2,908
  • 18216472_10210124657926075_6660287910544577866_o.jpg
    18216472_10210124657926075_6660287910544577866_o.jpg
    155 KB · Views: 5,765
Last edited:
5/21/17 59,608mi
Lots of little stuff this past week.

Coming up on 60k service and didn't want to run long on it since I've got some road trips coming up for the summer. For reference I keep my truck on the severe schedule because I tow, drive off road, drive trips <10mi in below freezing, and trips of length at temps >90F throughout the year.
Looking at the 60k service guideline there's a lot of things:
Oil & filter change, Engine & Cabin air filter change, Transmission Fluid change, 4x4 Transfer case fluid change, Front & Rear Differential fluid change, Rotate Tires, Replace Wiper Blades
I wasn't going to pay the dealer $800 for their 60k service package. Paid them $580 instead for all the fluid changes, and did the rest myself really more to save myself time and frustration than money. Thinking about differentials reminded me I haven't yet done the Rear Diff Breather mod yet, still on the list.

Tire rotation done for free by Discount Tire because I bought the tires there. Now almost 5k on the Cooper Disco AT3's, and wearing a little faster than the KO2's. The tech also informed my I have some light heel/toe and inside edge feathering on the front tires, supposedly common on rear wheel drive SUV's. So the next day I had the alignment checked, and aside from minor adjustments the toe was a little out. 13/32 of tread remaining and there is a little bit of harmonic/hum at 39-42mph. It's not at all enough to be bothersome, just enough to notice if you're listening for it with the radio off.

[MENTION=129513]bjohnston115[/MENTION] AC Evaporator Coil Cleaning
Long overdue from when I lived in Oklahoma, there was a bad smell at start of AC, especially with re-circulation mode on. I'd read a couple threads on what was causing it and how to clean it, but just never got around to doing it. So I finally cleaned the AC evaporator coil. A can of the exterior coil cleaner from Home Depot/Lowe's/Menard's was much cheaper than the Toyota or any auto kit for that matter.
Remove the kick panel immediately next to the throttle (gas pedal) - pull outwards toward driver door on edge of panel closest to driver seat, then once free pull towards driver's seat. Remove the blue plug, don't waste your time twisting, it pulls right out. Use some PVC (fish tank) tubing on the can and fill the area inside the plug with foam. I repeated until the can was gone, there were a few drips from the coil. The hardest part was finding a way to hold the PVC on while depressing the sprayer, and not getting the foam everywhere but inside the tubing. This stuff comes out fast, think like wasp spray or bear mace. But it was still much easier than crawling under the truck and working upside down with it dripping in your face. I parked the truck nose up on the incline of the driveway to try and help it work into the coil. A little bit of citrus cleaner smell for a couple days, and now nothing but a clean smell. Recirc comes on by default with the A/C on, even if you start the truck with it on, so I have to get in the habit of opening to the outside air. Thankfully I'm no longer driving past the dump and a sewage plant on the way to work!
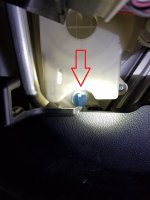
20170521_183533.jpg

The TRD Pro couple I went wheeling with a couple weeks ago sent me the link to the Diode Dynamics Switchback Parking Light/Turn Signal. After seeing it, I took up a quest to continue LED installs until all major incandescent lights have been eliminated. Although Diode Dynamics LED's are a little pricey so I researched some alternative options. Turns out that JDM ASTAR, DDM Tuning, and Putco (via Xenon Depot) have replacements.
I remembered [MENTION=103267]Saker[/MENTION] has had good things to say about DDM Tuning ( [MENTION=107788]Trail-AMMO[/MENTION] too), so I went back and read this thread about them and their products, along with some other scattered posts. Of course in going back and reading everything, I was convinced to order their Saber Pro LED 9005 kit for the high beams. I also ordered their Switchback LED's and a normal set of amber's for the front and rear turn signals. I did like that the hyper-flash preventing load resistors DDM sells come with connectors so no splicing or wire taps, though they don't work with the switchback's. I didn't like that they have a plastic casing either, rumors are that load resistors get kind of toasty, so I ordered the ones XenonDepot offers instead. I'm looking forward to these LED mods, pictures to come.
EDIT: DDM Tuning is off to a good start. As suggested I had submitted a help ticket requesting shipping from a US/CA depot instead of the Chinese drop-ship. Well I goofed on my order yesterday having added white LED's for the rear turn signals. So I went back to the help ticket, updated the importance to Critical, admitted my mistake, provided part numbers to remove and add (original selection not available in amber). Less than 8 hours later I had a reply with confirmation of US shipment origin and instructions to call them or paypal them the price difference. I quickly sent the paypal money and was sent an updated order invoice. I'm impressed so far and I don't even have the LED's yet.

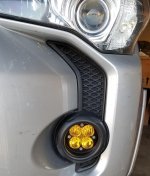
While I enjoy my Baja Design Squadron-R fog lights, they do well, but I was hoping for a little more visible distance with them. Maybe it's because the only places I've been able to use them in adverse conditions has been in the city where there's lots of diffused lights. I had ordered the amber-wide/cornering lens as they suggested. But since it's not expensive to change the lenses I ordered a set of the amber-driving/combo lenses to try. Assuming it's possible, I want to mount them inverted so the spot is on the bottom. I'll post results when I get them installed and some foul weather to test them in.

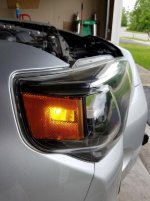
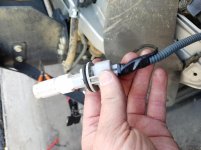
In doing research for the above Switchback LED's, I found out the side marker lights can be replaced with the same T10 type bulbs that fit most of the interior mountings. I had a few left over from a bulk pack I ordered, so why not replace them?
Remove radiator cover (always step 1), then slide the fender/hood fairing/seal towards windshield to remove. Buried at the top of the backside of the headlight inside the fender is the side marker bulb. I had to use a couple different pair of pliers to reach in and remove the connector, then turn the bulb mount to remove. Replace with LEDs', ops check for correct polarity (both wrong on first try), then disconnect, reinstall socket & connector, then fairings/covers. Maybe 20 minutes and you can actually see the things in broad daylight now. Thankfully these don't seem to flash with the turn signals, so no hyper-flash to worry about. The white bulb does seem to wash out the amber a bit, so if I were to do it again I'd order amber bulbs. But since white is what I had laying around I'll live with it that way.
20170521_144253.jpg
20170521_144118.jpg
20170521_150208.jpg

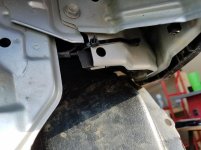
In cleaning up the truck from wheeling I noticed a seemingly large amount of mud inside the engine compartment. I figured some more would get in through the SSO bumper than the factory one, but enough to hit the radiator fan and get slung everywhere? I discovered I'm apparently missing one of the gap covers on both sides in the wheel-well between the frame and the fender. Well that opens up a fair sized area for mud to come off the wheels and into the engine compartment. Ordered replacement gap covers and retaining clips. I wanted to go the custom route, but don't have much time to fiddle with it between now and my first road trip to TN this summer.

Cleaned up the sliders a little, and finally got around to putting in that bead of black silicone to help keep water from sitting in the small channel between the tread plate and the tubing. It appears to help, although I didn't put much on the top side. The bottom has a fat bead everywhere I could get one since nobody really looks under there. The underside is more to keep the winter salt spray out. I may do another coat on the top side to help fill it in some more, then hit it with the aforementioned Rustoleom to kill off the gloss look the silicone seems to have. Gloss is a little hard to see here, but it is shinier when not in the garage.
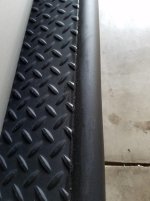
20170521_190321.jpg
 

Attachments

  • 20170521_183533.jpg
    20170521_183533.jpg
    136.4 KB · Views: 2,699
  • 20170521_144253.jpg
    20170521_144253.jpg
    99.7 KB · Views: 2,732
  • 20170521_144118.jpg
    20170521_144118.jpg
    63.9 KB · Views: 2,713
  • 20170521_150208.jpg
    20170521_150208.jpg
    51.2 KB · Views: 2,745
  • 20170521_190321.jpg
    20170521_190321.jpg
    50.8 KB · Views: 3,528
Last edited:
3Jun17 60,176mi

Today's updates did not go as well as planned, but there was progress. Step 1, remove radiator cover... always step 1.

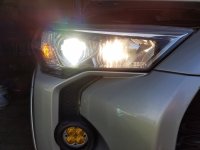
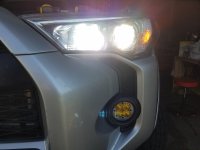
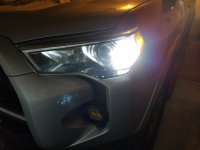
DDM Tuning Saber Pro 40w 9005 High Beam
Install was simple compared to everything else today. Installing and uninstalling the bulb to adjust the orientation to the required 9/3 o'clock that works best for the 4Runner wasn't exactly fun, but it wasn't difficult either. Holy crap these are bright, even in DRL mode. DRL has noticeable flicker.

Low beam: XenonDepot Xtreme HID w/Philips 4300k bulbs
1st pic: High beam PIAA Xtreme White Plus Halogen 4000k 9005
2nd pic: High beam DDM Saber Pro 40w LED 6000k 9005

20170603_160437.jpg
20170603_160443.jpg


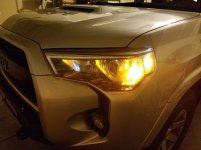
DDM Tuning Switchback Turn Signals w/ XenonDepot 11ohm 25w Resistors
Notes: Hazard lights do not use turn signal out warning circuit and will never hyperflash, even without resistors.
Truck must be in ON position for turn signal to work. Always check signal in both headlight off and on positions.

Instructional videos say to unscrew the fender liner, and push it aside mostly working blind behind the fender. This is fine for just replacing the bulb. But trying to do anything more is just an extreme PITA, especially if you hate those cheap wire taps and want to use a soldering iron for a secure off-road safe connection. Since I wanted to replace the lens on the fog lights as well, I decided it would just be easier to remove the plastic front bumper. Some may say that was a little extreme, but I'd rather work easier with more parts out of the way than to constantly fight past them. [MENTION=168818]Ghost120[/MENTION] arrived just after bumper removal, bearing a 6-pack, things are going well! My truck is the guinea pig for this mod that she wants. After liquid refreshments and a little chat, set about figuring out the wiring.

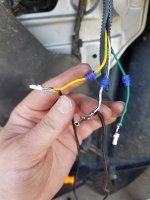
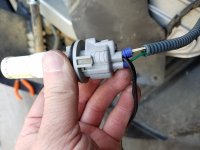
Removed the bulb from the housing, unplugged socket from harness, split the harness away from other wires, and set about disassembling the connector. The center white piece pops right off, then can use a pick above the pins to release them, and pull gently on the wires.

Used a multi-meter with hazards on to determine wiring:
Ground - White/Black (NOT GREEN)
Turn Signals: Front Left - Yellow, Front Right - Blue

Then I pinched the wires to the resistor into the appropriate wires, replaced wires in connector, ops checked - good. Disassembled back to wires with pins, soldered wires to resistor in place, reassembled connector, ops check good, wrap connector with silicone tape. Reinstall bulb into housing, ops check good. Repeat for other side. These switchback things are pretty cool looking, not money I had planned to spend, but another easy cool mod for the truck.
20170603_172650.jpg
20170603_174923.jpg
20170603_175127.jpg

Parking lights on (solid white), then turn signal (flashing amber)
20170603_234948.jpg
20170603_235039.jpg


And here's where things go downhill. I got replacement lenses for Baja Design fog lights. Except the faceplates are so tight from the factory neither of us can get the faces off to replace lenses. Low priority item, reinstall fog lights into bumper, replace bumper. Starting to lose daylight.

Opened rear hatch, removed access panels, unplugged connector, unbolted & removed taillights. Plugged connector back in with tail light in truck turned on hazards, used multi-meter to determine wiring at the harness that goes into taillight:
Ground - White/Black
Turn Signals: Rear Left - Yellow, Rear Right - Light Blue

Disconnected wiring harness, removed ground and signal pins, soldered resistor wires to pins, ops check - HYPERFLASH... well shit. Verified have correct wires in correct places on the harness, re-test - hyperflash. Unsolder wires from pins, solder wires to pins going into socket in taillight housing, reconnect, test - hyperflash. Connect other resistor to same side using wire taps, test - hyperflash (WTF?). Disconnect all resistors, test - hyperflash (duh), insert OEM bulb test good. Well no damage to system. TRD Pro friend leaves to put kid to bed. I'm baffled with the problem and continue variations of connections to harness and/or socket, using one, the other, or both resistors, and swapping bulbs, result is always the same - hyperflash. The resistors even ops check good using the multi-meter. Give up and revert back to OEM bulbs and reassemble tail lights without LED or resistors. I'm stuck on this one, emailed XenonDepot with process, but I'm leaving on road trip tomorrow and won't be able to continue to troubleshoot for a while.

At least the front end went well, and I got free beer! Tomorrow road trip to Tennessee for about a week, and hopefully some trail time.
 

Attachments

  • 20170603_160437.jpg
    20170603_160437.jpg
    120.2 KB · Views: 2,699
  • 20170603_160443.jpg
    20170603_160443.jpg
    111.1 KB · Views: 2,736
  • 20170603_172650.jpg
    20170603_172650.jpg
    122.1 KB · Views: 2,670
  • 20170603_174923.jpg
    20170603_174923.jpg
    122.1 KB · Views: 2,692
  • 20170603_175127.jpg
    20170603_175127.jpg
    53.9 KB · Views: 2,687
  • 20170603_234948.jpg
    20170603_234948.jpg
    122 KB · Views: 2,697
  • 20170603_235039.jpg
    20170603_235039.jpg
    50 KB · Views: 2,604
Last edited:
So I just got back from TN last night, and while there was no trail running, I did get a chance to play with my new lights in a rather dark deserted place. Here's a dashcam video where you can see all 3 lights progressively.
Low Beam: XenonDepot HID Conversion w/Philips Bulbs, 4300k 3200 lumen
High Beam: DDM Tuning Saber Pro 40w LED, 6000k 3500 lumen
Light Bar: Baja Designs 20" OnX6 Combo/Driving 5000k 14,700 lumen

 
Last edited:
I've got to say, love the build!! Great looking T4R. Keep up the awesome progress, you're giving some nice inspiration to my first build.:keyboard:
 
24Jun17 61,417 mi

LED Turn Signals Finale
After being befuddled by my last attempt at LED turn signals, I spent several days doing research online. I contacted DDM tech support, and called XenonDepot tech support several times. I even succumbed to calling for help from an electrical engineer... who's an ex-girlfriend... ummm yea.... less than helpful. Thanks a bunch to Robert at [MENTION=12905]XenonDepot[/MENTION] , he couldn't tell me specifically which resistors I needed for the truck, but was very interested in doing right by customer service.

Recap
So the problem isn't putting in the LED's, that part is troublesome but not difficult. The problem is simulating the removed incandescent bulbs because the LED's don't have the same resistance or load.

Front bulbs are replaced easiest by unscrewing the front half of the wheel well liner, and going in that way. Not the easiest for soldering a connection though.
Rear bulbs can be replaced by removing the access panel at the rear, although I had a difficult time due to the short pigtail and length of the LED tower over the incandescent bulb, so I removed the taillight housing from the truck to replace the bulb. Just 2x 10mm nuts with a deep well socket, much easier.

My original plan (see previous post) was to use the biggest resistor I could find, and install only one on each side. So I ordered 2 pair of 11ohm resistors from XenonDepot. Well as stated above this worked fine, if you only swapped out the front or rear turn signals to LED's, but not both front and rear. Even with a resistor installed in each corner I still had the hyperflashing problem.

Testing & Research

And so I launched into the scientific method we all learned in high school and never expected to use.
Incandescent bulbs: Front ~3 ohms - 1.85 amps, Rear ~2 ohms - 1.85 amps
Resistor specs: 11 ohm - 1 amp, 6 ohm - 2.5 amp, 3 ohm - 4 amp

Well removing 5 ohms and adding 11 (or 22) ohms shouldn't cause the hyperflash, so the bulb out relay doesn't use resistance of the circuit. Next guess amperage. So I read multiple threads, including this fix. Not knowing which would work, and not wanting to wait for parts to arrive to troubleshoot twice, I ordered a set each of 3 ohm and 6 ohm resistors. Again I stayed with XenonDepot because the housings are large and metal (good for heatsinks), and Robert made me a fair price since I couldn't return the ones I had already soldered into the truck.

With the 11 ohm resistors still soldered in the front, I start troubleshooting at the rear just holding the connections in place. Holding either the 6 ohm or 3 ohm in to the circuit with LED installed prevented the hyperflash, which started again as soon as they were removed. Tested both at the rear bulb socket, as well as the harness which plugs into the taillight, hyperflash eliminated connected in either place.

Install
I was going to just solder the 6 ohm into the rear, and then decided against it for several reasons: few mounting options in rear body, minimal airflow those locations, rear pins are small and difficult to work with. Well that meant mounting in the front, plenty of options, lots of airflow, and bigger wires to work with, the only catch is having to remove the bumper again. Well nothing else better to do today, and I've already done it a couple times, so why not again?

Removed radiator cover, inner fender cover, upper bumper, lower bumper, and splash guards behind the headlights. Removed front LED's, removed previous silicone tape, disassembled the connector, desoldered and removed the 11 ohm resistors from the circuit. Touch connection tested 6 ohm and 3 ohm resistors: 6 ohm hyperflash, 3 ohm normal ops. Doing the math, that makes sense.

OEM configuration is 1.85A x 2 = 3.7A per side
11 ohm (1A) and 6 ohm (2.5A) for total 3.5A is close enough for the circuit. Which is why the 6 ohm (2.5A) is not enough by itself. When the front turn signal burns out there's a second filament which has a draw of 0.45A (+1.85A Rear = 2.3A). So with only 2.5A (6ohm) the circuit assumes a bulb is still out hence the hyperflash.
So in order to use only one resistor in the circuit, it has to be the 3 ohm (4A).

So just like I did with the previous install I soldered the wires of the resistor (this time the 3 ohm/4 amp) to the signal & ground pins of the front head light harness. Ops good. Reassemble connector, wrap with new silicone tape - ops good. Reinstall in housing - ops good. Now I have only one resistor, wired into the front signal, and LED's in both front and rear on driver's side working appropriately.
Repeat on the other side, but almost forgot to install the rear LED before testing everything. Ops good on every step, just like the driver's side. Yeehaw working LED turn signals! :frog:
I know I'm supposed to use self tapping screws to mount the resistors, but somehow I still forgot to get any. So I just zip-tied them in place, in the void between the wheel well liner and the inner fender body. Finally the task of reinstalling everything else I removed, that took about as long as wiring in the passenger side. Man I can't imagine trying to do this more than once with the factory bumper, but it is simpler with the SSO Slimline, less bolts on the bottom to remove.

20170624_192340.jpg
20170624_192516.jpg
 

Attachments

  • 20170624_192340.jpg
    20170624_192340.jpg
    60.4 KB · Views: 3,373
  • 20170624_192516.jpg
    20170624_192516.jpg
    51.6 KB · Views: 3,309
Last edited:
[MENTION=122201]Friggin Idiot[/MENTION] - This is great info! In most cases, the XD 11 Ohm resistors will do the job all around but there have been cases where the 3 and 6 Ohm have been needed and this demonstrates that perfectly.

Danny
 
25Jun17

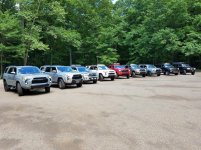
Ohio 4Runner Meet & Wheel
Bat Nest Rd & a power line access trail


1.jpg
2.jpg
4.jpg
5.jpg
6.jpg
7.jpg
8.jpg
9.jpg


Attachments

  • 1.jpg
    1.jpg
    86.9 KB · Views: 3,115
  • 2.jpg
    2.jpg
    131.7 KB · Views: 3,118
  • 4.jpg
    4.jpg
    104.4 KB · Views: 3,119
  • 5.jpg
    5.jpg
    81.6 KB · Views: 3,100
  • 6.jpg
    6.jpg
    114.7 KB · Views: 3,077
  • 7.jpg
    7.jpg
    63.1 KB · Views: 3,093
  • 8.jpg
    8.jpg
    102.9 KB · Views: 3,068
  • 9.jpg
    9.jpg
    60.7 KB · Views: 3,067
25Jun17
Ohio 4Runners Meet & Wheel
More pictures and short videos

Bat Nest Rd Mudhole


Powerline Access Trail Mudhole


Everybody after the picnic, before the trails
upload1.jpg

After the first run on powerline access trail
upload2.jpg

After the second run, wait something is missing....
upload3.jpg
upload4.jpg

Pavement begins
upload5.jpg

An hour's worth of quarters later.....
upload6.jpg
 

Attachments

  • upload1.jpg
    upload1.jpg
    125.4 KB · Views: 3,186
  • upload2.jpg
    upload2.jpg
    135.3 KB · Views: 3,059
  • upload3.jpg
    upload3.jpg
    99 KB · Views: 3,168
  • upload4.jpg
    upload4.jpg
    135.5 KB · Views: 3,164
  • upload5.jpg
    upload5.jpg
    135.6 KB · Views: 3,057
  • upload6.jpg
    upload6.jpg
    74.3 KB · Views: 3,167
Last edited:
8Nov17 66,986 mi

I've not been doing much aside from working lots of overtime, so the truck has only been getting regularly scheduled maintenance. Today I finally got a sunny day where I could unpack a couple small boxes of parts and set to work on some lingering pitfalls.

[MENTION=110183]Southern Style Offroad[/mention]
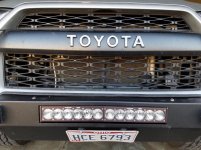
In my install of my SSO bumper I removed the baffles for the A/C condenser since I had forgotten to cut them to fit with the bumper. In my excitement about the bumper and fatigue from doing the install I left them somewhere.... somewhere they got tossed into the recycling. Since doing so I've noticed a couple things:
A) This summer my A/C didn't seem as cool as it had been
B) I'm getting progressively more tire rub while reversing with more than 3/4 of a turn of the wheel
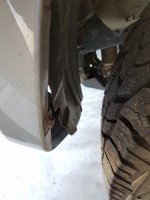
Near as I can surmise the airflow is taking the path of least resistance around the A/C condenser instead of through and cooling it. That means flowing into the void in front of the wheel wells. Now the passenger side liner is vented for the air intake, but the driver's side is not. Obviously the airflow is looking for an escape which means pushing the wheel well liner into the wheel well, to the point where it has torn away the plastic which holds it in place. So I ordered a new set of baffles, but I might have to do a wheel well liner too.

well.jpg
front.jpg

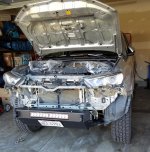
I started with the driver's side baffle, repeatedly playing some demented version of Tetris with the piece trying to get it somewhat in place so I could see how much I had to cut. After several tries and some small cuts, I gave up and set about removing that center bumper which was causing me so much headache. Turns out you have to loosen the headlight assemblies to do that. At this point I'm more frustrated by the Tetris than anything else, so I loosen them with hopes they won't be far off when I get it all back together. Things went quickly after that, even more so when I realized I also had to cut the bottom of the baffle to fit around the bumper mount. Once I got the driver's side installed, the passenger side only took me two cuts to get a correct fit. I just used the same ripsaw blade I had used during the original SSO install, except actually had my Dremel back this time making a nice difference.

cut.jpg
baffles.jpg


[MENTION=87816]Baja Designs[/MENTION]
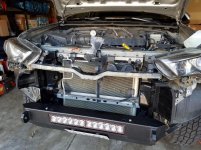
While I had the front bumper off, I figured it would be a good chance to change to the updated faceplate on the BD Squadron-R fog lights and fill the gap. I also have a set of driving/combo lenses that I was going to put on as well since the wide/cornering doesn't quite have the distance I would like in the dense fog/clouds of the TN mountains in the rain.

Remember I tried this a while back and had issues removing the screws from the faceplate. Sadly the faceplate screws are still stuck solid, I managed to get only a single screw loose on each fog light (there are 4 each light). Not replacing faceplates like that, and I started to wonder about just how "user servicable" these really are or if I just got "lucky" like usual. I was afraid of stripping the hex heads and then really be in a pickle. So I called BD for help, they said if I shipped the pieces to them they'd make the change for me.
Shipping to CA is cheaper than hours of frustration with me trying to drill out stripped screws and then wait to special order a suitable replacements. The catch is having to drive around without any fog lights installed for a while.

Since I wasn't reinstalling the fog lights, it was time to reassemble. I cleaned up a few places of mud, hit some rust spots with rust converter, and set about putting it all back together. I couldn't believe just how much of these baffles is visible and deflecting air from the front grill opening. I hope it's the fix for my issues.
EDIT: The tire rub is gone! The wheel well liners seem to be holding well enough in place without the additional airflow even in their damaged condition. I can turn to full lock either side in reverse and have no rub.

finished.jpg

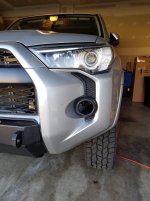
It looks kind of funny without fog lights, but not horrible. At least I don't have to remove the entire bumper to reinstall them once they return. I'll update on how this progresses as I hope to have them reinstalled before going to the TN mountains later this month.
I also removed some of the decals from the rear windows, it was looking kinda cluttered. Cleaned all the windows inside and out too, and hit the outside with a coat of Rain-X before winter starts going.

fog.jpg
 

Attachments

  • front.jpg
    front.jpg
    134.2 KB · Views: 3,788
  • baffles.jpg
    baffles.jpg
    138.6 KB · Views: 2,972
  • cut.jpg
    cut.jpg
    133.5 KB · Views: 3,020
  • fog.jpg
    fog.jpg
    66.1 KB · Views: 3,039
  • well.jpg
    well.jpg
    135.9 KB · Views: 3,008
  • finished.jpg
    finished.jpg
    138.3 KB · Views: 3,027
Last edited:
SSO bumper install

I'm installing my SSO front bumper and your post has been very helpful, but I have one question. How did you install the LED light bar on the inside of the bumper?
I got the generic LEB bar with the cut out and I can't seem to figure out how it should be mounted in there.
Any hints would be great.

Thanks,

KENG
 
Just returned from my Tennessee Thanksgiving and thought I'd share some results. Comparable weather, tire inflation, vehicle load distribution, etcetera.

Average mpg 87 octane 10% ethanol
16.5 combined prior to trip
17.4 highway on trip, 310.8mi between gas stations, 17.8 gallons added

Average mpg 90 octane ethanol free
19.6 highway on trip, 350.6mi between stations, 17.8 gallons added

I've said it before and I'll say it again!
mr-mackey-ethanol-is-bad-mmmkay.jpg
 

Attachments

  • mr-mackey-ethanol-is-bad-mmmkay.jpg
    mr-mackey-ethanol-is-bad-mmmkay.jpg
    25.5 KB · Views: 7,383
Last edited:
29 Nov 2017 68,340mi
I spent the last week down in the mountains of Tennessee with family. Sadly I didn't get to do any wheeling, although I did see a ton of other 4Runners. There were several trips to Boone, and I swear there are almost as many 4Runners are there are Subaru Outbacks! We did stop into the Toyota dealership there and turn some heads, but was just getting a replacement tire for my sister-in-law's Sienna.

[off-topic] BTW, WTF Toyota? The 50 mile range of the run-flat is worthless when it goes flat up in the mountains, after business hours on the weekend, in the dark, 15 miles from your destination which is 42 miles from the nearest shop with a suitable replacement. I'm very sure that 50 mile range is after the tire is considered deflated, not after reaching destination and having the weight of the vehicle crush the structure of the tire overnight before you can even call to find a replacement then trying to drive there. Not having even a piddly little donut spare is a bad idea in rural parts of the country. The included air pump was also laughable. [/rant]
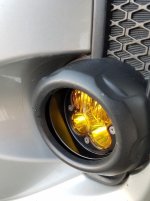
My neighbor came by today and gave me the package with the Baja Designs fog lights returned from the factory. Looks like they were able to remove the original screws which were stuck and install the new lenses and 4Runner faceplates. Unfortunately they installed them incorrectly for the vehicle with the hood at the top of the light instead of the side closest to the center of the vehicle. Thankfully the replacement screws were not as tight and I was able to remove the them, install the lenses as desired (spot on bottom), and reinstall the faceplates properly. Just to be sure I could get them off again if required I lubed the screws before reinstalling them.

I wanted to install the fog lights in the truck without removing the entire front bumper. That means going in from underneath the factory plastic bumper or in through the wheel well. Giving one look of how difficult it would be to work from a creeper under the truck with limited vision, I elected the latter. The creeper option wasn't really one for the passenger side without removing some of the bolts holding the wheel well liner anyway. In the end I freed the corners of the bumper as well, but it was still quicker than removing the entire thing. Unfortunately my forearms now look like I've tried to drown a wild housecat or something like that.

Even with the newly designed faceplates there's still a gap. I saw the idea of using the original flat faceplate as a spacer beneath the newer one and just getting longer screws. While this might fill the gap, it would effectively prevent one from aiming the fog lights properly. I actually couldn't aim mine quite as low as I would have liked because of the new cutout on the faceplate. Where they ended up was good enough though, still aimed below the headlights. Honestly it does look a little better, but for the money and the work that's involved in changing the faceplate, I really could have left them with the brushed aluminum look. Let's just hope I actually like the driving/combo lens better so I don't have to tear it all apart to change the lens back!

20171129_161713.jpg
20171129_161702.jpg


I'm installing my SSO front bumper and your post has been very helpful, but I have one question. How did you install the LED light bar on the inside of the bumper?
I got the generic LEB bar with the cut out and I can't seem to figure out how it should be mounted in there. Any hints would be great.

PM Sent/received. Glad you got it worked out. For others:
When I talked with SSO last year, they stated that most cutouts they weld the brackets in place inside the bumper. I don't know if this is still the case. If it is, all you should have to do is to slide the bar into the brackets already in the bumper.
If there are no brackets welded in, check the packaging for them. My brackets were not welded in place and I had to install them using holes in the top of the bumper. Mine was a custom cutout, though so could be different. Also feel free to call SSO for help. They were great supporting me through my questions (some technical issues, some RTFM idiot things). I would absolutely do business with them again! Still loving my bumper and get comments about it all the time!
 

Attachments

  • 20171129_161702.jpg
    20171129_161702.jpg
    70.4 KB · Views: 4,157
  • 20171129_161713.jpg
    20171129_161713.jpg
    53.8 KB · Views: 4,181
6Dec2017 68,483mi
Santa's Helper: [MENTION=168818]Ghost120[/MENTION]

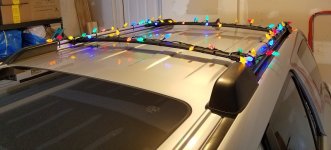
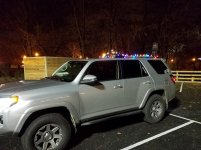
I've run LED Christmas lights on the roof rack every year since I bought the truck. Just attached with a bunch of zip ties and clip them when the season is over. Last year I discovered that my method of running an extension cord through the rear liftgate seal was letting water into the truck to be collected by my cargo liner. Obviously not a good thing, water and electricity don't mix well, thankfully I didn't short out anything or electrocute myself. I wasn't going to put lights on this year, until I tried to figure how [MENTION=65614]Antman[/MENTION] would do it and got an idea. Skip the whole extension cord through the hatch and use one with waterproof connectors run through the frame.

Since things are cheaper in packs, I ended up with 10 each male and female waterproof connectors as well as 10 replacement plugs. I guess I'll finally get around to fixing some extension cords as well. I was going to use lamp cord from a local store until I could only find 18ga. While no LED Christmas light set would require even that, I wasn't going to be satisfied with it. I bought a 16ga extension cord to destroy. Just before I started, I found a spool 16ga CL-2 heavy duty speaker wire laying around, double insulated. A little online research and found out the insulation is good for up to 150 volts, sounds a lot easier than destroying a perfectly good extension cord, speaker wire it is!

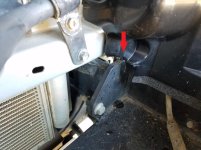
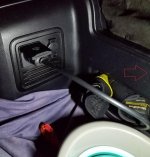
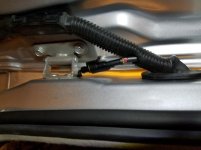
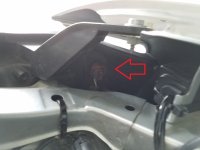
I removed the large rubber grommet from above the rear hatch being careful not to break the retaining clips. It has a clip on every side, but once you free the left, right, and front clips the one you can't reach will come as well. Then I removed the screw holding the rear camera in place, as well as the 2 plastic rivets holding up the headliner. A little tugging popped the passenger side upper trim panel free, and then freed access to the taillight assembly. Running the wire was easier than I thought, though still time consuming. I started at between the rubber grommet and the body, worked it above the headliner over to the passenger side upper trim panel. From there it went down behind the taillight. I don't have the JBL system, so I drilled a hole for the cable to come out behind the crossbar (red arrow in picture) and fed the cable out. Strip back some wire, and add a polarized plug, half of the extension cord is done.

inverter side.jpg

I went back and cut a small hole in the rubber wrap well above the grommet to prevent any leaks, worked the wire through, and added the male side of waterproof connector. I promptly ripped the connector off the wire trying to ensure it was secure. Fussed with the tiny pins which were now stuck in the connector for 5 minutes before swearing and pulling another connector and pin set from the bag. Good thing I got extras.

Time for the lights. Clipped the standard 110v plug off the lights and wired on the waterproof connector. Pulled gently on this one and it stayed fine. Clipped the female 110v plug off the end, removed the unneeded wire from the later half of the string, and waterproofed the exposed ends with some silicone tape and heat shrink. Put the waterproof connectors together, plugged the truck side into a real extension cord (no sense in blowing a truck fuse if I have a GFI right there on the wall). No lights, disappointment, lump of coal feeling.

waterproof connector.jpg

Went back over my connectors and wiring. The pins in the male waterproof connector weren't fully seated and not making contact with the female side. Also there were a couple nicks in the insulation where someone wasn't careful stripping off the outer layer inside the 110v plug I'd added. Clipped and re-wired the 110v plug. Tried to adjust the male waterproof connector and managed to rip the wires out of it again. Swearing ensued. Didn't even try to free those tiny pins and just grabbed a new connector, pins, and the soldering iron this time. I knew I should have started by soldering the pins onto the wires, but clamping them in place had felt pretty secure. Apparently that wasn't the case, but they're surely secure now! That done, ops checked good! Finally getting a good feeling, working Christmas lights are soothing and happy.

Arranged the lights on the roof, zip tied to the rails, and managed to pull the female connector off. Well at least they did work. Soldered replacement pins in place, installed new connector, readjusted weatherproof seal, and reconnected. They work again. Finish zip ties and cleanup.

roof.jpg

I'm pretty happy with how the whole thing came out. The waterproof connector mounting almost looks factory. The 110v plug can stow easily in the cubby when not in use. And I have a dedicated set of lights for the truck, operated by a switch on the dashboard!

tada.jpg
 

Attachments

  • roof.jpg
    roof.jpg
    107.9 KB · Views: 2,518
  • inverter side.jpg
    inverter side.jpg
    66 KB · Views: 2,623
  • waterproof connector.jpg
    waterproof connector.jpg
    47.7 KB · Views: 2,624
  • tada.jpg
    tada.jpg
    73.6 KB · Views: 7,961
Last edited:
Like a kid at Christmas, I had to go play with my new toy. It really needed to be dark to properly aim the light bar.... yea, we'll go with that excuse! Now these are crappy cell phone pics, but to give you some idea of how much the aperture had to change look at how the scattered light is shown in the bottom left corner

In order top to bottom: Low, High, Low+Fog, Low+High+Med Bar, Low+High+High Bar, Strobe video.
78e536d579e5e5ed9e3e9350ed09f8a9.jpg

7105ea69200efc1fdbcbea18986e20db.jpg

b7190a53849023b3567217b0b115566e.jpg


Sent from my SM-G930V using Tapatalk


This post with the hid low + BD squadron sport night shot was extremely helpful. Looks like the XD HID kit and the BD squadron sports complement each other very well, without one overpowering another. Im installing the squadron sports today and ordering the hid kit soon.
 
Last edited:
29 Nov 2017 68,340mi


My neighbor came by today and gave me the package with the Baja Designs fog lights returned from the factory. Looks like they were able to remove the original screws which were stuck and install the new lenses and 4Runner faceplates. Unfortunately they installed them incorrectly for the vehicle with the hood at the top of the light instead of the side closest to the center of the vehicle. Thankfully the replacement screws were not as tight and I was able to remove the them, install the lenses as desired (spot on bottom), and reinstall the faceplates properly.

View attachment 276505
View attachment 276504

Don't take this the wrong way, but your lights may be the wrong way.
From the pictures that I've seen of the baja combo lights, the wide angle/corner lights are on the bottom and the spot beams are on the top. I don't know if that makes a difference in terms of the lighting, I just thought that first sentence was really catchy and wanted to use it.
 
Don't take this the wrong way, but your lights may be the wrong way.
From the pictures that I've seen of the baja combo lights, the wide angle/corner lights are on the bottom and the spot beams are on the top. I don't know if that makes a difference in terms of the lighting, I just thought that first sentence was really catchy and wanted to use it.

Actually I intentionally put them this way, the idea being that I'll still have the hard cutoff of the wide lenses so as not to blind other drivers with the benefit of the longer range of the spot closer to the road where it can project more. In theory seems sound. I'm still playing with aim on it to decide if I like it or if I'm going to put them closer to the way BD intended.
 
I installed XenonDepots Xtreme LEDs with your knowledge and their 3-ohm resistors. They work like a charm. Thanks very much for such meticulous work!
 
10Feb18 70310mi
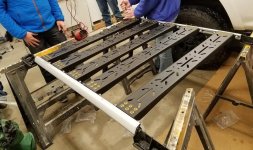
[MENTION=139789]RagoFabrication[/MENTION] 5th Gen 4Runner Modular Factory Rail Support System
Thanks to help from: [MENTION=135421]Ohio_Steve[/MENTION], [MENTION=166962]4RN4FUN[/MENTION], [MENTION=154178]OhioJeff[/MENTION], [MENTION=149963]JMFP![/MENTION], [MENTION=120994]SalsaRed[/MENTION], and a couple others

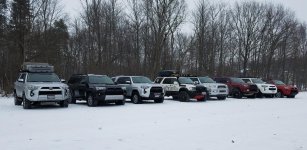
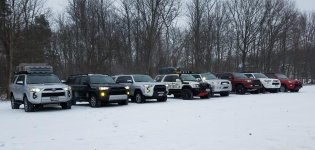
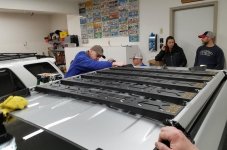
I drove up to 4RN4FUN's place and started helping with his Gobi Stealth install. After a taco party (real tacos, not Tacomas), and some fun in the snow for a photo op, we pulled my truck into his garage. Part of the crew helped finish his Gobi & ladder, while we started on the RagoFab crossbeams for my truck.

group off.jpg
group on.jpg


The install actually went pretty easily. I had watched the install video a couple times, so I had a good idea of what to do. [MENTION=139789]RagoFabrication[/MENTION], we actually found it simpler to install the Rago crossbars into the OEM side rails by installing the brackets to the crossbars, then sliding them into the OEM side rails. We tried a couple with the brackets already in the side rails and then getting the crossbars in became troublesome. I could see doing as in the video if you're doing all of one side and then the other, but it really was simpler to just slide the crossbars into the rails with the brackets attached and finger tight (just getting into the nylon). Actually the most difficult part was keeping the sockets on the nuts to tighten the brackets to the crossbars, they aren't very deep so there wasn't much for the socket to grip to. I managed a dent in the roof when a socket let go and went flying out of my hand, thankfully not smashing in my sunroof. The truck got another character mark and small story proving my screen name is still applicable.

rack sawhorse.jpg
rack roof.jpg

I was a little worried about increased wind noise, but even with the radio and heater/fan off at 80mph I couldn't hear anything more than the road noise and engine. I'll check it with windows down once it is warmer and not dropping freezing rain! Very happy an impressed with the rails. There was very little flex even with my large frame kneeling on them, and weren't close enough to touch the roof. From ground level you can't tell there's a serious mounting system up there, but from above it's impressive and low profile. I didn't realize the Toyota crossbeams only had plastic ends, which explains their weight restriction. I would have no qualms putting some serious weight up on the Rago crossbars.

complete.jpg
 

Attachments

  • group off.jpg
    group off.jpg
    132.9 KB · Views: 2,402
  • group on.jpg
    group on.jpg
    133.6 KB · Views: 2,394
  • rack sawhorse.jpg
    rack sawhorse.jpg
    80.4 KB · Views: 2,336
  • rack roof.jpg
    rack roof.jpg
    63.4 KB · Views: 8,126
  • complete.jpg
    complete.jpg
    131.7 KB · Views: 10,814
Last edited:
This has got to be the smartest idiot thread i've ever seen. If you had to pick one mod as your favorite, what would it be?
 

Members online

Forum statistics

Threads
278,307
Messages
3,554,053
Members
248,016
Latest member
Advally Service

Trending content

Back
Top