The Tank ~ My Build

Plastidip Emblems Gunmetal Grey

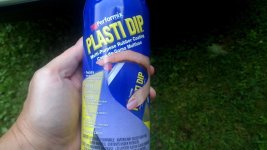
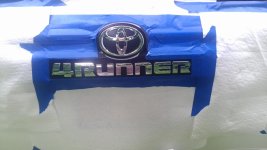
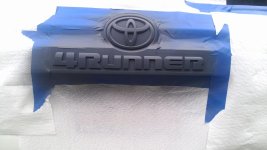
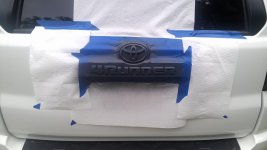
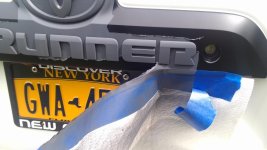
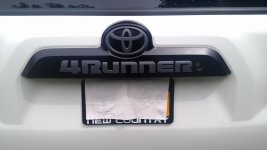
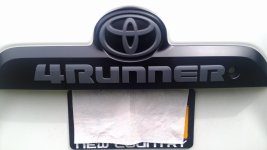
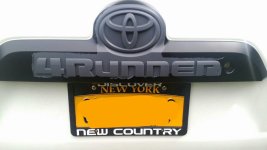
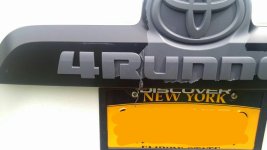
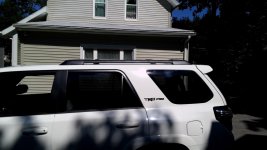
Plastidiped my shiny rear emblem and letters gunmetal grey. I wanted them to somewhat match the front TOYOTA emblem which came grey. Picked up a can of Plastidip at Wallyworld for about $6. Cleaned the emblems and surrounding area with a wet cloth and dried it well. Taped off the outer area to catch over spray and started with a light coat which came out a little splotchy but dried flat. Shook the can well and cleared the nozzle between each coat. Second coat really covered well and definitely showed the grey color. Third coat was a little too close trying to get the nooks and crannies and ran a bit but it too dried flat and even. Fourth coat was just to touch up a couple of still shiny edges.

Waited 15 minutes between coats and an hour before peel off. Patience and a little guidance brought much of the excess off. Used a couple of toothpicks to remove the rest between the letters and within the emblem. A little rough on a couple of edges up close but overall turned out better than I expected. I'm happy with it and think it looks much better. Next up, roof rails.

If you search this forum and YouTube you'll find a bazillion tutorials on how to do it. Yes, a bazillion. I counted them.
 

Attachments

  • IMG_20160815_103203.jpg
    IMG_20160815_103203.jpg
    128.3 KB · Views: 1,956
  • IMG_20160815_103146.jpg
    IMG_20160815_103146.jpg
    129 KB · Views: 1,995
  • IMG_20160815_111225.jpg
    IMG_20160815_111225.jpg
    135 KB · Views: 2,012
  • IMG_20160815_111243.jpg
    IMG_20160815_111243.jpg
    128.3 KB · Views: 2,025
  • IMG_20160815_121026.jpg
    IMG_20160815_121026.jpg
    132.2 KB · Views: 1,995
  • IMG_20160815_130601.jpg
    IMG_20160815_130601.jpg
    120.5 KB · Views: 2,012
  • IMG_20160815_130650.jpg
    IMG_20160815_130650.jpg
    123 KB · Views: 1,994
  • PicsPlay_1462075304627.jpg
    PicsPlay_1462075304627.jpg
    115.2 KB · Views: 2,023
Peeling Plastidip

A couple more shots of the peeling process.
 

Attachments

  • PicsPlay_1471281659944.jpg
    PicsPlay_1471281659944.jpg
    58.7 KB · Views: 1,953
  • PicsPlay_1471281716307.jpg
    PicsPlay_1471281716307.jpg
    63 KB · Views: 1,963
Plastidip Roof Rails

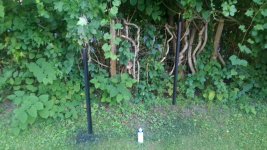
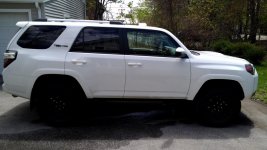
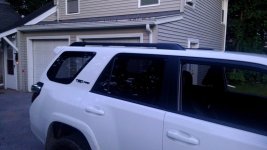
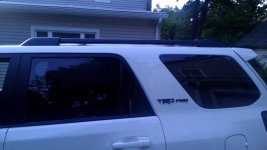
Plastidiped my roof rails black. Looks much better than the silver. I had some grey Plastidip left over so put on two coats as a base and then sprayed two coats of black. It was very humid out so the finish is a bit uneven and I had to touch up several spots where the grey showed through but they turned out pretty good.

Hung the rails from a couple of trees out back. Worked out well.

I used medium loctite on the rail bolts when putting them back in and put silicone around bolt heads for weather tight protection.

Here is a good video showing how to remove plastic covers and rails. The plastic bike tire removal tool worked great.

https://youtu.be/HVeuXVOmKbw
 

Attachments

  • IMG_20160819_185742.jpg
    IMG_20160819_185742.jpg
    147.7 KB · Views: 1,880
  • IMG_20160507_124452.jpg
    IMG_20160507_124452.jpg
    134.6 KB · Views: 1,873
  • IMG_20160819_200543.jpg
    IMG_20160819_200543.jpg
    128.1 KB · Views: 1,864
  • IMG_20160819_200515.jpg
    IMG_20160819_200515.jpg
    124.4 KB · Views: 1,914
Plastidip Roof Rails

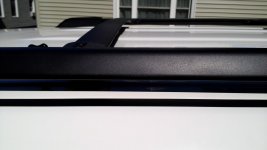
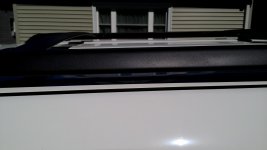
Closer shots of the texture and finish of the black Plastidiped rails. They dried to a nice even finish. I like the textured velvety look. Thanks to everyone who share these great ideas.
 

Attachments

  • IMG_20160820_105847.jpg
    IMG_20160820_105847.jpg
    127.6 KB · Views: 1,794
  • IMG_20160820_105903.jpg
    IMG_20160820_105903.jpg
    125.1 KB · Views: 1,817
  • IMG_20160820_105926.jpg
    IMG_20160820_105926.jpg
    124.3 KB · Views: 1,830
Black Plastidip Hood Scoop Tip

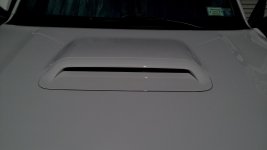
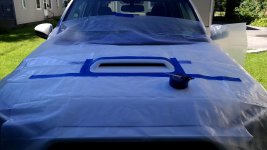
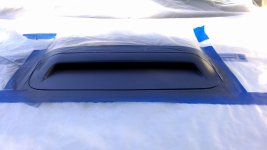
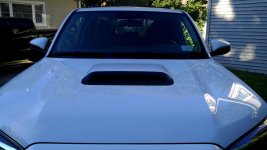
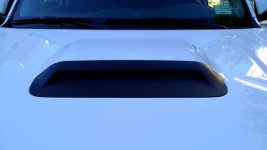
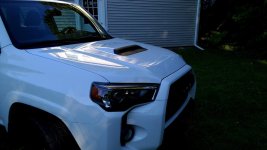
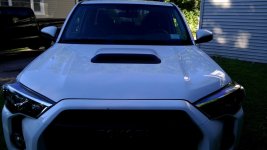
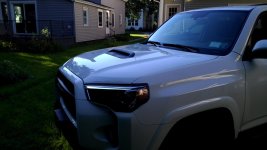
Plastidiped my hood scoop black today. Did not remove it from hood, used some plastic and painters tape to cover hood. Used 3 coats of grey plastidip I had leftover for a base to cover the white. 15 minutes between coats. Then 3 coats of black. Be careful how you mask the edges with the tape. In one area the tape came up a little on the edge and caused the plastidip to pull as I removed the tape revealing a couple of small white spots. (Which I colored in with a black sharpy. lol) Had a little overspray on the hood which wiped right up with a micro fiber cloth. I am pleased with the way it turned out. Pops with all of the other black accents.
 

Attachments

  • IMG_20160823_150856.jpg
    IMG_20160823_150856.jpg
    80.5 KB · Views: 1,724
  • IMG_20160823_153220.jpg
    IMG_20160823_153220.jpg
    129.5 KB · Views: 1,760
  • IMG_20160823_160711.jpg
    IMG_20160823_160711.jpg
    122.7 KB · Views: 1,746
  • IMG_20160823_174815.jpg
    IMG_20160823_174815.jpg
    128.2 KB · Views: 1,784
  • IMG_20160823_174827.jpg
    IMG_20160823_174827.jpg
    109.4 KB · Views: 1,743
  • IMG_20160823_174905.jpg
    IMG_20160823_174905.jpg
    127.2 KB · Views: 1,745
  • IMG_20160823_174911.jpg
    IMG_20160823_174911.jpg
    124 KB · Views: 1,742
  • IMG_20160823_174922.jpg
    IMG_20160823_174922.jpg
    127.2 KB · Views: 1,758
Great work on your truck!

I have the RCI gas-tank skid in aluminum. I too found a pair of giant gashes on my factory skid after two trips off-roading. At the time C4 did not make their slider or gas tank skid.

One thing to note - With the C4 slider now bolting underneath the frame rail too it has to go in the same place the gas tank skid three bolts that also attach to the rail. With my RCI gas tank skid and the C4 slider in between, the driver outside of the RCI gas tank skid is forced down lower by the thickness of the frame-rail mounting plate on the sliders. Since you already have the RCI slider it doesn't have the bottom plate that attaches to the bottom side of the frame rail.

The C4 gas tank skid also uses the same three bolt location on the bottom side of the frame rail.

Good luck with your mods and keep posting. Everyone does theirs just a bit different. At least for me it helps give me ideas on a different and sometimes better way to do it!
 
[MENTION=3442]Boyds4Runner[/MENTION] Thanks. I am looking forward to getting my C4 Fab tank skid next month. I am dying to get back into the trails to put it and the sliders to good use. I am also planning on getting the RCI aluminum skid package in the spring. I don't foresee any interference issues but we'll see. Hopefully then when I'm bombing through the mud and I hear a bang I won't have to worry about it. Definitely lots of options and mods to keep me busy (and broke) for years to come. Investing in these trucks is worth it though.
 
[MENTION=3442]Boyds4Runner[/MENTION] Thanks. I am looking forward to getting my C4 Fab tank skid next month. I am dying to get back into the trails to put it and the sliders to good use. I am also planning on getting the RCI aluminum skid package in the spring. I don't foresee any interference issues but we'll see. Hopefully then when I'm bombing through the mud and I hear a bang I won't have to worry about it. Definitely lots of options and mods to keep me busy (and broke) for years to come. Investing in these trucks is worth it though.


I'm sure your enthusiasm for going off road got the best of you but skid plates don't make you bullet proof on the trails LOL!

I say that from experience. When I got the full skid set from RCI in aluminum on I went on the trails thinking I didn't have to worry so much. I didn't break anything but boy did my skids get bent! I had to take them off and hammer, stomp and pry them back into shape. The aluminum gauges a lot on the rocks but it does its job (protecting the vitals from the sometime inevitable bump with a rock or stump) so that you can still use your rig to take you home. I like the comment that the Fab Shop gave me..."you definitely got some rock-love going on under here".

I've been going slower since through the technical more rocky parts. I also hope my experience is building enough to pick the better, less contact inducing lines.

You shouldn't have any interference issues. The only trouble I had was with the TRD integration skid. The angle isn't steep enough and it makes contact with the bottom of the front diff casing. I used one pair of the provided nylon spacers for the front bolts to make more space but asked for a spare set from RCI for the back bolt locations. In the end I did take a sledge hammer to the skid plate just where I could see the notches from the diff case contact to "bump" a little goose egg shape out to now clear the diff without touching.


Sent from my iPhone using Tapatalk
 
I'll have to talk to Josh about adjusting the integration skid. I had a Mazda B2600 4x4 back in the day and cannon balled that thing over boulders and through mud holes, even bounced it off a few trees. I beat the shit out of that truck but had a blast. I should try to be a little nicer to this one.
 
I'll have to talk to Josh about adjusting the integration skid. I had a Mazda B2600 4x4 back in the day and cannon balled that thing over boulders and through mud holes, even bounced it off a few trees. I beat the shit out of that truck but had a blast. I should try to be a little nicer to this one.

Yeah, these trucks are a little bit heavier than the B2600. They won't be bouncing off of trees as much as smashing right into them lol!

I'd be curious to hear what Josh says. Maybe they changed the design a little bit since the introduction of the part last year. He shipped me an extra set of nylon spacers when I mentioned what I was running into. He is very easy to deal with once you get a hold of him on the phone as I'm sure any forum members that have worked with RCI would agree.
 
Yeah, these trucks are a little bit heavier than the B2600. They won't be bouncing off of trees as much as smashing right into them lol!

I'd be curious to hear what Josh says. Maybe they changed the design a little bit since the introduction of the part last year. He shipped me an extra set of nylon spacers when I mentioned what I was running into. He is very easy to deal with once you get a hold of him on the phone as I'm sure any forum members that have worked with RCI would agree.

He might have already made the adjustment. I just installed the TRD front engine, And the rest full aluminum RCI (including integration). I remember reading you had issues, but mine fit seamlessly and has about a 1/8" buffer between the skid and front differential. Also just installed the RCI sliders last night...beefy!
 
[MENTION=120701]Cymon[/MENTION] I was going to ask you how you like the sliders. They do seem solid though I haven't had a chance to test them. I'm glad the skids fit well.
 
Last edited:
[MENTION=120701]Cymon[/MENTION] I was going to ask you how you like the sliders. They do seem solid though I haven't had a chance to test them. I'm glad the skids fit well.

Just installed las night so I haven't tested either. 1st impression was super easy to install and they seem really solid. I also really like the look (makes it appear as though the vehicle has risen 2 inches over the running boards) and they are plenty functional as a step (my 4 year old daughter approved). I'll post some pictures on my thread in the next couple of days.
 
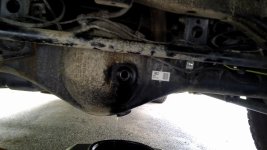
Changed Rear Differential Oil

I changed my rear diff oil because before I did my breather mod I went through several washouts at least up to a foot deep, one was back in March when the water was full of ice chunks. I have just 4950 miles but want to be sure.

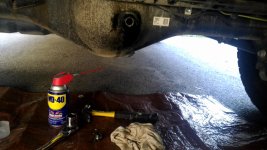
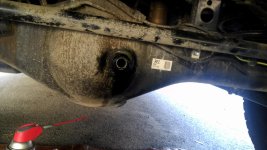
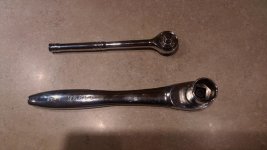
I tried to check the oil but the fill plug would not budge. I used a 12 point 24mm socket adapted to a small 3/8" rachet. I read alot of various vehicle forums where evidently this is a notorious problem. Solutions ranged from breaker bars, pipe plug sockets, heat and hammers. Notably most warned against pneumatic wrenches for fear of cracking the housing.

Sprayed WD40 on it yesterday and today, tapped on it with a hammer and put a larger 1/2 " ratchet with a 6 point 15/16" socket on it. Pulled down with everything I had (and I weigh 200 lbs) but no movement. I feared rounding the bolt head so went in and had lunch. Later I tried again, more WD40 and tapping, I put the ratchet on to push up and it gave. I thought, Shit I've rounded the head but tried again and it came right out with no damage.
 

Attachments

  • IMG_20160904_165108.jpg
    IMG_20160904_165108.jpg
    137.6 KB · Views: 1,422
  • IMG_20160904_165101.jpg
    IMG_20160904_165101.jpg
    136.6 KB · Views: 1,447
Rear Diff oil change

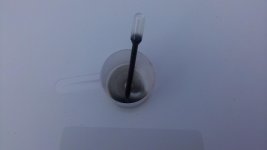
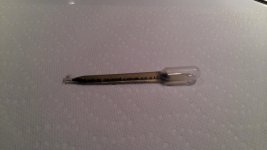
So put a little dropper in and sucked up some juice and as you will see, it is as black as night. It still feels slick but I'm guessing it ain't good if it looks like that!

After letting my oil sample set for two days the sediment settled out and the oil turned clear. I squirted some onto my finger and the sediment is very fine, barely able to feel it. I'm still changing it though.
 

Attachments

  • IMG_20160904_165302.jpg
    IMG_20160904_165302.jpg
    71.5 KB · Views: 1,419
  • IMG_20160906_102450.jpg
    IMG_20160906_102450.jpg
    122.6 KB · Views: 1,447
Change Rear Differential Oil

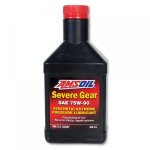
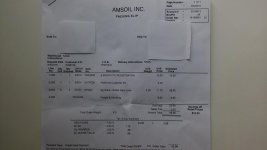
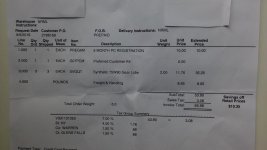
Dealer said that the trucks come stock with synthetic diff oil in them and that you can go from regular oil to synthetic but not vice versa. So I decided to go with Amsoil Severe Gear 75W90. If you pay for the Preferred Membership you get an instant 25% discount. With tax and shipping it came out to about $15 a quart. Two day shipping also. I ordered Tuesday morning and had it at my door Thursday morning.

Food for thought. We spend hundreds of dollars buying armor to protect the outside of our vehicles but cheap out on internal protection. Out of sight, out of mind. Considering I spent 45 grand on the truck I guess I could cough up 45 bucks to protect it's gears.
 

Attachments

  • amsoil_gear_oil.jpg
    amsoil_gear_oil.jpg
    122.5 KB · Views: 1,488
  • IMG_20160908_124422.jpg
    IMG_20160908_124422.jpg
    125.6 KB · Views: 1,457
  • IMG_20160908_124350.jpg
    IMG_20160908_124350.jpg
    128.1 KB · Views: 1,407
Rear Differential Plug Crush Gaskets

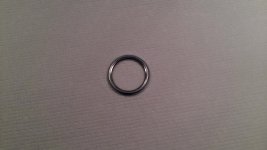
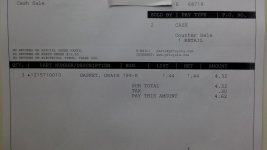
Picked up three plug gaskets from the local Toyota dealer. The same gasket goes on both the fill and drain plugs. Cost 4 bucks and change.
 

Attachments

  • IMG_20160908_192957.jpg
    IMG_20160908_192957.jpg
    109.7 KB · Views: 1,414
  • IMG_20160908_124704.jpg
    IMG_20160908_124704.jpg
    140.4 KB · Views: 1,428
Rear Differential Oil Change

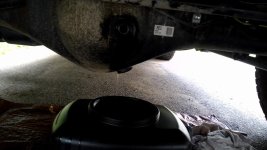
Drain plug came right out no problem.
 

Attachments

  • IMG_20160908_111121.jpg
    IMG_20160908_111121.jpg
    133.4 KB · Views: 1,432
  • IMG_20160908_111136.jpg
    IMG_20160908_111136.jpg
    129.5 KB · Views: 1,479

Members online

Forum statistics

Threads
278,316
Messages
3,554,110
Members
248,016
Latest member
Advally Service

Trending content

Back
Top