
You are using an out of date browser. It may not display this or other websites correctly.
You should upgrade or use an alternative browser.
You should upgrade or use an alternative browser.
Tigger's Build and Mis-Adventures
- Thread starter tigger
- Start date


Land_Shark
New member
I'm pretty ignorant when it comes to vinyl wraps and graphics, but I really love the side graphics you have. Would it be possible to buy some from you? Is this something you can share for us to have printed locally? Thanks for all the detailed writeups!
I'm pretty ignorant when it comes to vinyl wraps and graphics, but I really love the side graphics you have. Would it be possible to buy some from you? Is this something you can share for us to have printed locally? Thanks for all the detailed writeups!
We did a very limited run of 3 sets. I no longer have the file.
If you go to any sign shop, they should have a catalog of clip art and be able to create a design unique to you. That way you can customize it to your exact taste and pick out the exact color you want it cut or printed in.
Snow on Mt. Charleston
Since snow is rare in Vegas, (maybe twice a year, never sticks) I went back up to Mt. Charleston as they received a few inches on Sunday. It is about the only place around here to get to the mountains within an hour so it's close enough for a quick afternoon jaunt.
Didn't hit any trails since I have the skids off for repair. So just took a few pics. It was about 19 degrees so didn't stay out long.
I like this shot with the reflections in the window


Frosted trees in the sunlight

The gate was locked. Would have been a fun little road

Since snow is rare in Vegas, (maybe twice a year, never sticks) I went back up to Mt. Charleston as they received a few inches on Sunday. It is about the only place around here to get to the mountains within an hour so it's close enough for a quick afternoon jaunt.
Didn't hit any trails since I have the skids off for repair. So just took a few pics. It was about 19 degrees so didn't stay out long.
I like this shot with the reflections in the window
Frosted trees in the sunlight
The gate was locked. Would have been a fun little road
Last edited:
Infinity Kappa 10.9t - Dash Speaker Replacement
One of the first things I did when I got the 4Runner was change out the audio system. The speakers I used in the fronts were high end speakers but they were about 15 years old. I decided to try out some new tweeters to see if there would be a sound difference.
I picked up a set of Infinity Kappa 10.9t on Amazon for about $50.
Let me begin by saying, if you have you have never messed with car audio equipment before, these are not a speaker I would recommend starting with. These are very difficult to work with and probably the reason they have been discontinued.
Sound wise, they are an excellent speaker. The highs are much brighter than the Boston Pro tweeters I pulled out. They are very clear and provide nice high end details. They are an excellent replacement for the stock tweeters, as they are extremely efficient with a 93dB sensitivity and 2 ohm rating.
They fit well in the dash openings with no modifications and are a fairly easy install. The reason I don't recommend them for a novice, is that for some sick twisted reason, Infinity decided it would be a good idea to use a set screw with an Allan wrench about the thickness of a mechanical pencil lead. The reason this is an issue, is that once you get moderately close to tightening the set screw down on the wire, the wrench strips out which rounds out the set screw. It is a really bad design.
I would think I had it tight then the wire would fall out. I managed to get it tight enough to keep the wire in place, then zip tied the wire to the bracket to hold it in place. I have the feeling after a few off road trips, I will have to pull them out and solder the wires in.
The other issue is the size and design of the crossover. It is fairly large for a tweeter crossover, but they didn't provide covers for the set screws so they are exposed. If you don't protect them and shove the crossover into the dash opening, you could easily short the terminals, which could short your amp or head unit. I added some foam weather stripping to the top and bottom side to keep it from rattling and to cover the set screws.
The driver side fit well just using a mounting bracket on the underside of the stock bracket. The passenger side did not as the speaker still sat too high. I had to find longer bolts and use two nuts as spacers to get it to sit low enough.
So while it is a great sounding speaker and an excellent price point, I would say stay away unless you are comfortable with modifying a brand new speaker.


One of the first things I did when I got the 4Runner was change out the audio system. The speakers I used in the fronts were high end speakers but they were about 15 years old. I decided to try out some new tweeters to see if there would be a sound difference.
I picked up a set of Infinity Kappa 10.9t on Amazon for about $50.
Let me begin by saying, if you have you have never messed with car audio equipment before, these are not a speaker I would recommend starting with. These are very difficult to work with and probably the reason they have been discontinued.
Sound wise, they are an excellent speaker. The highs are much brighter than the Boston Pro tweeters I pulled out. They are very clear and provide nice high end details. They are an excellent replacement for the stock tweeters, as they are extremely efficient with a 93dB sensitivity and 2 ohm rating.
They fit well in the dash openings with no modifications and are a fairly easy install. The reason I don't recommend them for a novice, is that for some sick twisted reason, Infinity decided it would be a good idea to use a set screw with an Allan wrench about the thickness of a mechanical pencil lead. The reason this is an issue, is that once you get moderately close to tightening the set screw down on the wire, the wrench strips out which rounds out the set screw. It is a really bad design.
I would think I had it tight then the wire would fall out. I managed to get it tight enough to keep the wire in place, then zip tied the wire to the bracket to hold it in place. I have the feeling after a few off road trips, I will have to pull them out and solder the wires in.
The other issue is the size and design of the crossover. It is fairly large for a tweeter crossover, but they didn't provide covers for the set screws so they are exposed. If you don't protect them and shove the crossover into the dash opening, you could easily short the terminals, which could short your amp or head unit. I added some foam weather stripping to the top and bottom side to keep it from rattling and to cover the set screws.
The driver side fit well just using a mounting bracket on the underside of the stock bracket. The passenger side did not as the speaker still sat too high. I had to find longer bolts and use two nuts as spacers to get it to sit low enough.
So while it is a great sounding speaker and an excellent price point, I would say stay away unless you are comfortable with modifying a brand new speaker.
Last edited:
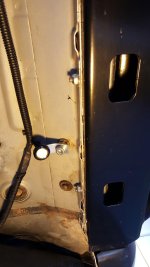
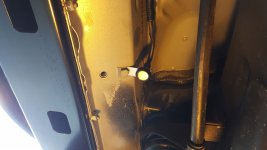
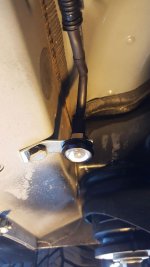
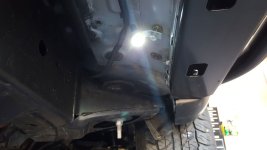
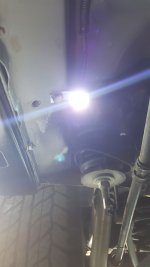
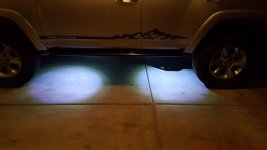
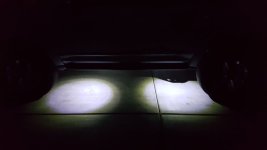
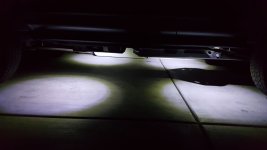
Installed some rock lights today. They are the Cyclops Series Rock Lights from Olympus Offroad. They are rated at 1000lm but honestly I don't think they are any where near that. The main thing I dislike about them is the length of the stem. Made it a little harder to mount. That and the 24 ga wiring. Wow is it thin. Hard to twist and crimp.
Install was fairly easy. I just used a couple of bolt holes from where the stock sliders would bolt. Ran wiring to my Bussman relay box and I now have some night time lighting underneath.
Whether I will Keep these or upgrade remains to be seen. If I upgrade, I could see using these in the cargo area for additional lighting.
Install was fairly easy. I just used a couple of bolt holes from where the stock sliders would bolt. Ran wiring to my Bussman relay box and I now have some night time lighting underneath.
Whether I will Keep these or upgrade remains to be seen. If I upgrade, I could see using these in the cargo area for additional lighting.
Attachments
-
 rock-light-1.jpg134.9 KB · Views: 2,135
 -
 rock-light-2.jpg81.6 KB · Views: 2,122
 -
 rock-light-3.jpg129.2 KB · Views: 2,195
 -
 rock-light-4.jpg59.3 KB · Views: 2,149
 -
 rock-light-5.jpg130.7 KB · Views: 2,224
 -
 rock-light-6.jpg53.2 KB · Views: 2,428
 -
 rock-light-7.jpg27.9 KB · Views: 2,154
 -
 rock-light-8.jpg45 KB · Views: 2,139
Did you make these vinyl decals your self? If so are you willing to make another set? absolutely love the design!
I designed them and had [MENTION=118444]flyinhawaiian01[/MENTION] cut them. We are not making anymore sets. I lost the file in a hard drive crash.
You can go to any sign shop and they can design something unique to your tastes and print or cut it in the exact color you want.
I designed them and had [MENTION=118444]flyinhawaiian01[/MENTION] cut them. We are not making anymore sets. I lost the file in a hard drive crash.
You can go to any sign shop and they can design something unique to your tastes and print or cut it in the exact color you want.
Very cool, I think I'll have to get something made up!
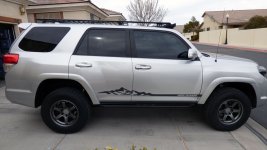
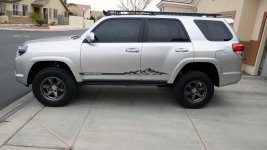
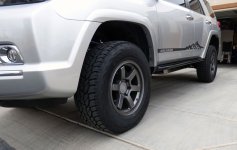
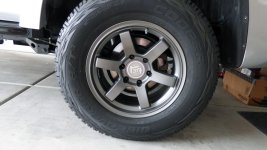
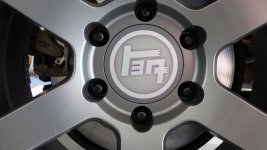
Tigger got some new shoes. Although I really like the looks of the TRD wheels and loved the traction of the Nitto M/T's, I wanted to gain some of my MPGs back and get something a little quieter and easier to clean.
Called up Discount Tire Direct and ordered up a set of Level 8 MK6's and some Cooper AT3's. Still working out the final design of the center caps but very pleased so far.
Called up Discount Tire Direct and ordered up a set of Level 8 MK6's and some Cooper AT3's. Still working out the final design of the center caps but very pleased so far.
Attachments
Road Trip stuff
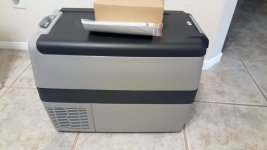
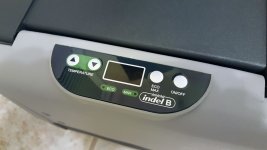
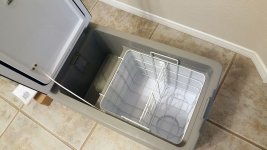
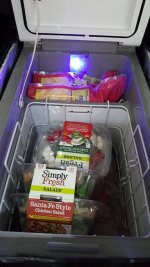
In planning for road trips in the future, I have been looking at a portable fridge. I love the look of the ARB but could never pony up the money for it, even when I found them on sale at 20% off once.
Then an awesome group buy on the Indel B (truck fridge) popped up last week. I did a lot of research and I think this will be a great fridge for my needs. And at half the price of an ARB, I am a happy camper.
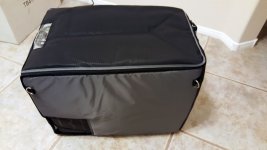
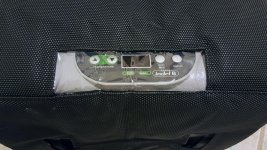
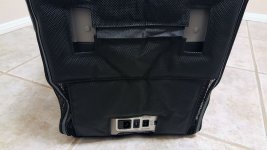
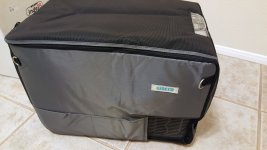
Anyone that picked up the T41 size, I wanted to let you know the Waeco cover fits perfectly.
I picked it up for $58 shipped from here Dometic IC-CF-40 Protective Cover For CF-040 // Boat And RV Accessories
It's a little lighter colored than the Ironman cover which is what I wanted. And about $35 cheaper. The only drawback is that I think it is an older design. Some of the covers out there have velcro on the top part so you don't have to unzip every time you need to go into the fridge. But for the price, I am very happy with it.
In planning for road trips in the future, I have been looking at a portable fridge. I love the look of the ARB but could never pony up the money for it, even when I found them on sale at 20% off once.
Then an awesome group buy on the Indel B (truck fridge) popped up last week. I did a lot of research and I think this will be a great fridge for my needs. And at half the price of an ARB, I am a happy camper.
Anyone that picked up the T41 size, I wanted to let you know the Waeco cover fits perfectly.
I picked it up for $58 shipped from here Dometic IC-CF-40 Protective Cover For CF-040 // Boat And RV Accessories
It's a little lighter colored than the Ironman cover which is what I wanted. And about $35 cheaper. The only drawback is that I think it is an older design. Some of the covers out there have velcro on the top part so you don't have to unzip every time you need to go into the fridge. But for the price, I am very happy with it.
Attachments
Last edited:
LED Upgrade
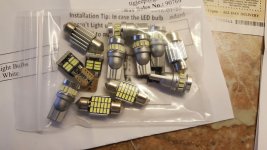
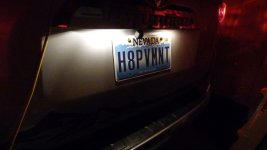
Decided to upgrade the interior lighting in the Toy. One of the forum members recommended a company out of Texas called Fyreflys. I found a high output set on their ebay site that looked like what I was looking for.
12pc 3014 Series Interior LED Light Bulbs Package Kit for 03 15 4Runner White | eBay
I chose the 3014 series as they are supposed to be brighter than the 5050 series. My only complaint is that they are 6000K so a little bluer than I had hoped for. Would have preferred a 4500K or 5000K.
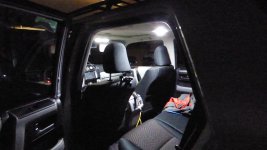
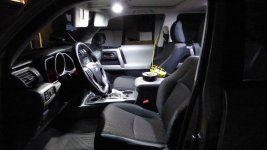
It is so much brighter in the 4Runner now. I can actually see things at night if I am looking for something.
I used small pieces of gorilla tape to remove the small light bulbs from the overhead lights and vanity lights.
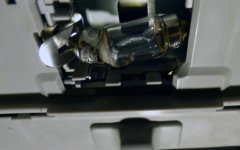
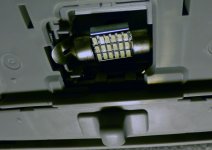
The center overhead bulb was the hardest to get out. I am sure there is a trick to it, but as you can see below, I destroyed the bulb trying to remove it.
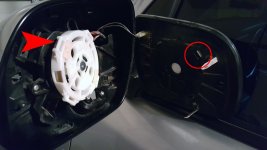
Even the puddle lights in the mirrors weren't too bad once I figured out where the clips were to pop them loose. There are 4 sets of double clips on the back of the mirror and you can see the bars they pop onto on the housing side. I used a 90 degree pick to pry the clip out, but since they are double clips, it was probably easier to just carefully pull the mirrors loose.
Decided to upgrade the interior lighting in the Toy. One of the forum members recommended a company out of Texas called Fyreflys. I found a high output set on their ebay site that looked like what I was looking for.
12pc 3014 Series Interior LED Light Bulbs Package Kit for 03 15 4Runner White | eBay
I chose the 3014 series as they are supposed to be brighter than the 5050 series. My only complaint is that they are 6000K so a little bluer than I had hoped for. Would have preferred a 4500K or 5000K.
It is so much brighter in the 4Runner now. I can actually see things at night if I am looking for something.
I used small pieces of gorilla tape to remove the small light bulbs from the overhead lights and vanity lights.
The center overhead bulb was the hardest to get out. I am sure there is a trick to it, but as you can see below, I destroyed the bulb trying to remove it.
Even the puddle lights in the mirrors weren't too bad once I figured out where the clips were to pop them loose. There are 4 sets of double clips on the back of the mirror and you can see the bars they pop onto on the housing side. I used a 90 degree pick to pry the clip out, but since they are double clips, it was probably easier to just carefully pull the mirrors loose.
Attachments
New Alpine Amp
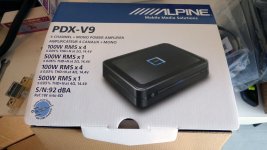
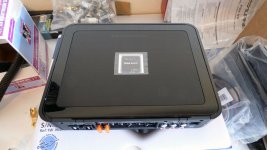
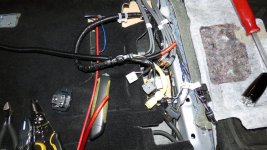
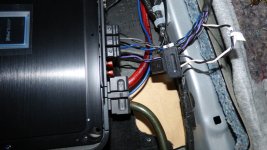
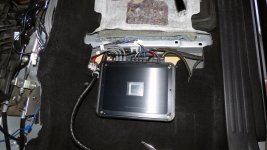
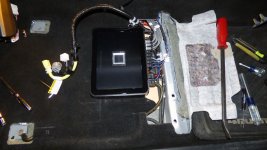
Since I have had the 4Runner for a year now, I thought it was time to upgrade the amp. Got a good deal on an Alpine PDX-V9. This will work a little better with the Alpine sub as it has about 175 more watts.
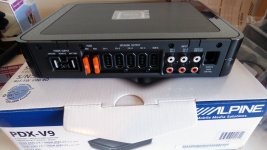
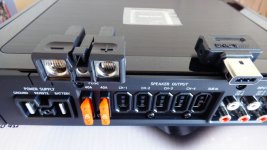
The nice thing about the PDX series is the connectors. You can pre-wire the connectors, put the amp in place and just plug everything in. As long as you payed attention to the polarity when wiring up the connectors, you can't install anything backwards so nothing will be out of phase.
I thought this would be a quick install since I had just removed an Alpine PDR amp, but no, Alpine had to reverse the wiring on the PDX so the power wires were on the wrong side. That meant pulling out the console and retrieving more power wire.
Sound is great but I may have created an issue by pulling the fridge power from the stereo distribution block. Something to work on tomorrow.
Since I have had the 4Runner for a year now, I thought it was time to upgrade the amp. Got a good deal on an Alpine PDX-V9. This will work a little better with the Alpine sub as it has about 175 more watts.
The nice thing about the PDX series is the connectors. You can pre-wire the connectors, put the amp in place and just plug everything in. As long as you payed attention to the polarity when wiring up the connectors, you can't install anything backwards so nothing will be out of phase.
I thought this would be a quick install since I had just removed an Alpine PDR amp, but no, Alpine had to reverse the wiring on the PDX so the power wires were on the wrong side. That meant pulling out the console and retrieving more power wire.
Sound is great but I may have created an issue by pulling the fridge power from the stereo distribution block. Something to work on tomorrow.
Attachments
Fridge Power
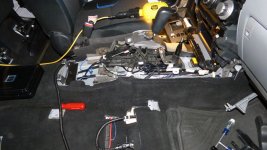
Since I had the amp out, I thought I would add a circuit for the fridge power port. This required removing the center console and fishing wire across the Toy. Easier said than done.
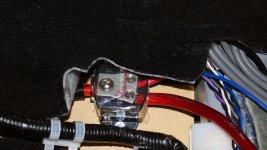
I picked up a power distribution block as Best Buy since the one I had only had 8ga outs, and I needed 1 - 4ga and 1 - 8ga out.
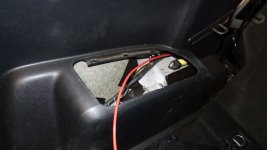
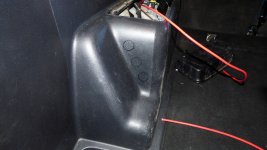
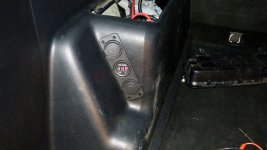
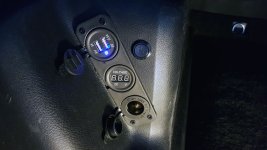
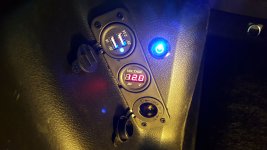
I ran the wire from under the passenger seat to the rear driver wheel well. I had ordered a new power port for the fridge and found one that included two USB ports as well as a voltage meter. I wish they had placed the ports closer together as the whole thing was about 1/2" too long to sit completely flush. But it will work fine for what I need. Whether this was the best place to mount it remains to be seen but I at least I can easily check the battery status when grabbing something out of the fridge.
I do plan on installing a switch for the gauge so that it isn't on all of the time. Just need to find a nice one that I like.
*Edit* 4-1-2016 added switch for Volt meter
Since I had the amp out, I thought I would add a circuit for the fridge power port. This required removing the center console and fishing wire across the Toy. Easier said than done.
I picked up a power distribution block as Best Buy since the one I had only had 8ga outs, and I needed 1 - 4ga and 1 - 8ga out.
I ran the wire from under the passenger seat to the rear driver wheel well. I had ordered a new power port for the fridge and found one that included two USB ports as well as a voltage meter. I wish they had placed the ports closer together as the whole thing was about 1/2" too long to sit completely flush. But it will work fine for what I need. Whether this was the best place to mount it remains to be seen but I at least I can easily check the battery status when grabbing something out of the fridge.
I do plan on installing a switch for the gauge so that it isn't on all of the time. Just need to find a nice one that I like.
*Edit* 4-1-2016 added switch for Volt meter
Attachments
-
 fridge-wiring-1.jpg125 KB · Views: 1,867
 -
 fridge-wiring-2.jpg131.7 KB · Views: 1,823
 -
 fridge-wiring-3.jpg79.5 KB · Views: 1,883
 -
 fridge-wiring-4.jpg103.9 KB · Views: 3,732
 -
 fridge-wiring-5.jpg91.2 KB · Views: 3,158
 -
 fridge-wiring-6.jpg106.1 KB · Views: 4,260
 -
 fridge-wiring-7.jpg110.4 KB · Views: 2,208
Last edited:

flyinhawaiian01
New member
Neat! Hopefully they used a good volt meter in that unit, as the standalone meter I bought a while back caught on fire and burned up in the shop! Took about 3 weeks before it melted into a big ol' sloppy mess.
Neat! Hopefully they used a good volt meter in that unit, as the standalone meter I bought a while back caught on fire and burned up in the shop! Took about 3 weeks before it melted into a big ol' sloppy mess.
Well that's not comforting. This wasn't an expensive unit, so hard to say. It will only be on when I need to check it so won't be running all of the time. Hopefully that keeps mine from burning it to the ground. Not that that would be a bad thing.
flyinhawaiian01
New member
LOL! you're funny, Brian!!!
I take it there's a button to see the voltage then? Its not on all the time?
I take it there's a button to see the voltage then? Its not on all the time?
LOL! you're funny, Brian!!!
I take it there's a button to see the voltage then? Its not on all the time?
I have a switch under the cover for now. I am looking for a round flat one that I will mount next to the gauge.
flyinhawaiian01
New member
What about a momentary push button? That way its not always on when power is on. Just a thought.

jdtaylor42
New member
Wow. That stereo install was INTENSE! You have some dedication man. Nice rig
Similar threads
- Replies
- 0
- Views
- 11K


- Replies
- 2
- Views
- 3K


