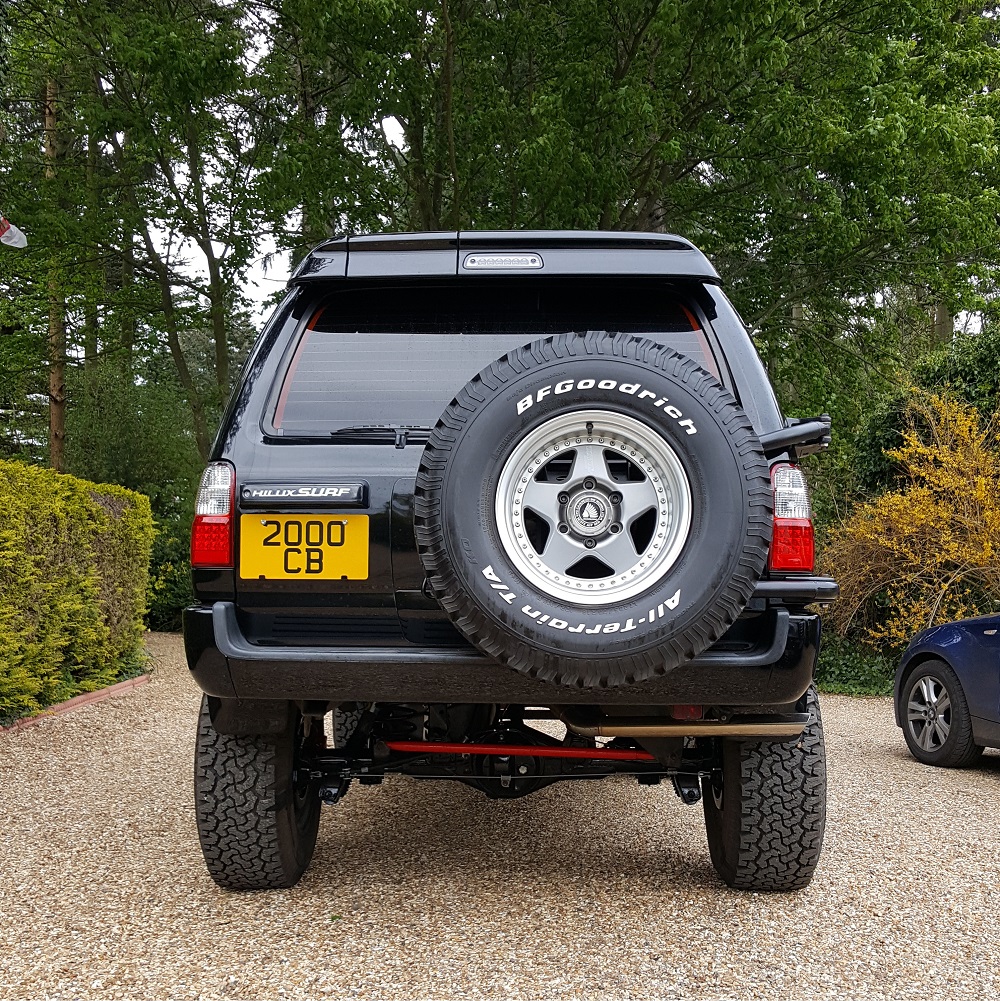
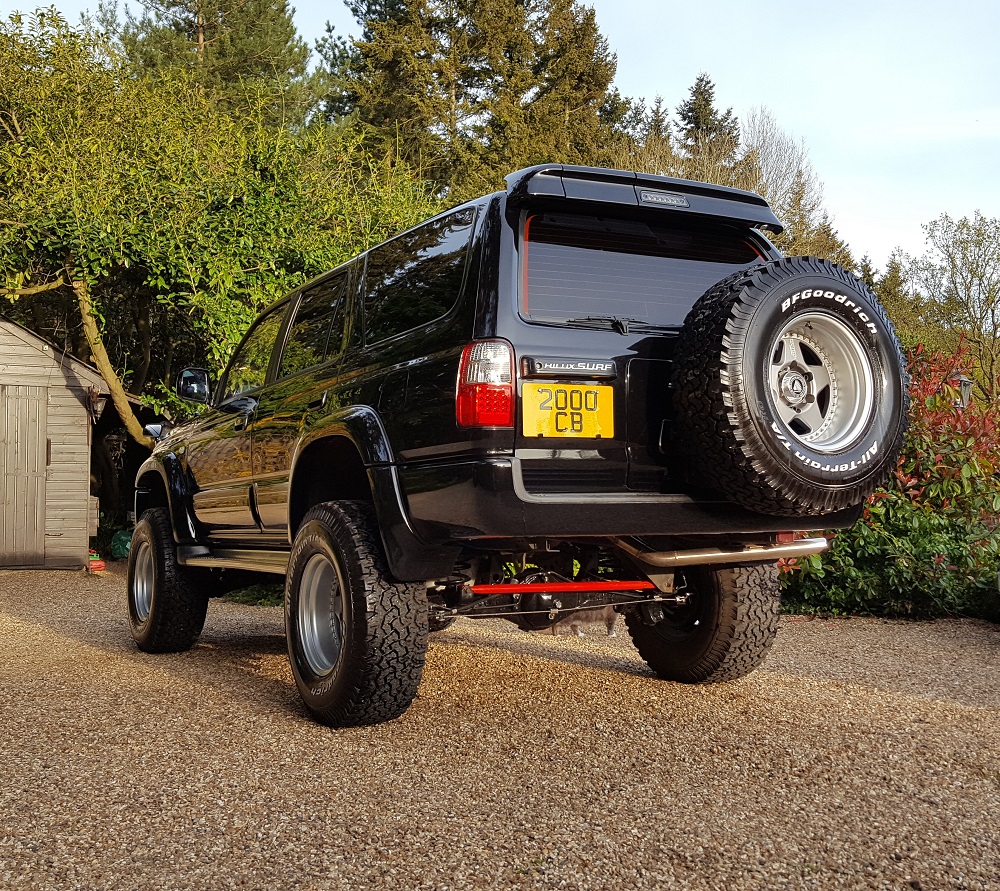
TorqueOfTheDevil’s Build Thread ..::1UZ-FE VVTi Hilux Surf::..

Sorry to hear about your mishaps!! I too hate it when things aren't perfect, or when the only person you can blame is yourself..

Question, how much work is involved with the POR15?? I've used in a motorcycle gas tank before and sealed the inside, but never used it as an exterior paint. I'm thinking of doing the rear end in that and reading that you use it all the time, it must be a decent coat! Just wondering what kind of work is entailed.
 
I love everything about this thread, one of my new favorites! I am really enjoying how thorough and clean you are keeping it.

Thank You!!

High praise indeed... many years ago when I had decided I was going to buy a 3rd Gen Hilux surf, your earlier build threads was one of the inspirations!


What is the beauty hiding under the blanket? :hungry:

Not mine I'm afraid.. This is all in my Dad's Garage it's an early 80s Silver Wraith II.

He LOVES having bits of 20 year old Toyota in bits in there. :angel:
 
Sorry to hear about your mishaps!! I too hate it when things aren't perfect, or when the only person you can blame is yourself..

Question, how much work is involved with the POR15?? I've used in a motorcycle gas tank before and sealed the inside, but never used it as an exterior paint. I'm thinking of doing the rear end in that and reading that you use it all the time, it must be a decent coat! Just wondering what kind of work is entailed.

I guess we all have mishaps... it'd be easier to not mention them and just say how clean sailing everything was.. but then it'd not be a proper build thread! Lets just say my week off wasn't the relaxing distressing assembling new parts on my truck that I'd hoped for!

I'd not say any more work than Hammerite or whatever. Its pretty easy to brush on, cure with ambient moisture. Just make sure that the surface is prepped properly as you would anyway.

One thing though is when it is cured, you can't paint over it without roughing up that surface. if you do you can peel it off, it sets like a hard rubber. I found out as there was a run that ran down a cured part.. I picked at it and it neatly peeled off.
 
I guess we all have mishaps... it'd be easier to not mention them and just say how clean sailing everything was.. but then it'd not be a proper build thread! Lets just say my week off wasn't the relaxing distressing assembling new parts on my truck that I'd hoped for!

I'd not say any more work than Hammerite or whatever. Its pretty easy to brush on, cure with ambient moisture. Just make sure that the surface is prepped properly as you would anyway.

One thing though is when it is cured, you can't paint over it without roughing up that surface. if you do you can peel it off, it sets like a hard rubber. I found out as there was a run that ran down a cured part.. I picked at it and it neatly peeled off.

So, is it, pliable?? As in, bendable, but strong enough to take a beating? (Like what you were doing)
 
Yeah, I'd describe it as feeling like power coat. If you have really made a mess it peels of a bit in chunks like a power coat would.

It will flex to a point. I'm not sure if it gets harder after 6 months or so.

I wish I'd done my calipers in POR15 caliper paint. Althoguh I used "proper" caliper paint, they look all chipped and very tired already.
 
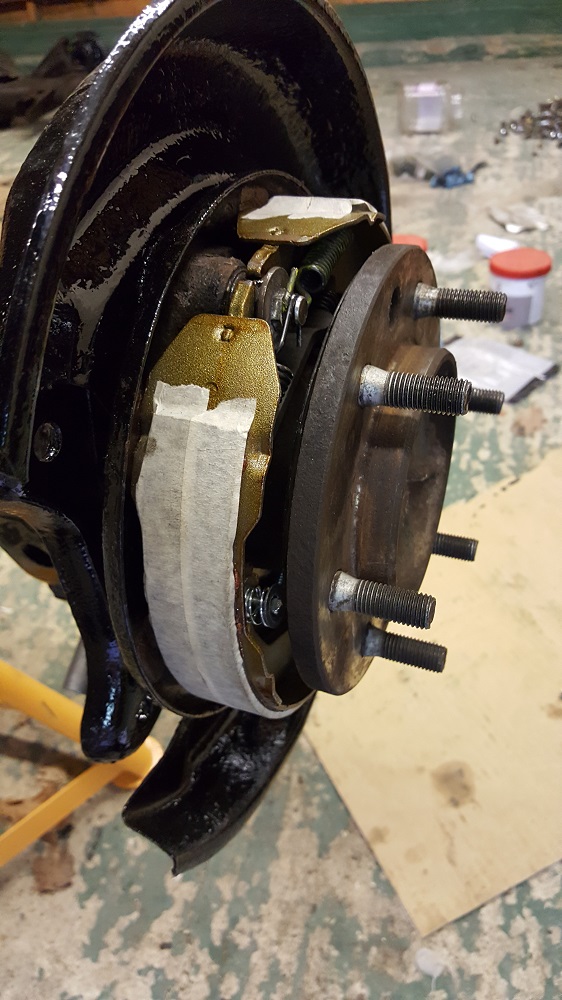
I got out after work on Wednesday and finished fitting the front up, it now sits on its front wheels, new shiny diff in, driveshafts in, all ready to go (just need to run over with the correct torque settings) At least now the front is on the ground I'll be happier jacking the back up nice and high to change the axle! I also assembled the handbrake mechanism.. all 9 springs per side! I usually only use Toyota parts, but in this case I used Pagid handbrake shoes, and a fitting kit (springs and washers for mounting the shoes) from a local supplier, the kit was good, but the end caps weren't as good as the Toyota ones, and make an already very fiddly job a lot harder as they didn't have the second "cross head" to make them easier to turn.

Here they are all fitted up. I put masking tape on the shoes to minimise any oil contamination.
AX18.jpg


This is my "cheat" tool for doing the push down spring caps that hold the shoes in... its an old injector ring from a 1G-GTE supra used to space open long nosed pliers with masking tape...

AX19.jpg

Proper.

lol


The weather was on my side today, so after work I went outside (the joy of working from home most of the time!) and started immediately.

I disconnected the ABS sensor wires from the old axle, and removed the ABS sensors.. the drivers side one came out easy (I changed it a few years back when I ripped the cable out off road) but the passenger side one put up a fight! luckily it came out intact, so I don't need to buy another one!

Moving inside as it was getting dark, I thoroughly degreased the new Toyota Disks and fitted them to the axle, remembering to remove the masking tape.. I nipped them up with two wheel bolts and started adjusting the handbrake mechanism. The LSD seems to work as when one side had slight handbrake tension and I started working on the other the axle "locked" and instead of just the pinion turning the opposite side tried to against the brake load...

At least we know the Truetrac works! I've not played with one in that situation before and it was quite cool seeing it do its thing, it did catch me off guard a bit.

Once done there I assembled and fitted the rear calipers and pads.. they went together nicely and my new trick (that probably everyone else has ben doing for years) of using a cotton bud (do you call them Q tips??) to apply copper slip worked a treat.. loads where I wanted it, not a visible drop anywhere else.

AX20.jpg


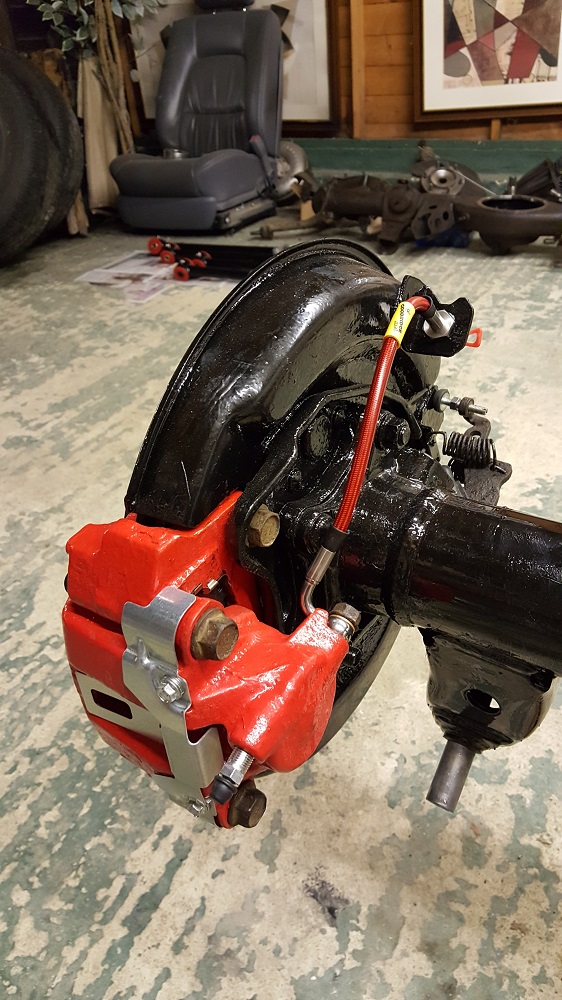
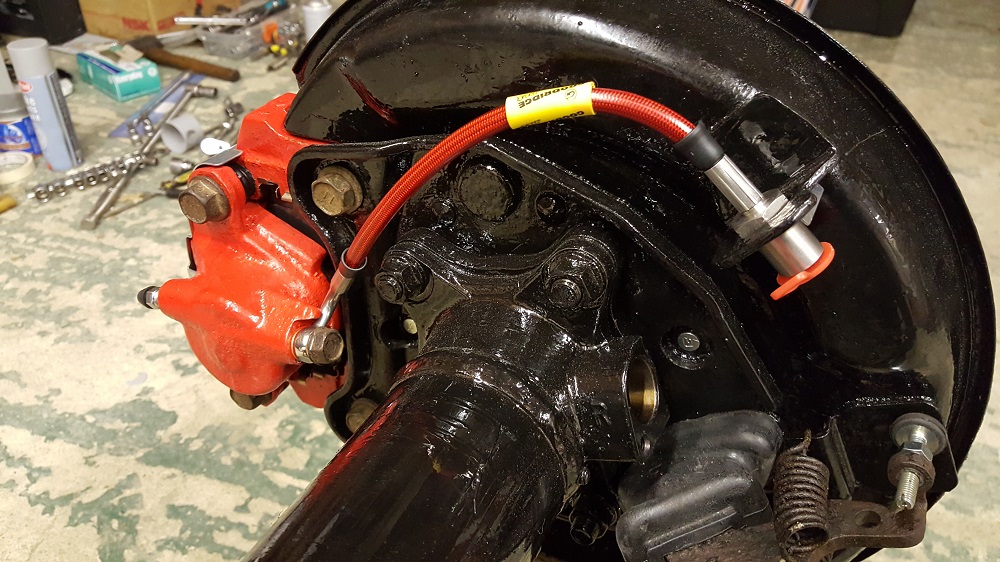
I started fitting the new goodridge stainless braided brake lines ( I already had a set but the Landcruiser ones are different... obiously!)
AX21.jpg


I actually bought these so long ago I'd forgotten about them, I'd not used the coloured ones before... I know they are a bit tarty, will never be seen, and soon be filthy, but I like they way they fit and go nicely with my "Black and Red" theme..
AX22.jpg


As always with Goodridge stuff they feel quality and fitted perfectly.

This is where I have a slight issue, I'd decided later on to order brand new hard lines and T piece from Toyota to keep everything fresh.. unfortunately they are japan stock, and we don't live in Fast and Furious land.. parts are more "about a month" as opposed to "overnight".. as Such to get the thing on the road again I'm going to reuse the manky old ones, so I pit a bit of paint on to freshen them up for now. (No Pics, they ruin the clean!)

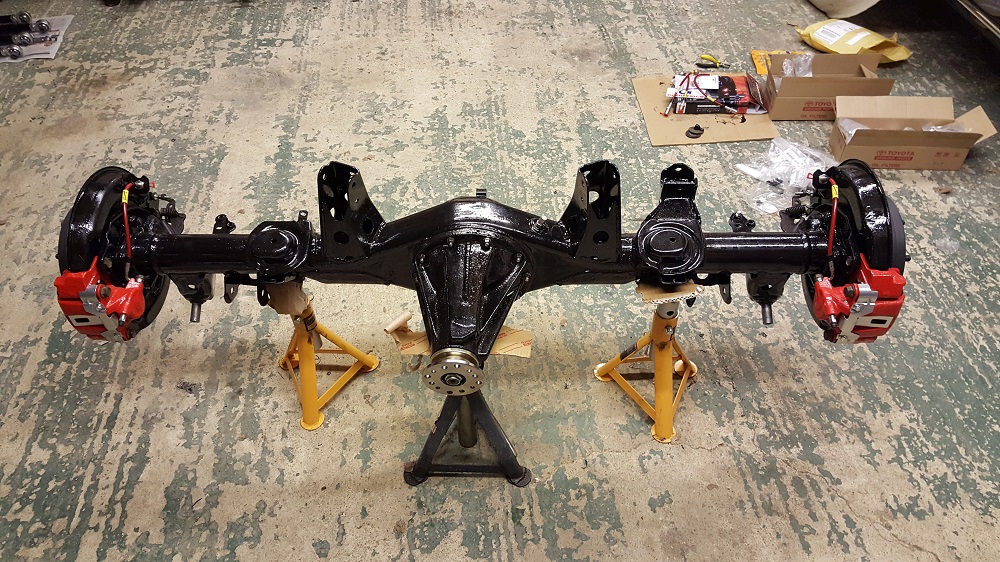
So this is where I have got to...

tomorrow I'll fit the old brake hard lines, stick the wheels on and roll it up t the truck.. the current axle just needs the 2 trailing arms fully unbolting and that rolling out... then its connect the wires lines and tighten everything up... hopefully I'll have it tested by beer time.

I'm happy with how is taking shape so far.. it almost looks too good to put under a truck!

AX23.jpg


AX24.jpg


I also assembled the Ebay special rear arms.

New correct sized misalignment spacers fitted, upper ones shaved down 3mm for a better fit, new machined up bush inserts fitted, all assembled with copper slip.

AX25.jpg


I noticed one of the zerk fittings has taken a beating in the post, its still intact but slightly damaged, I'll order another set, like the heims, the quality on them is pretty low... Still they should do the job, and now should at least fit 100%.. Another job out the way before Axle fitting time!

 
It's sooooo pretttttty!!! Very curious to know how well she's going to brake now. Sucker will be able to stop on a dime!

Thanks! Almost looks too good to fit :D

Good news, I had a call from my local dealership, the other rear hard brakeline is in.. but the "T" piece is still outstanding. The one on my truck wasn't as corroded, so I quickly pulled it off the old axle degreased it and gave it a couple of coats of Plastikote... It should be dry soon enough to fit it later today

At least now it'll not look like "the part that got blatantly forgotten"

AX26.jpg


Yes I also painted the old one last night.. but this one looks a bit better :D
 
Well, its on!. The truck is sitting on its own wheels on its own coils and shocks.

AX27.jpg

I had to jack it up pretty high at the back to roll the axles in and out.. Getting the old one out was easy, the new one in was harder as the LSD effectively left it "locked" which made it hard to make the final moves to get it straight.. still amuses me that it works so effectively though!

Safety first :) I need a decent jack that gives enough height!
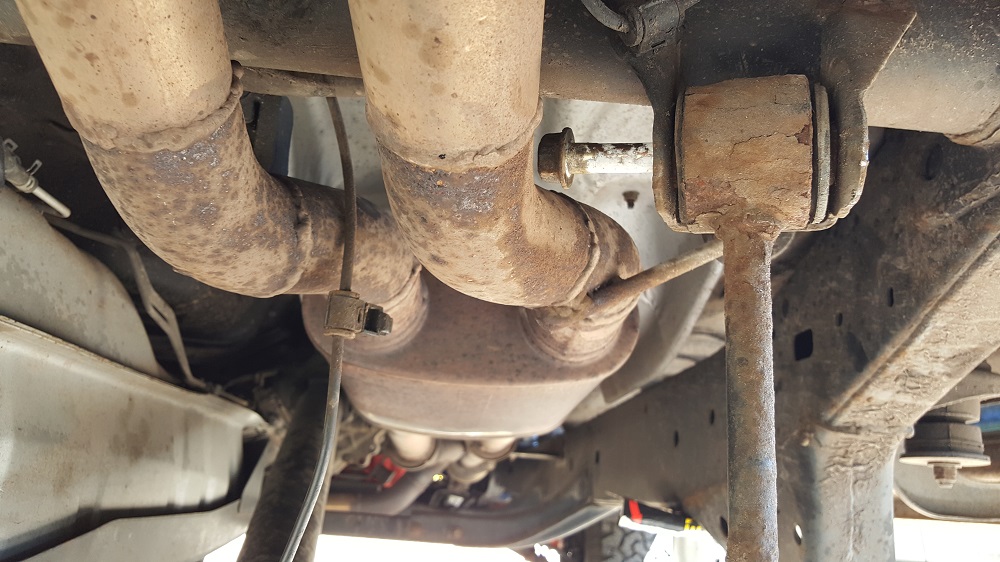
AX28.jpg


I also hit a design flaw with my V8 exhaust system... you can't remove the upper arm bolts.
AX29.jpg


I could tell you meticulously disassembled the exhaust to remove this, but instead I used a grinder.
Out in a minute. The bolts now go on from the other side. :D

Slightly disappointed at the surface corrosion on the stainless steal exhaust parts... but the tips you see still look good.

Funny after the engine swap everything looked so clean apart from the axle.. not that has been reversed!

Disk Brakes!
AX30.jpg


They look tiny here, but they fill the 16s nicely.

All I need to do now is fill up both diffs, torque everything up and attach the handbrake cable to the lever and put the trim back together.

Here is to hopping that nothing leaks, bangs, whines or knocks!
 
Last edited:
This build is savage as f#ck! I love how clean you're able to keep everything. I don't bother just because I'm going to beat the hell out of it on rocks and snow anyways. But props for the great work and love for your Surf.

Cheers!

Jon - Infidel Garage
 
This build is savage as f#ck! I love how clean you're able to keep everything. I don't bother just because I'm going to beat the hell out of it on rocks and snow anyways. But props for the great work and love for your Surf.

Cheers!

Jon - Infidel Garage

Thanks! Corrosion is a bit of an issue here so everything gets painted.. once you do one part the rest stands out... so you get carried away!

I now think I need to POR15 my entire frame :D

Anyway... it's all together!

I've done about 130 miles on it (running in the gears... boring) so far all is well apart from a few niggles..

-The thread is damaged on my front left roll bar drop link.. it has done up but stopped without putting the correct tension on the top bushes, and I'm aware of a slight new knock from it...
I have spare front linkages, but they are going on the back (they are longer) annoyingly my fronts had been extended 1.5" so not an easy replacement. I'm looking for a better "off the shelf replacement for them, I had heard that rear 2nd gen ones were longer, but looking at the measurements they don't look like it.

-The alignment doesn't seem right since putting it back together. The steering wheel is about 10 degrees out. I'll re-measure the rear control arms. I am planning on getting another alignment anyway, but I was not expecting it to be as far out.

-Now its all on the truck I could do a better job of adjusting the handbrake.

That aside it drives well, the gears are silent, there are no obviously leaks or whines or transmission clunks... and the brakes are AWESOME. They stop well, are silent and it stops straight. I keep doing learner driver style emergency stops as I keep forgetting how improved they are. :D

Brake bias seems ok.. on performing a (deliberate) emergency stop, the front tyres chirped first.

Rear calipers peeking through. :D
AX31.jpg


It's so new and fresh looking!!
AX32.jpg


Rear view
AX33.jpg


I'm not sure the rear is sitting 100% level (it was previously)
I'm hoping its just a settling thing, as sometimes it appears to lean one way, and sometimes it appears to lean the other way, if the rear bars are not a perfect length match that might contribute to it, but they can't be out more than a couple of mm as they were measured and set before fitting! I had planned for an alignment anyway after this I'll just let it all settle a little more first. I need to find a flat place to park to look at it!

I still have the 4Crawler rear prop shaft spacer to fit, I decided against doing it earlier as I didn't want to introduce another possible vibration source into the mix until I was sure it was all running properly.

As above I'm about 130 miles into the gear run in process. I'm doing all these miles in 4WD to make sure the front diff also gets used.

The front Truetrac gives slight steering feedback, it feels a bit like torque steer, but the self centering effect is enhanced under power, especially on greater lock. I don't notice it under normal driving, on or off power, but you do notice it pulling out of a T junction where you are on more lock and accelerating, I usually let the wheel feed through my hands and self centre... try that now and it wrenches itself back to straight pretty hard.. it feels exactly the same as it did in RWD. It's not bad, it's just a slightly altered sensation. I thought it was worth posting if anyone is considering one.

Also worth mentioning is that the left hand front driveshaft sits slightly further "out" from the differential casing. This is normal and expected, but I thought something was wrong. Customer support at Randy's ring and pinion conformed this is normal; and acceptable. (It annoys me, but I am probably fussier than most)
 
Where in UK did you get those clean headlights and clear side indicators? Is it hard to get them?
Very nice ride BTW. When you will be in Poland? You are welcome anyway :)
 
Where in UK did you get those clean headlights and clear side indicators? Is it hard to get them?
Very nice ride BTW. When you will be in Poland? You are welcome anyway :)

I got them from Japan, as I needed right hand drive.
If you want them for Poland there are plenty on US ebay! They are just the DEPO ones.

Thanks! Not sure when I'm heading over, but my girlfriend is Polish so a road trip will definitely happen.. Probably in the summer!
 
There was a factory Twin battery option on the Diesel Surfs... Mine never had it (or the rear heater and heated fuel filter) this annoyed my greatly as it was something I knew about but didn't have... and it was a big gaping hole in my engine bay..
39.gif
7.gif

8.gif

Hey look even bots like you!
 
Just read the entire thread. I must say I am very impressed. It's also very nice to see another UZ swapped third gen... I know you will love yours as much as I love mine.


Good on you Sir, for a job very well done!
 
I hate black on the truck; I know because my 97 limited is black :) -- But man, this build is simply epic, I LOVE the red powdercoating in the engine bay.

Great work.
 
Just read the entire thread. I must say I am very impressed. It's also very nice to see another UZ swapped third gen... I know you will love yours as much as I love mine.


Good on you Sir, for a job very well done!

Thanks! I think there are a few of us about now...

The engine as out then... the truck was out then.. it really should have been a factory option!

I feel very inadequate when I read this build. You've got some serious skillz my friend (and some serious cash too)

HaHa thanks! Slight correction though... I *would* have cash if every last penny didn't go straight into what is.. lets face it a 20 year old Toyota :D

In my defence it has been over a number of years!

I hate black on the truck; I know because my 97 limited is black :) -- But man, this build is simply epic, I LOVE the red powdercoating in the engine bay.

Great work.

Tell me about it.. the worse colour for showing up dents.. scratches.. marks...

it didn't look *that* bad before I got it resprayed.. now I feel I'm too precious over it!

They do look great though when it's not your responsibility too look after it!!

Talking of which.. I just gave it its first "Proper" clean since the last round of work!

HiLex05052016.jpg


I also ordered new SPC upper control arm uprated bushes and ball joints from Toytec, and new Toyota OEM LCAs from a local supplier today... and asked for a quote form my local dealer on new front wheel bearings clips and seals, and lower ball joints..

Terrible UK roads, 33s and lift really kill suspension parts.. :redbrick:
 

Members online

Forum statistics

Threads
278,316
Messages
3,554,111
Members
248,016
Latest member
Advally Service

Trending content

Back
Top