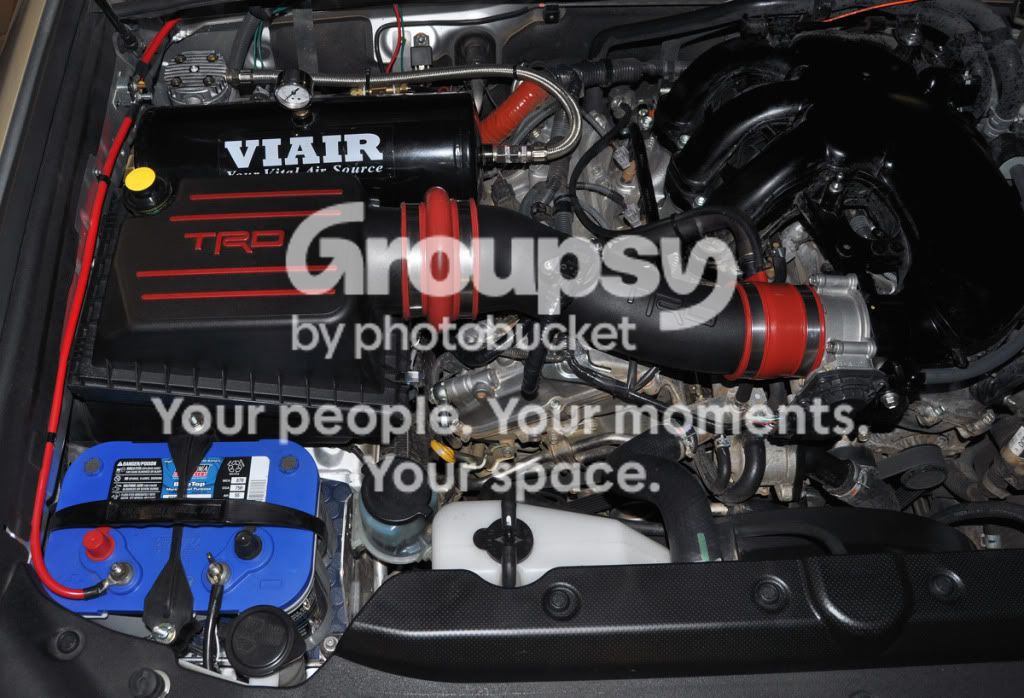
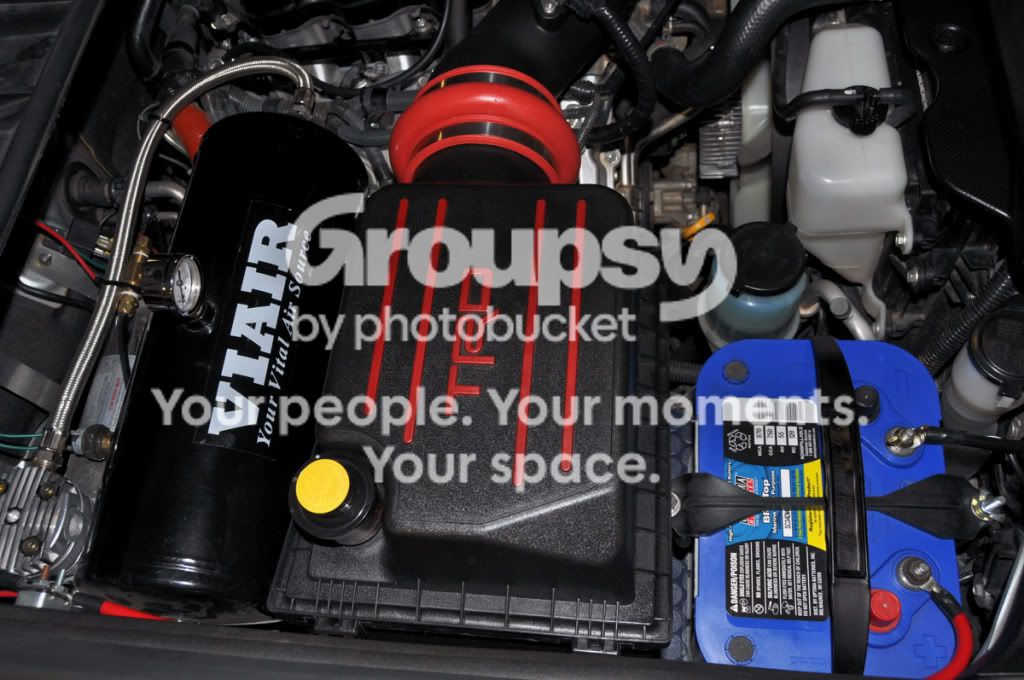
TRD Intake available now!

I will get some pics tomorrow to show the clearances.

I only pulled the MAF wires out to just before the 90degree angle bracket. Had to trim about 5-6 inches off of the supplied wire loom.

Hmm, after rereading your post, I'm not sure if I understand what you are saying. My OEM MAF bolted to the TRD intake without a problem. Used some blue LocTite and it sits nice and flush. The wire connection to MAF has enough slack to not pull.
 
I am talking about the actual plug that connects to the MAF I really had to push on it to get it to lock on and after looking at it closer the bottom of the connector was getting alot of resistance from the intake tube. I had plenty of slack on the wires but after filing alittle off the intake tube where the MAF is bolted to it fits fine now.
 
Oh I see, I thought mine went on well. I'll double check though because I didn't pay too much attention to it. I'm off to the gym so I'll get it under a parking light and check it out.
 
I figured I would throw it out there just in case anybody else runs into it I figured with as much force as it took to plug it in it would only be a matter of time after it actually broke due to the pressure
 
Another successful TRD CAI install here. Had the same issue on one of the bolts that secures the lower housing. Threads in just fine but it goes into a different hole than it was removed from, and it bottoms out. Put a spacer in and it was fine. The other two bolts would hold it anyways.

I will say the audible difference is noticeable. Forget the whistle, which is low, get it to 4000 RPM and she downright growls. Much louder than before. I dig it, and maybe it is just the monstrous sound, but it feels stronger. I only got up to 50 on the test roads and I love it. Awesome mod, free for me, but knowing the difference now it is worth the money, IMO.

BTW, I stripped the MAF wires just beyond the 90 degree bracket, and mine has plenty of slack coming around the intake and is not tight.

<a href="http://photobucket.com" target="_blank"><img src="http://i84.photobucket.com/albums/k2/MichaelC1000m/IMG_5809.jpg" border="0" alt="Photobucket"></a>
 
Got mine put in today. Had to chase the mail man around the island to get it cause I missed him the first time. It went in just like everybody else described it and it sounds awesome!!

Did anyone else get a rotten egg smell when they put the hammer down the first couple of times? The only other CAI's I have experience with were dry filters so not sure if thats the difference or if my trucks gonna start on fire soon.
 
Finally finished the install this afternoon. Took me about 5 hours...damn flash floods and tornado warnings! Install was a breeze, actual time was only about 45 min.
[tibia * gold]
Had to use a few extra washers on the back-right lower air box mounting point to get the hardware to sit flush against something. I only unwrapped the MAF wiring far enough to not pull and reach the new connection. Trimmed the wire loom and taped her all up. Highly suggest you use some lubricant to grease the fittings, made the final install of the TRD CAI very easy.
[]guild * wars armor[/url]
Its pouring rain, but I did take the truck out for a quick round the block. There is a definite whistle when you get on the gas a bit, although I couldn't hear it over my radio. I doubt there is any SOTP gain here and I don't expect any.

Well made product, directions were very easy to follow, install was a breeze (only scraped one knuckle). Whole hell of a lot more room to work in on this truck than my 5.7L LS1!

They spam within other people posts now? :flamethrwoer2:
 
Last edited by a moderator:
Finally finished the install this afternoon. Took me about 5 hours...damn flash floods and tornado warnings! Install was a breeze, actual time was only about 45 min.
tibia gold
Had to use a few extra washers on the back-right lower air box mounting point to get the hardware to sit flush against something. I only unwrapped the MAF wiring far enough to not pull and reach the new connection. Trimmed the wire loom and taped her all up. Highly suggest you use some lubricant to grease the fittings, made the final install of the TRD CAI very easy.
guild wars armor
Its pouring rain, but I did take the truck out for a quick round the block. There is a definite whistle when you get on the gas a bit, although I couldn't hear it over my radio. I doubt there is any SOTP gain here and I don't expect any.

Well made product, directions were very easy to follow, install was a breeze (only scraped one knuckle). Whole hell of a lot more room to work in on this truck than my 5.7L LS1!

You've been reported jack@ss! :wtf:
 
Last edited by a moderator:
I'm assuming since it comes with the same oiled TRD filter we can get with our stock OEM Airboxes, the AFE DryFilter will fit? I'm not a huge fan of oiled filters...
 
My one gripe about this intake is that it seems in order to remove the filter later down the road to clean it the intake tube will also need to be removed in order to pull the airbox lid up and off I wish they would have made it snap down with 4 clips instead of the stupid hinge.
 
They spam within other people posts now? :flamethrwoer2:

You've been reported jack@ss! :wtf:


Please do not post a copy of the spam in your post. It is a little harder to clean up spam. I deleted your copy of the spam in your post. I know you are up-set about the spam and I understand your post, but please don't promote him by copying the spammers post. Thanks.
 
My one gripe about this intake is that it seems in order to remove the filter later down the road to clean it the intake tube will also need to be removed in order to pull the airbox lid up and off I wish they would have made it snap down with 4 clips instead of the stupid hinge.

Is there not enough flex in the orange couplings to get enough space to pull the filter out? (I am drawing a blank on the name right now)

And I agree with running a dry filter on it if possible. I am going to watch this as all of you post your reviews before I buy.
 
I finally had time to install my TRD CAI and the fit and install went smooth. The instructions on this are pretty accurate except I needed to add a washer to one of the bolts that hold the air box down to the fender.Took about 2 hours as I rewrapped the wires with electrical tape and put new split looms on them and wrapped again.

Just took her out for a little spin and it's definitely real loud when you get on it but seems most of the gains are in the high rpm range. Need more seat time to really tell but as I stated before it's mainly for looks . Unbiased dyno runs would be the only real way to tell.
It does look great and the fit was perfect.:thumb3:

Picture017-2.jpg~original


Picture010-4.jpg~original
 
Is there not enough flex in the orange couplings to get enough space to pull the filter out? (I am drawing a blank on the name right now)

And I agree with running a dry filter on it if possible. I am going to watch this as all of you post your reviews before I buy.

Not really because the end of the airbox towards the fender is hinged and there isn't much flex in the orange couplers I wish it was more like the factory airbox with more metal clips.

For some reason not sure why I didn't need to add a washer to the airbox like some have it might be cause I had a K&N CAI on for awhile unless I wasn't paying much attention to it either it seems pretty stable though?
 
Just the two bolts for the lower air box did seem very stable, I added the extra washers from the hardware for the FJC installation.

Sure glad the 4Runner guys are able to skip all those additional steps! My first thought when openign the box was...."Hmmm, what's all this crap for?"
 

Members online

Forum statistics

Threads
278,309
Messages
3,554,075
Members
248,016
Latest member
Advally Service

Trending content

Back
Top