TRD Limited Fat Bike Hauler v1.1

2nd Chance

New member
TRD Limited Fat Bike Hauler v1.1

As Purchased

20160331145605-66d2a875-me.jpg


Current with Updates

20160806141806-df2b2bff-me.jpg


Stage 1 Chassis
TRD Wheels w/BFG Tires

Toytec Spacers / TRD Suspension / TRD Skid Plates


Stage 2 Paint & Body

Trail Hood Swap

Blacked out Chrome (Bumper & Trim)

Vent Visor Part # 894027

TRD Pro Rear Lift Gate Handle Panel (Black) 76811-35220 $115.16

Roof Rack Front End Caps (Black) 63491-35030 + 63492-35030 $38.55pr

Roof Rack Rear End Caps (Black) 63493-35030 + 63494-35030 $38.55pr


Stage 3 Rocky Road Roof Rack & Running Boards

Rocky Road Roof Rack modified for Fat Bikes hauling

Planning the Rack Build - Concept

Fabrication of the rack

Wheel Trays & heading to Pro-Tek Powder Coating

Roof Protection & Removal of OEM Cross Bars & Installation of Roof Rack

Finished Rack

Bikes on the Roof

Trail Rockers & Nerf Bars

Toyota Mud Flaps


Stage 4 Interior Protection

Weather Tech Floor Matts

Canvas Back Rear Cargo Matts

Chris Kyle Seat Covers


Stage 5 Lighting

20'' Rigid Behind the Grill Light Install

Morimoto Headlights & Driving Lights Installed 02-29-20

LED Tailgate Light ( Chi-Town 4X4)

LED Hood Light

LED Interior Lights

Stage 6 Trail/TRD Front & Rear Cover Swap

Research & Parts List Post #112

Excel Spreadsheet Post #148

Collecting all of the Parts

Front Facia & Rear Facia Swap

Front Cover missing pieces

Rear Cover missing pieces

Stage 7 Carbon Fat Bike Dream Build

Trek Farley 9.6 Build

Farley 9.6 is getting closer

So I bought another "Farley" a "5" this time which is Aluminum

Stage 8 TRD Suspension

TRD Suspension Chi-Town 4x4

Cleaning up the TRD Suspension

Packing it up to Drop off at Village Auto

Install Pics from Billy


Limited Side by Side Look

Finally parked next to a stock Limited


BFG 275 Tire Swap FINALLY !!!

Time to Visit Discount Tire


Other Projects

70 Camaro 2nd Chance

92 Sonoma GT Syborg TT


More to come...
 
Last edited:
Register to hide this ad
Now it's time to find a roof rack that works with my goals. After looking at all the rack option I choose to use the roof rack from Rock Road Outfitters.
Using this rack would reduced the amount of fabrication needed for my end goal.


20160331150933-fc8ae712-me.jpg


20160331150939-1c67bf4c-me.jpg


They fit however the rear tire was too far back which would limit the rear hatch from opening when the bikes were on the roof.

20160331150954-f45db206-me.jpg


20160331151000-a8d028a9-me.jpg


Plan B

Move the Fork mount 10" forward and remove the sleeves from the Kuit trays and recreate the concept with PVC tubing.

20160331151005-7b2b761d-me.jpg


20160331151010-3cad851c-me.jpg


Next Step was to come up with a rear wheel tray that accommodates any tire combination.

20160331151016-03be008a-me.jpg
 
Last edited:
Since I haven't welded in 30 years I headed to High Speed Welding in Westmont, il and asked him to fabricate the fork brackets and rear wheel tray.

Using the Kuit fork inserts allows me to quickly change fork combinations.

20160331151023-85abd731-me.jpg


I plan to use a 3/8" ARP 12 point hardware to retain the fork inserts.

20160331151026-4333f7c3-me.jpg


20160331151030-467307bb-me.jpg
 
Last edited:
I needed a wheel tray that could accommodate a 5" tire. This is what I I can up with.

20160331151034-bbc3ce0c-me.jpg


I asked Dennis at High Speed Welding to cuts slots in the trays so I could use a Saris Fat Bike Wheel Strap.

Also, This is what the finished rack looked like the day I dropped it off at Pro-Tek Powder Coating.

20160331151042-abebaddd-me.jpg
 
Last edited:
The next step is to De-Chroming the truck. At some point I may swap front ends to the trail version but for now a wrap will hold me over.

Quick trip to the guys at XTreme Graphics in Lombard, Il for a Satin Wrap.

20160331151126-23b9e124-me.jpg


20160331151137-2496f530-me.jpg


20160331151111-676aa82b-me.jpg


da20f3f3a669000479684322a4bd8146.jpg


ecf830300f8a6ec4083d7ce3cdf751e8.jpg


897f9eace6c15c0e8f2c966313080a4e.jpg


I want to thank the other limited guys on the board for posting there pics as it made my decision. I choose to wrap vs powder coating.
 
Last edited:
Since the roof rack hides most of the roof I wanted to protect the paint from crud that falls off the bike.I also want to protect the roof from the accidental fork jab that sometimes happens when you carry it up to the roof. So I asked the guys and gals at X-Treme to wrap the roof in black vinyl which should offer plenty

20160331151218-e34c9e80-me.jpg


Quick picture of the rack fresh from the Powder Coater and ready to install.

20160331151204-365fe047-me.jpg


Step 1

Remove the plastic end caps from the stock rails so you I can install the modified Rocky Road roof rack.

I took these picture so people can see how easy it is to remove the caps. Just slide the tool under and pull back gentle.

20160331151047-b832c221-me.jpg


20160331151052-d58dfbef-me.jpg


Step 2

Loosen the hardware on the drivers side so there is room to tip the rack up. On the Passenger side remove the hardware completely.

20160331151102-af2ebbbf-me.jpg


Step 3 -- find a friend

Since I was flying solo and the instructions said that a friend or two would be helpful I decided to call my dog I know he's not much help when it comes to lifting but oddly enough he's good company. Plus all of my friends were out riding without me.

20160331151057-40732cee-me.jpg


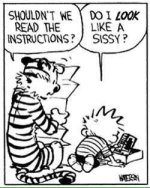
Step 4 -- Read the Instructions bla bla bla

Since I'm doing this myself and after reading the instructions I realized that it would not be possible to follow them. Main reason was the Satellite antenna would be in the way and they wanted you to slide the rack in from the rear of the truck. I decided to step back and look for a better way that one person could install the rack. I decided installing the rack from the Passenger side of the truck would be much easier for a solo job.

Personally I like picture instructions better as I am a visual person plus lets be honest most of us don't actually read the instructions.

Sorry no picture of me reading the instructions.

2015 08-01 15 runner Roof Rack (0).jpg


Step 5 -- Run a tap through all bolt holes

To be safe you should run a tap through all the threaded holes just to make sure there was no powder on them.

20160331151152-261c994b-me.jpg


20160331151159-fa87fb75-me.jpg


Assemble the side brackets and slide them into the drivers side factory side bars.

20160331151222-0c8f1416-me.jpg


Prop up the passenger side of the rack with a 2 x 4 Remember the drivers side needs to be loose so this can happen.

20160331151236-32c5d1f6-me.jpg


Remove the Passenger side bar and slide all 3 brackets into the factory rack rail (Found the Picture)

2a103f0340c5ac33d3d1a39d5e0e823a.jpg


Using a ladder install the factory side rail with the Rocky Road brackets onto the Rocky Road Rack and then secure the factory rail back down.

1f3a1d1b744e5d17d22deeb32e60721e.jpg


Make sure you center the Rack and then tighten the factory rail bolts down and finally tighten the bolts on the bottom of the Rocky Road brackets.

2f49dcff142fc2ce66e126786f4339cc.jpg


I am very happy with the Quality of the Rocky Road Rack and for the money you can't find a better rack.

61e71f07d203208154e6494a292cae3a.jpg
 

Attachments

  • 2015 08-01 15 runner Roof Rack (0).jpg
    2015 08-01 15 runner Roof Rack (0).jpg
    21.6 KB · Views: 13,037
Last edited:
Rear wheel tray

4f2c270ea62ab4de60e1e13e9187f30f.jpg


Added 1/4" nylon spacers under the tray to elevate the tray up enough to clear the Rocky Rock Brackets.

de16cd3710f18f0818f389bc3b91fb19.jpg


I am very happy with the finished concepts. Yet to install are the Saris extra long strap.

fd104004ad844a2a16e1fc42c4ca86d4.jpg


with the Saris Straps installed

f65f381ce660847620ae3ce458aa07d6.jpg


Close up of the fork brackets.

48b07e91976ea8310c06c31527686ef2.jpg


2c5a0e448f9c4b98b259d50f4baed63d.jpg


fcb2ee1919a4583eccd9d1b17999732d.jpg
 
Last edited:
And finally pics of the bikes on the roof.

eb82252243e948c6fbe3a1f50482f9cd.jpg


fcc6b1580a3616aa1b8f754a5812fd6c.jpg


Still waiting for the Stealth Maxels so I can make it a little harder for would-be Thief's
 
Last edited:
Happy Farley Family!

Where in the world do you ride fat bikes in Chicago? Kettle Moraine? If you come up to MN for the Fat Bike Series, give me a shout!

A ton of attention to detail on this rack...very impressive. I never imagined trying to fab a fork mount to the roof. Nice! I'm just hanging my steeds off the back with my Kuat...which I'll plasti-dip at some point this month.

Nice rides!
 
Happy Farley Family!

Where in the world do you ride fat bikes in Chicago? Kettle Moraine? If you come up to MN for the Fat Bike Series, give me a shout!

A ton of attention to detail on this rack...very impressive. I never imagined trying to fab a fork mount to the roof. Nice! I'm just hanging my steeds off the back with my Kuat...which I'll plasti-dip at some point this month.

Nice rides!

We have about 40 miles of trails located in Palos, IL and the bike loves them. We go from supper rocky technical trails to dirt roadie trails. Something about this bike makes me want to just ride it.

My buddy and I have talked about riding Blue Mounds State Park and even Copper Harbor and now I have to convince him that we need to head your way for the Fat Bike Series.

and Yep we ride Kettle and Brown County

The black bike has the 27.5 plus WTB Scrapper rims with 3.5 Panaracers Fat B Nimbles on it and it rides just like my old cross country bike.
 
Awesome job! We have some fat bike beach cruisers and are looking to get some fat mountain bikes now that we moved here to Utah. One of the biggest issues we've had is transporting them!
 
Good decision to go with the wrap. Had mine wrapped in brushed black aluminum and the emblems plastidipped. The plastidip on the limited emblems on the side of the truck are coming off already.

Also diggin the redwood interior... Nice choice.
 
We have about 40 miles of trails located in Palos, IL and the bike loves them. We go from supper rocky technical trails to dirt roadie trails. Something about this bike makes me want to just ride it.

My buddy and I have talked about riding Blue Mounds State Park and even Copper Harbor and now I have to convince him that we need to head your way for the Fat Bike Series.

and Yep we ride Kettle and Brown County

The black bike has the 27.5 plus WTB Scrapper rims with 3.5 Panaracers Fat B Nimbles on it and it rides just like my old cross country bike.

Nice. I've bought and sold 7 fatbikes over the years. The carbon Beargrease FINALLY made for a good handling bike, yet I didn't want a $6000 bike that gets ridden a few times a year. Most fatbikes handle like pigs. Then.....my buddy was selling his pimped out Farley and it rode like the Beargrease at a fraction of the cost, so I swooped it up and pocketed the leftover. VERY nice bike...esp for the price!
 
Good decision to go with the wrap. Had mine wrapped in brushed black aluminum and the emblems plastidipped. The plastidip on the limited emblems on the side of the truck are coming off already.

Also diggin the redwood interior... Nice choice.

Your truck was one of the reason's I had had my chrome wrapped and eventually I plan to actually powder the bumpers satin black for a more permanent solutions. But this works for now and it cost a whole lot less.

btw I am doing the trail hood just like your truck.


Nice. I've bought and sold 7 fatbikes over the years. The carbon Beargrease FINALLY made for a good handling bike, yet I didn't want a $6000 bike that gets ridden a few times a year. Most fatbikes handle like pigs. Then.....my buddy was selling his pimped out Farley and it rode like the Beargrease at a fraction of the cost, so I swooped it up and pocketed the leftover. VERY nice bike...esp for the price!


My favorite thing about the Farley is it handles like my old hard tail and with the 27.5+ wheels it's even better.


Hey someone from the Chicago area. Maybe I'll see you on the road somewhere. I'm in Glenview

I try to hit a couple cruise nights in the summer when the weather is decent. If the weather is good this weekend I might be in Lombard with this car or the truck.

2015%2008-12%20Bumble%20Bee%20Speed%20Inc%20Dyno%20%282%29.JPG
 
Last edited:
Best $159.00 I have ever spent.

f1c2f5b6c2c2dbf4e5b12a54a2246d26.jpg


399e2899e4e264eaf8d3024e8366d500.jpg


cf151ae01ade9af5439b21b3c77b75f0.jpg


I also added some rubber tread to the roof rack.

5f21d009f4d1b5ac77daa13ec657bbe2.jpg


afacce7736d22ca7d8a32af249adc92b.jpg


I had planned to use the anti-slip stuff from a skate board. But found this at Home Depot last night and it was the exact width and the length was close enough.

I forgot to mention the guys at Canvas Back even included two dog treats. Which my dog enjoyed.
 

Members online

Forum statistics

Threads
278,316
Messages
3,554,124
Members
248,016
Latest member
Advally Service

Trending content

Back
Top