
"Upgrading your console interior map lights with 'Philips 194 LED's!'"

rigtec

New member
Hi team,

I'll be installing these leds today:

They're the: Philips 194 LED
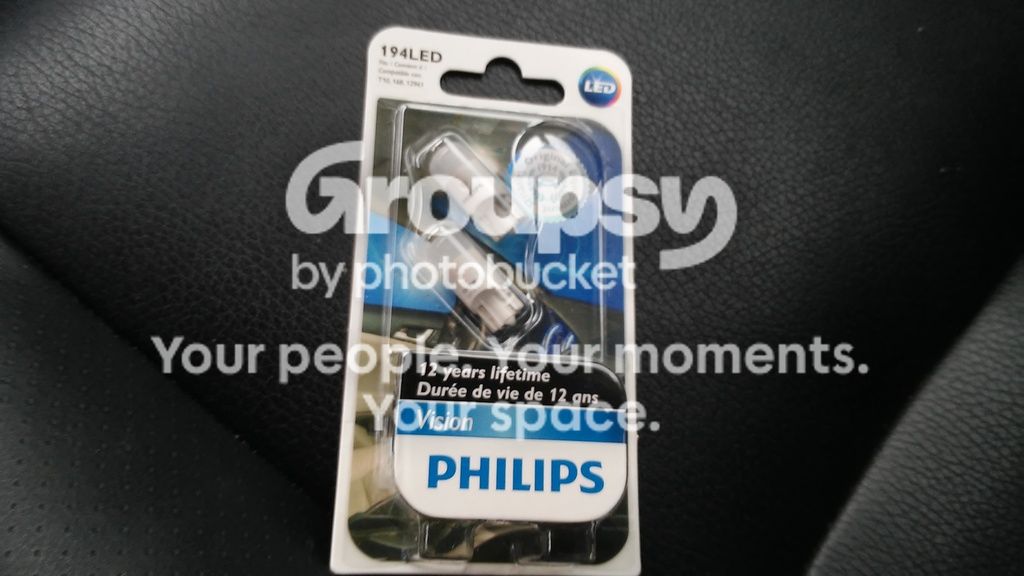

I wanted to repost this 'pictorial essay' which I felt had benefit, but accidently got deleted along with another thread that I took down... hope I can remember what I said in that post... :noidea:

"THE BEFORE"
rigtec-albums-riggy-s+workbench-picture37319-20151211-145820.jpg~original


To begin, insert a small (electronics type) flat-head screwdriver here as shown in the photo below; remember that patience is your very best friend so 'take your time':

SCREWDRIVER INSERTION POINT
rigtec-albums-riggy-s+workbench-picture37320-20151211-150033.jpg~original


I'm deliberately targeting the lens at it's hinged anchors (there are two). Once they let go, nothing else holds it in place!

AND HERE ARE THOSE HINGES; "just for your reference"
rigtec-albums-riggy-s+workbench-picture37321-20151211-150159.jpg~original


The BIGGEST problem with this mod was removing (pulling) the tiny bulbs from their sockets! The bulbs are tightly seated, as they should be, within the grasp of the "push-in clip" socket but to further complicate things, the reflective 'cowl' that surrounds the bulb prevents your fingers from making contact with more than 15% of it's smooth, round surface. The best way that I thought to grab the bulb; w/o disassembling it's bezel, was to use some scotch tape that was handy in the arm rest and made a little safety harness to envelop the bulb:

LIKE SO...
rigtec-albums-riggy-s+workbench-picture37322-20151211-150849.jpg~original


...it pulled right out! And here's an A/B comparison of the bulbs (O.E.M. on the bottom):

rigtec-albums-riggy-s+workbench-picture37323-20151211-151150.jpg~original


Okay, now you'll want to install the led bulb and test it for proper polarity. CAUTION: Don't push the little 'pita' all the way in until you know that the (POS) and (NEG) poles/contacts are in the right position (like I did); these are somewhat difficult (at best) to maneuver!

POLARITY TESTING
rigtec-albums-riggy-s+workbench-picture37324-20151211-151455.jpg~original


If it lights up then you've got it! If it doesn't, don't panic, it's simply in the wrong way... just remove the bulb, spin it 180 deg and push it in again!

"THE AFTER"
rigtec-albums-riggy-s+workbench-picture37325-20151211-151729.jpg~original


..."And all done!" :cool:

I think I picked these 194 bulbs up for about $10 bucks on amazon but may be found even cheaper on ebay or the generic online sights! Hope you'll find this little mod helpful!

Rgds!
 
Last edited:
Register to hide this ad
RT,

Are they that much brighter in light out put or just whiter in color?

I believe I commented on some of your post before on the Phillips 921 reverse lights and I said I was disappointed, but I retract that statement, I was in my small pickup truck and my son was backing out my 4Runner in front of me and they were bright, so I take back some of my negative comments.

I really need more light inside the vehicle. Especially with the map lights.

Thanks,

Richard
 
RT,

Are they that much brighter in light out put or just whiter in color?

I believe I commented on some of your post before on the Phillips 921 reverse lights and I said I was disappointed, but I retract that statement, I was in my small pickup truck and my son was backing out my 4Runner in front of me and they were bright, so I take back some of my negative comments.

I really need more light inside the vehicle. Especially with the map lights.

Thanks,

Richard

Hi Richard,

Your posts (both the above and the prior...) are much appreciated here for the benefit and edification of this forum community! And I do 'particularly' appreciate people that are strong enough 'as individuals' to sometimes... 're-examine' their own comments and acknowledge (openly) if they think that they might not have presented their idea(s) in the best way; there are some really amazing people around here... thank you for that!

The difference in the amount of light output is night and day (No kidding)!! This is truly a "MISSION ACCOMPLISHED" scenario and I'm so glad that I did it. This being a luxury vehicle and not a sports car, I was very cautious about altering it's carefully planned lighting scheme. Believe it or not, there are rules that govern night time lighting protocols for luxury cars, trucks and suvs, so I was careful not to disturb it's delicately balanced soft lighting presentation. Once again, thanks much for your posts!

'Best to you'
 
Thank you for the write up, I didn't realize it was as simple as popping out the map lights. I too have looked into changing out my driver's side map light with a red bulb, here is one of the many options I found when searching for red 194 led.

Robot Check
 
One of the easiest and best mods you can do! So much brighter than stock, now if something drops on the floor, you can actually find it without having to grab a flashlight :whoo: Nice write up Greg :thumb3::thumb3::thumb3:
 
One of the easiest and best mods you can do! So much brighter than stock, now if something drops on the floor, you can actually find it without having to grab a flashlight :whoo: Nice write up Greg :thumb3::thumb3::thumb3:

Hi Barry,

...and thanks! I really appreciate a mod that with very little money, effort and time, you can actually eradicate an issue that once was considered to be a flaw. Now I've got my eye on that dome-light... just not sure if I want to compromise the interior privacy in the back row! I may however, consider adding some soft reading (spot) lamps back there in the head-liner.

Best!
 
any thoughts about what bulb is in the center of those lights? its very dim and lights the shifter area at night with a dim light
im not even sure how to get into where that bulb is.
 
Hi Barry,

...and thanks! I really appreciate a mod that with very little money, effort and time, you can actually eradicate an issue that once was considered to be a flaw. Now I've got my eye on that dome-light... just not sure if I want to compromise the interior privacy in the back row! I may however, consider adding some soft reading (spot) lamps back there in the head-liner.

Best!

I say go for it, takes like two minutes to change out! Next ones to tackle will be tailgate.........lol, it never ends.
 
The polarity should be marked on the base of the new LED. The polarity of the socket can be determined with a meter. That way you don't risk damaging anything.
 
,
Hi team,

I'll be installing these leds today:

They're the: Philips 194 LED


I wanted to repost this 'pictorial essay' which I felt had benefit, but accidently got deleted along with another thread that I took down... hope I can remember what I said in that post... :noidea:

"THE BEFORE"
rigtec-albums-riggy-s+workbench-picture37319-20151211-145820.jpg~original


To begin, insert a small (electronics type) flat-head screwdriver here as shown in the photo below; remember that patience is your very best friend so 'take your time':

SCREWDRIVER INSERTION POINT
rigtec-albums-riggy-s+workbench-picture37320-20151211-150033.jpg~original


I'm deliberately targeting the lens at it's hinged anchors (there are two). Once they let go, nothing else holds it in place!

AND HERE ARE THOSE HINGES; "just for your reference"
rigtec-albums-riggy-s+workbench-picture37321-20151211-150159.jpg~original


The BIGGEST problem with this mod was removing (pulling) the tiny bulbs from their sockets! The bulbs are tightly seated, as they should be, within the grasp of the "push-in clip" socket but to further complicate things, the reflective 'cowl' that surrounds the bulb prevents your fingers from making contact with more than 15% of it's smooth, round surface. The best way that I thought to grab the bulb; w/o disassembling it's bezel, was to use some scotch tape that was handy in the arm rest and made a little safety harness to envelop the bulb:

LIKE SO...
rigtec-albums-riggy-s+workbench-picture37322-20151211-150849.jpg~original


...it pulled right out! And here's an A/B comparison of the bulbs (O.E.M. on the bottom):

rigtec-albums-riggy-s+workbench-picture37323-20151211-151150.jpg~original


Okay, now you'll want to install the led bulb and test it for proper polarity. CAUTION: Don't push the little 'pita' all the way in until you know that the (POS) and (NEG) poles/contacts are in the right position (like I did); these are somewhat difficult (at best) to maneuver!

POLARITY TESTING
rigtec-albums-riggy-s+workbench-picture37324-20151211-151455.jpg~original


If it lights up then you've got it! If it doesn't, don't panic, it's simply in the wrong way... just remove the bulb, spin it 180 deg and push it in again!

"THE AFTER"
rigtec-albums-riggy-s+workbench-picture37325-20151211-151729.jpg~original


..."And all done!" :cool:

I think I picked these 194 bulbs up for about $10 bucks on amazon but may be found even cheaper on ebay or the generic online sights! Hope you'll find this little mod helpful!

Rgds!

Rig,

I installed the 194s in the map lights last night and they do make a big difference. I was amazed, as compared to my initial reaction to the 921s I installed in the reverse light location, but I later retracted, as they are good.

Now getting these little SOBs out was difficult, I tried the tape, duct tape, gorilla tape, electrical tape, nothing. So I said I am going to break them, but that is not good...

Digging in my gun cleaning box, I came across a small pair of Craftsmen angled needle nose pliars, reached up near the base and plucked them out. I did do your recommended polarity test. With the pliars method, a total of 10 minutes...

Also, I used a thin tounge depressor/Popsicle stick to remove the lenses, this worked great, instead of a small metal pry bar or screwdriver.

Thanks,

77
 
,

Rig,

I installed the 194s in the map lights last night and they do make a big difference. I was amazed, as compared to my initial reaction to the 921s I installed in the reverse light location, but I later retracted, as they are good.

Now getting these little SOBs out was difficult, I tried the tape, duct tape, gorilla tape, electrical tape, nothing. So I said I am going to break them, but that is not good...

Digging in my gun cleaning box, I came across a small pair of Craftsmen angled needle nose pliars, reached up near the base and plucked them out. I did do your recommended polarity test. With the pliars method, a total of 10 minutes...

Also, I used a thin tounge depressor/Popsicle stick to remove the lenses, this worked great, instead of a small metal pry bar or screwdriver.

Thanks,

77

Just bought these, can you share a photo of the angered pliars you used?

thanks [MENTION=83083]rigtec[/MENTION] for the write up
 
so i installed the LEDs recommended in another thread on my wife's 4Runner. I'll install these in my brand new 4Runner and report back.
 

Members online

Forum statistics

Threads
278,310
Messages
3,554,079
Members
248,016
Latest member
Advally Service

Trending content

Back
Top