USB Charger In 2nd Row

So last night I attempted to take out the 12v port but got stuck when trying to pull the face plate that the port is connected to out due to some other trim piece in the way:


This trim piece prevented me from being able to pull out the face plate...does your 4Runner have this piece? Any ideas on how to remove it? It seems like it is under the center console trim so not sure if the whole center consonle has to come out too or not... :shrug:

You have to remove to top of the center console to remove the lower part of the center stack.
 
So last night I attempted to take out the 12v port but got stuck when trying to pull the face plate that the port is connected to out due to some other trim piece in the way:

This trim piece prevented me from being able to pull out the face plate...does your 4Runner have this piece? Any ideas on how to remove it? It seems like it is under the center console trim so not sure if the whole center console has to come out too or not... :shrug:

Yeah, sorry. I totally spaced removal of that little trim piece is required. I used this lady's video as my guide and it was easy as could be.

https://www.youtube.com/watch?v=xRqJ5Jb4uVw&feature=youtu.be

She talks about it specifically at the 4 minute mark. No tools required for anything in the center console for what you need to get to.
 
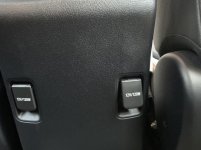
I see southeast region 4Runners with 2x 2nd row USB ports along with seprate 2x 12V outlets. Anyone have any information on how to get the panel like this? I can’t find it in the Toyota parts catalog.
 
You have to remove to top of the center console to remove the lower part of the center stack.

Yeah, sorry. I totally spaced removal of that little trim piece is required. I used this lady's video as my guide and it was easy as could be.

https://www.youtube.com/watch?v=xRqJ5Jb4uVw&feature=youtu.be

She talks about it specifically at the 4 minute mark. No tools required for anything in the center console for what you need to get to.

Awesome, thanks guys! I'll have to give it another go when I get a moment...

BTW, will the factory harness plug right into the new USB charger or will I have to splice the factory wires? If the latter, there were 2 wires: 1 green and 1 black and white...any ideas which one is the hot wire? I'll double check to make sure when I'm down there but just trying to get a heads up.

Thanks again.
 
Awesome, thanks guys! I'll have to give it another go when I get a moment...


BTW, will the factory harness plug right into the new USB charger or will I have to splice the factory wires? If the latter, there were 2 wires: 1 green and 1 black and white...any ideas which one is the hot wire? I'll double check to make sure when I'm down there but just trying to get a heads up.


Thanks again.


Factory 12v outlet uses a convenient Molex connector plug.

Most aftermarket USB outlets I found came with bare wires.

I cut the molex connector off my factory 12v outlet and soldered it onto the USB’s wires. Only thing I had to cut was the connector off the 12v outlet (that I was throwing in the trash, anyway).

As for wiring color: black is almost universally the ground wire in automotive. My 12v outlet ground was black and white. Hot was a solid color. The hot wire color can vary.


Sent from my iPhone using Tapatalk
 
I shoved one of these in the port:

acc005a.jpg

Does the cover close when not in use? I bought a similar "flush" unit but it still interferes with the cover thus the cover sits up a bit and catches my kids feet when they slide across the seat getting in/out. If this fits under the cover please post a link to where you got it.
 
Does the cover close when not in use? I bought a similar "flush" unit but it still interferes with the cover thus the cover sits up a bit and catches my kids feet when they slide across the seat getting in/out. If this fits under the cover please post a link to where you got it.

It doesn't fully close but it closes enough to not be in the way. I don't have kids but haven't had any issues with adults in the back.

I can get a picture later.
 
Does the cover close when not in use? I bought a similar "flush" unit but it still interferes with the cover thus the cover sits up a bit and catches my kids feet when they slide across the seat getting in/out. If this fits under the cover please post a link to where you got it.

Pics attached...
 

Attachments

  • 1.jpg
    1.jpg
    135.7 KB · Views: 549
  • 2.jpg
    2.jpg
    139.6 KB · Views: 575
SUCCESS!!

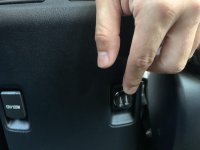
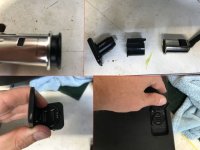
The 12v port is sorta tricky to remove the first time you do it. It pushes out thru the front. The spring loaded cover stays attached and the entire unit comes out in one piece. Hopefully it makes sense when you look at it yourself. Disconnect the power and set it on a table for a good view. You have to release some retaining pins that are inside the 12v connector, then push the whole unit forward out of the mounting bracket. Same is true for the 2nd row seating power outlets. Exact same design holding them in place.

Happy to help. I still have one more 12v outlet to replace, so I'll take the opportunity to record how to remove it from the housing. It's kinda awkward, but not hard once you figure it out. A small, flat blade screwdriver helps a lot.

If you happen to work on your last 12v port, please do record the removal process as I'd like to see how you remove yours. My 12v port was different in that there were no springs inside but rather, a plastic piece that held the port in place. It would not budge when I tried to push it in to remove it from cover so in the end I just ended up cutting it off:


I wanted to keep the factory connector just in case I need it for something in the future so I ended up just splicing the hot wire and grounding the ground to a bolt:


The hardest part of this install was trying to get the locking collar (not sure what it's called...) on the back of the USB charger to screw on tightly. lol Let me explain... On my setup, the seat controller has a path that sticks out very close to the charger so I could not turn the collar all the way down to tighten the charger. I went back and forth trying to figure out how to get it to spin all the way down until I finally realized that I can just turn the USB charger instead. :redbrick:


Reassembled and ready to go:


Thank you to everyone who responded to this thread but a special THANK YOU to DarkPassenger for all your help. I would not have been able to figure this out without your help and I really appreciate you taking the time to record your videos. Thank you!!
 
I worked on this over the weekend and wanted to pass on what I did.

I pulled off the back cover from the console, pulled out the plug, then pulled out the spring loaded cover which is all one piece with the sleeve (barrel) that the outlet is slid into.

I bought one of the hardwired dual USB sockets listed in this thread but when I got to looking at it, it was just too big to install and keep the flip up cover that the truck came with. I could have installed it flush mounted like others have on this thread but I kind of wanted to keep it stock looking.

I went back to the idea of using a plug-in adapter in the original 12v socket. If you look at the top left photo, this is how deep the Aukey brand socket fits. (I got this off of Amazon, its similar to the Griffin one someone else posted) It sticks out an 1/8" preventing the little door from closing when its in the factory socket.
Since it has the same lip and is roughly the same size as the 12v outlet it fits nicely in the base of the cover.

What I did was used a Dremel to cut the "barrel" portion from the cover. (See top right of photo where I have the aukey plug in the faceplate and the barrel cut off) Then I mounted the faceplate with flip open cover to the console using a dab of epoxy. I put the Aukey plug in the front of the cover and used the original 12v outlet slid in from the backside to hold it on place. Then I slid the original "Barrel" that I cut off over the 12v outlet from the backside of the console and epoxied it back together. The Aukey plug fits tight in the socket so it held it all together while the epoxy dried.

When I was all done the Aukey plug is flush mounted where the 12v socket used to be and the spring loaded door still closes all the way. Plus since I'm still using the original 12v plug I didn't have to cut or modify the wiring. Oh and if for some reason I want to go back to stock its just a matter of taking the Dremel to the epoxy and putting it back to stock and gluing the barrel to the faceplate.
Hope this helps someone who wants to keep their outlet stock looking.
 

Attachments

  • IMG_7927.jpg
    IMG_7927.jpg
    50.5 KB · Views: 435
Last edited:

Members online

Forum statistics

Threads
278,312
Messages
3,554,086
Members
248,016
Latest member
Advally Service

Trending content

Back
Top