Valve cover gasket leaking

ILLCOMM

New member
Hi all, new user, new poster.

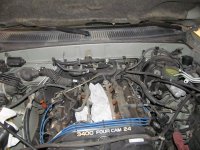
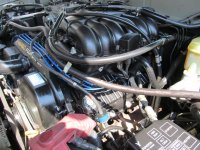
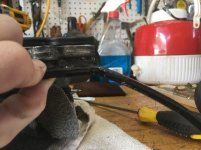
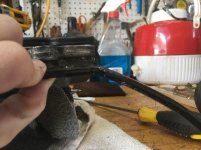
I have 2001 4Runner with ~120k miles and the last time I had the oil changed the dealer mentioned a leaking valve cover gasket. They didn't sound super concerned. Said it was a $600+ job. Is that the black residue in the pictures below?

aMCjBLPl.jpg


Nzs9QYVl.jpg


Anyone have a good link to the service manual so I can see whether I can do this myself and save $600?

Thanks!
 
Register to hide this ad
just go re torque them. mine have been leaking for the last 70k miles... not really a big deal until it start just dripping out.
 
Not that difficult of a job, didn't even follow a write up to do mine. It did take me two days since I painted the upper / lower intake and the valve covers. the two most aggravating parts was removing the coolant line underneath the throttle body closest to the firewall and removing the driver side valve cover. I found unplugging the fuel injectors, unclipping the wire harness at the back of the timing belt cover, removing the oil filler cap and wedging the valve cover under that harness at an angle towards the center the engine was the only way to get the bugger out. Oh by the way that plastic cover is a brittle piece of junk covering the wire harness there. The only thing I used off this site was the torque specs for the intake and throttle body, 13 ft.-lbs. Most of the nuts and bolts I removed where just re-installed in the spot they came from so I would not forget where they came from. Make sure not to drop any thing in the lower plenum and once you remove it cover the holes with a some clean rags. Also those two coolant lines on the bottom of throttle body will leak a good amount of fluid, have some rags ready and hopefully it will not be hot coolant like I experienced.... When it come to the spark plug grommets on the valve covers use a small and I mean a small flat head screwdriver and hammer. You will need to bend a metal tab up and out of the way and very carefully drive the screw driver in between the grommet and valve cover from the underside. Then just bend the little guys by prying the towards the center hole. Use a rubber mallet or a body hammer to beat the new ones in and bend those tabs back down. Just take your time, its easy to knock a little rubber of the outer edge of these things. When re-installing the valve covers I used a bit of black sealer ( p/n 00295-00103) from the dealership in the grove of the valve cover at the two half moon portions and in the corners of the half moon part of the head. would say if you have wrenching skills at all you can do it in 6 hours with just a few hand tools.

Tools:
10mm-14mm sockets
(2) 1 1/2" socket extensions
(1) 3/8" swivel
3/8" socket wrench
torque wrench with value as low as 10ft.-lbs. ( you can rent one and get an adapter to 3/8")
Phillips screw driver
small flat head screw driver
rubber mallet ( also use this to knock your valve covers loose, do not pry them off)
channel locks or pliers (for the snap bands holding most of the hose's on)
wd-40 ( makes it easier to get those hose's back on)
throttle body cleaner ( why not clean , you got it apart)
shop Rags

What to expect:
Frustration with the driver side valve cover
Frustration with removing all those rubber hoses, just twist them back and forth with pliers while pulling on them.
Coolant all over your garage floor

Its also recommended to disconnect the battery since you will be unplugging so much electrical. When tightening the hardware on the intake and valve covers work in a clock wise fashion from the center outward while only tightening the bolts in small increments to prevent warping. It may seem like a daunting task to preform, but all those hoses are only a certain length and most are bent in a manner that they will only go where they need to. All the plugs you unplug will only go back to where they are supposed to. Unless a hose tears on you, it will only cost you around fifty dollars if you have the tools and cleaner. Also to clean off the valve cover, save yourself the time... Use a pressure washer or take them to car wash and spend two dollars and spray them off, its a lot easier than purple power and rag.
Also you could pick up some mass air flow cleaner and perform the task as well...
http://www.4runners.org/writeups/throttle/index.html
 

Attachments

  • IMG_0054.jpg
    IMG_0054.jpg
    138.7 KB · Views: 24,582
  • IMG_0060.jpg
    IMG_0060.jpg
    141.4 KB · Views: 13,867
Last edited:
Use your cell phone to take pics as you go. Its cheap insurance. Be sure to cover the intake manifold once you pull the intake runners off. And I highly recommend getting a torque wrench that measures inch pounds. Its near impossible to accurately torque tom4-5#s using the bigger torque wrenches.
 
Last edited:
Not that difficult of a job, didn't even follow a write up to do mine. It did take me two days since I painted the upper / lower intake and the valve covers. the two most aggravating parts was removing the coolant line underneath the throttle body closest to the firewall and removing the driver side valve cover. I found unplugging the fuel injectors, unclipping the wire harness at the back of the timing belt cover, removing the oil filler cap and wedging the valve cover under that harness at an angle towards the center the engine was the only way to get the bugger out. Oh by the way that plastic cover is a brittle piece of junk covering the wire harness there. The only thing I used off this site was the torque specs for the intake and throttle body, 13 ft.-lbs. Most of the nuts and bolts I removed where just re-installed in the spot they came from so I would not forget where they came from. Make sure not to drop any thing in the lower plenum and once you remove it cover the holes with a some clean rags. Also those two coolant lines on the bottom of throttle body will leak a good amount of fluid, have some rags ready and hopefully it will not be hot coolant like I experienced.... When it come to the spark plug grommets on the valve covers use a small and I mean a small flat head screwdriver and hammer. You will need to bend a metal tab up and out of the way and very carefully drive the screw driver in between the grommet and valve cover from the underside. Then just bend the little guys by prying the towards the center hole. Use a rubber mallet or a body hammer to beat the new ones in and bend those tabs back down. Just take your time, its easy to knock a little rubber of the outer edge of these things. When re-installing the valve covers I used a bit of black sealer ( p/n 00295-00103) from the dealership in the grove of the valve cover at the two half moon portions and in the corners of the half moon part of the head. would say if you have wrenching skills at all you can do it in 6 hours with just a few hand tools.

Tools:
10mm-14mm sockets
(2) 1 1/2" socket extensions
(1) 3/8" swivel
3/8" socket wrench
torque wrench with value as low as 10ft.-lbs. ( you can rent one and get an adapter to 3/8")
Phillips screw driver
small flat head screw driver
rubber mallet ( also use this to knock your valve covers loose, do not pry them off)
channel locks or pliers (for the snap bands holding most of the hose's on)
wd-40 ( makes it easier to get those hose's back on)
throttle body cleaner ( why not clean , you got it apart)
shop Rags

What to expect:
Frustration with the driver side valve cover
Frustration with removing all those rubber hoses, just twist them back and forth with pliers while pulling on them.
Coolant all over your garage floor

Its also recommended to disconnect the battery since you will be unplugging so much electrical. When tightening the hardware on the intake and valve covers work in a clock wise fashion from the center outward while only tightening the bolts in small increments to prevent warping. It may seem like a daunting task to preform, but all those hoses are only a certain length and most are bent in a manner that they will only go where they need to. All the plugs you unplug will only go back to where they are supposed to. Unless a hose tears on you, it will only cost you around fifty dollars if you have the tools and cleaner. Also to clean off the valve cover, save yourself the time... Use a pressure washer or take them to car wash and spend two dollars and spray them off, its a lot easier than purple power and rag.
Also you could pick up some mass air flow cleaner and perform the task as well...
4Runners.org - Cleaning Your Throttle Body and MAF

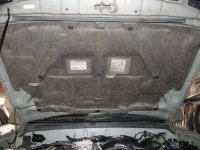
Where did you get the inner hood heat shield? Saw many 4runners and non of those have it. If you got it from a different car, please let me (us) know
thanks
 
Where did you get the inner hood heat shield? Saw many 4runners and non of those have it. If you got it from a different car, please let me (us) know
thanks

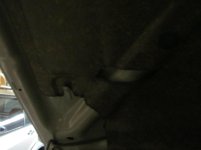
The under hood insulation was already on the 4runner when I bought it used several years ago. It looks like a factory piece to me with all the correct hardware and cut outs. Sorry for the thread hijack.:boxer:
 

Attachments

  • IMG_0066.jpg
    IMG_0066.jpg
    133.6 KB · Views: 11,993
  • IMG_0068.jpg
    IMG_0068.jpg
    128.5 KB · Views: 11,063
The under hood insulation was already on the 4runner when I bought it used several years ago. It looks like a factory piece to me with all the correct hardware and cut outs. Sorry for the thread hijack.:boxer:

Yeah, mine came with that from the factory. It's possible pre-'99's did not have it (I think I may have read that somewhere.)

EDIT: I did. From J.A's site on changes for '99:

6. Body
A silencer to reduce the engine noise has been provided on the outer dash panel and the engine hood.

Toyota 4Runner History 1999
 
I know ots old, but google pulls this post up.

I’d say do not retighten the bolts. They are impossible to get to, without doing all the prep work for the job.

Objective evidence to support. Old gasket, flat, hard as a rock in hand. New on the cover.
 

Attachments

  • C269BC64-03D0-4D3E-9819-9B12AB41145E.jpg
    C269BC64-03D0-4D3E-9819-9B12AB41145E.jpg
    122.8 KB · Views: 5,529
  • 0F8B8FF2-3381-4BEB-A359-3F2FEB891DC2.jpg
    0F8B8FF2-3381-4BEB-A359-3F2FEB891DC2.jpg
    122.8 KB · Views: 5,497
My seal is on my "eventually I'll get to it this year" list...

But in the mean time I took a ratchet extension and tighten them down by hand so they they were snug. A few were loose. I also took photos after cleaning off leaked residue that was there. I've noticed no additional oil leaking out since
 

Members online

No members online now.

Forum statistics

Threads
278,312
Messages
3,554,083
Members
248,016
Latest member
Advally Service

Trending content

Back
Top