Warthog Build and Adventure Thread

Moar pics!

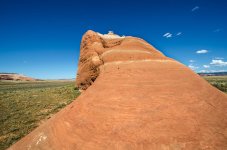
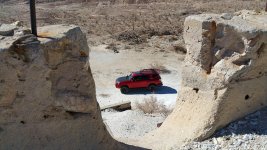
JailhouseRock1.jpg
Climbing up Jailhouse Rock. DEEP cistern at top. If you fall in you can't get out!
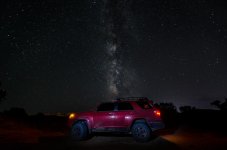
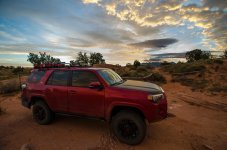
WarthogMilkyway1.jpg
Warthog and Milkyway. Some Moab light glow on the right and lighting up the valley on the left.
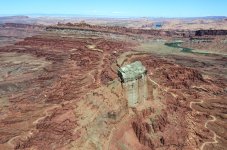
KaneCreekAnticline.jpg
Kane Creek Anticline and looking over Harrah pass below. Need to do that one next time!
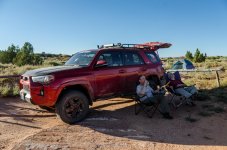
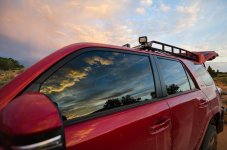
WarthogShade.jpg
Every day after offroading 7-8 hours. Hide in the shade of the runner with a beer or two and relax till the sun went down.
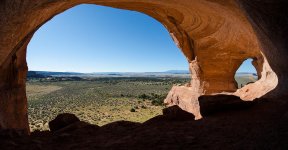
LookingGlassArch2.jpg
looking Glass Arch and HUGE cave. Man this was enormous. In the arch to the right is my friend standing there for scale. And from the parking you hike up to the arch for a surprising reveal :D
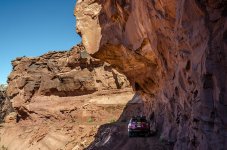
WarthogUnderOverhang.jpg
Warthog under huge overhang on fun shelf road leading down to the Colorado.
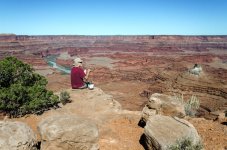
LunchOnTheEdge.jpg
Lunch on the edge... This was at Canyonlands Overlook which was at the end of a "Moderate" but really not too hard trail. Surprisingly there was a pit toilet and a picnic table at the end. But to heck with that, the view was much better from here :)

Continued....
 

Attachments

  • JailhouseRock1.jpg
    JailhouseRock1.jpg
    100 KB · Views: 2,320
  • WarthogMilkyway1.jpg
    WarthogMilkyway1.jpg
    60.8 KB · Views: 2,344
  • KaneCreekAnticline.jpg
    KaneCreekAnticline.jpg
    139.8 KB · Views: 2,305
  • WarthogShade.jpg
    WarthogShade.jpg
    119.5 KB · Views: 2,337
  • LookingGlassArch2.jpg
    LookingGlassArch2.jpg
    97 KB · Views: 2,376
  • WarthogUnderOverhang.jpg
    WarthogUnderOverhang.jpg
    138.6 KB · Views: 2,300
  • LunchOnTheEdge.jpg
    LunchOnTheEdge.jpg
    137.2 KB · Views: 2,268
Last edited:
Final batch of pics!

WarthogSunrise1.jpg
The morning we were leaving. Clouds gathering, yellowish light, ominous.

WarthogSunrise2.jpg
Rain held off till we were up and had everything packed and on the road though so "Yay!".

Oh! I almost forgot. In Beaver UT there is a taco shop called... Beaver Taco (snicker :D)

Good foods!

20140923_154851_sm.jpg
 

Attachments

  • WarthogSunrise1.jpg
    WarthogSunrise1.jpg
    99.2 KB · Views: 2,423
  • WarthogSunrise2.jpg
    WarthogSunrise2.jpg
    86.8 KB · Views: 2,419
  • 20140923_154851_sm.jpg
    20140923_154851_sm.jpg
    76.8 KB · Views: 2,312
Last edited:
Awesome writeup and thank you for the pics! I just added a few more "must sees" and "must drives" to our itinerary for our 2015 trip out west!
 
I tried to edit my previous response, but it gave me multiple error messages:

2014 Warthog - any specific trails in Arches that I should drive while out there? I'm having difficulty finding names for them, or geocoords. Google maps has some names like "BLM 146" etc..., We're trying to get in as much scenic driving off the beaten path as possible while out there. Again, awesome writeup, truly inspirational.
 
WOW, great thread with awesome build and landscape photos. Well done, your rig looks fantastic, one of the nicest on here.
 
I tried to edit my previous response, but it gave me multiple error messages:

2014 Warthog - any specific trails in Arches that I should drive while out there? I'm having difficulty finding names for them, or geocoords. Google maps has some names like "BLM 146" etc..., We're trying to get in as much scenic driving off the beaten path as possible while out there. Again, awesome writeup, truly inspirational.

Funny thing is that Arches is the most "on the beaten path" area around moab :D but yes there is a single 4x4 only route that is fun and takes you to Tower Arch which is pretty nice and definitely missed by 99% of anyone going into the park.

Here are a couple GPS coords you can plug into google earth for come context. (Copy paste entire GPS coord into the search box)

Start of Arches trail (or end): 38°46'5.98"N 109°35'19.32"W
4x4 turnoff: 38°47'42.99"N 109°39'29.20"W
Tower Arch parking: 38°47'13.91"N 109°41'22.56"W
End of trail (or start): 38°42'6.10"N 109°34'0.63"W

Looking glass rock (Arch with cave): 38°16'29.39"N 109°24'19.39"W

Cave house: 38°14'26.70"N 109°26'8.85"W

Canyon Lands overlook: 38°24'16.30"N 109°42'29.98"W

Start of Shafer trail (inside Canyon Lands NP): 38°28'17.43"N 109°48'41.32"W Easy trail with hugely awesome views all the way down to the potash ponds anyway.

Top of Spring canyon shelf road: 38°38'39.26"N 109°58'46.79"W

Well those are some of the places in the photos. Maybe 0.1% of the awesome places you can go near Moab :D Definitely buy a book or two of moab area trails, there are SO many places to go.
 
Last edited:
Wow, I had no idea (east coaster). Thank you for all the great info - I'll be sure to incorporate it into our trip for next year.

Keep having fun out there!
 
Ditch lights

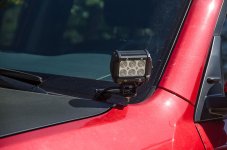
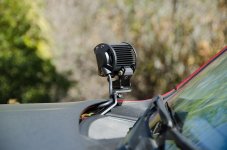
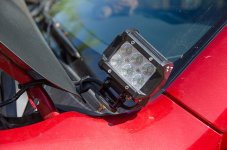
I had initially mounted my ditch lights on the rack up top. That was an ok place for them, though they lit up my mirror some, and they kind of stuck out and I was afraid they might be taking off more mileage up there. So I bought a set of CBI ditch light brackets to mount them to the hood.

DitchLights1.jpg


DitchLights2.jpg


DitchLights3.jpg
Clearance with hood open

DitchLights5.jpg
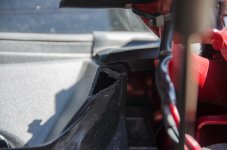
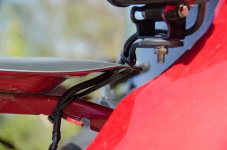
Problem: The brackets actually hit the plastic drainage system when the hood closes. And that plastic is strong enough that it actually bends the hood hinge up when closed, exposing about 1/8 inch more gap between the hood and the quarter panel :(

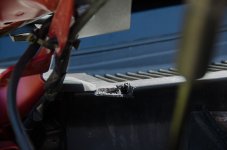
So... out came a loose hacksaw blade to trim down the plastic in order to make it fit...

DitchLights6.jpg
Trimming on the passenger side

DitchLights4.jpg
Here is the bracket in profile. It seems like it could have followed the hood line a little more closely and prevented the need for cutting the plastic. Though maybe this is only a 5th gen problem?

Overall I like them in this position a lot and would still recommend them as long as you don't mind possibly having to trim some plastic to get them to fit.
 

Attachments

  • DitchLights1.jpg
    DitchLights1.jpg
    60.7 KB · Views: 6,643
  • DitchLights2.jpg
    DitchLights2.jpg
    59.4 KB · Views: 6,197
  • DitchLights3.jpg
    DitchLights3.jpg
    77.5 KB · Views: 6,579
  • DitchLights4.jpg
    DitchLights4.jpg
    126.2 KB · Views: 4,915
  • DitchLights5.jpg
    DitchLights5.jpg
    55.3 KB · Views: 4,884
  • DitchLights6.jpg
    DitchLights6.jpg
    113.7 KB · Views: 4,881
Last edited:
Noise Abatement

I got 2 of my three noise problems taken care of.

1) New LED light bar to prevent whistling.

Actually, the little 8000 lumen one was ok but not quite bright enough for my liking, besides whistling like a mofo sticking up above the rack level. Fixed both with a 30 inch 12500 lumen single row light bar. Lower profile, no whistling.

LEDs.jpg

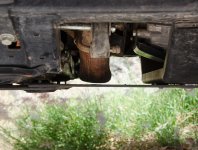
2) After the last moab trip, I bent the skid under the exhaust pipe crossover a tiny bit and reduced the clearance from about 1/8 in to < a 16th. In reverse the pipe would rattle pretty loudly against the plate.

SkidRattle1.jpg

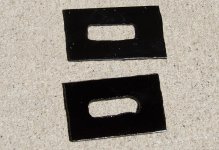
So I quickly cut a couple of spacers to add back the 1/8 in spacing.

SkidRattle2.jpg

If I bend it more, I'll then just flip it upside down till I bend it back :D

SkidRattle3.jpg

3) (Not done) The urethane bushings in the lower link arms are squeaking pretty loudly. Silicone spray removes a lot of it, but when going over big bumps there is still a hefty rubber squeaky sound. I need to order some silicone grease on line and lube them up properly...
 

Attachments

  • LEDs.jpg
    LEDs.jpg
    142.1 KB · Views: 5,758
  • SkidRattle1.jpg
    SkidRattle1.jpg
    78.9 KB · Views: 4,644
  • SkidRattle2.jpg
    SkidRattle2.jpg
    137.1 KB · Views: 4,646
  • SkidRattle3.jpg
    SkidRattle3.jpg
    120.5 KB · Views: 4,648
Borrego for a day

Last Sunday I got out to Borrego for a day trip. My friend was sick so I went alone. Not nearly as fun that way :(

I headed for south Borrego, to areas I used to camp 30 years ago with another friend that is no longer with us. Was a bit harder than I thought to find the old spots where we camped. After 30 years, those snapshots you have in your head you find out are not all that accurate. Things just don't look the same, even though they haven't changed at all.

Course some things have changed!

Truck1.jpg
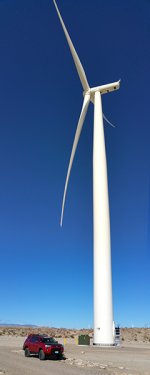
THESE THINGS. There's like 50 of them ALL OVER the lower borreco/ocotillo area now. Almost completely surrounding Ocotillo. Those people that lived there and had clear and vast views of the desert are now hemmed in by these giants. Kind of made me think.. What exactly is "Green" or "Eco" about these again?


Truck2.jpg
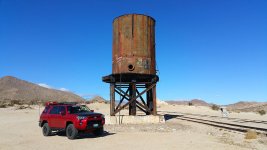
Explored around the Dos Cabesas area. We used to camp at Mortero Palm a lot.

I scrubbed out the "Hail Satan" on the base :D I was surprised they spelled it correctly. Must have been real Satanists!

Truck3.jpg
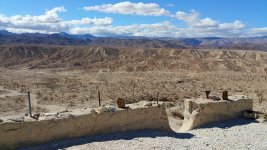
Headed over to the old calcite mine area. I didn't think I'd been there before but when I arrived I had a distant memory of it come up from the depths.

Truck4.jpg

I then headed over to the fossil canyon area. Boy that place has changed :/ besides being encroached on by development, it is now apparently the official, unofficial lawless shooting rage for the most part. Everywhere I went there was tons and tons of brass and shells. Couple of guys with some insanely high powered sounding stuff shooting at steel plates it looked like in one area. Could have been wood painted dark grey though I guess. Fossil Canyon itself was also blocked off to vehicles, hiking only. But if the shooters all go to that area instead of Painted gorge area like I've seen in the past then overall that's a good thing. There wasn't anything really that special about the camping there really.

From there I headed to Painted Gorge to see what was up over there. There was a new gate across the entrance since I was there last. Now closed Jan1 to July1 for the Bighorns. So go early if you want to get in. Drove as far back as I could but not up the trail to the peak since I was alone.

No one was camping in the gorge! Strange, maybe that's fallen out of favor. We always camped in the gorge.


Truck7.jpg
I went back out of the gorge without getting a pic somehow, then over to the shell beds to the north and then drive north on the east side of the mountains. After getting out of the wash to a main cross road I headed to Corizzo Mtn. What a hell road! Woops the entire way ugh.

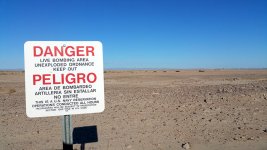
Half way through I decided I was tired of it and tried cutting across the Stage line trail to the west since I'd never gone past the swamps before. Unfortuantely after a few miles the route was closed due to "unexploded ordinance" :( Had to head back to the Woops road and continue north.

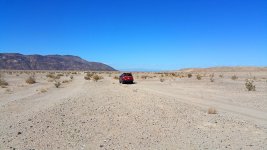
After a while it became a wash and it was all high flying fun till I got to the tip of the Corisso range ( dark mtns on the left in the above pic) and crossed under the plaster city RR trestle. From there I headed SE along a pole road. 100% sand, fast and fun with occasional break slams :D

Then I cut across to Superstition hills. Hadn't been here in at least 30 years. All sand everywhere. And a great view of the military action, including live bombing, even at night! Only a lonely helo out today though.


Truck5.jpg
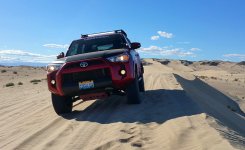
Only did a little dunes running as again, I was by myself and didn't want to get stuck somewhere stupid.


Truck6.jpg
Finally headed back towards Seeley and home. Passing by the dummy target range where we used to watch them drop talc bombs from about 1000 feet away. Range was still there, but quiet on a Sunday. Had some new targets out there it looks like though.

Headed back home as the sun was low, clouds keeping it from my eyes mostly and listening to my new "Desert Mix" on Google play that I recently put togeather of all my old late 60s /early 70s arena and psychedelic rock for the drive home.

Stats:
Escondido to Ocotillo: 90 minutes
Total off roading: 5+ hours
Superstition Hills to Escondido: 2hours and change
Distance: 246 miles
MPG: 15.9

Final note: I forgot my Nikon at home and had to use my phone to take these pictures. I'm actually surprised at how well they came out. Note 4 in HDR mode. Nice :)
 

Attachments

  • Truck1.jpg
    Truck1.jpg
    51.6 KB · Views: 4,541
  • Truck2.jpg
    Truck2.jpg
    88.7 KB · Views: 4,637
  • Truck3.jpg
    Truck3.jpg
    138.6 KB · Views: 4,639
  • Truck4.jpg
    Truck4.jpg
    139.5 KB · Views: 4,651
  • Truck5.jpg
    Truck5.jpg
    92.4 KB · Views: 4,683
  • Truck6.jpg
    Truck6.jpg
    110.5 KB · Views: 4,614
  • Truck7.jpg
    Truck7.jpg
    113 KB · Views: 4,509
Last edited:

Very nice pics of Borrego. I'm actually heading down there to camp this weekend. It's been about 3 years since I've been down there so I'm looking forward to it. Those big turbines were not in the Dos Cabezas area at all 3 years ago, bummer.
Have you ever hiked to Goat canyon trestle?
 
Very nice pics of Borrego. I'm actually heading down there to camp this weekend. It's been about 3 years since I've been down there so I'm looking forward to it. Those big turbines were not in the Dos Cabezas area at all 3 years ago, bummer.
Have you ever hiked to Goat canyon trestle?

Ah yeah. I've hiked to the trestle several times back in the day. Up the river from below and along the tracks. LONG hike but amazing scenery. Then I heard they opened the tracks again! Not sure if the trains are still running on it though. Seems a bit crazy to have opened the tracks . :D

I would like to see it again and get some better picture. Been a long long time.
 
Ah yeah. I've hiked to the trestle several times back in the day. Up the river from below and along the tracks. LONG hike but amazing scenery. Then I heard they opened the tracks again! Not sure if the trains are still running on it though. Seems a bit crazy to have opened the tracks . :D

I would like to see it again and get some better picture. Been a long long time.

I attempted to hike once from Goat Canyon trail head. But it was a very long hike and the trail gets confusing. After a few hours we turned back since we had lost direction. Second attempt I hiked from the river wash that you hiked but it was a pretty long hike and decided to turn back.
I don't think the tracks are actually operational, they just announced that a few years back that they are reopened to make it illegal to hike and mountain bike through the tunnells. I found a trail I plan on exploring that drops you out at one of the tunnels, I'd like to take a few buddys and some mountain bikes and ride the tracks to the trestle.
Send me a PM next time you plan to hit the area and I'll see if I'm free to meet up with you.
 
SSS Front bumper/winch/dustlights install

After some shipping snafu's (aren't there always?) I got my custom SouthernSS Streamline 2014+ mini bumper/winch mount delivered this week and spent 7 hours cutting and wrenching to get it installed.

Note that this is not a full install thread, but augments the actual online instructions some.

On that note, look at this entry on wiring the winch: http://www.toyota-4runner.org/5th-gen-t4rs/165542-warthog-build-adventure-thread-12.html#post1839963 Make sure the same doesn't happen to you. Take care of any tricky winch wiring before installing the bumper if at all possible.

FrontBumper1.jpg
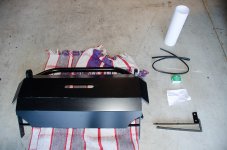
What arrived. (Winch arrived like two weeks earlier) The bumper, bolts, bumper cover support brackets and edge finishing, even a cutting template for non-trail owners. Nice.

I can see what caused the shipping snafu, the packing list had my address and phone number on it, but the phone number had a 6 where a 0 should have been so they couldn't get ahold of me for delivery. :/


FrontBumper2.jpg
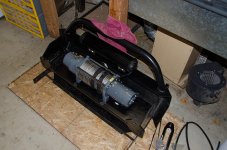
Mounted the winch and the dust light bar. I mounted the bar too far back it turned out later, Doh.


FrontBumper3.jpg
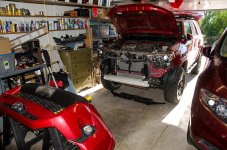
Getting started, removed bumper cover and set aside carefully. Then removed the actual bumper...


FrontBumper4.jpg
Taping on the template after cutting it out. This was a little confusing, the on line instructions do not really cover it, and it's only needed on a non-trail bumper.

So after cutting the template out. Initially I placed the top edge against the grill and taped down the lower edge (the cutting edge). But looking at a lot of other pics in the SSS bumper thread (http://www.toyota-4runner.org/5th-g...t-bumper-2014-sr5-trail**-18.html#post1825021) and the instructions, that seemed to be too high up. So I took it off and taped it with the top edge right at the bend in the front bumper piece.


FrontBumper5.jpg
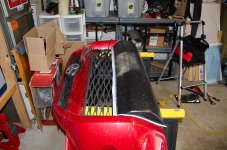
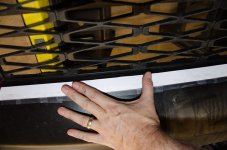
SO here is where I aligned the top edge. And I did follow the gentle curve from end to end. Since my bumper was black I just used clear tape and cut along the edge with a dremmel with a saw toothed blade on it.


FrontBumper6.jpg
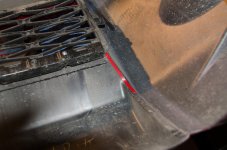
Underside cut. I used some pinstripe tape to guide from the first cut to where you just go down the inside curved edge leaving as much lip there as you can.


FrontBumper7.jpg
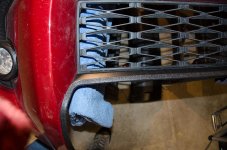
After putting the edging on. Fit perfectly. Be sure to really work it on down the sides over the small lip so you get it all the way on.


FrontBumper8.jpg
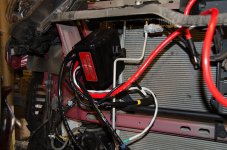
Before putting the bumper cover back on. This is the most logical place to put the control box. The strut there already has two holes in it in the perfect position.

Edit: In retrospect, I should have attached that white ground wire along with the thick battery ground to the winch before mounting the winch to the bumper. It was impossible to do after the fact. This means that the control box there needs to follow the bumper around rather than be mounted like here at this time. It would have been a LOT easier to simply mount this box with the bumper cover on then trying to attach all those wires to the winch with the bumper cover on instead.

Continued...
 

Attachments

  • FrontBumper1.jpg
    FrontBumper1.jpg
    99.5 KB · Views: 4,286
  • FrontBumper2.jpg
    FrontBumper2.jpg
    126.2 KB · Views: 4,203
  • FrontBumper3.jpg
    FrontBumper3.jpg
    141.3 KB · Views: 4,240
  • FrontBumper4.jpg
    FrontBumper4.jpg
    138 KB · Views: 4,367
  • FrontBumper5.jpg
    FrontBumper5.jpg
    87.9 KB · Views: 4,191
  • FrontBumper6.jpg
    FrontBumper6.jpg
    93.4 KB · Views: 4,296
  • FrontBumper7.jpg
    FrontBumper7.jpg
    115.6 KB · Views: 4,203
  • FrontBumper8.jpg
    FrontBumper8.jpg
    137 KB · Views: 4,220
Last edited:

Members online

No members online now.

Forum statistics

Threads
278,312
Messages
3,554,083
Members
248,016
Latest member
Advally Service

Trending content

Back
Top