weeeee's build thread

Ugh....I need a snorkel at some point but I think I'll wait a little bit for now. Most of the crossings I've done up until now have been okay with the stock airbox but I'll let you know if I change my mind.

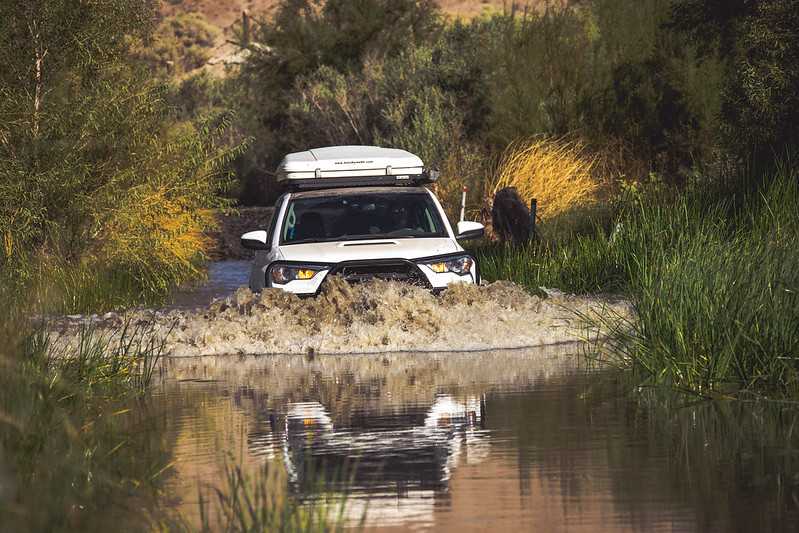
The water I went through in the same crossing was higher than what Victor did, and I even didn't need a snorkel. It's nice to have but not critical at that depth at all.
 
And yeah, MR isn't a HARD trail, but it's a mix of either high speed driving in washes, whoops, and a lot of rutty terrain. So it'll shake loose what you forgot to torque down.

From talking to Victor, I think he ran MR too quickly, it's really a 2 day trail to take in all the sights. Honestly you can blast through in 5-6 hours, but it takes all the fun out of it.

I also added one of those green frogs and left money in the Money Tree!
 
THE BUILD

I started this build with the idea that it'd be just a mild expedition setup. I don't plan on doing any heavy wheeling, but most of the mods are planned around being as capable as possible while still being mild mannered and retaining factory reliability/drivability. With that in mind, don't expect anything crazy here :)


CURRENT MODS


Engine
TRD Cold Air Intake LINK
AFE Pro Dry S filter LINK

Interior
Antman Flashlight Mod- Surefire P3X Fury Tactical LINK
5K LED Interior Lighting
Husky Weatherbeaters
Canvasback Cargo Liners
Customized RAM Mount w/ Proclip Vent Clip for iPhone LINK
Hard-wired Dash Cam LINK
Zulu Tactical Window Visor Organizer

Armor
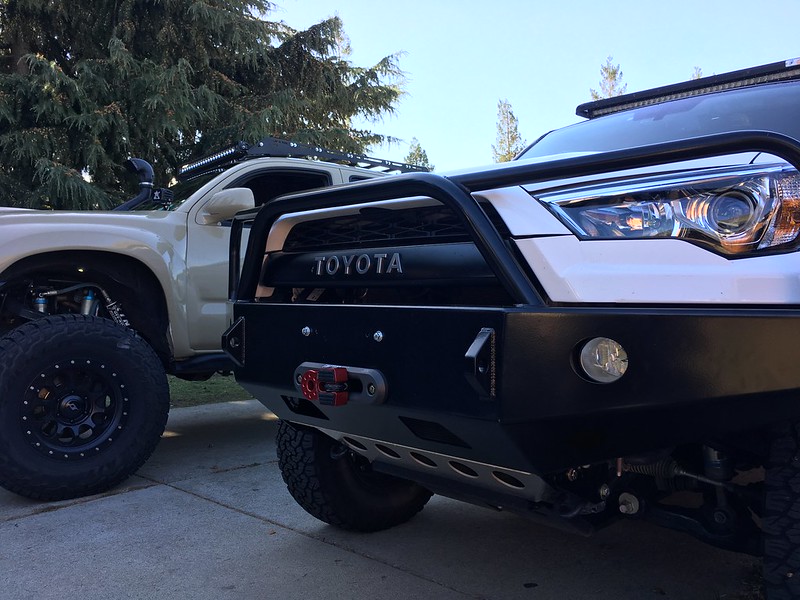
Demello Triple Hoop Front Bumper
Shrockworks Front Plate Bumper
BAMF Bolt-on Rock Sliders LINK
RCI Full Underbody Skids
CBI Rear Bumper- Dual Swing Out LINK


Exterior
Bajarack Spy Utility Rack
Eezi-Awn K9 2.2M Rack w/ 40mm legs
RAV4 Blind Spot Mirror Retrofit LINK
Low profile XM antenna mod LINK
ARB 2000mm Awning LINK
ARB Awning Room
Maggiolina Airlander Roof Top Tent (SM)
Weathertech In-Channel Vent Visors
Satin Black 3M 1080 Roof Wrap

Electrical/Lighting
40" Single Row LED light bar on K9 Rack
Xenon Depot HID kit w/ Philips 4300k bulb upgrade
Adventure Trailers Solar Plug mounted in hood cowl trim LINK
Renogy 100W folding solar panel LINK
Odyssey 31-PC2150 Group 31M Deep Cycle Battery LINK
National Luna Single Battery Monitor LINK
Truck Fridge/Indel-B TF51 w/ Wagon Gear hinge flip kit LINK
Tacomapros Bussman Relay Box LINK
OTTRATTW Switches in center console
ARB Twin Compressor OBA system LINK

Suspension/Wheels
Front TRD suspension swapped for Bilstein 6112, set at 2.5" front lift
Rear TRD 5160 stock shocks w/ Toytec Superflex 2" lift springs
BF Goodrich KO2 34x10.5x17
BF Goodrich KO2 285/70/17
Spidertrax 1.25" Wheel Spacers
No-Loss Valve stem caps LINK

Comms
Full Size CB (Bearcat 980SSB) in center console LINK
Firestik 2' CB Antenna
Diamond K400 3/8C on hatch
Hustler CB Quick Release LINK


TRIP HIGHLIGHTS

2016

29874138711_fce3d2c16e_c.jpg

Mojave Road (Mojave, CA)- 09/2016

29537343735_9ca661dbc3_c.jpg

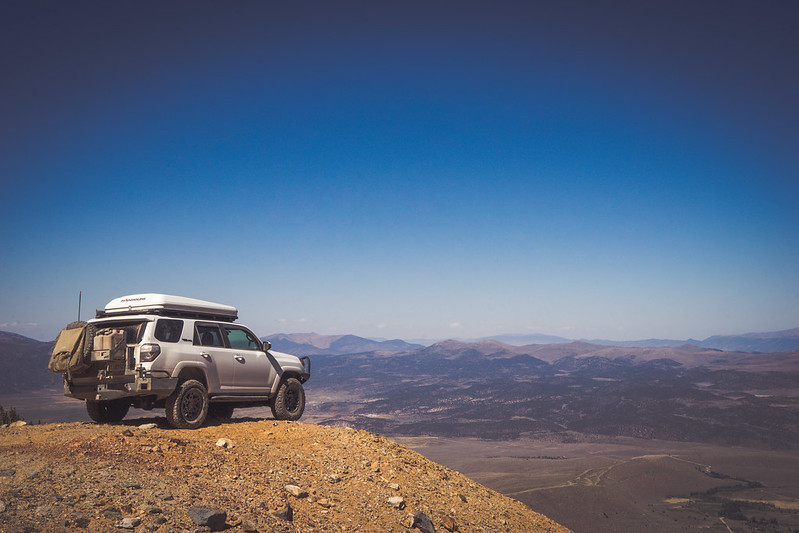
Eastern Sierra Mountains (Bodie/Mammoth/others, CA)- 09/2016

28894741930_bffcac1471_c.jpg

Signal Peak/Eagle Lake, Tahoe National Forest (CA)- 08/2016

27397629745_43945be82f_c.jpg

Joshua Tree/Berdoo Canyon & Prewitt Ridge(CA)- 05/2016

26762413966_d715be34d8_c.jpg

Prewitt Ridge/South Coast Ridge Road (CA)- 04/2016

25345711514_64c422331d_c.jpg

Joshua Tree National Park (CA)- 03/2016

23488651303_6acccb8535_c.jpg

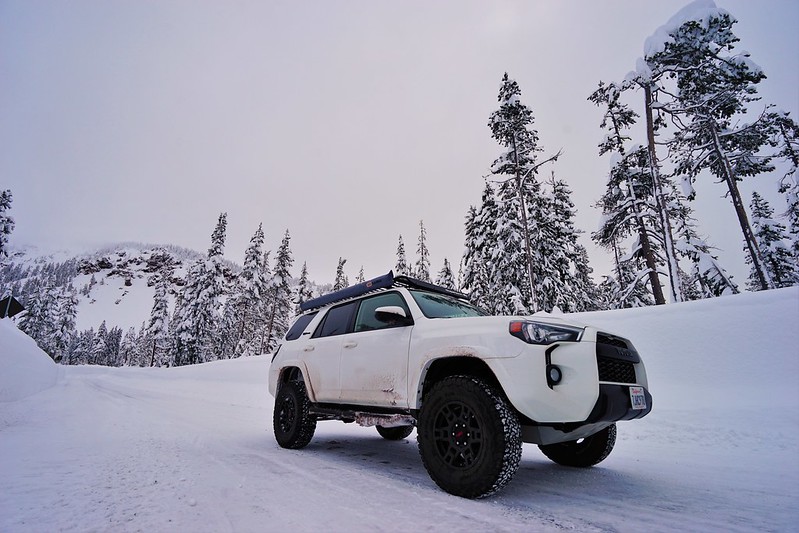
Crater Lake National Park (OR)- 01/2016


2015

26054321046_2f7c1b98b8_c.jpg

Jedidiah Smith Redwoods State Park (CA)- 08/2015

25807483600_580260932d_c.jpg

Vancouver and Victoria, BC (Canada)- 08/2015

25987852452_7fd8fa5088_c.jpg

Portland/Seattle from San Diego (CA/OR/WA)- 08/2015

WOW awesome build and even better pics
 
I'm never disappointed checking in on this build thread- just really awesome all around.

How satisfied are you with your current suspension setup? It looks plenty capable judging from your pics and it looks to be handling the increase in weight with the front/rear bumpers just fine. Are you eventually thinking about changing it out or are you sticking with this setup for the foreseeable future?
 
Wow great build. That trip through the Mojave road looked amazing!

WOW awesome build and even better pics

Thanks for the kind words! Knowing people are enjoying this thread keeps me taking photos and documenting my trips/build.

I'm never disappointed checking in on this build thread- just really awesome all around.

How satisfied are you with your current suspension setup? It looks plenty capable judging from your pics and it looks to be handling the increase in weight with the front/rear bumpers just fine. Are you eventually thinking about changing it out or are you sticking with this setup for the foreseeable future?

Thanks!

I'd be happy with my setup if I didn't have so much weight around. Even unloaded without the RTT and my camping gear it still sags a bit on account of the full armor and skids. Fully loaded with my RTT/gear I get quite a bit of reverse rake and it seems like I'm riding lower than a stock 4Runner, lol. Without all that weight I was pretty satisfied with my suspension setup.

I was about to just buy upgraded springs to handle the additional weight while keeping the 6112/5160 shocks but decided it'd be more straightforward to just swap out the entire suspension and be done with it. I have some Kings on order, just waiting for them to come in.
 
Last edited:
I want to thank you for sharing your adventures! New SR5 owner here, and I came to the forum and discovered threads like these -- this one in particular really inspired me... made me think what I might want to do with my SR5 and what kinds of adventure I might take my son on! Thanks again, and know you are appreciated by total newbies. :-)
 
I want to thank you for sharing your adventures! New SR5 owner here, and I came to the forum and discovered threads like these -- this one in particular really inspired me... made me think what I might want to do with my SR5 and what kinds of adventure I might take my son on! Thanks again, and know you are appreciated by total newbies. :-)

Thanks man! I really appreciate it, and documenting my trips to help other members explore more is what this thread is all about. An SR5 is plenty capable even in stock trim. Just remember to be safe and have fun!
 
Small updates...

Installed a new Warn winch with some Factor 55 bling. Also mounted up the old TRD garnish since I had the bumper off.
30268570460_8f3d9ab3b3_c.jpg


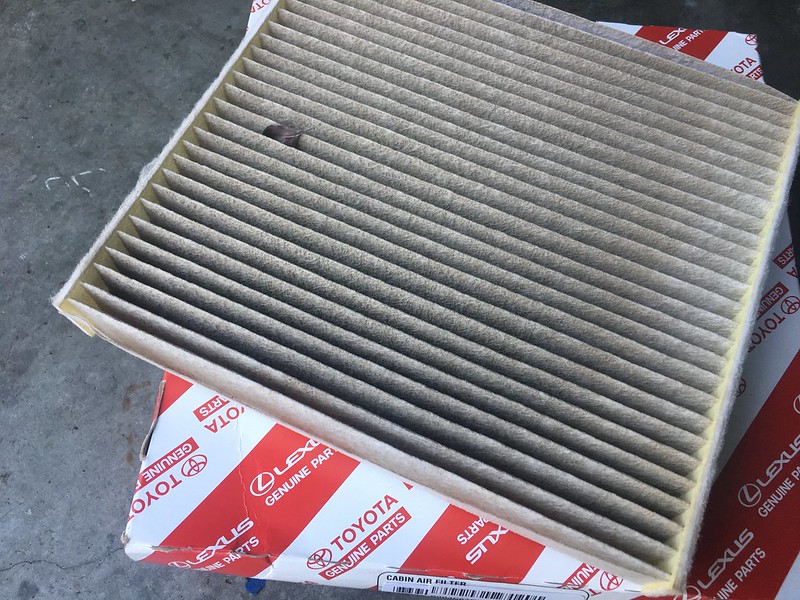
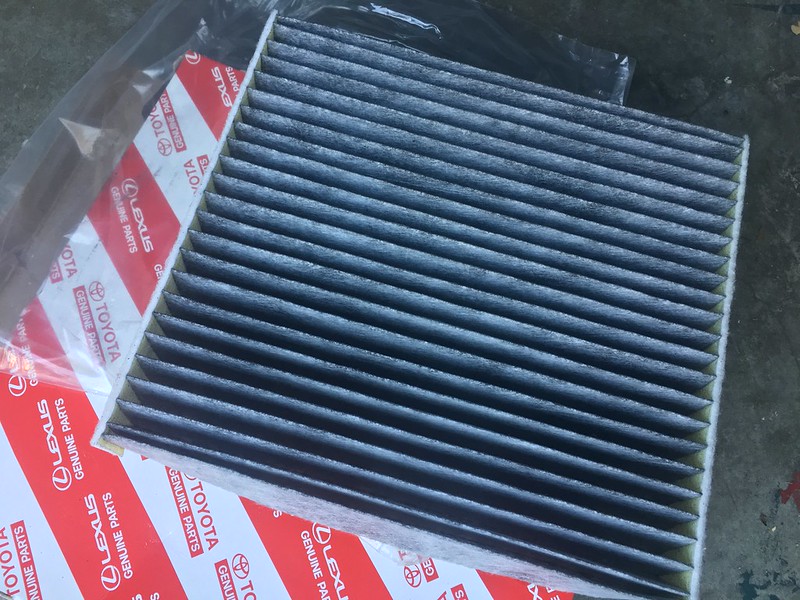
Finally changed out my cabin filter. Super filthy.

Old
30450833982_c88824e1a7_c.jpg


New activated charcoal one
30268572660_e5ca6ddaa6_c.jpg
 
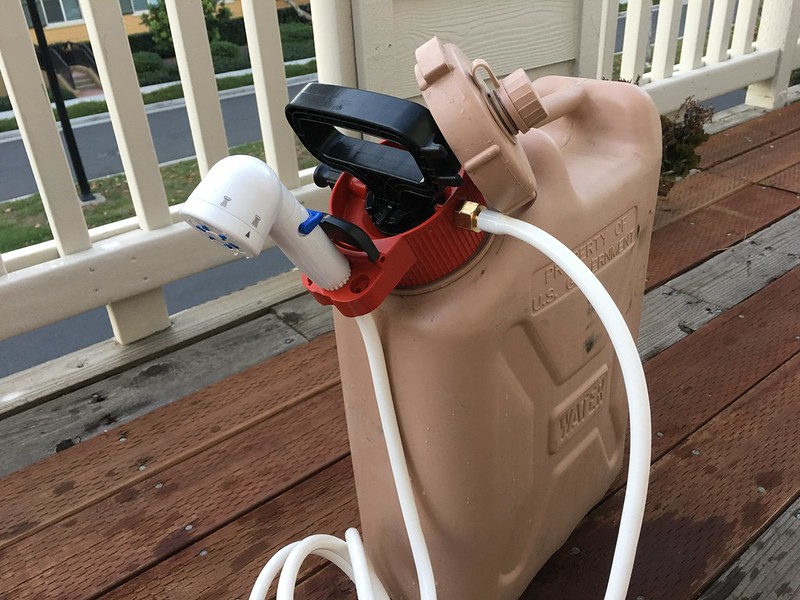
Modified Scepter MWC Water Setup

I was tired of taking out the water cans from the jerry can holder on the bumper every time I wanted access to water (i.e washing hands, dishes, etc.). The official $40 Scepter spigot also left a bit to be desired:
SCEPTER_WATER_CAN_NOZZLE_INSTALLED_ON_CAN__52247.1409855487.451.416.jpg


The idea of pressurizing the Scepter water cans isn't new, but I made some modifications to make it better suit my needs. The plastic MWC's are pretty stout and can handle about 10-15 psi without any issues. I opted not to use my air compressor to pressurize mine just because I didn't want to deal with the hassle of turning it on and hooking up the air lines, etc.

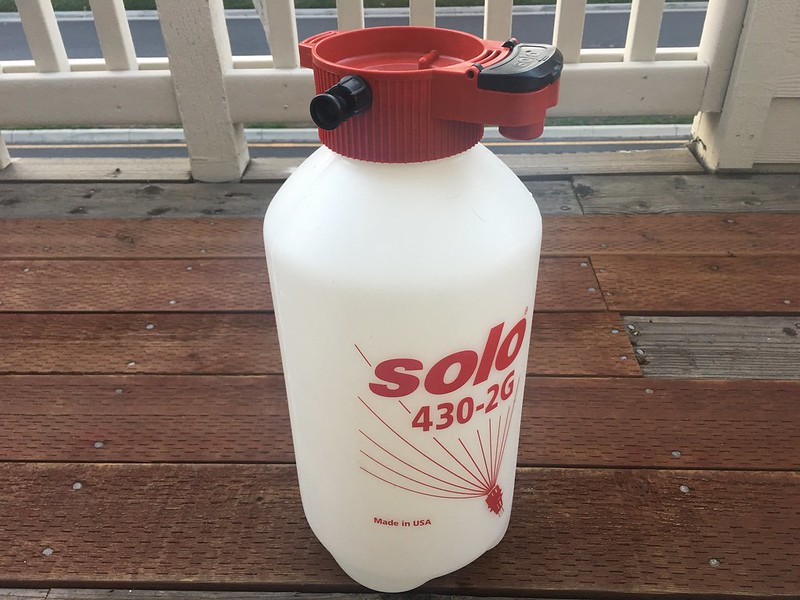
Through some internet searches I found that people have been using the Solo weed/garden sprayers to pressurize the plastic jerry cans. I really liked this idea, but needed to modify it a bit further with a different spray head. This simple mod took less than 10 minutes.

Parts needed:
Solo Weed Sprayer 430-2G
Rinse Ace 3-Way Pet Shower
3/8-in hose barb (get a lead-free hose fitting)
Teflon tape

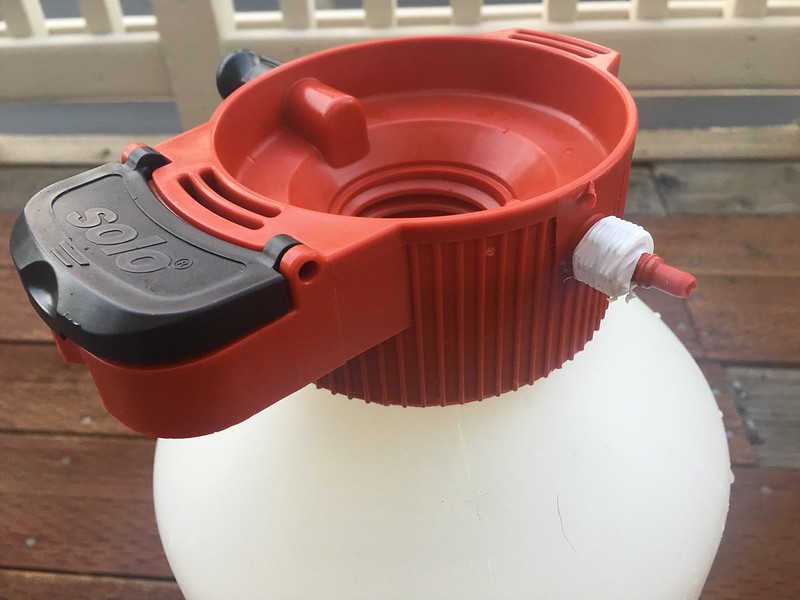
Start by stripping down the weed sprayer:
30151121764_179e54aa9c_c.jpg


Remove the old sprayer hose, wrap teflon tape around the threads.
30481842450_79f2754389_c.jpg


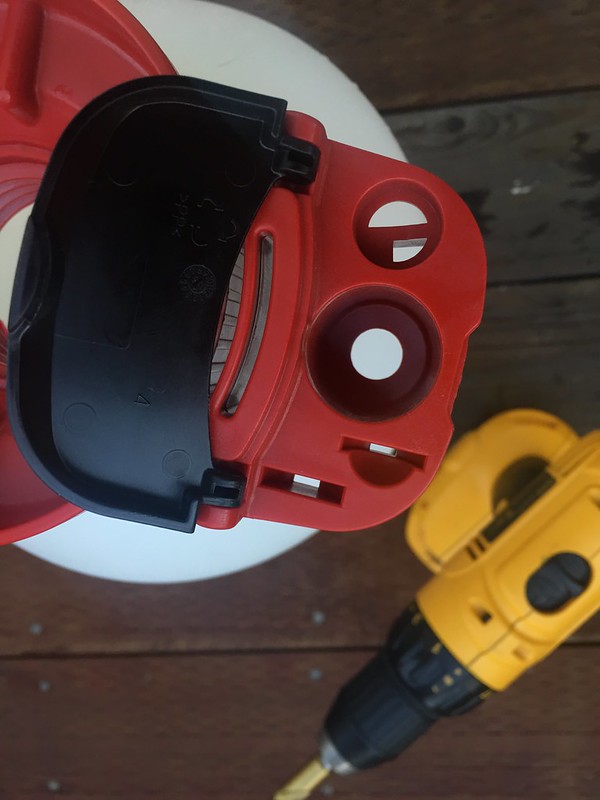
I'll be mounting the spray head to this area here. Unfortunately the hole is a little small. Use a 1/2" drill bit to enlarge it to fit the hose and spray head.
30746246106_803de7021f_c.jpg


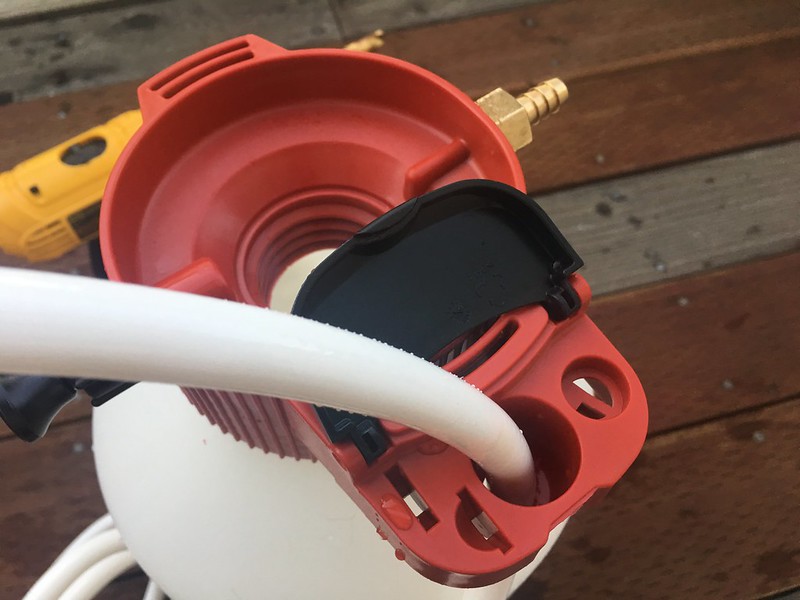
Feeding the new sprayer hose through to make sure it all fits:
30151131544_125ffae141_c.jpg

30782853415_ddc31e0597_c.jpg


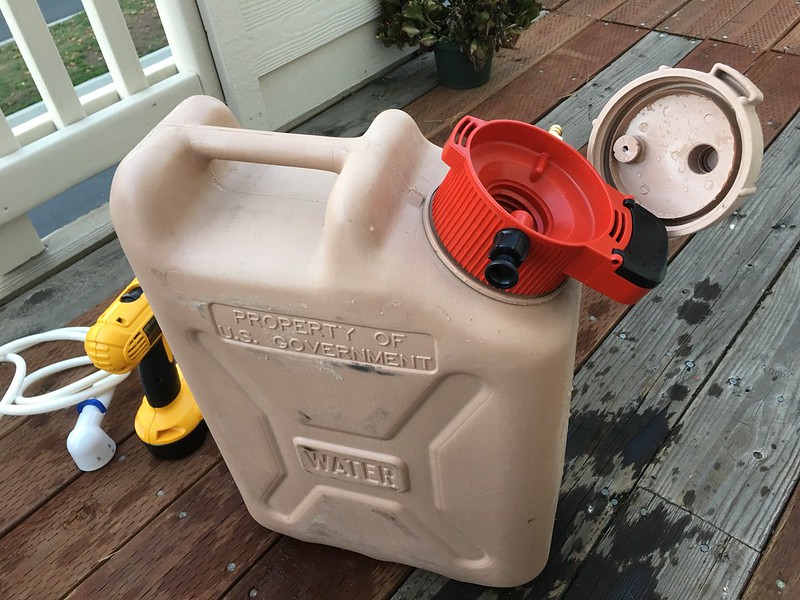
Transfered the Solo sprayer assembly over to the MWC
30694324791_397270063d_c.jpg


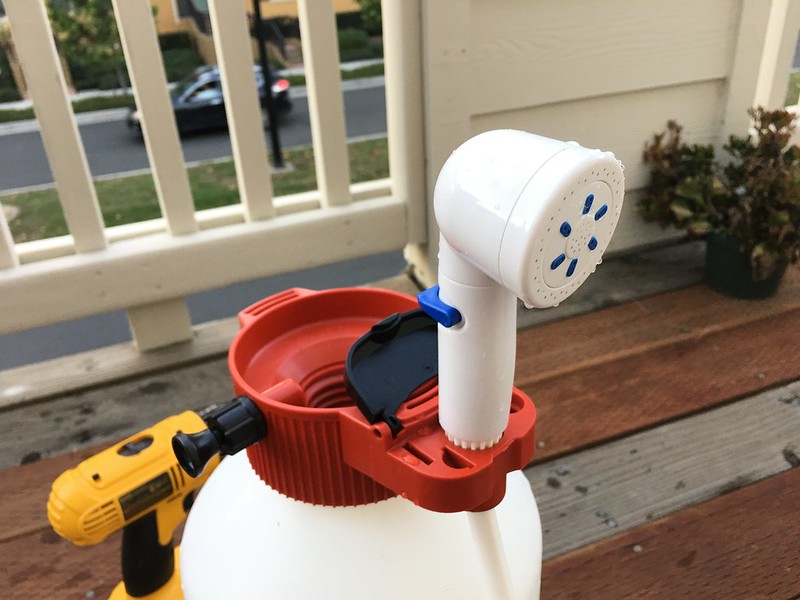
All done!
30481844870_d930704c2f_c.jpg


In action:


About 10-15 pumps gives me a steady water stream about 5 minutes long. With the sprayer head I can change the water pattern (stream, jet, etc.) and strength. I can also leave it on to wash my hands or dishes and leave it on the holder for hands free operation.

Later on I'll likely build a hot shower setup using the same head.
 
Last edited:
Why did you switch from the 34 x 10.50 to 285s?

Kept having punctures and slow flats with my 34x10.5s for some odd reason. I had road hazard warranty and I guess the manager was tired of the labor so he offered to change them out to the 285s which are E-rated.

[MENTION=44305]weeeee[/MENTION] haven't seen you in awhile. How you been?

I'm keeping away from you....you're a bigger drain on my wallet than my wife! :ballchain:
 
Kept having punctures and slow flats with my 34x10.5s for some odd reason. I had road hazard warranty and I guess the manager was tired of the labor so he offered to change them out to the 285s which are E-rated.


I'm keeping away from you....you're a bigger drain on my wallet than my wife! :ballchain:

is that why you've been hiding from me? :bowl:
 
Hardwired Dash Camera

I didn't want to run the bulky 12V cigarette lighter plug with my dash cam, so I ended up hardwiring a 12V to micro USB plug directly to the fuse box.

I used this 12V Micro USB plug:
https://www.amazon.com/gp/product/B00U2DGJOQ/ref=oh_aui_search_detailpage?ie=UTF8&psc=1

And a few Bussman Add-a-Circuits:
http://www.amazon.com/Bussmann-BP-H...249594&sr=1-1&keywords=bussmann+add+a+circuit
^^These are kind of pricey on Amazon, but you can find them cheaper at your local auto parts store.

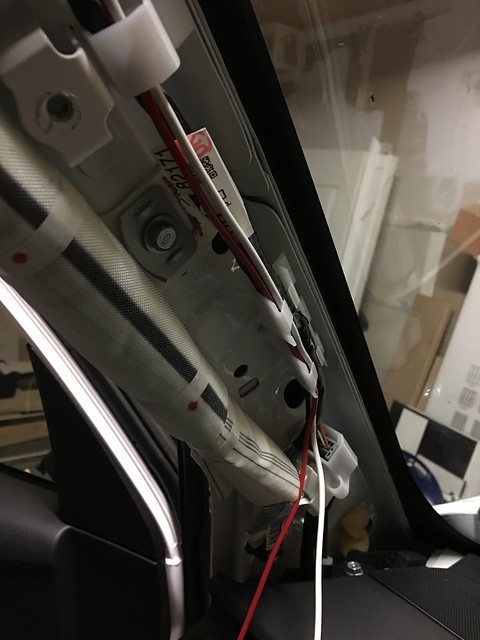
I tucked the dash cam right behind the mirror, and ran the wiring through the headliner, down the A-pillar, which dropped me right behind the dash to the fusebox. If you do this make sure you route the wires into the existing harness clips to avoid interfering with the airbag.

23325131414_fd802ff816_z.jpg


23640260659_a31dd36521_z.jpg


23982041566_e1c4c0b416_z.jpg

weeeee what kind of camera is it?
 
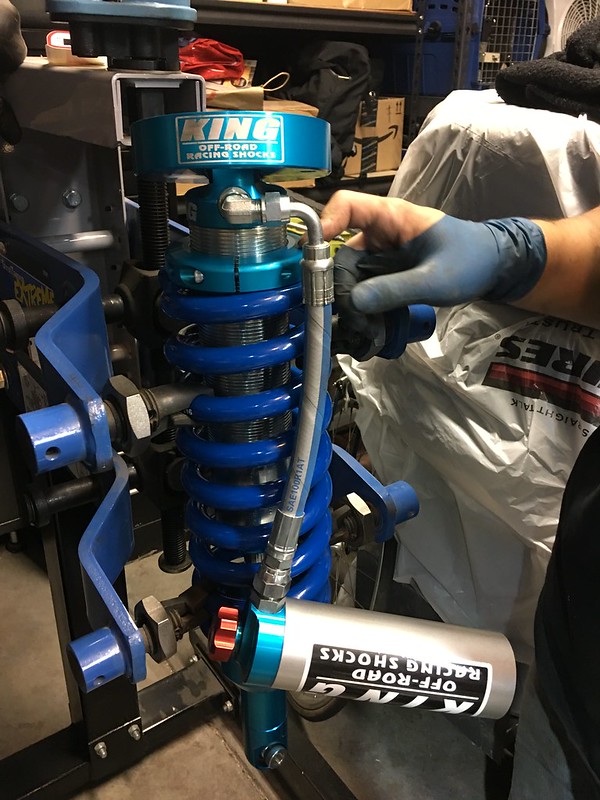
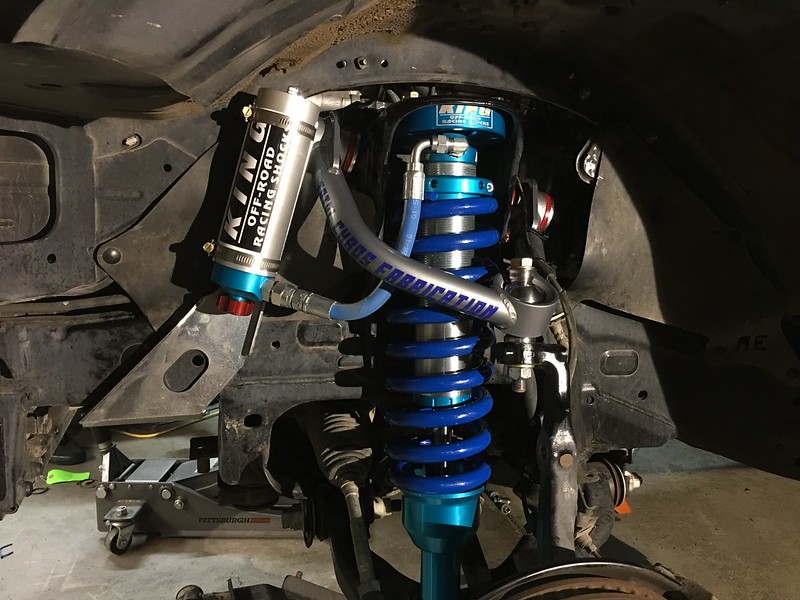
King/TC Mid Travel Install

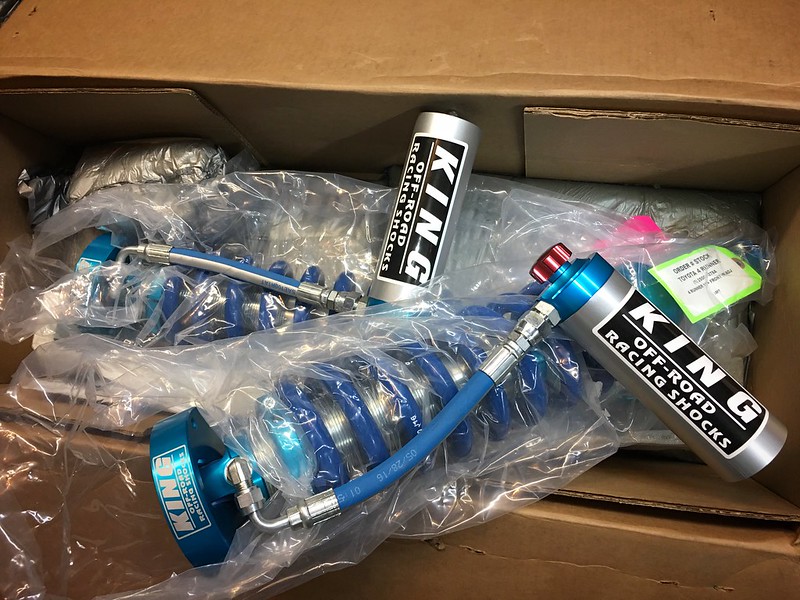
A suspension upgrade has been way overdue on this rig given the amount of weight she's been putting on this past year. On recent trips I was sitting loaded at worse than stock ride height even with the upgraded Bilstein 6112/5160 setup. After installing the winch and skids it was definitely time for an upgrade.

After getting shafted from another vendor on my King order I hit up Downsouth Motorsports. I'd highly recommend going with them if you're considering going this route.

Fronts:
TC UCAs
King OEM Performance w/ CDC adjusters (extended travel)
700# spring rate (opted to get these over the 650# due to the sway bar delete
Timbren bumps courtesy of [MENTION=124732]LawnDart[/MENTION] :guitar2:

Rears:
King w/ CDC adjusters, custom 1" longer shafts
Icon Overland springs
Timbren Active Off Road bumps

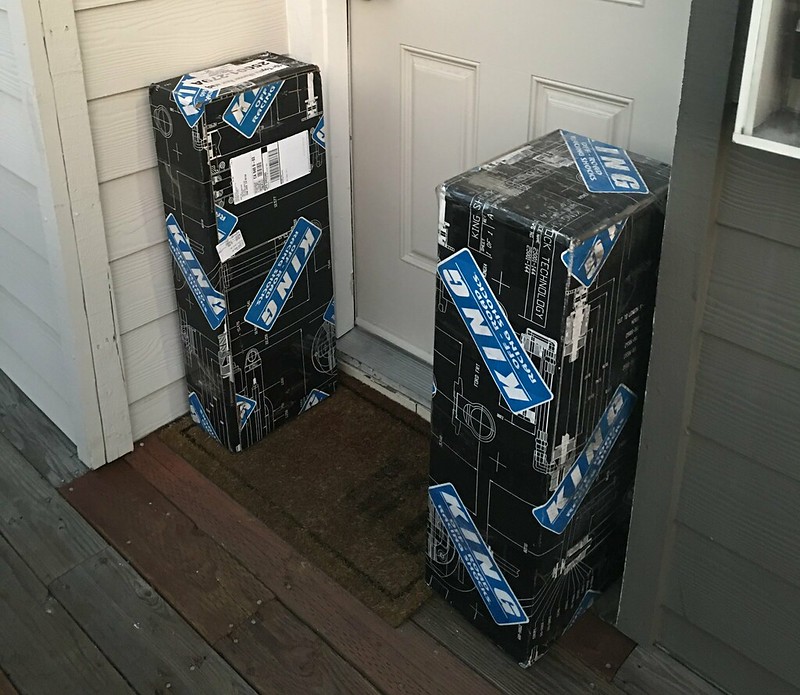
UPS likes to drop off signature required parts at my front door without a signature.
30870039345_a7d625e0a3_c.jpg


She's beautiful! :love::love:
22812690898_0d3ddb10bf_c.jpg


Had to put the spring compressor to use in order to adjust the preload easily. Really glad I chipped in with my buddies for this. Makes swapping springs and compressing them a breeze.
30945309055_902a0c1b9a_c.jpg


Completed install.
22766402428_ed559a65bc_c.jpg


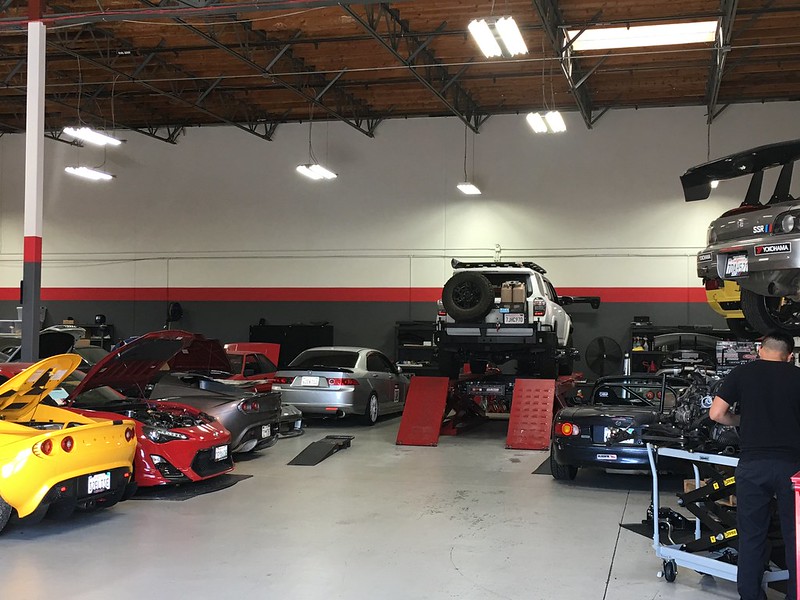
Drove out to Fremont and buttoned up the alignment at my buddy's shop
30874879182_2d1eb1ed10_c.jpg
 
Last edited:

Members online

Forum statistics

Threads
278,306
Messages
3,554,045
Members
248,016
Latest member
Advally Service

Trending content

Back
Top