What did you do to/in your 5th Gen today?!

What do you use to "recondition the rubber door seals?"

That Blackfire Wet Diamond looks interesting. How are you applying this? I have a random orbital polisher which helps with with the waxing process. Could I use this to apply the Blackfire product?

A Random Orbital Polisher, or DA polisher, is the perfect tool for applying waxes or sealants. Equally important is using the right pad.

Here is a great info resource.

How To Wax A Car, Car Wax & Paint Sealant Application Techniques, how to apply wax & paint sealant by hand or polisher, how to apply wax
 
What do you use to "recondition the rubber door seals?"

That Blackfire Wet Diamond looks interesting. How are you applying this? I have a random orbital polisher which helps with with the waxing process. Could I use this to apply the Blackfire product?

Dammit I knew someone was gonna ask, I had to go dig up the bottle and find the name because its got a real long weird name, lol.

Here you go: Einszett Rubber Care Stick Gummi Pflege, gummi pflege

I am using the Blackfire polish and sealant both by hand. It's a very forgiving product, you pretty much can't screw up the application. If anything I would probably use the random orbital polisher for just the polish only, since that one requires a bit more elbow grease. The sealant is just way too easy to do by hand, so might as well waste a little less product :)

Here is the polish I use, which I believe is a good pre-step to make the wet diamond go on easier and better: BLACKFIRE Gloss Enhancing Polish, prewax polish, car polish
 
Installed a 4gal rotopax on top of the gobi. You all we're kidding when you said the bolts were a PITA... I almost started drinking at 8:30 this morning b/c of it.

1 thing I learned, that hopefully will save someone the time and trouble doing this on the gobi. If you don't have one, invest in a 7/16 ratcheting wrench, like the one below. It will save you so much time.
dual_ratcheting_wrench.png


Oh and remember to put the f'ing mounts on the base before you start tightening the base lugs... that sucked.
 
Reading about all this emergency preparedness talk on this forum got me inspired to be more prepared...so, I gathered some items that seem to be "essentials" including: a cheap recovery strap, hitch pin, clevis, jumper cables, lug nuts and some gloves, as seen below.


Then I shoe horned it all in into this nifty hidden compartment I only recently discovered, lol.


All done! I really really really hope I never have to take anything out, it took me over 15 mins to fit it all in there and close the lid.

 
Installed a 4gal rotopax on top of the gobi. You all we're kidding when you said the bolts were a PITA... I almost started drinking at 8:30 this morning b/c of it.

1 thing I learned, that hopefully will save someone the time and trouble doing this on the gobi. If you don't have one, invest in a 7/16 ratcheting wrench, like the one below. It will save you so much time.
dual_ratcheting_wrench.png


Oh and remember to put the f'ing mounts on the base before you start tightening the base lugs... that sucked.

x2.. ratcheting box-end/combination wrenches are a lifesaver. I keep a set of traditional 6-point box-ends in the garage, but on the go I only bring the ratcheting ones.
 
I know it's not good but drove like this for a few miles.
Sorry for the bad pic

The fuel range is obviously set up to hit 0 miles way early. My gas gauge is usually at 1/8 of a tank still when the range hits 0.
 
Last edited by a moderator:
Mine too and my buddy works for Lexus (which just happens to be across the road from my Toyota Dealership) so when I drop of my 4 runner I walk across the street to see my buddy and he is always showing me the new cars. Plus the waiting room at Lexus offers free, soda, coffee, bagels, doughnuts, etc.....

That's how I ended up getting mine, My Buddy is the finance guy at the Lexus Dealer. I just had to drive 8 hours to him is all.

Nice drive home tho
HA!
 
Just dropped her off at the Doctor's while I'm down in Charleston, SC. New upper ball joints, rebalance and alignment. Hope it fixes some issues.
 
^ Hey [MENTION=76550]cbielat[/MENTION] that's my town! Whatcha doin here?

Speaking of Doctors, I just drove my wife to the doctor and we just found out our baby is gonna be a little girl! Due in late Feb! :baby:
 
^ Hey [MENTION=76550]cbielat[/MENTION] that's my town! Whatcha doin here?

Speaking of Doctors, I just drove my wife to the doctor and we just found out our baby is gonna be a little girl! Due in late Feb! :baby:

Hey, congrats man! I'm heading down there for a friend's wedding and then meeting up with another to play some golf. I used to live in SC for a few years and would frequent Charleston. It's a beautiful place and looking forward to this visit as I haven't been there in quite a few years.
 
How was it? I've been thinking about buying the kit. Any dealer programming required?
I still have to program it and put all of the dash back in place. You do have to have Techstream to program it, but that is $30 for a cable and software on ebay, and more than worth it for being able to change options, do zero point calibration, etc. You also need the service manual for installation (available on this site), as it does not come with installation instructions.

Installation is basically removal of all of lower and center dash, entire glove box, passenger knee airbag, steering column cover, radio, HVAC, running a big wire harness, securing it in place, installing remote start ECU, and putting in some pigtail connectors in the steering column and the passenger kick panel area. Everything is plug and play, no splicing or wire taps, but you do have to partially disassemble one ground block (easy) to add an additional wire to it.

For SR5s, there is also a hood switch that needs to be installed, but TE and LE have it already as part of the alarm.

If I don't count the other wiring that I am doing for my spotting cameras while in the dash, I think it would probably be about 3 hours total. Might take a bit longer if you haven't ripped apart the interior a few times already.

 
Last edited:
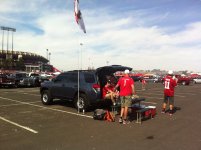
Tailgated with friends and then watched the Niners destroy the Texans. Plus a bonus photo of a nice sunset over The 'Stick.
 

Attachments

  • IMG_2451.JPG
    IMG_2451.JPG
    115.7 KB · Views: 1,371
  • IMG_2455.JPG
    IMG_2455.JPG
    100.9 KB · Views: 1,345
Taking off door edge clear tape guard. Removing all warning and other useless stickers inside and on door jamb.
 
I still have to program it and put all of the dash back in place. You do have to have Techstream to program it, but that is $30 for a cable and software on ebay, and more than worth it for being able to change options, do zero point calibration, etc. You also need the service manual for installation (available on this site), as it does not come with installation instructions.

Installation is basically removal of all of lower and center dash, entire glove box, passenger knee airbag, steering column cover, radio, HVAC, running a big wire harness, securing it in place, installing remote start ECU, and putting in some pigtail connectors in the steering column and the passenger kick panel area.
Everything is plug and play, no splicing or wire taps, but you do have to partially disassemble one ground block (easy) to add an additional wire to it.

For SR5s, there is also a hood switch that needs to be installed, but TE and LE have it already as part of the alarm.

If I don't count the other wiring that I am doing for my spotting cameras while in the dash, I think it would probably be about 3 hours total. Might take a bit longer if you haven't ripped apart the interior a few times already.

Yeah, that sounds pretty simple... :jaw drop:
 
Last edited:

Members online

Forum statistics

Threads
278,317
Messages
3,554,129
Members
248,016
Latest member
Advally Service

Trending content

Back
Top