[MENTION=75328]DannyLlama[/MENTION] just spray the plastidip on a newspaper and use an artist brush to paint it on. you shouldn't have that problem next time if you tape further away from the edge.
A few bits of advice for that piece, for everything but the bottom edge, there is no need to tape right against the garnish, the dip will cut itself where the garnish/weather stripping meets the hatch. You can leave yourself an inch or two gap and peel the dip off the hatch when it's dry. For the bottom edge, you will want to peel the tape off immediately after your last coat (and it will probably still be a bit rough). I used a dab of paint thinner to re-liquify the dip and push it back down, but that section isn't all that visible unless you have the hatch open. As far as I know, there is no "dip pen" or touch up system short of respraying.
It also looks like there was some bleeding in your third pic - to the left of your tape line. You'll want to use thicker paper or double up what you have for masking off that area. That's pretty easy to clean up either way though.
Your door handles look like they came out great though!
OA
EDIT: [MENTION=108420]EasyAndy[/MENTION] beat me and had a good solution.
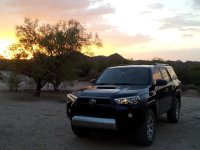
Did my first fill up!
Then headed out on a adventure!
Tired out crawl control and multiterrain mode, didnt get into the rear locker or atrac but made a few decent climbs, and got brave on a narrow rocky road with bushes pounding the sides, i mean hey its got 300miles on it, she is ready to have some fun!
Advice so far is spot on. I've peeled my garnish twice, painted it three times. First time I sprayed too far away, some dip 'dries' in the air and sets up with a very coarse texture. Lesson: stay 8" away, keep moving.
Next time I didn't put enough layers on (too thin). The dip stretches/separates and does not peel easily, especially the raised letters or logos. In your first pic, it looks too thin. Plus, as mentioned, do not attempt to mask those edges. Mask a good 1/2" away, and put plenty of product down. It's just amazing how this stuff separates at those seams (but it has to be thick enough to not rip). Also, keep your can straight vertically, but make paint passes at angles (pointing up and down) so the dip fills all the edges and nooks/crannys.
Overspray rubs right off with a dry rag. Did you watch the Utube vids? Very helpful.
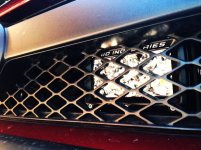
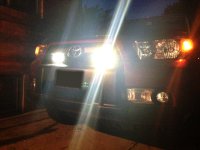
Added some...ahh... uhm "driving" lights :eyebrows: A pair of E2 4" yep Driving, I was thinking of getting a pair of 6" but got some "returned" for too good of a deal to pass up.
Man I can't believe how bright they are for the size. All of the pictures I have seen posted by others def don't do justice, I can't imagine how bright some of the rigs with the 40"+ bars plus other misc lights strewn all over are. LOL calling it good for now... low profile and all
Has anyone seen a solution to the stuff falling behind the cargo slider when it's open problem?
I made a partition out of pvc last night. I discovered that 1 1/2" pvc end caps fit perfectly into the cargo cover holes on the sides of the cargo area, and used that as an anchor point. I was going to post pictures, but I looked at it again and decided I'd rather redesign it all over again. :bowl:
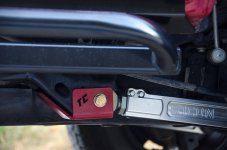
I installed an ARB CKMA12 under the hood. I used two of the stock holes in the fender that just barely lined up with the bracket, then drilled two more holes for the other feet. I had to shim the two rearmost feet a little bit due to the curve of the fender. It's close to the brake lines but doesn't touch. I haven't done the wiring yet but I'll probably use the harness that came with it to start.





 arty:
arty: