What did you do to/in your 5th Gen today?!

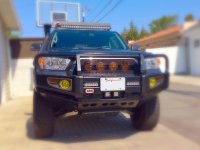
Added some...ahh... uhm "driving" lights :eyebrows: A pair of E2 4" yep Driving, I was thinking of getting a pair of 6" but got some "returned" for too good of a deal to pass up.

Man I can't believe how bright they are for the size. All of the pictures I have seen posted by others def don't do justice, I can't imagine how bright some of the rigs with the 40"+ bars plus other misc lights strewn all over are. LOL calling it good for now... low profile and all :)

Right on dude!! These rigids are so bright, the stock grill blocks almost nothing, at least thats true on with my 6" lights
 
Had the FTS snorkel Line-X'd thanks to [MENTION=92542]Fimbulvetr[/MENTION] and installed Saturday. Came out nice and fit was right on. Had to do some egging of holes after crossing my fingers and drilling based on the template - luckily wasn't too far off.

Also installed some 7.5" LEDs a la [MENTION=68685]Ducmonsta[/MENTION] since I am going to remove the other lower lights to make room for a something that is designated to that space. These things fit by 1/16th if that - had to make custom brackets, etc...hats off to Ducmonsta as this wasn't easy. Luckily I had everything wired so the hard part was the install of the brackets in a space that has no room.

Snorkel Front.jpg
 

Attachments

  • Snorkel Front.jpg
    Snorkel Front.jpg
    128.2 KB · Views: 895
Added some...ahh... uhm "driving" lights :eyebrows: A pair of E2 4" yep Driving, I was thinking of getting a pair of 6" but got some "returned" for too good of a deal to pass up.

Man I can't believe how bright they are for the size. All of the pictures I have seen posted by others def don't do justice, I can't imagine how bright some of the rigs with the 40"+ bars plus other misc lights strewn all over are. LOL calling it good for now... low profile and all :)

Man, I didn't have any desire for more lighting until I saw this, is it straight forward mounting? And where's your switch? I'm trying to stick to a stock look as much as I can. Aside from the blatant 3" lift :)
 
Had the FTS snorkel Line-X'd thanks to [MENTION=92542]Fimbulvetr[/MENTION] and installed Saturday. Came out nice and fit was right on. Had to do some egging of holes after crossing my fingers and drilling based on the template - luckily wasn't too far off.

Also installed some 7.5" LEDs a la [MENTION=68685]Ducmonsta[/MENTION] since I am going to remove the other lower lights to make room for a something that is designated to that space. These things fit by 1/16th if that - had to make custom brackets, etc...hats off to Ducmonsta as this wasn't easy. Luckily I had everything wired so the hard part was the install of the brackets in a space that has no room.

View attachment 127134

Looks good! It's unfortunate for us front license plate states, but we make do.
 
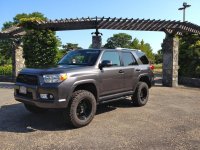
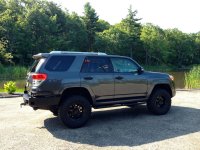
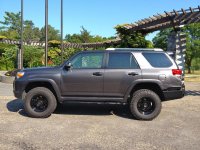
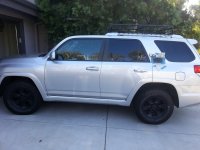
Just wanted to go to a nice location to get some pictures of my truck after I had washed and detailed it. Apparently the spot I chose is frowned upon by the police. They told me I couldn't be parked there and that someone had called saying I was driving all around the walking paths in the park lol. Then 50 feet up the driveway while I was leaving, I was pulled over by one of the cops, informing me that my registration had expired in April lol. This was a ticketable and towable offense but he was nice enough to let me go.
 

Attachments

  • front quarter.jpg
    front quarter.jpg
    138.9 KB · Views: 723
  • Rear quarter.jpg
    Rear quarter.jpg
    137.3 KB · Views: 716
  • driver side.jpg
    driver side.jpg
    137.9 KB · Views: 722
Last edited:
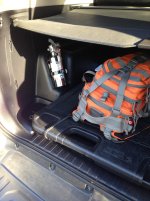
Installed an Amerex A620 BC Dry Chemical Auto Fire Extinguisher in the Chrome Finish. While this is not permanently mounted, I did use 3M heavy weight Dual Lock fasteners and I'm impressed at how strongly it holds. I cleaned the area with rubbing alcohol first to get a completely clean and bone-dry surface which I think helped with the bond.

Thanks to Desert Dawg for the location idea.

MB
 

Attachments

  • IMG_9646.jpg
    IMG_9646.jpg
    136.7 KB · Views: 781
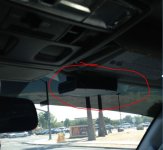
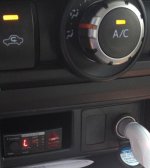
V1 Stealth MOD

I would've wanted to have the module next to the clock in my line of sight but there's a circuit board behind it. The second best option was in the pocket next to the AC knob. I also have the SAVVY connected directly to the OBD. I was looking at the belndmount but I wanted to go for the stealth mode. Hope this helps other RD owners.
 

Attachments

  • v1.JPG
    v1.JPG
    38.2 KB · Views: 681
  • v2.JPG
    v2.JPG
    35.1 KB · Views: 677
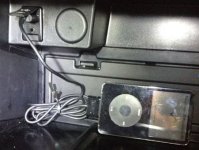
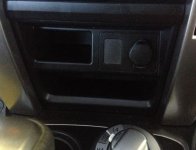
USB to Glovebox

It took less than 10 minutes. the wires were held together by clips. I just used the cover that was in the glove box in the center console.
 

Attachments

  • glove.JPG
    glove.JPG
    36.9 KB · Views: 677
  • center.JPG
    center.JPG
    33.2 KB · Views: 682
After a ridiculously busy day I finally took the plunge and did the dip! Handles, rear badge, SR5 badges are done. Still have the bumpers, rockers, fog bezels and front to do yet. Still debating on doing the wheels too. Bye bye chrome!


asade6yv.jpg

[MENTION=103396]4rnrgrl[/MENTION] Did you not tape the newspapers adjacent to the emblem?

slash, were you able to remove the dip that got on the paint fairly easily?

I messed mine up when i did it..
 
I know it's a tease but...

Got the first set of Stealth SR8s out of the warehouse this morning!!! I know I know :worthless: will try to get a picture. Won't get tires and.mounted for a couple weeks though due to traveling. They look waaaaay better in person. And for those wondering the two shades of bronze both look SICK too.
 
[MENTION=103396]4rnrgrl[/MENTION] Did you not tape the newspapers adjacent to the emblem?

slash, were you able to remove the dip that got on the paint fairly easily?

I messed mine up when i did it..

[MENTION=75328]DannyLlama[/MENTION] I taped about an inch from the emblem. It literally peels right off the paint. What doesn't peel off will rub off after it's dry. Don't worry about masking really close to the emblems it will peel the dip if you do that (lesson learned I did that).
 
Man, I didn't have any desire for more lighting until I saw this, is it straight forward mounting? And where's your switch? I'm trying to stick to a stock look as much as I can. Aside from the blatant 3" lift :)

One piece of 30"x 2"x 1/8" aluminum flat bar! You know the nice expensive stuff you buy from lowes or home depot in 4 foot pieces. That's it, and a pair of M10-1.25 bolts and a four 1/4"x1" carriage bolts. It spans the width of the grill and mounts to two existing holes on either end and is supported by center cross member. It is a simple as mounting anything could possibly be. You could bolt it up to 4 places if you like, I just used the ends it is surprisingly well self supported.

The switch is next to the dimmer, it is a 900 series that fits the factory knockouts. I got it from Slee offroad for ~$30. Aironboard has some cool ones to but only have green/red in stock ATM. I actually got a relayed switch wire set (40193) you'll need to splice another Deutsch lead on as it is only a single (the kits it comes with are single only too FYI hack one of those apart)

There is definitely room to go up to the E2 6" light and if you had the cradle bracket you may be able to squeeze two E2 10" in there. :)

All in all it's super easy, the firewall boot is your biggest enemy, search around here [MENTION=65614]Antman[/MENTION] and a few others have some tricks for getting the wires through. ;)
 
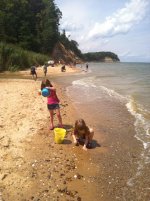
Took the girls to Calvert Cliffs today for some fossil hunting.

Good news- I found a shark tooth amongst the billions of shells!

Bad news- it was dumped out as part of the Sand Castle Project.

Oh well.

Best part was during the almost 2 mile hike back to the car. My 4 year old looked at my wife and said: "Man, this is a b!tch!"

How can you not laugh!!

IMG_3943.jpg

IMG_3941.jpg
 

Attachments

  • IMG_3943.jpg
    IMG_3943.jpg
    138 KB · Views: 1,096
  • IMG_3941.jpg
    IMG_3941.jpg
    135.5 KB · Views: 1,106
Took the girls to Calvert Cliffs today for some fossil hunting.

Good news- I found a shark tooth amongst the billions of shells!

Bad news- it was dumped out as part of the Sand Castle Project.

Oh well.

Best part was during the almost 2 mile hike back to the car. My 4 year old looked at my wife and said: "Man, this is a b!tch!"

How can you not laugh!!

Try flag ponds next time, there are more sharks teeth there. My 3yr old and I have tried calvert cliffs with no luck. Over at flag ponds we found 8 or 9 small ones, some skate teeth, and a small piece of whale bone. She was so excited!
 
[MENTION=103396]4rnrgrl[/MENTION] Did you not tape the newspapers adjacent to the emblem?

slash, were you able to remove the dip that got on the paint fairly easily?

I messed mine up when i did it..
Oh I taped it off and put newspaper around it. I didn't have any issues with over spray. I used a toothpick to get the small dip in between the letters out and I used a rag to get anything else off. It comes off very easily.
 
Plasti dipped wheels and started the emblems

Plasti dipped the wheels and SR5 emblems. Will do the 4runner rear emblem and probably the handles. Stuff works great!
 

Attachments

  • 20140810_173047.jpg
    20140810_173047.jpg
    134.4 KB · Views: 953
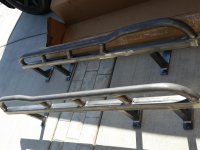
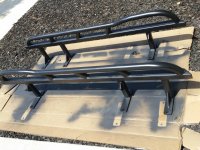
Getting my sliders from White Knuckles prep and ready for install in a few days for my 14' TE. Will have more pics once installed. ;-)
 

Attachments

  • 20140811_161901.jpg
    20140811_161901.jpg
    132.2 KB · Views: 962
  • 20140812_113823.jpg
    20140812_113823.jpg
    139.6 KB · Views: 956

Members online

Forum statistics

Threads
278,317
Messages
3,554,128
Members
248,016
Latest member
Advally Service

Trending content

Back
Top