What did you do to/in your 5th Gen today?!

Thank you for the compliment. I knew stock wasn't going to cut it at all! Lol. So I chose Bilstein 6221's and set them on the middle clip (#4, I have the version 2 with 7 total clip spaces) and day one it gave about 2" of lift on both sides. I used the springs they came with because on their youTube video, they show a 5th gen with winch and bumper.

With the version 2, your supposed to stager the drivers side a clip or 2 higher than the passenger to compensate for the lean. I haven't yet, I knew the weight of bumper/winch was going to pull the front down a bit and wanted to see how things settle out after a couple of weeks. After driving it around town last night I now measures in at 1" over stock. That's floor to wheel well. I was 34.5" on both sides and now I'm 35.5 on both sides. Which is right were I wanted to be, one inch over stock up front. So far the ride is more plush and "like butter" over stock and nose dive is almost non existent now. There is a discernible difference between when the front goes over a bump and the rear. (Rear feels choppy now lol!) I'm hoping the 5160's will help with that (when ever they get here).

Whew! Sorry to be long winded, but I hope this helps. I haven't seen where too many folks have used this exact set up.

Where you located? I'm in Abilene about 5 hours away from the Schrockworks guys.

No worries at all, I appreciate the detail and time, so thanks for that!
Sounds like I may go for those 6112s then to keep some cost down compared to Icons. May just go with 5100s and Icon springs in the rear. Knowing that yours is set on the middle, wouldn't mind maintaining a 2" lift whenever I get the bumper. Good to know it has more play in it.

I'm around the Spring area, just north of Houston.
 
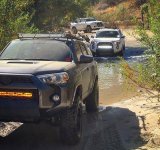
Hit up some trails near Kachess Lake today with my buddy.

What's the deal with the massive chunk of exposed "engine area" (for lack of a better term) behind the bumper / in front of the wheels? Is that the way that bumper leaves the area - exposed like that? Or is something missing from the installation?
 
What's the deal with the massive chunk of exposed "engine area" (for lack of a better term) behind the bumper / in front of the wheels? Is that the way that bumper leaves the area - exposed like that? Or is something missing from the installation?

Nothing is missing. It the part of the body exposed. Most aftermarket bumpers have that area mostly/partially covered.
 
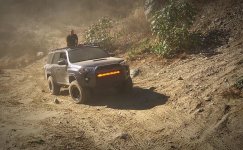
Got a little time off-road, found a bit of mud. Soft enough that when I turned the wheel left it kept going straight until I let off the power. Usually my wife complains. Today she said "guess you will never grow up".
 

Attachments

  • RailTrail.jpg
    RailTrail.jpg
    71.7 KB · Views: 765
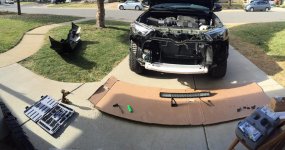
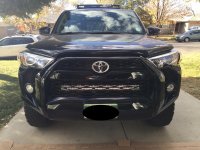
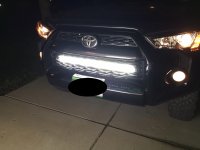
Installed a CaliRaised 30" bar behind the grille mounted with the Rago Fabrication brackets.

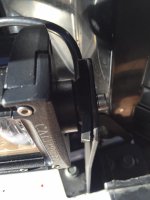
Installation was fairly straight forward although the video instructions on the CaliRaised site are atrocious as it related to the actual product. Great to remove the bumper and grille but it essentially ends without any info as to how to install the actual brackets/light bar. That said, it's not terribly difficult to figure out, but the provided screws that mount the light bar to the brackets were too long so I used the rubber spacers intended for the other light bar feet I didn't use. I watched their video for the 2016 tacoma and they used the rubber piece as a spacer too with a disclaimer about "not necessary for installation" which tells me they had the same problem. Why they are shipping these with the wrong hardware I do not know but just a heads up.

It worked fine using the rubber spacers (see below), but just felt silly and I will probably replace the screws due to the OCD in me. Additionally, the brackets push on the grille - I saw in another thread others have had this issue. I remounted about 5 times to make sure everything was mounted as far back as possible, but it's simply a design flaw.

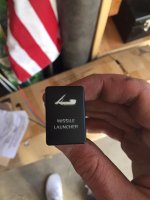
In the end, I'm pretty happy, the light is super bright and install wasn't too bad beyond trying to understand the silly design issues - the switch it comes with feels super AUTOZONE, but will have to do until I have time to figure out how to make the AOB switch I have compatible... I know there's a million threads on here and I can tie it into the wiper heater switch, but I'm not sure if I can splice it into the wiring for the existing switch thereby using the current relay or if it needs its own relay? I'm an electrical noob.
 

Attachments

  • IMG_3782.jpg
    IMG_3782.jpg
    139.6 KB · Views: 773
  • IMG_3783.jpg
    IMG_3783.jpg
    123.1 KB · Views: 788
  • IMG_3785.jpg
    IMG_3785.jpg
    116.8 KB · Views: 765
  • IMG_3784.jpg
    IMG_3784.jpg
    137.6 KB · Views: 789
  • IMG_3786.jpg
    IMG_3786.jpg
    122.8 KB · Views: 797
Nice. Was up there last weekend. One of the Arizona fav spots


Sent from my iPhone using Tapatalk
The scenery really is amazing. The best part about the spot I went to on the rim road is that you need 4wd AND clearance to access, which means not many people go there. I'm sure you're familiar with how popular this place is and how many cars actually drive the main road.
 
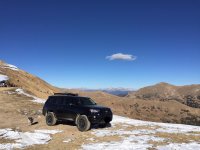
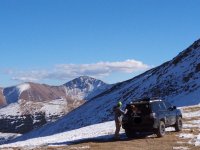
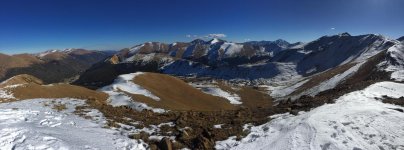
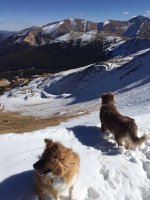
Also yesterday the new tires finally saw some dirt, drove up Jones Pass with a buddy and our dogs to scout some bc ski lines if winter ever actually arrives. Was a beautiful day to hike around on the continental divide.
 

Attachments

  • IMG_3724.jpg
    IMG_3724.jpg
    134.9 KB · Views: 772
  • IMG_3758.jpg
    IMG_3758.jpg
    135.2 KB · Views: 760
  • IMG_3720.jpg
    IMG_3720.jpg
    142.8 KB · Views: 770
  • IMG_3702.jpg
    IMG_3702.jpg
    137.1 KB · Views: 765
Long time lurker. First time poster in the 5th Gen forum. So much great inspiration in this thread. Thanks to you all! Done a bunch of mods over the last few weeks since I traded in my 2000 SR5 (see signature), but just mounted TRD C-pillar badges (left the PRO off out of respect ;) and went exploring some un-maintained mountain roads.

dreti-albums-dreti-s+4runner-picture42949-a.jpg
 
Tested the skids at Van Epps pass with Jeep friends. I did not expect any scraping (I did not expect or see the rock that did this).


Last edited:
Installed a CaliRaised 30" bar behind the grille mounted with the Rago Fabrication brackets.

Installation was fairly straight forward although the video instructions on the CaliRaised site are atrocious as it related to the actual product. Great to remove the bumper and grille but it essentially ends without any info as to how to install the actual brackets/light bar. That said, it's not terribly difficult to figure out, but the provided screws that mount the light bar to the brackets were too long so I used the rubber spacers intended for the other light bar feet I didn't use. I watched their video for the 2016 tacoma and they used the rubber piece as a spacer too with a disclaimer about "not necessary for installation" which tells me they had the same problem. Why they are shipping these with the wrong hardware I do not know but just a heads up.

It worked fine using the rubber spacers (see below), but just felt silly and I will probably replace the screws due to the OCD in me. Additionally, the brackets push on the grille - I saw in another thread others have had this issue. I remounted about 5 times to make sure everything was mounted as far back as possible, but it's simply a design flaw.

In the end, I'm pretty happy, the light is super bright and install wasn't too bad beyond trying to understand the silly design issues - the switch it comes with feels super AUTOZONE, but will have to do until I have time to figure out how to make the AOB switch I have compatible... I know there's a million threads on here and I can tie it into the wiper heater switch, but I'm not sure if I can splice it into the wiring for the existing switch thereby using the current relay or if it needs its own relay? I'm an electrical noob.

I installed a 32" light bar last weekend with the same brackets, so I can't speak to your spacing issue with the bar, I can say that the Rago brackets weren't rubbing on my grill anywhere when the bumper was put back on. I used a video posted by Ronin, I think its also linked on the Rago product page for the brackets- maybe worth checking out that video and seeing if there is any difference?
The AOB switch was super easy to install and is fully functioning using those other threads you mentioned, my light bar had the relay wired in so I just used the leads from the factory switch to rewire with the AOB.

Follow the advice of all those guys on here smarter than me and it won't be a problem.
 
I finished fabricating a new air dam for my Baja long rack. It's turned the air-buffeting into a super smooth and quiet sunroof enjoying experience!

 
Woke up to a nice sunrise
216ace81604bd9989761d705dd8ca59e.jpg


Got a little horizontal
8a472f14e3cd5edb38fe62531ea4836c.jpg


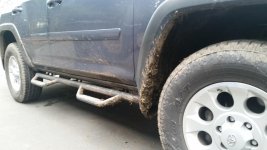
Came up with a plan to justify the running board - > slider upgrade to the wife
31f42beaf1317e122082d55e4d0ee7c8.jpg


Sent from my Pixel using Tapatalk
 
I installed a 32" light bar last weekend with the same brackets, so I can't speak to your spacing issue with the bar, I can say that the Rago brackets weren't rubbing on my grill anywhere when the bumper was put back on. I used a video posted by Ronin, I think its also linked on the Rago product page for the brackets- maybe worth checking out that video and seeing if there is any difference?
The AOB switch was super easy to install and is fully functioning using those other threads you mentioned, my light bar had the relay wired in so I just used the leads from the factory switch to rewire with the AOB.

Follow the advice of all those guys on here smarter than me and it won't be a problem.

Ya I was a bit perplexed I wasn't able to keep the mounts from pushing on the grille, but it's not terrible. I did see the Rago video and it was helpful but again I couldn't figure out why my grille was contacting the brackets.

I was hoping to get a response from someone who wired an AOB into the caliraised setup - my big question was if the existing relay would be sufficient to wire the AOB right into it with the existing switch wiring - thanks for confirming it works!
 
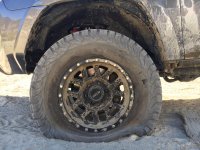
Went out to Azusa over the weekend. As you can tell - i like to deflate...TO THE MAX :P

FullSizeRender.jpg

IMG_8882.jpg

IMG_8912.jpg
 

Attachments

  • FullSizeRender.jpg
    FullSizeRender.jpg
    131.4 KB · Views: 1,408
  • IMG_8882.jpg
    IMG_8882.jpg
    138.6 KB · Views: 1,743
  • IMG_8912.jpg
    IMG_8912.jpg
    139.2 KB · Views: 1,392
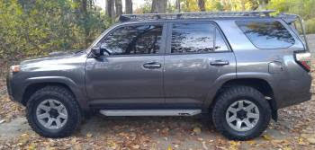
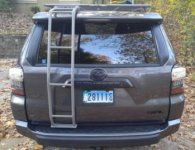
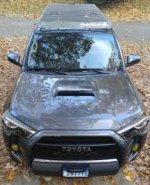
Tied up a lot of loose ends this weekend. Got my sliders and ladder back from powder coat, my Trail emblems and hood scoop insert back from the painter, and gave the whole thing a good cleaning. Now to let my bank account recover and think suspension...
 

Attachments

  • untitled3.png
    untitled3.png
    111.8 KB · Views: 1,013
  • untitled2.jpg
    untitled2.jpg
    19.5 KB · Views: 1,022
  • untitled.jpg
    untitled.jpg
    23.1 KB · Views: 1,022

Members online

Forum statistics

Threads
278,316
Messages
3,554,124
Members
248,016
Latest member
Advally Service

Trending content

Back
Top