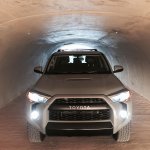
What did you do to/in your 5th Gen today?!

Ditch the zip ties I made my light bar brackets from a 1"x1/4" aluminum bar stock from lowe's took maybe 10 minutes. Cut to length, put it in the vise bend a 90, drill 2 holes, rattle can black. Cost maybe $6 total. And cut down the ends of those L brackets and paint them.
Sorry that triggered my OCD lol

I'll have to make another trip to Lowe's. The only issue I have is that I don't have anything to cut metal. The L brackets bug me too. It wasn't meant to be a permanent solution since there is some vibration with the outer light. Once I have the ability, I'll cut it at the bend so both lights are at the same height.
 
Did these recently...


shrockworks sliders, ragofab ditch light brackets w/ pods, and rotiforms

6jd1jk.jpg
 
Alas, I was not blessed with riches beyond my wildest dreams, ravishing looks, or being surrounded by so many gorgeous women that it would make even Dan Bilzerian blush.

You guys will have to make do with my frugality. Installed a hidden light bar with some 175lb. heavy-duty zip ties. Another glimpse into my cheap little world is my dual ditch light install. Used $3 L brackets from Lowe's. Enjoy.

Ditch the zip ties I made my light bar brackets from a 1"x1/4" aluminum bar stock from lowe's took maybe 10 minutes. Cut to length, put it in the vise bend a 90, drill 2 holes, rattle can black. Cost maybe $6 total. And cut down the ends of those L brackets and paint them.
Sorry that triggered my OCD lol

I'll have to make another trip to Lowe's. The only issue I have is that I don't have anything to cut metal. The L brackets bug me too. It wasn't meant to be a permanent solution since there is some vibration with the outer light. Once I have the ability, I'll cut it at the bend so both lights are at the same height.

I ended up with these:

https://www.ragofabrication.com/collections/toyota/products/ditch-light-bracket-extensions-pair

Honestly, for $20 they have zero vibration and are very beefy.

Ditch_Bracket_Extensions_1024x1024.png
 
My dealer badge didn't come off easy and you can still see traces of it up close. What did you use to remove it?


Sent from my iPhone using Tapatalk


I just waited for a really hot day when my truck was baking in the sun and i peeled it off easily. Then I used a small amount of goo gone on a micro fiber cloth and the small amount of leftover residue came right off.


Sent from my iPhone using Tapatalk
 
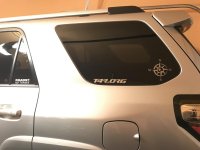
After sitting on my end table for a good 6 months, I finally got around to putting my t4r vinyls on :bounce:
 

Attachments

  • IMG_8471.jpg
    IMG_8471.jpg
    126.7 KB · Views: 712
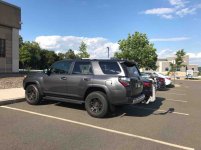
After an incident with the parking garage door and a fight over liability - I ended up wrapping the roof my 2011 in black vinyl and some of the front. A night in the back country helped as well.
1147b29b56dd68e9b193c0e9a92ab505.jpg


Sent from my iPhone using Tapatalk
 
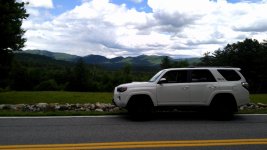
Went for a drive in the hills. Met some folks running a little white water.
 

Attachments

  • IMG_20170626_140813.jpg
    IMG_20170626_140813.jpg
    130.6 KB · Views: 1,637
  • IMG_20170626_151010.jpg
    IMG_20170626_151010.jpg
    153.5 KB · Views: 1,636
I ended up with these:

https://www.ragofabrication.com/collections/toyota/products/ditch-light-bracket-extensions-pair

Honestly, for $20 they have zero vibration and are very beefy.

Just ordered these. I had seen them in the past but don't know why I didn't buy them. With the L-brackets I'm currently using, there is quite a bit of vibration so these extensions seem like a good bet. Next on the list will be their hidden light bar mount if I can decide to pony up the money.
 
Last edited:
I took the dealer badge off the bottom left corner and got a D-ring for the hitch.
...
After:
e71fedab01f471ce1bff773d6264db61.jpg


Sent from my iPhone using Tapatalk
Looks good, now you need to replace the dealer license plate frame.

That's what I did with mine: $10 to $ 20 for the frames and about $12 for stainless steel hardware with locking star nut drivers.

Next for me is the dealer sticker.
 
Continuing on with my previous post:

http://www.toyota-4runner.org/5th-g...u-do-your-5th-gen-today-1718.html#post2730464

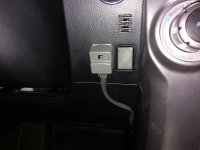
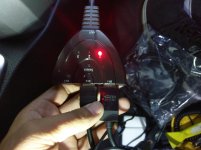
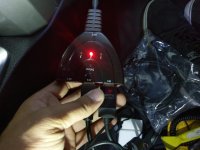
Just took out my radio again (it's stupidly easy to take the radio out) and connected an HDMI 3 input splitter that I had laying in my room.

Connected 2 HDMI cables (for the meantime).
1 for my Nintendo Wii
1 to my mirror my phone to the radio head unit.
The third HDMI will be for my PS3.

I have an HTC 10 with a Type C (USB 3.1) connector. With a lot of reading on XDA to find a working device to mirror my phone (I'm also a developer on XDA), I chose the Anker Hubs Premium USB-C Hub with HDMI and Power Delivery, 2 USB 3.1 and it works flawlessly.

I mounted my video/parking brake bypass finally.

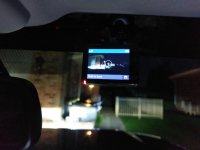
Also, installed a Garmin 45 Dash Cam. Dash cam is very clear. The audio and video captures great amount of light and it can read license plate numbers fine. I ordered a 64GB memory card for it, as the 4GB that is included doesn't do even an hour of recording.

The next steps:
- Put in my Husky cargo liner that's sitting in my garage.
- Install my rain guards.
- Run the HDMI cables better. I just rigged it real quick as it was night time and I just got home from work.
- Get a piece of wood and mount it in my truck. Put something around it from scratching up/ruining my truck/cargo liner. Mount my Wii, PS3 and 4 outlet power strip on the wood.
- Mount a cooler, as I used to do so in my previous SUVs.

I should be done at that point. I put too much time and money into this truck and I have it for 37 days lol.

Any tips or ideas on how to improve things are always welcome.

 

Attachments

  • IMAG0126.jpg
    IMAG0126.jpg
    134.4 KB · Views: 1,504
  • IMAG0128.jpg
    IMAG0128.jpg
    119.6 KB · Views: 1,486
  • IMAG0129.jpg
    IMAG0129.jpg
    120.7 KB · Views: 1,482
  • IMAG0130.jpg
    IMAG0130.jpg
    120 KB · Views: 1,478
...Next on the list will be their hidden light bar mount if I can decide to pony up the money.

I have that too. By far one of the easiest mods I have done to the 4Runner.

If I can make a recommendation: put the bumper down on towels! that thing is unwieldy to say the least. It will move and scratch without protection.

If you check out [MENTION=139789]RagoFabrication[/MENTION] website, they have a video by [MENTION=129328]jasonaaron480[/MENTION] (Ronin Chronicle) where he shows how to do it. Watch all of the video. He points out one mistake in it.

Cheers!
 
I have that too. By far one of the easiest mods I have done to the 4Runner.

If I can make a recommendation: put the bumper down on towels! that thing is unwieldy to say the least. It will move and scratch without protection.

If you check out [MENTION=139789]RagoFabrication[/MENTION] website, they have a video by [MENTION=129328]jasonaaron480[/MENTION] (Ronin Chronicle) where he shows how to do it. Watch all of the video. He points out one mistake in it.

Cheers!

Thanks for the heads up! Will make sure to put it on towels. The front bumper isn't exactly in tip-top shape but less scratches the better. Did you go into the factory bolts or have to use self-tapping screws (for light bars less than 32")?
 
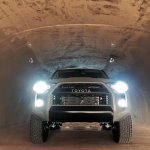
Installed xenon depot 5k HIDS on my cement Pro matched with LED fog light bulbs
 

Attachments

  • IMG_0312.jpg
    IMG_0312.jpg
    132.2 KB · Views: 1,410
  • IMG_0308.jpg
    IMG_0308.jpg
    126.7 KB · Views: 1,385

Members online

No members online now.

Forum statistics

Threads
278,317
Messages
3,554,129
Members
248,016
Latest member
Advally Service

Trending content

Back
Top