What did you do to/in your 5th Gen today?!

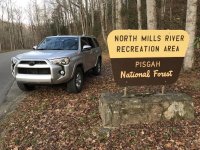
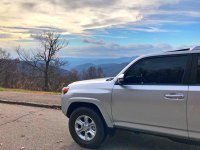
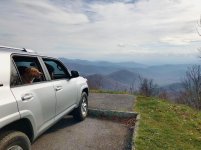
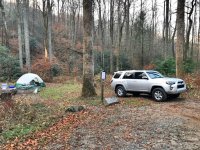
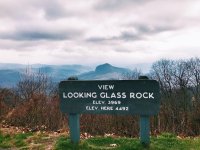
Road tripped to Pisgah National Forest for some road side camping last night. Today we took a drive on the Blue Ridge Parkway and enjoyed the views, and explored some forest roads. Some rough weather was rolling in that kept us from hiking Black Balsam Knob so we dropped down through Brevard for lunch and a cold beer at Oskar Blues Brewing. First camping trip in this truck, and I couldn’t have been happier with it!
 

Attachments

  • 3CE3A3F2-1D80-4D65-9D4A-56BBD5DB30FC.jpg
    3CE3A3F2-1D80-4D65-9D4A-56BBD5DB30FC.jpg
    140.3 KB · Views: 958
  • 5068D1C1-5250-4F3F-928B-190A50F61ED4.jpg
    5068D1C1-5250-4F3F-928B-190A50F61ED4.jpg
    136.9 KB · Views: 965
  • 40E84307-F82F-4C45-AE64-4C5E3C407207.jpg
    40E84307-F82F-4C45-AE64-4C5E3C407207.jpg
    136.5 KB · Views: 973
  • 962CD1C3-E1EA-488B-92A5-EFFE94CD188F.jpg
    962CD1C3-E1EA-488B-92A5-EFFE94CD188F.jpg
    136.9 KB · Views: 964
  • D95C564C-BD72-4193-9F7C-C6193C572210.jpg
    D95C564C-BD72-4193-9F7C-C6193C572210.jpg
    137.2 KB · Views: 955
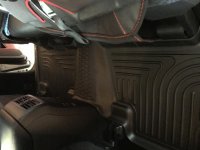
Wet Okole seat covers.
Khaki/Khaki (#100) with full piping.

good in front, but a little too thick in back.

makes it hard to fold the seats up and down (which I do a lot). If I had know that I probably would have ordered something else for the back(maybe ballistic nylon).


Last edited:
It is matching day today! Installed the infant car seat for little peanut to ride with daddy.

<img src="http://i116.photobucket.com/albums/o21/acurawei/20171118_152140_zpslzmbvpro.jpg" border="0" alt=" photo 20171118_152140_zpslzmbvpro.jpg"/>

<img src="http://i116.photobucket.com/albums/o21/acurawei/20171118_152639_zpskktukg8e.jpg" border="0" alt=" photo 20171118_152639_zpskktukg8e.jpg"/>

<img src="http://i116.photobucket.com/albums/o21/acurawei/20171118_154607_zpsztuz8arl.jpg" border="0" alt=" photo 20171118_154607_zpsztuz8arl.jpg"/>
 
Last edited:
It is matching day today! Installed the infant car seat for little peanut to ride with daddy.

<img src="http://i116.photobucket.com/albums/o21/acurawei/20171118_152140_zpslzmbvpro.jpg" border="0" alt=" photo 20171118_152140_zpslzmbvpro.jpg"/>

<img src="http://i116.photobucket.com/albums/o21/acurawei/20171118_152639_zpskktukg8e.jpg" border="0" alt=" photo 20171118_152639_zpskktukg8e.jpg"/>

<img src="http://i116.photobucket.com/albums/o21/acurawei/20171118_154607_zpsztuz8arl.jpg" border="0" alt=" photo 20171118_154607_zpsztuz8arl.jpg"/>

Congrats on the peanut! Move that seat to the middle, safest place for a child to sit.
 
It is matching day today! Installed the infant car seat for little peanut to ride with daddy.

<img src="http://i116.photobucket.com/albums/o21/acurawei/20171118_152140_zpslzmbvpro.jpg" border="0" alt=" photo 20171118_152140_zpslzmbvpro.jpg"/>

<img src="http://i116.photobucket.com/albums/o21/acurawei/20171118_152639_zpskktukg8e.jpg" border="0" alt=" photo 20171118_152639_zpskktukg8e.jpg"/>

<img src="http://i116.photobucket.com/albums/o21/acurawei/20171118_154607_zpsztuz8arl.jpg" border="0" alt=" photo 20171118_154607_zpsztuz8arl.jpg"/>

You should have got matching car seat protectors.
Best picture I have at the moment, but you get the idea, black with red stitching
 

Attachments

  • B0259E4E-3A35-4FEF-80F7-46A3F5D49B13.jpg
    B0259E4E-3A35-4FEF-80F7-46A3F5D49B13.jpg
    136.8 KB · Views: 913
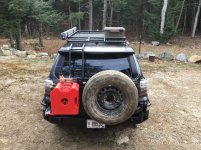
Finally finished my CBI install. Was held up a few days by a bit of missing hardware for the swing arm. But CBI took care of me lickity-split, and the bumper is top notch quality, fit and look.
 

Attachments

  • image.jpg
    image.jpg
    138.9 KB · Views: 780
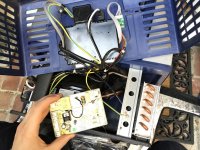
Replaced the circuit board and thermistor in my fridge. It wouldn't hold the set temperature on DC power, oddly it would on AC. Either way ARB sent the parts out awhile back and finally got around to swapping them out.
 

Attachments

  • IMG_8836.jpg
    IMG_8836.jpg
    139.8 KB · Views: 990
How did you remove the valances w/o removing the bumper covers?

Haha, I was too flustered in the middle of the process to take photos. I took both the front and rear bumper off by myself in the parking lot. 10mm socket and ratchet + flathead screwdriver is pretty much all it takes. And a couple hours for front/back.
 
Haha, I was too flustered in the middle of the process to take photos. I took both the front and rear bumper off by myself in the parking lot. 10mm socket and ratchet + flathead screwdriver is pretty much all it takes. And a couple hours for front/back.

Gotcha. I thought there was some sort of breakthrough on removing these valances. Thx!
 
Gotcha. I thought there was some sort of breakthrough on removing these valances. Thx!

I tried to do the front without removing the bumper but I'm honestly not sure how people are able to do it. There are two clips smack dab in the middle of the valance that I can't imagine being able to get to due to the foam/bumper support. My arms also couldn't fit into the space on either side of the radiator to get to the outside most clips and I'm not a huge dude or anything like that.
 
Honda offers a special wrap(coated with cayenne pepper I believe). But I usually use moth balls in a tiny foil wrap to keep them at bay

Sent from my SM-G955U using Tapatalk

thats what i did. i used a lot of mothballs though. i dont know if the rodent is still in my car or not
 

Members online

Forum statistics

Threads
278,316
Messages
3,554,124
Members
248,016
Latest member
Advally Service

Trending content

Back
Top