What did you do to/in your 5th Gen today?!

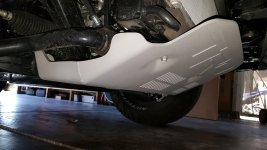
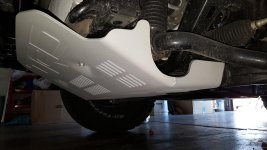
Finally cut, trimmed, filed down the rough spots and installed the TRD skid plate to clear the KDSS sway bars.
 

Attachments

  • 20180216_125445.jpg
    20180216_125445.jpg
    136.7 KB · Views: 768
  • 20180216_125341.jpg
    20180216_125341.jpg
    137.4 KB · Views: 761
Should be getting Cornfed 1” front spacers and alignment done later this work week. Super excited. This is just the initial start...possibly bilstein 5100s in the future.
 
Installed RCI skid plates

I installed the RCI full skid plate package yesterday. I got to the rear RCI crossbar and was very disappointed to see it did not fit the frame with KDSS plates and brackets. I was drilling holes in the mounting plate to make it fit the actual bolt location, removed the KDSS line anchor point, propped the crossbar up on wood blocks so I could get it bolted, only to find out it's too wide for the frame and the bolt pattern doesn't fit. I will be calling RCI to see what they can do to fix it. I'll take some photos of the crossbar and the frame today and post them later.

Operator Error- See post #30583 on the next page.

The front two skids, engine and transmission skids fit fine. The OEM plastic front filler plate between the stock bumper and the new RCI skid does not reinstall. It has bolt holes that must have fit the OEM skid plate, which I had to cut off and has now gone off to the scrap yard.

RCI sells a filler plate for this. It's 1/8" aluminum plate for $65.

I installed the gas tank skid last week.
 
Last edited:
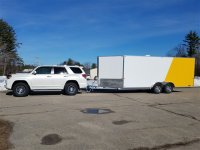
Picked up a new trailer today, Proline CRG90-18

20180217_095043 (2).jpg

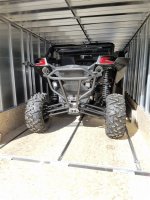
Plenty of room for the X3 Turbo R even with sunny boy's Outlander XT in the v-nose
 

Attachments

  • 20180217_095043 (2).jpg
    20180217_095043 (2).jpg
    78.4 KB · Views: 940
  • 20180217_121223.jpg
    20180217_121223.jpg
    101.9 KB · Views: 899
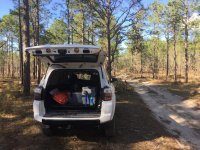
Withlacoochee state forest

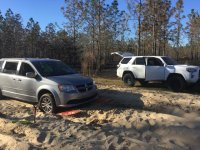
Exploring this state forest that allows OHV’s. Will definitely be back, so many miles to cover. Found a shady spot for lunch and then, a minivan?.. with a mom and 2 youngsters high centered something fierce. Took an hour of digging, the max trax and a pull to get her out. Not a Jeep I know, but at least a dodge.
:lookout:
She was on her way to a campsite for a birthday party and took the wrong trail. I’m surprised how far she made it.
 

Attachments

  • 85BF19C6-B10B-4F3E-9B36-4777EDA333CA.jpg
    85BF19C6-B10B-4F3E-9B36-4777EDA333CA.jpg
    139.4 KB · Views: 880
  • AACEE7AC-E64E-4DF8-8CD4-6637AE3C2D8A.jpg
    AACEE7AC-E64E-4DF8-8CD4-6637AE3C2D8A.jpg
    139.4 KB · Views: 885
Finally stripped and replaced the Unrequested dealer tint off the front windows and added tint over back privacy glass as well. 15% all around now.

11ee20bc0abed2c897c84e7ba80b92db.jpg


Sent from my iPhone using Tapatalk Pro
 
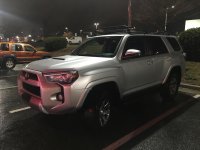
I finally was able to close the deal and take home a 2015 trail premium with a Gobi rack, leveling kit and 32" KO2s.

I'm pretty excited since this is my first 4Runner and coming from a Jeep TJ that I built with 35s, arbs and ton of other mods.
 

Attachments

  • image.jpg
    image.jpg
    129.5 KB · Views: 898
Swapped out almost all my interior lights, puddle lights, fog lights and license plate lights to leds. Huge improvement. Now the wife wants them in her car too.
 
Rub it in...lol, post up install pics! That’s serious packing


Hi, finished SSO rack installation yesterday evening. In total it took me about 4.5h to do it all by myself including about 45min of MacGyver-ing (I will create a post later with installation steps/pictures/lessons learned).

I’m a little frustrated by the fact that on a $1k product I had to figure out what the problem was with wind fairing installation and to fix it:

0e791e8df56281418edcb6c076175d93.jpg


If I would have lived in an apartment and had no tools I would have been SOL :)

4520062eaa9d73489b4ad5becbac8d84.jpg


Here is the final product:

d4fe7779b8b9b151715346e69368b36b.jpg
 
Hi, finished SSO rack installation yesterday evening. In total it took me about 4.5h to do it all by myself including about 45min of MacGyver-ing (I will create a post later with installation steps/pictures/lessons learned).

I’m a little frustrated by the fact that on a $1k product I had to figure out what the problem was with wind fairing installation and to fix it:

0e791e8df56281418edcb6c076175d93.jpg


If I would have lived in an apartment and had no tools I would have been SOL :)

4520062eaa9d73489b4ad5becbac8d84.jpg


Here is the final product:

d4fe7779b8b9b151715346e69368b36b.jpg

Interested in hearing more about the install problems since I have one heading my way.
 
Interested in hearing more about the install problems since I have one heading my way.


The problem was re wind fairing installation.
Those nuts don’t align properly

bbfd50d9931f425cb8832fb85155acdf.jpg


and some amount of filing is required on the inside of the fairing

ea227e5863e936d41700148e91d24d82.jpg


I advise first fit-mounting on a flat surface to see where you are, unless you want your BOSS

cbcc76b566de08a58fc6d8431b7bc0d1.jpg


to give you the look of “you paid 1k for this, I’m here for the last 1/2h and you still did not install this thing? [emoji4]

When you fit it, make sure the edge trim is in between fairing and the rail.
Fitting will allow you to see if you need to file the fairing

5ca5bb877bbcb4a99f87329f38e5cffe.jpg


99b3b5dadd440f70933ae534a62910c0.jpg


and where you have to start filing

1a6ae7295d531a8650414d2b15cad2a2.jpg


Maybe you’re lucky and you will not have to make any changes but doing it first on a flat surface will save you a lot of aggravation.

Check also how many 1/4-20 button heads you get. Their inventory list calls for 52 but you need 60s. I wrote them last night about it.
With 52 screws you end up with 4 rails mounted on 2 screws vs 3

75c03083d841fec69348f1a4ad8ec953.jpg


e7bdf37a9acf44549ec4bafee99a7453.jpg


I’m also frustrated by the fact that one of the fairing’s nuts gave away and I couldn’t finish one screw

0db0c405a9191d701ae85005227c5928.jpg


I’ll have to figure out a solution for it
 
Last edited:
The problem was re wind fairing installation.
Those nuts don’t align properly

bbfd50d9931f425cb8832fb85155acdf.jpg


and some amount of filing is required on the inside of the fairing

ea227e5863e936d41700148e91d24d82.jpg


I advise first fit-mounting on a flat surface to see where you are, unless you want your BOSS

cbcc76b566de08a58fc6d8431b7bc0d1.jpg


to give you the look of “you paid 1k for this, I’m here for the last 1/2h and you still did not install this thing? :)

When you fit it, make sure the edge trim is in between fairing and the rail.
Fitting will allow you to see if you need to file the fairing

5ca5bb877bbcb4a99f87329f38e5cffe.jpg


99b3b5dadd440f70933ae534a62910c0.jpg


and where you have to start filing

1a6ae7295d531a8650414d2b15cad2a2.jpg


Maybe you’re lucky and you will not have to make any changes but doing it first on a flat surface will save you a lot of aggravation.

Check also how many 1/4-20 button heads you get. Their inventory list calls for 52 but you need 60s. I wrote them last night about it.
With 52 screws you end up with 4 rails mounted on 2 screws vs 3
75c03083d841fec69348f1a4ad8ec953.jpg


e7bdf37a9acf44549ec4bafee99a7453.jpg

Thanks for the tips and the extra photos! Maybe they'll get their hardware list fixed before mine gets shipped. Install sounds a bit frustrating but it looks awesome.
 
Thanks for the tips and the extra photos! Maybe they'll get their hardware list fixed before mine gets shipped. Install sounds a bit frustrating but it looks awesome.


Don’t get me wrong, it sounds bad but if you take your time, dry-fit it first you’ll be ok. Feel free to IM me anytime and we can talk. You should be able to get it done by yourself in about 2 1/2 - 3h-s .

There is also a video on how to remove the roof rack

https://youtu.be/8qu7Plf8Leo
 

Members online

Forum statistics

Threads
278,317
Messages
3,554,129
Members
248,016
Latest member
Advally Service

Trending content

Back
Top