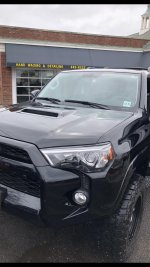
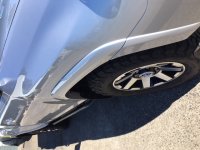
What did you do to/in your 5th Gen today?!

Looks great! I'm thinking of getting some too. Any additional wind noise at highway speed?

How is the wind noise

There is some slight wind noise above 70MPH, but you have to know what you are listening for. My plan is to use the Rhino Rack mesh with fairing on this setup when I am not sporting my RTT.

For now the RTT makes more noise than anything else, but the bars by-themselves are very quiet.
 
Hit the back way to Crown King for the first time. Fresh rain made for a fun mud trip. Also saw this poor guy left behind with a broken ball joint/LCA? Hopefully they get it fixed soon :/
f5b0a1d29f35bcb3a1858692bed60b03.jpg


Sent from my SM-N950U using Tapatalk

Probably LBJ, 3rd Gens are known for their failures.
 
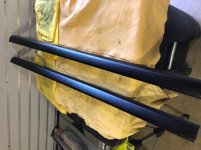
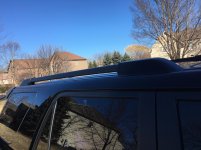
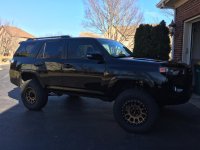
Linex'd roof rails

Had my rails sprayed with Linex and threw them on. Opted for the smoother texture....really happy with how they turned out and they are durable as a mo fo.
 

Attachments

  • RR1.jpg
    RR1.jpg
    66.2 KB · Views: 765
  • RR3.jpg
    RR3.jpg
    136.9 KB · Views: 764
  • RR2.jpg
    RR2.jpg
    135.8 KB · Views: 776
Nothing I can see. At 40psi I still see the tire sits "flat", I doubt it is overinflated. When I check the pressure at cold day (below freezing) I have around 37psi, when it's warm I see 40psi. No visible change in quality of ride or fuel economy. I'm getting constant 20mpg driving mixed the city and county roads.

One thing I noticed is KO2 has a bit worse traction on wet pavement comparing to P-type Michelin M/S I used to have on my Tacoma (now I have KO2 on my Tacoma too). But I drive very passive keeping save distance so it does not bother me.

I ran it up to 40psi...and I have noticed it handles better...yet to determine the impact of the addition to mpg (but I suspect with the level/lift and wider/heavier tires I'm gonna get some impact). Mostly I've noticed how quiet they are on the HWY...really impressive.
 
Had my rails sprayed with Linex and threw them on. Opted for the smoother texture....really happy with how they turned out and they are durable as a mo fo.

Semi-random question, did you have the remove the end caps to pull off the bars? I see screws on the underside but didn’t want to start messing with them to find out the end caps need to come off too. After seeing yours I need to black mine out. Thanks!
 
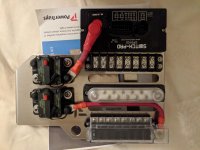
Installed my 32" Auxbeam Light Bar this weekend. Went a little different route then buying prefabbed mount brackets as I just couldn't stomach the idea of paying more for the brackets than I did for the light bar. Below are some pics of the steel material I bought from Home Depot for $8. As is the case for most people here, the mounting was the PITA on this project and not the wiring/electrical as I had imagined.

XQDdLqX.jpg

GvxV9I4.jpg

JEVZvxg.jpg


Here it is mocked up to make sure it was centered and to get the height correct. After mocking up the set-up I realized I needed to paint the flat bracket black because it was very noticeable with the bumber back on.

1J1xgV4.jpg


Just a quick look at how I got the harness through the firewall, hope this helps someone out there. I used a wire hanger to poke through and wrapped the hanger around the harness like shown below. Then just pulled, no lubricant needed.

u39bL3P.jpg
 
Last edited:
Hit the back way to Crown King for the first time. Fresh rain made for a fun mud trip. Also saw this poor guy left behind with a broken ball joint/LCA? Hopefully they get it fixed soon :/
f5b0a1d29f35bcb3a1858692bed60b03.jpg


Sent from my SM-N950U using Tapatalk

Hope his wheel didn't end up in the canyon!:wow:
 
Got a Trail hood!

Just got it today, like the look of the scoop more than the flat hood. I swapped with a guy who had a Trail and did not like the look of the scoop. Wish it was funtional.
 

Attachments

  • 1479A019-B76F-48C6-A54E-F05627C5F695.jpg
    1479A019-B76F-48C6-A54E-F05627C5F695.jpg
    135.4 KB · Views: 880
Last edited:
Semi-random question, did you have the remove the end caps to pull off the bars? I see screws on the underside but didn’t want to start messing with them to find out the end caps need to come off too. After seeing yours I need to black mine out. Thanks!

Yep. All four caps, 8 bolts total underneath, then the 8 screws to remove the rails from the end pieces. Super easy. I had the rails reassembled and mounted back on the car in 20 mins.
 
Hit the back way to Crown King for the first time. Fresh rain made for a fun mud trip. Also saw this poor guy left behind with a broken ball joint/LCA? Hopefully they get it fixed soon :/
f5b0a1d29f35bcb3a1858692bed60b03.jpg


Sent from my SM-N950U using Tapatalk

This looks an awful lot like my buddies rig.. and I haven’t heard from him in a few days. I’ll give him a call.
 
Installed the RRO super sliders. Finished up installing the aux roof lights too.
Ana8Twa.jpg

Can you post more pics of the super sliders? I'm trying to figure out what the difference is between their regular sliders and super sliders.
Can you use it as step boards?
 
Can you post more pics of the super sliders? I'm trying to figure out what the difference is between their regular sliders and super sliders.
Can you use it as step boards?

Their slider is the rectangular tube that sits below the rocker panel. The super slider adds the round tube that sticks out past the rocker. I'd call it more of a mini step... You can stand on it with your toes, but it's not a full step like a lot of the other sliders available. Personally that's why I liked them. Not the best picture, but it gives you an idea of how tight it is to the body.
 

Attachments

  • image002.jpg
    image002.jpg
    115.2 KB · Views: 821

Members online

Forum statistics

Threads
278,317
Messages
3,554,126
Members
248,016
Latest member
Advally Service

Trending content

Back
Top