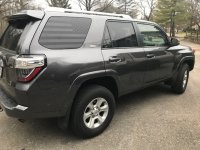
What did you do to/in your 5th Gen today?!

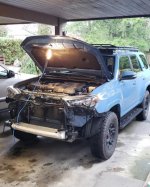
Here's where it's at right now. I think I mentioned that my brother is doing the welding. He put the lower plate on last night. Only thing left to weld on are the light tabs. Then I've got quite a bit of grinding to do. He warned me his welds may not be very pretty. He welded a bumper for his CJ7 probably 12 years ago and that is the only welding he has done. That said, it's solid. It for sure isn't going anywhere. Plan to try and do the bulk of grinding over the next couple days and see if I can't have paint on this weekend. I will for sure post pictures of it completed.

Looking good and coming together!
 
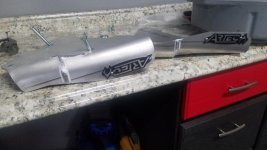
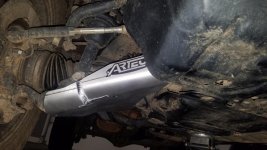
Test fitting some Artec sliders before paint. Loosely attached with a couple bolts in the picture.

index.php


index.php
 
Took the Mountain bikes out for a ride

Off for the Holiday week and have been working on the beast... Added the Gobi Stealth rack and an Extreme LED curved light bar, then went out for some downhill excitement!:flame:


Where did you get the red trd badges and what size tires are you running. Cant decide between 275 or 285. Great looking ride

Thanks,

JT
 
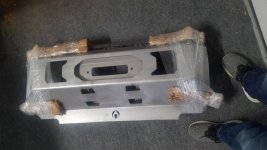
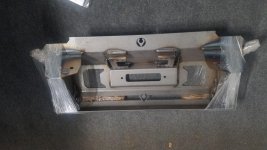
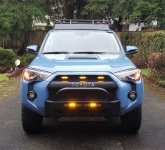
After reviewing a thread on another member's experience with Artec Industries I decided to pull the trigger on their bumper as well. Now, admittedly, the thread was INTITIALLY less than flattering about the fit and finish of the product but it got the attention of the Director of Sales for Artec. Not only did he/they apologize for the concerns and tried to make good on them for that customer, they also revamped the design and manufacturing process and provided photos of the changes made to address the original flaws. THIS IS HOW COMPANIES SHOULD WORK! Take the advice or criticisms, listen to the concerns of your customers AND THEN FIX THE FLAW(S).

With that I can say I am now the proud owner of an Artec bumper that arrived in less that TWO WEEKS which is remarkable!! The issues present in V1 of the 4Runner bumper have indeed been remedied. This thing is STOUT! I am taking it to a buddy's fab shop to weld on a bull bar as well (its an aesthetic thing for me so no hate). I got the bumper as part of the holiday sale so it was an fantastic price and also came with LCA armor plates and other little goodies for FREE!

I am extremely happy with this bumper and will update once I get it painted and installed with my Smittybilt X20!
 

Attachments

  • 20191230_180450.jpg
    20191230_180450.jpg
    72.1 KB · Views: 1,155
  • 20191230_180435.jpg
    20191230_180435.jpg
    78.3 KB · Views: 1,158
  • 20191230_182701.jpg
    20191230_182701.jpg
    62.7 KB · Views: 1,155
  • 20191230_210431.jpg
    20191230_210431.jpg
    78.3 KB · Views: 1,150
Installed my steel bumper and AOB switches

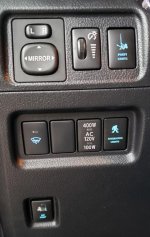
I installed my low profile steel bumper and wired up my factory style switches. The switches all illuminate factory Toyota blue, turn on / off with ignition power and are fully dimmable using the factory dimmer switch. A little bit more involved during installation, but I think they turned out great.
 

Attachments

  • bumper.jpg
    bumper.jpg
    83.6 KB · Views: 1,063
  • C4.jpg
    C4.jpg
    68.7 KB · Views: 1,056
  • switches.jpg
    switches.jpg
    88.7 KB · Views: 1,065
This week, 4R maintenance items completed:

Front diff drain/ refill
Rear diff drain/ refill
Transfer case drain/ refill
Power steering flush/ fill
Cooling System drain/ refill
Replaced upper/ lower radiator hoses
Lubed drive shafts
Engine oil change​

Remaining maintenance items:
New brake pads
Brake system fluid flush
Transmission flush/ fill
Wash, detail, wax​
 
I installed my low profile steel bumper and wired up my factory style switches. The switches all illuminate factory Toyota blue, turn on / off with ignition power and are fully dimmable using the factory dimmer switch. A little bit more involved during installation, but I think they turned out great.

Looks nice, can u post a side view, curious on the hoop protrusion.
 
wired up my factory style switches. The switches all illuminate factory Toyota blue, turn on / off with ignition power and are fully dimmable using the factory dimmer switch. A little bit more involved during installation, but I think they turned out great.

What wires did you tap into for the dimming ability? Are these the AOB switches?
 
Replaced serpentine belt. Dealer wanted $250 to replace belt. Amazon.... $13.00 and 15 minutes of my time. Cash in the pocket.
30fcaabcfe7a0ee207b3e0c5b5ac1a35.jpg
7b543680df10710c6ea69103d5ae10f6.jpg


Sent from my SM-G950U1 using Tapatalk
 
Last edited:
What wires did you tap into for the dimming ability? Are these the AOB switches?

Correct, they are AOB switches. I tapped into the green wire on the de-icer to connect into the dash lights and the grey wire for the ground. If you don't tap into the grey wire they will not dim with the factory dimmer dial. Otherwise you can ground anywhere convenient.
 
First bling

Applied the first piece of bling today to our new Christmas gear.
xplore-offroad.com 10% discount, use USA10
 

Attachments

  • IMG_0450.jpg
    IMG_0450.jpg
    109.6 KB · Views: 1,066

Members online

Forum statistics

Threads
278,317
Messages
3,554,125
Members
248,016
Latest member
Advally Service

Trending content

Back
Top