What did you do to/in your 5th Gen today?!

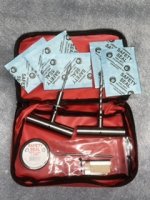
Last month I tried three times to plug a flat tire with an old crappy tire plug kit. The plugs were crusty and hard, the insertion tool bent. And a new pack of plugs I bought from the auto parts store were old and they didn’t hold either.

I’ve successfully plugged tires in the past and this was going to be a temporary fix just to get it to the tire store for a proper repair, but I was disgusted with the tool quality.
So I ordered and received a high quality (and expensive) US made kit from Safety Seal.
Beefy tools, thick plugs, thin plugs, spare parts, and lube. All in a nice zippered bag. Model KABC30. For next time.

KABC30 - Auto/LT Deluxe Combi Bag - Safety Seal
 

Attachments

  • C7F84E9E-E71A-44B1-BED9-159E7F68096E.jpeg
    C7F84E9E-E71A-44B1-BED9-159E7F68096E.jpeg
    39.9 KB · Views: 648
Over the weekend. I finished installing my Victory 4x4 Blitz sliders. I like how they look but I'm not happy with the installation. They come in three pieces with arms that attach to the actual slider with slots for adjustability. However, you can't access all of the bolts when they are installed, so you have to leave them loose, halfway install it, tighten some of the bolts, take it off, tighten the rest, and then reinstall it. Also on the driver's side, the arms push up on the hard KDSS lines running along the frame, which makes it impossible to get one of the bolts through a line bracket and into the frame. The front arm has to be maneuvered around the KDSS lines as they turn under the frame when they could have just notched the corner off of the bracket. I added a 4" wide strip of grip tape on top to make them less slippery. I also decided to do a proper job wiring up the lights and got a full set of crimper, pins, connectors, etc. for Weatherpack connectors. Also added the corrugated sleeving for the wiring going up to the engine bay. Moving forward I'll be doing a more professional job with the wiring so things don't look so DIY.
400aa20375ca0c86597df6a762525985.jpg
60b0a353d7025743dc46842a5e23ce77.jpg
be77a6325cc1f5d344e74db42c93fbc5.jpg
b3f686befb730e20117dd239531ec271.jpg


Sent from my Pixel 2 using Tapatalk
 
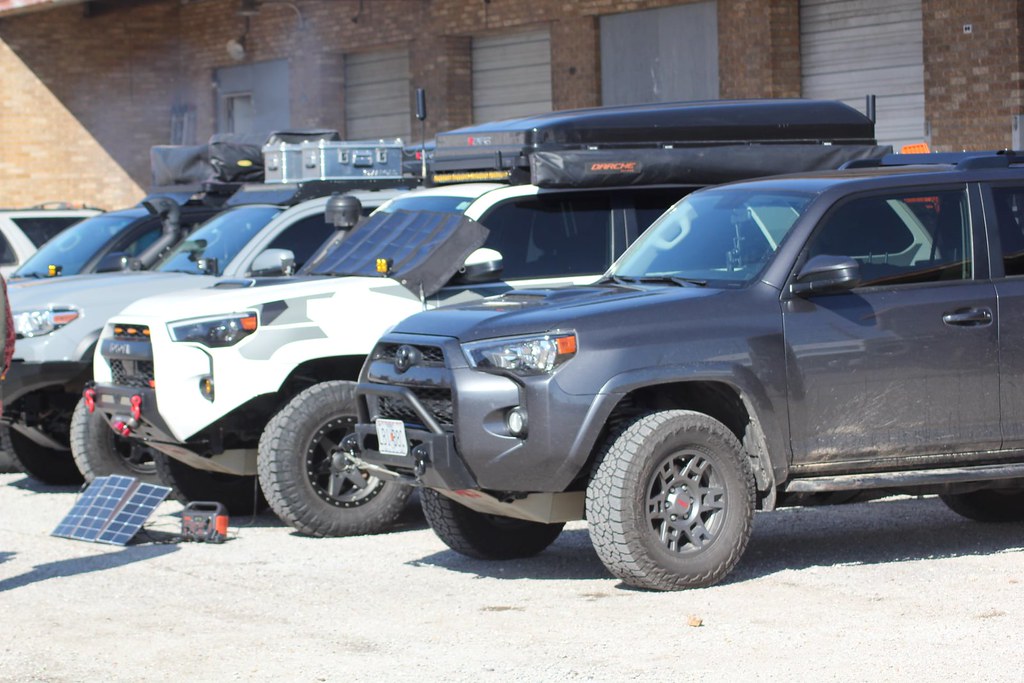
This last Saturday I attended a Rigs & Coffee event at Artemis Overland Hardware in Springfield, MO.

Artemis Overland Hardware

They do a get together once a month. Next one is April 3rd from 10am to 12pm.

Link goes to facebook:
Rigs and Coffee: Springfield, MO

51021538333_4efa72635e_b.jpg


51022368917_579282ef39_b.jpg


51021538353_a71a3677e5_b.jpg


51022270176_b7ac8fb578_b.jpg


Me (camo hat) in the back checking out the FJ
51022368957_5c17eb9578_b.jpg


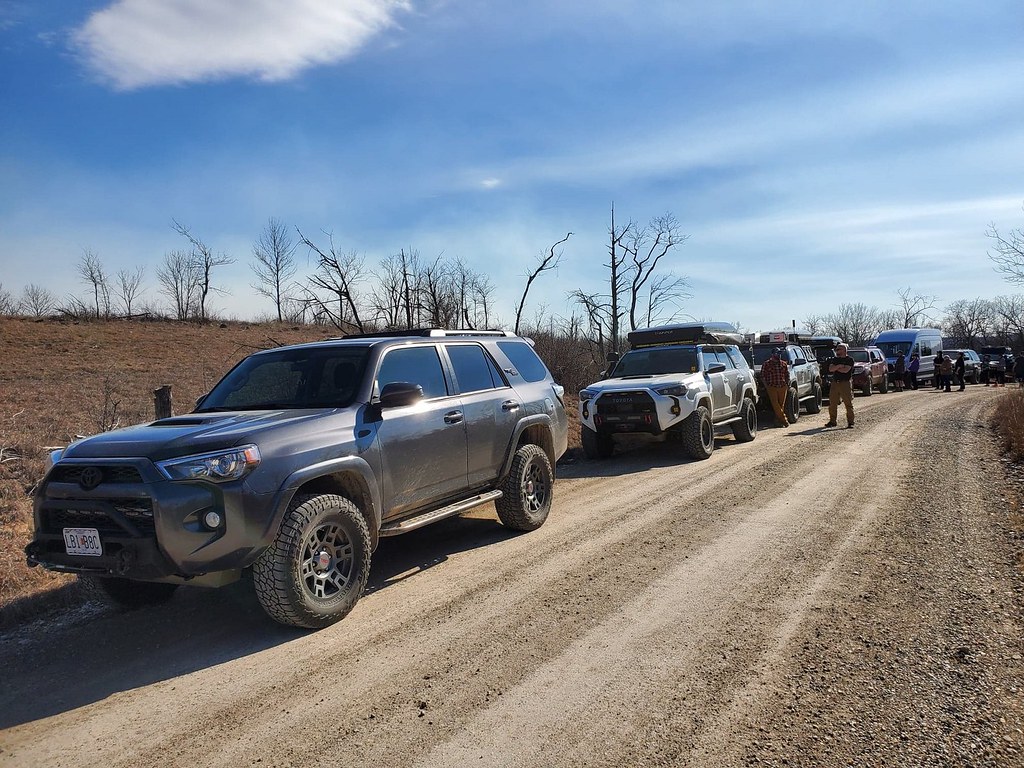
At noon most everyone lines up and convoys over to Glade Top Trail:

51021538363_cfb13905d5_b.jpg


51022299586_e4243bb0ce_b.jpg


51022299601_1e8a0a4739_b.jpg


I'd say 75% of that group of 50 vehicles dropped off and headed home from there. The rest found a hilltop to set up camp for the night:

51021567688_9a7ebaebca_b.jpg


51022398182_7e9bc0c7c6_b.jpg


A few of us (9 vehicles or so) hit one of the gnarly off road trails. I followed this Land Rover who led the trail ride.

51022398132_55bdfdef36_b.jpg


I did 2 craptastic videos of the trail. Feel free to skip this 1st video (vertical oriented) and watch the 2nd one.

https://www.youtube.com/watch?v=MY7b2tbwjGw

About 6mins into the 2nd video, I stopped and gave a Nissan Pathfinder behind me a tug up 2 rock ledges with my kinetic tow rope. He didn't have much in the way of articulation plus really needed a locker or Atrac on this trail.

https://www.youtube.com/watch?v=1tPQJo0tDqs

I hung out for a little at the hill top campsite and then headed home. I wasn't prepared to overnight with food / camping gear.

Was a good time and y'all are welcome to join us.
 
BMC done, SPC Upper Control Arms added, plus 33 inch - LT285/70R17 Yokohama Geolander tires. Waiting for alignment and Port bumper cut.

Local body shop charged me $375 to install the UCA's and do the Body Mount Chop. The BMC was $210 of that.

51023112046_8dd7ce5542_b.jpg


51022380563_2492bc3830_b.jpg


51022380618_8befc3c03d_b.jpg
 
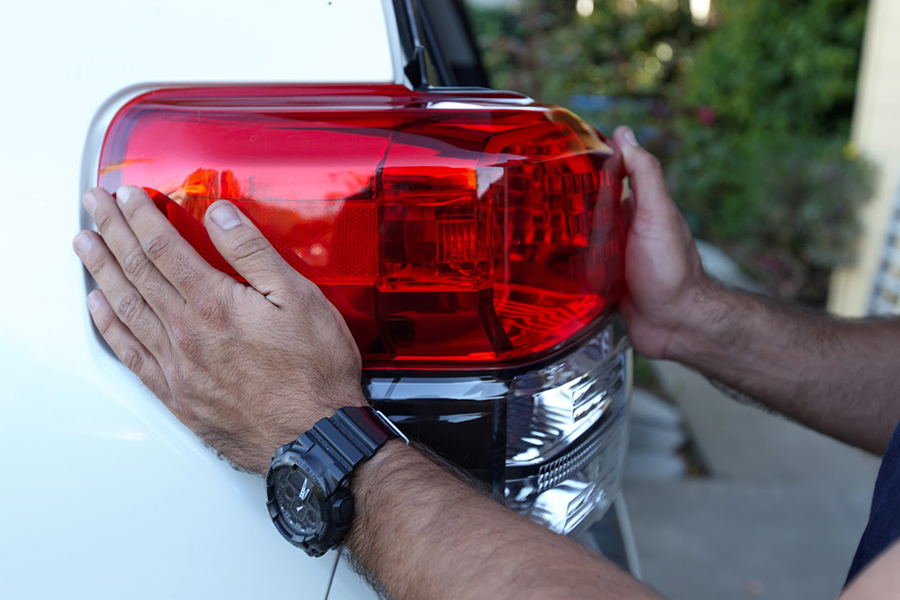
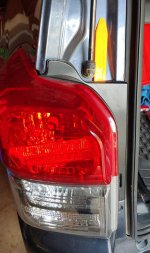
Ya, you don't want to pry on the actual lens. You want to get the trim removal tool further in so it pushes more on the back of the light. I put the tool down the area next to the liftgate strut as well as on the furthest point on the exterior.
Right where this guys pointer finger is pointing towards:
4runner_6.jpg

(Picture stolen from trail4runner.com)

I was surprised at how much brute force I had to pull with the light to get it off.

Great advice, thanks. Yes it was a hard pull but it worked with a pry tool. Is a pointer finger the finger finger?
 

Attachments

  • Lights.jpg
    Lights.jpg
    139 KB · Views: 501
New Outgear Solutions Bumper and Sliders

Visited Joe at Outgear Solutions and got my Lowkey Bumper and Sliders with Top Plate installed

<a data-flickr-embed="true" href="https://www.flickr.com/photos/191675456@N02/51012102113/in/dateposted-public/" title="4Runner"><img src="https://live.staticflickr.com/65535/51012102113_371b647d97_b.jpg" width="683" height="1024" alt="4Runner"></a><script async src="//embedr.flickr.com/assets/client-code.js" charset="utf-8"></script>

<a data-flickr-embed="true" href="https://www.flickr.com/photos/191675456@N02/51012096988/in/dateposted-public/" title="4Runner"><img src="https://live.staticflickr.com/65535/51012096988_21032fc5e0_b.jpg" width="1024" height="683" alt="4Runner"></a><script async src="//embedr.flickr.com/assets/client-code.js" charset="utf-8"></script>

<a data-flickr-embed="true" href="https://www.flickr.com/photos/191675456@N02/51012097323/in/dateposted-public/" title="4Runner"><img src="https://live.staticflickr.com/65535/51012097323_883de2131a_b.jpg" width="683" height="1024" alt="4Runner"></a><script async src="//embedr.flickr.com/assets/client-code.js" charset="utf-8"></script>

<a data-flickr-embed="true" href="https://www.flickr.com/photos/191675456@N02/51012815846/in/dateposted-public/" title="4Runner"><img src="https://live.staticflickr.com/65535/51012815846_2299114ce7_b.jpg" width="683" height="1024" alt="4Runner"></a><script async src="//embedr.flickr.com/assets/client-code.js" charset="utf-8"></script>
 
Very nice.

Are those sliders custom/different than what they show on the website? Yours seem much ‘flatter’.

And, excuse my ignorance but does it make a decent step as well or do you need to step out ‘over/around’ it? If that makes sense ...
 
RSG sliders delivered today. Wow, they are fantastic. Got the bare metal....cause I'm impatient. And, have a great bud with a shop that, next weekend, we'll clean 'em up and shoot 'em.
 
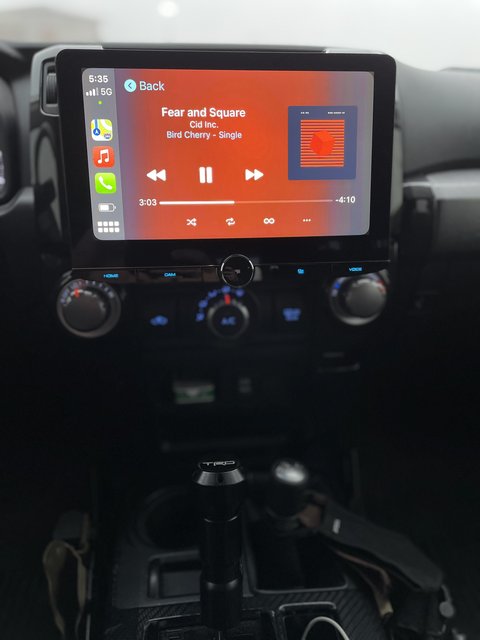
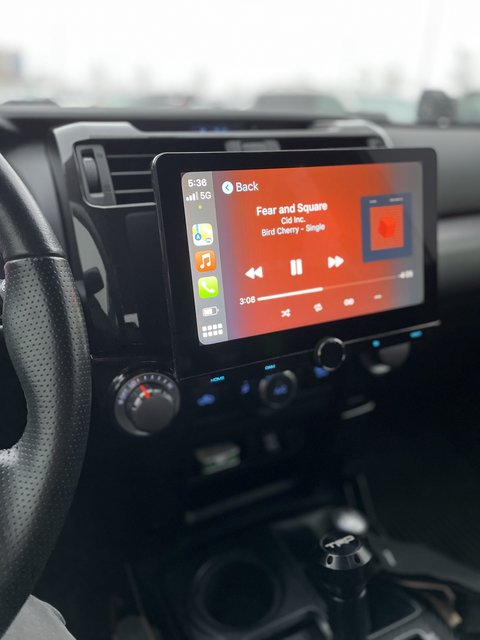
On my third, and definitely final, aftermarket head unit. The Alpine Halo 9 just had too many big issues I felt I couldn't live with for what it cost. Had a Kenwood DMX1037S installed, and now i'm happy. The shop that's been doing the work has been phenomenal, swapped out all my speakers for Kenwood Excelon, door treatment, and now the head unit. This is how music should sound. In case anyone is on the fence about the Alpine, i'll list off the "cons" that made me send it back.

Alpine Halo 9 Cons: does not dim enough (the lowest setting is still much brighter than your gauges on low), screen quality (480p) is complete chit, maps wash out, INSANE GLARE, not tiltable, control buttons on bottom of bezel very hard to use, no volume knob (never knew how much I wanted a volume knob until it was gone), no wireless carplay.

IMG-0199.jpg


IMG-0200.jpg
 
This is getting to be a little bit expensive. New truck January 2021 + new forum.... :banplease:

So far I've bought:

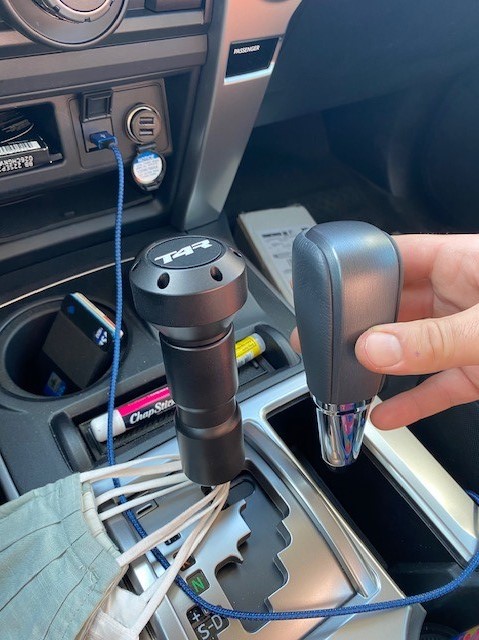
Ellis Precision shift knob -- I have never bought a shift knob in my life. Never even considered it. But this one is awesome. I know its an auto so who cares really but its just "one of those things" that adds to the 4 for me.


nFab Nerf Bars -- these were an essential mod having a short wife and two daughters in grade school. The kids love them. Much easier climbing into the 4 at pick up each day.


Raingler Back Window Barrier Net -- I'm real excited for this to come. I ordered it a week ago and likely will take a couple months to arrive. Which is completely fine. This pic is pulled from their website but the net I ordered will look exactly like this one with the colors and customizations made to it.


hosting images online


TRD Pro Skid Plate -- ordered it via BAM Wholesale for less than $300 shipped. This was a frivolous purchase honestly. I don't need a skid plate. But I was at Menards last week and came out to a TRD Pro parked next to me and got a bit jelly at their front skid plate. Ordered one right there in the parking lot.. :roll:


Covercraft Carhartt Seat Savers -- this was a necessity for me. In addition to working my normal full time job I also do a lot of apartment maintenance/ painting for my in-laws apartment complexes. My former truck (Xterra) was covered in paint. Specks all over my front seats and the cargo hold had a bunch of spots. I could always scrub it out when I cared but over time (9yrs) that motivation to do so waned. Pic pulled from their website. Just ordered these last night.. And check out the price I paid for these. I'm new here but I feel I got a great deal. I was able to find a promo code online (which never works) and saved $27.60.


online upload photos


Canvasback Cargo Liner + Side Pieces + Hatch Cover -- again more paint/ grit protection for the 4. Ordered these yesterday too. I went with all black to match the black interior. ALMOST went all camoflauge but felt maybe that would be "too loud"..


Next up is possibly Pedal Commander? I have some research to do but I am currently INTRIGUED.

Before next winter I plan to install a remote start too.
 

Members online

Forum statistics

Threads
278,317
Messages
3,554,129
Members
248,016
Latest member
Advally Service

Trending content

Back
Top