What did you do to/in your 5th Gen today?!

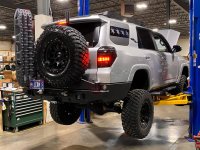
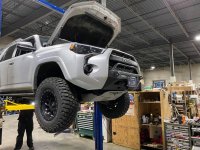
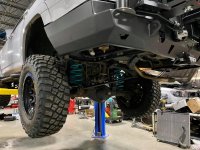
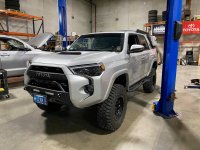
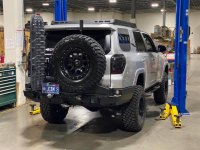
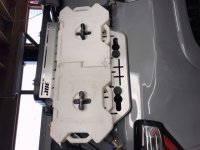
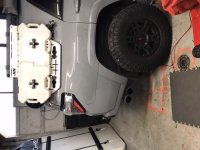
not today, but a couple days ago. In Moab.

2HznaY2.jpg

jVdKRqx.jpg

J7H7hpG.jpg

jIXO62H.jpg

Sweet Moab pics. What lift are you working with?
 
Schematic

2021 has been wild y'all. This didn't all happen today or yesterday, but it sure feels like it. How are we already a quarter of the way through this year?

Where to start? So like a month ago western Washington got a ton of snow - like 12-24" in some areas. So of course we went out to play in it. We spent about 4 hours out on the roads, up in the mountains and all over, no trouble what-so-ever. Then, in our own neighborhood, 1 street from our house, we hit an icy spot and slid into a 3ft deep ditch and smacked a concrete culvert. Everyone in the car was alright, thank goodness. Aside from the a clearly cracked bumper cover, I could not see any other damage - no bent tie-rod, no broken CV or axle, knuckle and tire looked fine. So I got back in, drove it right out of the ditch and headed to the house.

Once we got home, I started inspecting the damage. I scuffed the hell out of the front passenger wheel, the Slimline bumper took a dent and lost some powder coat, the front skid and supports were completely mangled, the front bumper cover was cracked from the Slimline bumper all the ay to the fog light pocket (so much for that high clearance "protection" lol) and my alignment was way off.

I got an alignment the next day (caster had been pushed off a whole 1 degree), and started ordering stuff to make my repairs. I took the skid plate off and took an angle grinder to cut off the mangled bits and stuck it back on. A couple weeks later another 4Runner owner gave me his old one (thanks again Kyle!). All of the skid plate bolts and supports had to be replaced. Then I got to work on the bumper cover - pulled it off and dremeled out a channel in the back side along the crack. Then, while holding the crack together with some tape, I layered in some JB plastic weld, some mesh drywall tape and some more JB plastic weld on top. It's not perfect, but you'd never notice the hairline fracture at a glance. We'll see how it holds up to washboards.

I also decided it was time to fill in the empty light bar space on my bumper and set up my accessory fuse box. I ordered up a PowerTray for a Bussman 15303 fuse box and drew up a wiring schematic. I also ordered a light bar off of amazon that sounded too good to be true - (15) 10 Watt Cree LEDs for $62! Turns out it was too good be true - it only pulled 52 Watts. So This morning I ordered a Light bar from Diode Dynamics. Hopefully this one works out a bit better.

Oh, and I replaced the MAF sensor in the wife's Volvo. I have a new found respect for Swedish engineering. I've never known an engineer willing to pin so much on hopes and dreams. There's basically nothing holding that air box in but the wiring harness attached to it lol

51066364436_0ea8f12fd3_b.jpg

51066364671_a73ca6ef00_b.jpg

51066367161_952fd28664_b.jpg

51066369751_6099b119d2_b.jpg

51065663323_47b097876d_b.jpg

51066389626_48a06bf327_b.jpg

51066387301_c1239283dd_b.jpg

51066469112_2b518d1b86_b.jpg

51066465647_9d588e9e7f_b.jpg

51066494592_a7c0ee284c_b.jpg

51066374456_d43b444aab_b.jpg


Nice job on the schematic. What'd you draw that in?
 
Nice job on the schematic. What'd you draw that in?

AutoCAD 2019. My job involves a lot of 2D CAD drafting for construction documents. I don't know much about wiring, but I know how to make boxes, circles and straight lines in CAD and can make it look pretty :lmao:
 
dirt catchers

Laid underneath my rig and scrubbed the frame with scotch-brite pad for an hour. To remove scale and dirt in anticipation of doing this at least 2x more, before sanding any rusty spots before touch up paint. Then ultimately fluid film coating.
Fair amount of mud gets trapped on top of the frame in certain spots. And I avoid mud when possible. Not to mention wheel wells, have to wonder what the engineers were thinking on all the rear mud catching crevices back there.

I think my 16 has more frame paint flaking/rusting then my 03. No question body paint on the 03 is better too.

If I could do it over, I would have fluid filmed from day one. But live and learn.

its not just underneath, i think the interior is cool, but there is way to many spaces where its hard to keep clean. one day, iim just going to give it up!
 
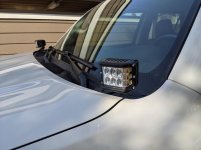
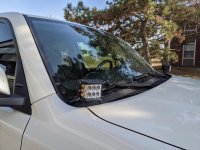
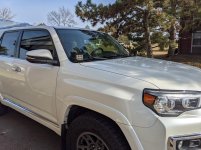
Installed a pair of Cali Raised LED ditch lights earlier today. Was going to wait for my light bar to come in and install everything at the same time, but I got impatient.

Do you guys have any suggestions for security nuts and bolts to keep them "secure?"
 

Attachments

  • PXL_20210323_210935461.jpg
    PXL_20210323_210935461.jpg
    119.2 KB · Views: 625
  • PXL_20210323_210946046.jpg
    PXL_20210323_210946046.jpg
    132.8 KB · Views: 625
  • PXL_20210323_210948950.jpg
    PXL_20210323_210948950.jpg
    135.6 KB · Views: 612
To help with the sag ... being 7500lbs when I have our camping gear loaded w/ my family of 6...

I installed a airlift kit #60920 ( 5"x9" ) bags on the rear...

50998654410_d8f1737fd4_c.jpg


Routed the Schrader valve to the center of my tail gate and have the bags connect together.

51067934392_35cf5502c4_c.jpg


50998654360_2e69ba77f0_c.jpg


51067139328_67be531dee_c.jpg
 
Installed a pair of Cali Raised LED ditch lights earlier today. Was going to wait for my light bar to come in and install everything at the same time, but I got impatient.

Do you guys have any suggestions for security nuts and bolts to keep them "secure?"

I live in Chicago and have not had anyone try to steal them yet. I would recommend using lock tite to at least make it more difficult for them. You could also try running a cable line around the base of the light to under the hood (available at Home Depot) to try to help secure them.

Not sure if there is a fool proof way to prevent theft, but you could help discourage it by making it more difficult.
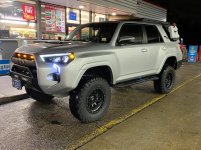
 
Finally got the 3" Dobinsons long travel MRA/MRR 3-way adjustable suspension kit installed along with Icon DJ UCAs and Arkguard splashguards.
 

Attachments

  • Lift pic.jpg
    Lift pic.jpg
    141.8 KB · Views: 1,063
  • Lift pic 2.jpg
    Lift pic 2.jpg
    140.2 KB · Views: 1,052
  • Lift pic 3.jpg
    Lift pic 3.jpg
    138.2 KB · Views: 1,051
  • Lift pic 4.jpg
    Lift pic 4.jpg
    136.6 KB · Views: 1,050
  • Lift pic 5.jpg
    Lift pic 5.jpg
    133.8 KB · Views: 1,054
  • Lift pic 6.jpg
    Lift pic 6.jpg
    135.3 KB · Views: 1,048
  • Lift pic 7.jpg
    Lift pic 7.jpg
    141 KB · Views: 1,050
Took her on a family trip to Zion. The fresh lift came in handy, and actually got to use four-wheel drive a few times! [emoji16]
85623e61dbc0dfea84449f84557600e3.jpg
95598707dc435654887cea94148227c8.jpg
7df30284cb2213a65a89262fcb06ce8d.jpg


Sent from my SM-G998U1 using Tapatalk
 
Installed a pair of Cali Raised LED ditch lights earlier today. Was going to wait for my light bar to come in and install everything at the same time, but I got impatient.

Do you guys have any suggestions for security nuts and bolts to keep them "secure?"


You can order Tri-Grove security nuts from places like McMaster-Carr or Fastenal. I use tri-grove conical nuts to secure my RoofTop Tent.

Any determined/prepared thief will likely get what they want if they have the time and a selection of tools.

But these should stop what I call opportunity theft. The types who just happen to come across "what ever" and decide to steal it on the spot.

McMaster-Carr

As they say "ounce of prevention is worth a pound of cure"!
 
Not as sturdy as I have hoped..... would be better if it was all bent/welded one piece.

Anyone have some off road miles on these Joe’s panels? Curious about vibration.
 

Attachments

  • C1404D3C-9E84-4F2D-BD97-ED33BA48E256.jpeg
    C1404D3C-9E84-4F2D-BD97-ED33BA48E256.jpeg
    69.8 KB · Views: 856
  • 350FBB1D-6620-4266-9B88-B116D9618EB2.jpeg
    350FBB1D-6620-4266-9B88-B116D9618EB2.jpeg
    89.4 KB · Views: 862
You can order Tri-Grove security nuts from places like McMaster-Carr or Fastenal. I use tri-grove conical nuts to secure my RoofTop Tent.

Any determined/prepared thief will likely get what they want if they have the time and a selection of tools.

But these should stop what I call opportunity theft. The types who just happen to come across "what ever" and decide to steal it on the spot.

McMaster-Carr

As they say "ounce of prevention is worth a pound of cure"!


I live in Chicago and have not had anyone try to steal them yet. I would recommend using lock tite to at least make it more difficult for them. You could also try running a cable line around the base of the light to under the hood (available at Home Depot) to try to help secure them.

Not sure if there is a fool proof way to prevent theft, but you could help discourage it by making it more difficult.

Thanks for the suggestions. I'll look into these!
 
Spent way too long today cleaning her up and getting all of that red Utah sand out. Then threw on a coat of wax [emoji51]
81df4047d5058a241a71fd9ce38b3b5e.jpg


Sent from my SM-G998U1 using Tapatalk
 
Spent way too long today cleaning her up and getting all of that red Utah sand out. Then threw on a coat of wax [emoji51]
81df4047d5058a241a71fd9ce38b3b5e.jpg


Sent from my SM-G998U1 using Tapatalk

Haha! If you picked it up when wet, that sand sets up like concrete! I’m still cleaning it out of my chassis, after a November trip, every time I’m under my 4Runner.
 
Installed a pair of Cali Raised LED ditch lights earlier today. Was going to wait for my light bar to come in and install everything at the same time, but I got impatient.

Do you guys have any suggestions for security nuts and bolts to keep them "secure?"

I have the same side shooters and mine came with nylon lock nuts, and I haven't had any issues in 2 years or so, no rattle or vibrations
 

Members online

Forum statistics

Threads
278,316
Messages
3,554,124
Members
248,016
Latest member
Advally Service

Trending content

Back
Top