What did you do to/in your 5th Gen today?!

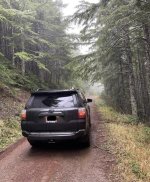
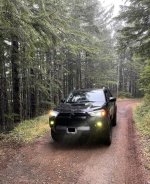
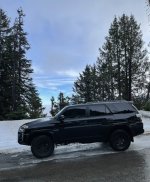
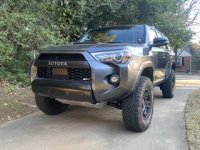
Took a trip up to Olympic National Park this weekend. Had a blast even though it rained the entire time.
 

Attachments

  • 21987BDE-4F49-4BCB-8B24-A914008F9568.jpg
    21987BDE-4F49-4BCB-8B24-A914008F9568.jpg
    80.6 KB · Views: 673
  • EE8BDB06-5D7F-41E5-AC6A-C8615200D541.jpg
    EE8BDB06-5D7F-41E5-AC6A-C8615200D541.jpg
    85.8 KB · Views: 671
  • CD293D78-EAA6-4402-9698-C34CEC002156.jpeg
    CD293D78-EAA6-4402-9698-C34CEC002156.jpeg
    127 KB · Views: 681
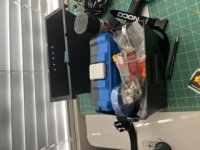
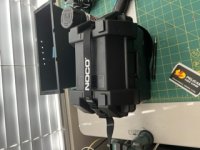
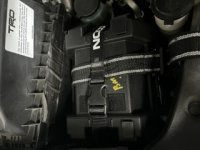
under hood tool box

So my dual battery setup is on the back burner indefinitely, after I bought the CTEK controller, Shrockworks dual battery setup, LiPO battery box, all thanks to the awesomeness of the hackery.

I had to make some use of the wasted space and use some of the stuff that I bought, so I decided to make an under hood, easy to access toolbox.

Basic metric socket set, Allen key set, wires, wire cutter, metric wrench set, pliers, screw drivers, Loctite, and zipties. m8 bolts

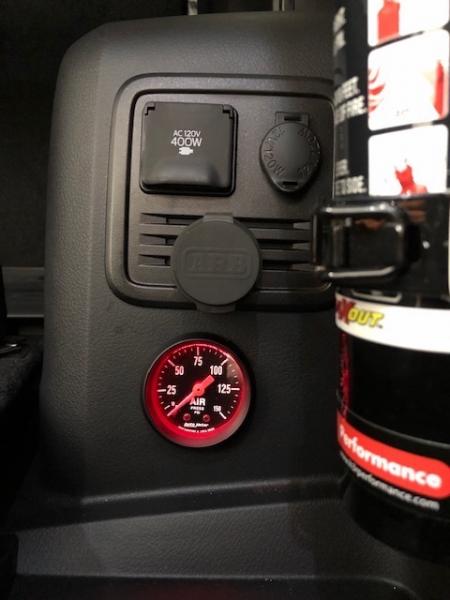
Spare pressure switch and relay for ARB compressor.

Battery box is held down by 2 straps, and velcro feet on bottom.

Reason: vehicle doesn't typically break offroading, the tools is to replace things that "fall off" your vehicle when offroading, like skid plate bolts, suspension bolts, bracket bolts, etc...hahaha

cheers
 

Attachments

  • 65990226904__6DC6D6EC-3C84-4495-8A0F-63EDEB0A2BD5.JPG
    65990226904__6DC6D6EC-3C84-4495-8A0F-63EDEB0A2BD5.JPG
    40.5 KB · Views: 881
  • 65990228534__54B25F83-B280-4D5F-BE2C-F00A053272A2.JPG
    65990228534__54B25F83-B280-4D5F-BE2C-F00A053272A2.JPG
    39.9 KB · Views: 885
  • IMG_3612-2.JPG
    IMG_3612-2.JPG
    37.1 KB · Views: 892
Last edited:
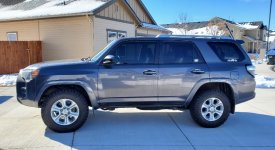
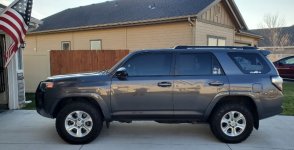
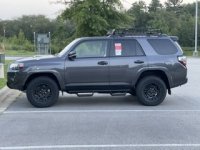
Painted my roof rails black today because I had a couple hours and two cans of black Krylon to burn.
 

Attachments

  • 20211129_165100.jpg
    20211129_165100.jpg
    132.8 KB · Views: 838
  • 20211129_164911.jpg
    20211129_164911.jpg
    135.9 KB · Views: 827
So my dual battery setup is on the back burner indefinitely, after I bought the CTEK controller, Shrockworks dual battery setup, LiPO battery box, all thanks to the awesomeness of the hackery.

I had to make some use of the wasted space and use some of the stuff that I bought, so I decided to make an under hood, easy to access toolbox.

Basic metric socket set, Allen key set, wires, wire cutter, metric wrench set, pliers, screw drivers, Loctite, and zipties.

Spare pressure switch and relay for ARB compressor.

Battery box is held down by 2 straps, and velcro feet on bottom.

cheers

sell it as a kit. f'in sweet idea.
 
Used the Wifey block mount for an air manifold.


Just about to install this setup on my 2020 ORP, two questions, the 2020+ have a relay switch right in that area, have you heard a work around for that (I guess I’m asking if your rig is 2020+), second question, does the block mount keep you from accessing the fuse box? I’ve seen the option of cutting down the block mount and actually mounting that manifold right to the fuse box lid for easier access. What are your thoughts? Thanks in advance!


Sent from my iPhone using Tapatalk
 
Led interior lights 5th gen

Hi all, today my LED replacement bulbs came for the interior of my 2022 lunar rock trail edition. Just thought I would share some links to the bulbs I installed.

Took a total of 15 minutes to replace every light bulb (map, dome, visors, doors, etc.).

Some of the companies out there are selling bulb kits for nearly $100.. I however found some great bulb alternatives and spent less than $20 and have a few spare bulbs. Initial thoughts are that they are a HUGE improvement over the stock halogen bulbs throughout the interior. Much brighter, great color temp for LED and perfect fitment in install.

Here are the links to the bulbs I purchased:

Amazon.com: Marsauto 194 LED Light Bulb 6000K 168 T10 2825 5SMD LED Replacement Bulbs for Car Dome Map Door Courtesy License Plate Lights (Pack of 10) : Automotive

Amazon.com: Marsauto 194 LED Light Bulb 6000K 168 T10 2825 5SMD LED Replacement Bulbs for Car Dome Map Door Courtesy License Plate Lights (Pack of 10) : Automotive
 
Started my project on flattening the floor. I’m no craftsman so it’s not pretty as some of my screws didn’t countersink fully, they will be covered. Trying to decide between carpet or a treadmill mat which would be way more comfortable.

I used 1/2” plywood 43”x41”. I didn’t want it to rub on the wheel wells so I left about a 3/8 gap all the way around. I used three 2x4’s cut to 30”. I used two 2x4’s as far outside to wedge against the wheel well so the platform won’t slide around. The 3rd 2x4 is off center to the driver side since that’s the best side for me to sleep so I can stretch out since I have the 40% seat bottom removed for easy entering for my dog. And I leave the 60% side in for the daily drives and long trips for my dog.

I’m planning on making a slide out table. I also need to figure out the best way to anchor it to the stock D rings. I highly doubt this thing would become a projectile since the rear seats lean back and that wedges the platform. If anyone has ideas of simple anchoring options I would appreciate them.

I like the color of the wood as it sort of matched my beige interior. I couldn’t spend $1-2K on drawers and a sleeping platform that I would lose 13” of headroom. This cost under $100 and probably can be down for a lot less but lumber is expensive right now. My dog Nick approves.

609aff7357648536e7a185bd42b143d3.jpg


8da0a46d15ac923bb4c44fa73db92641.jpg


5c368df366511afd3c2c9da428e7c2e4.jpg


ecda9ddce6976394ea17040ab5d1c7ed.jpg
 
Last edited:
I’m planning on making a slide out table. I also need to figure out the best way to anchor it to the stock D rings. I highly doubt this thing would become a projectile since the rear seats lean back and that wedges the platform. If anyone has ideas of simple anchoring options I would appreciate them.

Looks good, nice and simple! I did something similar and made a YouTube video about it. I need to make an update video since I have since modified it quite a bit including tie downs.

In the forward portion of the platform I removed the stock D-rings and used a longer bolt to go through the platform and into the vehicle. Then put the D-rings on top. So now the front is secured.

In the rear I'm building wings that will go on the side and tie into the same D-rings in that area. Although with the front secured it hasn't budged at all.
 
Looks good, nice and simple! I did something similar and made a YouTube video about it. I need to make an update video since I have since modified it quite a bit including tie downs.

In the forward portion of the platform I removed the stock D-rings and used a longer bolt to go through the platform and into the vehicle. Then put the D-rings on top. So now the front is secured.

In the rear I'm building wings that will go on the side and tie into the same D-rings in that area. Although with the front secured it hasn't budged at all.


Yeah I watched your video. You have skills and tools I don’t have. I want a slide out table that will be directly under my fridge. Great YT channel.
 
Took a couple months but she’s getting somewhere
 

Attachments

  • D384B8D8-89C0-4719-8397-568C91EAB0F8.jpeg
    D384B8D8-89C0-4719-8397-568C91EAB0F8.jpeg
    40.5 KB · Views: 691
  • 4EF83675-70DB-4D06-B340-2C77C5961272.jpeg
    4EF83675-70DB-4D06-B340-2C77C5961272.jpeg
    32.7 KB · Views: 701
Tried to adjust Fog Light beam

I tried to adjust the fog light beam, but it didn't make any difference. All they do is shine to the side and not in front. I installed amber LED's and the colour is great for the snow, but there is no forward shine going on. Any suggestions? I was thinking of replacing the OEM housing with a driving light housing that has the beam more in front and then installing my bulbs, thought? Ideas?
 
Got rid of some more chrome. I hate that AJT and MESO were told to stop making these, yet China gets to profit. I hate chrome so much that I don’t mind giving them some money. Looks similar or the same as my AJT did on my pro. MESO door handles, MESO start button ring and now Chinese steering wheel emblem all for $60. The remaining chrome on the shifter and ac vents probably won’t get done since a black TRD shift knob is $80-90 and I actually like the size of the one in my SR5P.

e49c9753a8c6f7eb6fdf83193c311e56.jpg


936ec6d8d75e15ae6df7e8774c387e09.jpg


b0b21fe0de667c1899a5173145d54545.jpg


ea6632ac89ed9f9aed61d2b0db29a051.jpg
 
I tried to adjust the fog light beam, but it didn't make any difference. All they do is shine to the side and not in front. I installed amber LED's and the colour is great for the snow, but there is no forward shine going on. Any suggestions? I was thinking of replacing the OEM housing with a driving light housing that has the beam more in front and then installing my bulbs, thought? Ideas?

I would just replace them with Diode Dynamics SS3s. Up to you how much you want to spend and which level of brightness you want, but even the sports that I have in amber are pretty bright and are cheap at $170. The install takes 10 minutes per side and they are plug and play.
 
I tried to adjust the fog light beam, but it didn't make any difference. All they do is shine to the side and not in front. I installed amber LED's and the colour is great for the snow, but there is no forward shine going on. Any suggestions? I was thinking of replacing the OEM housing with a driving light housing that has the beam more in front and then installing my bulbs, thought? Ideas?

LED in halogen reflector is the issue. the diodes arent lined up properly
 
I would just replace them with Diode Dynamics SS3s. Up to you how much you want to spend and which level of brightness you want, but even the sports that I have in amber are pretty bright and are cheap at $170. The install takes 10 minutes per side and they are plug and play.

Yep, this is the right move. Sticking random LED bulbs in halogen housings is a terrible idea. Go with a full replacement light that is SAE J583 compliant and an actual improvement over stock.
 
lasfit light bars
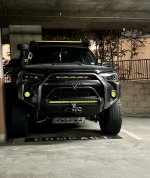
Let there be light!!!!

Updated my lightbars to lasfit stuff. Way better than the crap i had on last time.

40 inch is flood/spot.
20 inch is supposedly flood/spot but because of the upper grill blocking the side output, its more spot, which is better in that position anyways.
30 inch is flood/spot, which works well in that position.

the 20 inch light bar will fit in the upper grill area with no modifications or extra brackets and is aim-able.

Drove up to yosemite, up to reno on HWY 395 at 3am, and it did its job wonderfully on the dark stretches. Don't worry i didnt blind anyone, because there is nobody on that hwy at 3am but tweakers and myself.

Lightbars before Lockers!!!!
 

Attachments

  • 4101A58E-290B-474C-95DA-F94D1BFE1DC1_1_201_a.jpg
    4101A58E-290B-474C-95DA-F94D1BFE1DC1_1_201_a.jpg
    130.7 KB · Views: 842
Last edited:
Let there be light!!!!

Updated my lightbars to lasfit stuff. Way better than the crap i had on last time.

40 inch is flood/spot.
20 inch is supposedly flood/spot but because of the upper grill blocking the side output, its more spot, which is better in that position anyways.
30 inch is flood/spot, which works well in that position.

Drove up to yosemite, up to reno on HWY 395 at 3am, and it did its job wonderfully on the dark stretches. Don't worry i didnt blind anyone, because there is nobody on that hwy at 3am but tweakers and myself.

Lightbars before Lockers!!!!


Nice! Being a little OCD, I love the consistency in everything… yellow.[emoji109]


Sent from my iPhone using Tapatalk
 

Members online

No members online now.

Forum statistics

Threads
278,317
Messages
3,554,129
Members
248,016
Latest member
Advally Service

Trending content

Back
Top