What Did You Do To Your 3rd Gen Today?

Status
Not open for further replies.
Today I removed the power steering reservoir disassembled the reservoir and with my fancy million dollar special tool (tooth brush bent into a 90 degree) and scrubbed the screen clean. 245k miles and it was really clogged bit I had no problem with the assist. Slapped on a new oring, hooked up the old trans cooler to the ps return line and flushed the whole system.

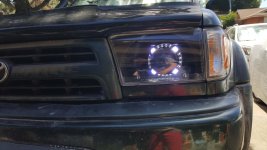
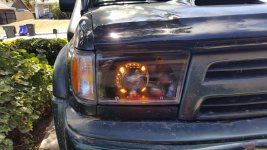
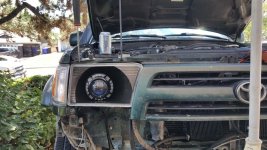
Took about 4 quarts to flush to get fresh fluid out. After that was done I started on the hid retrofits. I had already stripped down, painted and modded the housings a few months ago. Ran all the wiring and got the drl's wired in with the flash back turn signals. Looks wicked. Tonight I'll adjust the projectors and do a final tightening of the lock nuts then clean the housings and seal them up for good. My list is getting shorter. Front lift/refresh stuff will be here tomorrow. So I have that stuff and the trans flush/shift kit to install and I'll be done for now.
 

Attachments

  • 20200611_144059_compress2.jpg
    20200611_144059_compress2.jpg
    143.8 KB · Views: 547
Let's see if I can tag everyone lol [MENTION=319302]Bad Luck[/MENTION] [MENTION=193907]Hopeless Diamond[/MENTION] [MENTION=175921]TonyB66[/MENTION]

Well I wanted to stuff the biggest and highest cfm fan I could on a hyden 699 cooler. Which ended up being a spal puller (pn 30100435) 805 cfm @ 15 amps and it moves air! Wanted to do a pusher but didn't want to run a fleabay fan. So stuck with a spal. Im excited to see what this cooler/fan does. Yes pusher fans are no where as efficent as pullers, but cfm is also important as well along with having the fan as close to the cooler or having a sealed shroud.

I pit this kit together myself, found the thermo switch, built the connectors for the relay, wired up everything. It took a bit more work but I was able to get everything I wanted.

Basically there is little airflow at idle to slow speed, unless your running your a.c. the engine fan won't do much untill the clutch kicks on. So that is when the fan comes into play. Well see how this works, can always put a bigger plate cooler like we have installed on our 3500 chevy. That cooler is the size of a place mat! Add a fan and bam profit! But then again the 4runners don't have a ton of room either.

Also when I do the plate front bumper, I'll cut the bumper to fit around the cooler, unless the winch mounting will be effected. Sorry for rambling on I'm a bit inebriated lol.
 
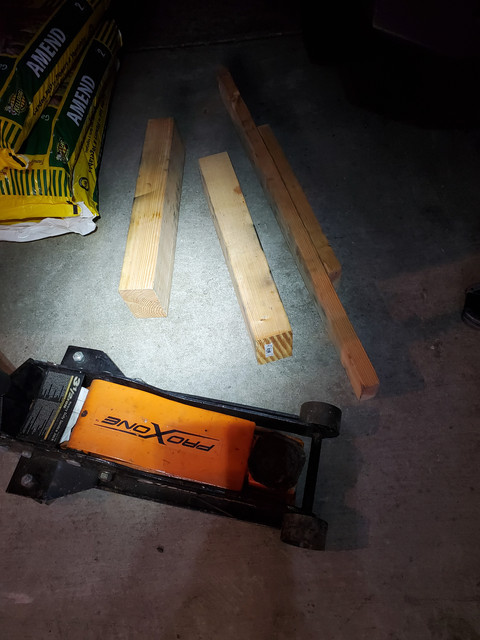
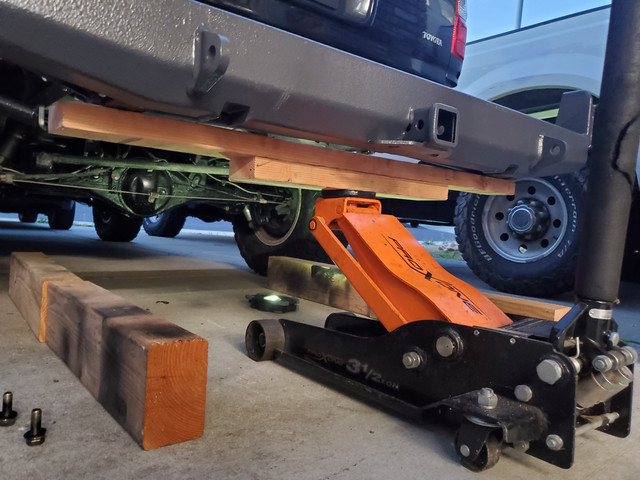
Just installed a 4xinnovations rear bumper. It's heavy as f*(> but it can be installed with only one person with the right tools.
20200611-213740.jpg

20200611-215642.jpg

20200611-204525.jpg

20200611-221417.jpg

20200611-221858.jpg


Next up is the front bumper with winch and rear swing out.
 
Last edited:
Well today I finished up the hid retrofit. Got them all sealed up. I did use a bit to much rubber glue stuff but all is ok. Everything works. And while I was wrapping the headlights up my front shocks came in. That will be a project for tomorrow. Then I can go and drive it around and aim the headlights. The switch backs a pretty rad if I say so.
 

Attachments

  • 20200612_153322_compress83.jpg
    20200612_153322_compress83.jpg
    137.7 KB · Views: 463
  • 20200612_153307_compress12.jpg
    20200612_153307_compress12.jpg
    136.2 KB · Views: 466
  • 20200612_153255_compress17.jpg
    20200612_153255_compress17.jpg
    141 KB · Views: 469
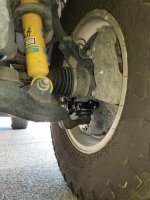
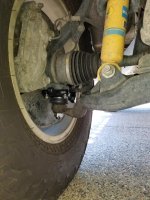
Replaced LBJs with OE from my local dealer. Parts were $270. Started about 6:30 PM Friday and finished about 1AM today. The old ones looked fine but glad I did this. Thanks again to [MENTION=10950]Brian[/MENTION] and [MENTION=5345]habanero[/MENTION] for lighting a fire under my butt on this.

Not a bad job at all. Get the pullers from AAP (or most any auto part store) under their free tool loaner program. Living in AZ sure makes removing the bolts easy since no rust, etc.

Next time I do them, it'll be under 4 hours easy. I stopped for dinner and an evening walk with my wife, plus a couple TTMVCs (Timmy the Tool Man Video Check). Thanks Timmy.


Eddie


P.S. Wanted to add a reminder (and pix) that once all bolts are removed and it's time to remove the old LBJs, do not forget to use a floor or scissor jack to lift the axle (using the underside of the rotor just below where lug nuts are) a few inches. Make it very easy to remove old LBJ. I forgot to do this on the first LBJ and it made for an interesting and head scratching few minutes until dawn finally broke over Marblehead (for all you folks in Mass.).
 

Attachments

  • NEW-LBJ-Driver.jpg
    NEW-LBJ-Driver.jpg
    124.4 KB · Views: 370
  • NEW-LBJ-Pass.jpg
    NEW-LBJ-Pass.jpg
    129.5 KB · Views: 364
Last edited:
Sway Bar End Links + Rust Treatment

I replaced the sway bar end links on my 2001. For the rear I used the stock ones from the front. For the front I used the rears from a second gen. In my opinion a little longer would be better for the rear. I should have used the ones from a second gen all around; however, it's good for now.

I also topped off the rear diff fluid since a bunch had spilled out when I did my rear axle seals and bearings.

As my car is from the East Coast it has a bit of rust issue. Luckily the frame is in good shape and the front components are also solid. But the old owner probably put some boats in the water so the area around the rear diff is very rusty. It's mostly surface rust so some tlc will fix it up. I used a wirebrush on a drill to clean up all the flaky parts and get it smooth. Next applied the Fertan Rust converter to the rear pumpkin. It is supposed to convert the surface rust into some zinc coating. Tomorrow I will have the results and will report back. If all works out well I will use the same stuff to treat the rest of the rusty spots in the rear.
 
Replaced my other CV axle (driver’s) and took the old one to Oreilys for the swap out. Nope, they don’t offer the lifetime warranty anymore (lifetime replacement). Manager claims that people abused the implied lifetime warranty by bringing other cv axles to swap out so company policy has changed. I told him if they stopped making those asinine commercials, money wouldn’t be a problem for them. He did give me $25 off, still felt if I was getting bent over.

New policy for Oreilys: when the first CV is bought at full price, there is one free replacement after that. So essentially two new CVs for $45 a piece.
 
I changed my rear springs which really helped on my 1998 4runner limited. Feels way more smoothed out in the back. Also im a new member and was wondering if anyone might know why i cannot post a thread yet? It does not allow me.

Cheers
 
I changed my rear springs which really helped on my 1998 4runner limited. Feels way more smoothed out in the back. Also im a new member and was wondering if anyone might know why i cannot post a thread yet? It does not allow me.

Cheers

You need to have 15 posts on other threads before starting your own :).
 
Well yesterday I got the front lift bilsteins in. Suggestion, don't work on your truck when you are out of it. I had massive sinus draining yesterday morning and it really messed me up, dropping crap, bumping into things, forgetting stuff etc. Well I forgot to put in the bottom top hat bushing on drivers side and had to pull it all apart and compress the spring again. Pass side I remembered everything. Lowered the runner off jack stands and massive positive camber. No biggie, I have spc upper arms. Adjusted camber to max on the arms.

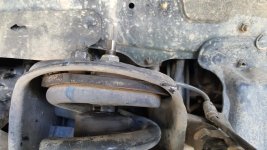
This is where I had a bad lapse of judgement, I forgot to check clearances, test drove the truck and head a loud smack. WTF! Park it and inspect, have another massive sinus drain, and see the rear of the upper ball joint hit the coil bucket! Yikes!

So then I fought with setting up the ball joints differently, and put them on backwards (the ball joint to the outside of the nut). Thankfully later that night I realised my mistake. Which leads to today, I decided to run my lower arm cams at max negative camber front and back and do all camber and castor adjustments at the ball joint. So with that done I had around 2 inches for positive toe out! So fought with getting the toe back under control so I can limp it to the alignment place tomorrow. Steering wheel is cocked to the left but it doesn't pull, so that is ok for now, well as good as a driveway alignment by yourself can get. And it is so nice to actually have suspension travel again! Probably will have to do a panhard bar lift soon.

But the power steering cooler and trans cooler are working perfectly, my trans temps are much lower now. Just driving around with no fan on and highest I hit was 174 when it usually is at 184. So about 10 degrees cooler, which is awesome. And that is with the fan off!

So moral of the story, if your under the weather don't work on your truck lol.
 

Attachments

  • 20200613_145213_compress27.jpg
    20200613_145213_compress27.jpg
    137.7 KB · Views: 362
Went for a ride

<a data-flickr-embed="true" href="https://www.flickr.com/photos/62201747@N02/50007120947/in/album-72157668959674996/" title="DSC_2259"><img src="https://live.staticflickr.com/65535/50007120947_bd8a2f2cd2_b.jpg" width="1024" height="684" alt="DSC_2259"></a><script async src="//embedr.flickr.com/assets/client-code.js" charset="utf-8"></script>

<a data-flickr-embed="true" href="https://www.flickr.com/photos/62201747@N02/50006863111/in/album-72157668959674996/" title="DSC_2261"><img src="https://live.staticflickr.com/65535/50006863111_47c5d5778c_b.jpg" width="1024" height="684" alt="DSC_2261"></a><script async src="//embedr.flickr.com/assets/client-code.js" charset="utf-8"></script>
 
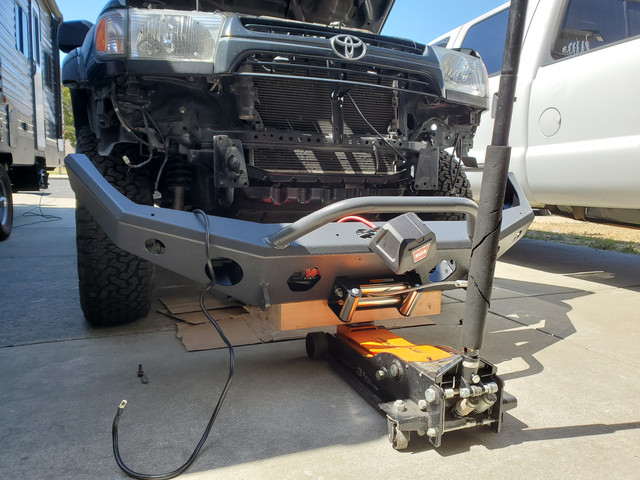
Got the front bumper and winch in. What a PITA this was by myself. The rear was so much easier. I still need to order more bolts and a winch box relocation kit.

20200614-151326.jpg

20200614-153319.jpg

20200614-173104.jpg
 
Took out my rear axle so I could coat it better with POR15. Also provides easier access to the frame and spring/shock cups so I could coat those also.
l43ewrS.jpg

DF8EsK1.jpg
 
Just finished a weekend project. Timing belt and water pump. And started on blacking out my grill.
b9a18901c7b5933d25d42a2661503c32.jpg
3920537cab4455760ac4fd8a99f39d6a.jpg
e3dce7be0a6913768455206b491e908a.jpg


Sent from my SM-G960U using Tapatalk
 
Just finished a weekend project. Timing belt and water pump. And started on blacking out my grill.
b9a18901c7b5933d25d42a2661503c32.jpg
3920537cab4455760ac4fd8a99f39d6a.jpg
e3dce7be0a6913768455206b491e908a.jpg


Sent from my SM-G960U using Tapatalk
Curious is the Grill blacked out available anywhere? or perhaps an aftermarket one? Thats folks here have used? with good results?
Thanks.
 
Got the runner aligned, drives so much better, driveway alignment was only off slightly on camber (.2 degrees) and toe was off a bit (really needed someone to hold the wheel). But he's all better now ready for the trail tomorrow.
 
Got in the 4Runner this AM after a long extended rain last night and found wetness on the driver’s side headliner and on the floorboard. Was thinking that the drains were blocked, cleaned them out and greased the tracks. Then noticed that the vent shade on the outside was cracked and the window was left cracked. Hoping there isn’t a bigger problem on the horizon.

Also bled the brakes lines once again, engine running. Much better, Wondering why it took me so long to put on the SS lines.
 
Status
Not open for further replies.

Members online

Forum statistics

Threads
278,316
Messages
3,554,120
Members
248,016
Latest member
Advally Service

Trending content

Back
Top