What Did You Do To Your 3rd Gen Today?

Status
Not open for further replies.
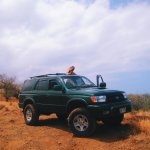
went to a cruise in...


started work on my onboard air...


I used fatmat on the backside of the factory storage box, then used a metal bracket on the underside to mount the compressor through the rubber isolators. I'll fatmat the storage box door also...drilled the hole for the air hose, then the hole for the wiring. I'll do the tank tomorrow.

 
Last edited:
Pulled a screw out of my tire. Sub contractors on housing jobs have to be some of the sloppiest workers out there when it comes to throwing away materials.:hurt::Cry:
 
Rust prevention on the frame and surrounding areas. Pictures and description can be found Here.

That's funny.... I started doing the exact same thing! Using Por15 products. Started with the frame around the rear wheels. And relined my wheelwells while I was at it with Dupli-Color Bed Liner.
 
went to a cruise in...


Where's that V8 badge?

That's funny.... I started doing the exact same thing! Using Por15 products. Started with the frame around the rear wheels. And relined my wheelwells while I was at it with Dupli-Color Bed Liner.

It was a lot easier than I expected. I used Rustoleum products because I saw previous members had luck with them and their were at down the street as I woke up today and decided to do this out of no where. I've heard great things about Por15 products and if I lived in a high rust area, I'd probably be using this.
 
Wash and wax. It's nice and clean now. I wish I would have had the time and materials to clay bar it. I believe this is the most attention I've given the exterior since I bought it in '02.
 
Today i sprayed on a bug guard and primed my wheels to get ready for paint.

CAM00296.jpg~original
 
Last edited:
It was a lot easier than I expected. I used Rustoleum products because I saw previous members had luck with them and their were at down the street as I woke up today and decided to do this out of no where. I've heard great things about Por15 products and if I lived in a high rust area, I'd probably be using this.

First time I used Por15.... I wanted to use Monstaliner products, but for a gallon that cost $110, it would cost $56 to get it to me. So I tried to get the Eastwood product, but they don't ship to Alaska... I talked to an owner of a body shop that I trust and he said he's used Por15 before and it was at a local Auto Parts Store so that sealed it for me. I plan on using it not only on my 4Runner, but on spots of my Daughters '90 Wrangler.

I wanted a good Metal Prep, and that's why I picked Por15. I bought their Metal Prep, the Rust Converter, and the Top Coat (which isn't REALLY needed, but I have an idea for my Daughters Jeep.... So far, I really like the looks of it. I have both wheel well areas done. Next weekend I'll put the back end on ramps (like you did) and start on the inner frame area.
 
First time I used Por15.... I wanted to use Monstaliner products, but for a gallon that cost $110, it would cost $56 to get it to me. So I tried to get the Eastwood product, but they don't ship to Alaska... I talked to an owner of a body shop that I trust and he said he's used Por15 before and it was at a local Auto Parts Store so that sealed it for me. I plan on using it not only on my 4Runner, but on spots of my Daughters '90 Wrangler.

I wanted a good Metal Prep, and that's why I picked Por15. I bought their Metal Prep, the Rust Converter, and the Top Coat (which isn't REALLY needed, but I have an idea for my Daughters Jeep.... So far, I really like the looks of it. I have both wheel well areas done. Next weekend I'll put the back end on ramps (like you did) and start on the inner frame area.

Unlike you, I didn't do the insides of my wheel wells; just the frame/chassis/under body. In the summer, I wash my car 2 times a week as I find the blue to show sand and dirt very noticeably and I'll spray out the insides of the wheel wells. It only snows here a few times a year(maybe) and we only get a few inches at a time so I was more worried about stopping what I had.

I am a little jealous however because the Por15 products do seem to be top notch but they are priced for that.

As far as the inner frame, they say these frames rust from the inside out. Last week I did try and hose out a lot of the sand and dirt in mine. Today, I tried to point and shoot in whatever hole I could fine and spent a good amount of time at the rear near the frame end.
 
With the help of Jerry (10ac) I was able to move my Savage rear bumper back 1.5" so it would BETTER accommodate my spare tire.
 
Last edited:
Trying to change my swaybar bushings and snapped the swaybar link off...
Love working on michigan cars all rusted to crap
 
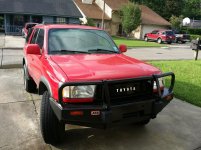
Finished building and mounting my Satoshi modded grill! So stoked with how it turned out
 

Attachments

  • 20150516_180940.jpg
    20150516_180940.jpg
    136.9 KB · Views: 487
Got the rear end of my SS 1.2 installed this weekend. Yes, I am slow :p

I had hoped to get all 4 done, but quickly realized Saturday that wasn't gonna happen.

My '98's ass was sagging bad. It added ~5-6" of lift :biggrin2:
I knew it was gonna be a lot of lift when I was done. When I put the frame on the jackstands, the wheels had been off the ground. The drums were only ~4" off the ground when I was done. I jacked up the axle on each side to get the wheels back on. When I was done, the truck was almost off the jackstands!

Wore out my uni-bit trying to open up the upper shock mounts, so I'll go back in there and add the centering washer later. Everything else went as good as expected.

You learn the most when you take things apart a couple extra times, so I learned a LOT about how my rear suspension works. :lol:

It didn't help that I didn't realize there were directions for my kit until I had already spent a few hours taking things off. Since I had already started, I just sorta jumped around the directions. Not a good plan when the time comes for reassemly.

Tip: There is a reason he puts the steps in the order they are in.

In case you have the same idea I did, no it will not be easier to put the struts in before the springs because you can use that hole to reach your hand in. :doh: Springs, then struts kids.

I have pictures!
The goodies
hayduke-albums-1998+4runner+sr5+4wd+automatic+w-diff+lock-picture33175-ss-1-2-kit.jpg


The truck before, including fender heights.
hayduke-albums-1998+4runner+sr5+4wd+automatic+w-diff+lock-picture33176-my-98-before-suspension.jpg

Driver's Rear Before
hayduke-albums-1998+4runner+sr5+4wd+automatic+w-diff+lock-picture33179-drivers-rear-before-suspension.jpg

Passenger's side before
hayduke-albums-1998+4runner+sr5+4wd+automatic+w-diff+lock-picture33180-passenger-rear-before-suspension.jpg


New parts vs Old parts
hayduke-albums-1998+4runner+sr5+4wd+automatic+w-diff+lock-picture33181-old-stock-toyota-vs-new-ss-1-2.jpg


After including heights
hayduke-albums-1998+4runner+sr5+4wd+automatic+w-diff+lock-picture33182-after-ss-1-2-rear-install.jpg

Rear After
hayduke-albums-1998+4runner+sr5+4wd+automatic+w-diff+lock-picture33183-drivers-rear-after-ss-1-2.jpg

Passenger After
hayduke-albums-1998+4runner+sr5+4wd+automatic+w-diff+lock-picture33184-passenger-rear-after-ss-1-2-install.jpg


huh now that I am reviewing these pics, the passenger side is higher. Gonna have to figure out what I did wrong :Cry:

 
Status
Not open for further replies.

Members online

Forum statistics

Threads
278,316
Messages
3,554,113
Members
248,016
Latest member
Advally Service

Trending content

Back
Top