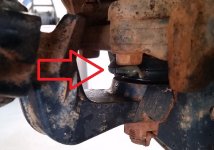
I inspected the front suspension today, getting ready for lift & bigger wheels, didn't expect to find anything since I checked it just a few months ago. Passenger side lower ball joint boot just started leaking. The ball joint itself is solid. Has anyone ever replaced just the boot?
Tundra in the front and 4Runner in the back. I'm very happy with the appearance and the ride. My old shocks were completely blown so the improvement has been dramatic. I neglected to mention that I also replaced the lower ball joints. My rig is at 193k miles and to the best of my knowledge they were original. The rest of the front suspension is in really good shape. It probably helps that it is a Northern California vehicle. I'm very pleased with the results.
Tundra in the front and 4Runner in the back. I'm very happy with the appearance and the ride. My old shocks were completely blown so the improvement has been dramatic. I neglected to mention that I also replaced the lower ball joints. My rig is at 193k miles and to the best of my knowledge they were original. The rest of the front suspension is in really good shape. It probably helps that it is a Northern California vehicle. I'm very pleased with the results.
I'm working in Fresno at the moment, but I drove up to Burlingame to buy the 4Runner a few weeks ago. I'm interested in joining the next Bay Area get together. I don't really know anybody out here or where to go to get my tires on dirt. It was much easier in AZ. Just pick a direction.
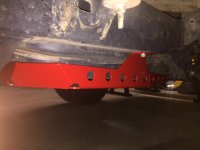
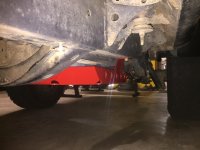
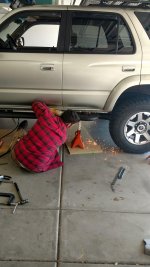
Today played around on the loading dock at work. I'd like to get the front a little more articulate and I think I'm going to finally swap in my 7 wraps. Also finally swapped on a skid plate I found on a wrecked 2000 in the junkyard. Kind of a pain whoever built it drilled the holes in the wrong places. So it took some convincing.
Put on my flag stickers... Decided to put the matte black on the glass and it turned out pretty awesome. Stand out quite nicely when light hits it right.
Bought a 4 channel amp. lol Apparently I can't just use my old 2 channel. Not that there's anything wrong with it. It would have worked just fine. It's just I'm really into shiny new toys. lol
Besides the intake hose clamp,spark plugs + wires, I also tightened down the valve cover bolts (driver side ones were pretty loose) and replaced a bent bolt for the AC compressor idler pulley.
Got the boot put in over the transfer case shifter underneath the shifter plate. Little bit of a pita, and then I realize that I "lost" the plug for the clock behind the dash when I had the whole thing out. Oh well, got the gas tank skid plate put back on....armor alone is a little difficult at times.
Took the fuel skid off and got a wire wheel going on it. Put a base layer of rust preventer on it. Should finish tomorrow with a coat of spray bed liner.
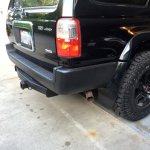
after 2 days of taping, disassembling, and cleaning I finally matted out the front and rear bumper. Unfortunately its only a temp fix since I didnt want to sand down the chrome so the paint comes off rather easy. Newbie mistake but will do it later.
Planning on taking out the rear bumper frame and removing the rust on there at some point.
Used 3m restore black on the rear bumper plastic cover.
I was wondering the same thing. I have the same tool but only pulled the grenade pin once after I installed the new tensioner. Did you not replace the tensioner?
That's good to know! I was looking at mine the other day and it doesn't look too bad actually, I think I might leave it be for now, but I def need to change the hoses back there – I've got a small leak too.
So I can't recall all the details about timing belts but don't you only need the Schley tool if you are not replacing the hydraulic tensioner? Is there not a need to replace it each time?
You only need the Schley tool if you are not replacing the hydraulic tensioner AND you don't wish to pull the tensioner off the truck to compress it. It's a time saver that's worth it. If you get one just don't go too fast. You will break the pulley bracket if you do.
If you are replacing the hydraulic tensioner it comes pre-compressed with a pin you pull out when you're sure you're ready. No compression tool needed for that.
I don't feel the need to replace the hydraulic tensioner each time. I haven't actually replaced it yet. Mine is dirty but shows no sign of leakage. The pulley is separate from the tensioner (10mm allen socket came in handy here) so it can be replaced as needed or for peace of mind or because it came in the kit I bought.
I gotcha! I'm looking to use my sliders as steps more than anything and Stubbs offered to build them to sit alittle more flat. I've been looking for some pictures of sliders rocking that flatter design. Thanks man!