What Did You Do To Your 3rd Gen Today?

Status
Not open for further replies.
There's plenty of forum politics we could discuss... Like which oil filter to use or rubber bushings vs poly, king vs icon.
Let's rumble, bros

Sent from my Nexus 5X using Tapatalk

You forgot the best color to plastidip, or what kind of nerf bars and grill guard.
 
There's plenty of forum politics we could discuss... Like which oil filter to use or rubber bushings vs poly, king vs icon.
Let's rumble, bros


Whatever one's in stock and on sale. Rubber for the rack bushing if you wheel hard. King.


You forgot the best color to plastidip, or what kind of nerf bars and grill guard.


Just say no to plastidip. WELD on sliders and plate bumper.

Thanks for playing. lol
 
I replaced both rear rubber flex lines on my '01. Gawd I hate rust. I hate rusty parts even more when there's no damn room to fit my shop ape hands into the area that they need to fit into in order to replace the rusty parts that I hate. Does that make any sense ?? LOL.
Also adding to the misery- the recent memory of the test drive of the 2011 4runner that I liked, but can't afford right now. It doesn't have any rusty parts. It doesn't even need any attention ! [ this is all meant in a sarcastic way, which is extremely to convey via a keyboard.]

Yesterday I spent entirely too much time trying to figure out which OME coil springs would mimic the '99 Highlander springs. Going strictly by the spec sheets for the OME coils, the numbers that I picked out all seem to have bad feedback on this forum. I liked the 891/881 combo, strictly from the specs but it seems that NO ONE has had good results from that combo.

 
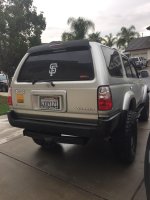
I did the diff breather extension mod today. Ended up deciding to put run the vent into my tail light instead of the gas tank fill. It was pretty easy once I had everything I needed. Here are some pictures.
c96af9aa6496c0790cd715f2eefbf9b2.jpg
c3b0cacd2acdd094e934a452b2513e9d.jpg
2839fe09b6486aa33bd9cf695dd4199a.jpg
d6d095a2d8135b92a56b41945745d3af.jpg


Sent from my A0001 using Tapatalk
 
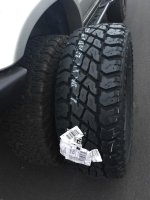
Finally got my 295 coopers in. Installing tom morning.
 

Attachments

  • 2F871074-FE8D-4A89-97BC-43368AC28B5C.jpg
    2F871074-FE8D-4A89-97BC-43368AC28B5C.jpg
    130.1 KB · Views: 426
  • 77A88A92-7423-475A-B420-8D750BC65895.jpg
    77A88A92-7423-475A-B420-8D750BC65895.jpg
    130.8 KB · Views: 431
What were the symptoms of worn upper control arm bushings?
Not quite right steering feeling on bumps with a slight clunk noise and I knew the rest of the suspension was good. Right side was the worst- tire chopping was beginning on that side (not quite cupping). Shocks are near new.
Most recently a horrible creak on big upward bumps.
I haven't had an alignment in a couple of years so can't tell you what they would have found.
Keep in mind mine were really bad.
[MENTION=5345]habanero[/MENTION]

How did you get the old ones out and the new ones in? I bought all the stuff to redo my OEM arms and ball joints, but part of me is thinking about just getting SPC arms, I just don't know about the longevity.

I had in my mind that I'd get them out myself. Then I decided my favorite machine shop 'needed' the work and I needed the sanity. :D He charged me $20 per bushing and I was glad to pay it.
I also had replacement boots for the upper ball joints.

Toyota upper a-arms come with bushings and run about $342 shipped from EB Toyota...

For anyone interested Steve at Sonoran Steel says he has front upper and lower control arm bushings and rear upper control arm bushing in Poly, Strongarm made in Poland, with similar hardness to oe rubber.
Individual Suspension Parts : Sonoran Steel, Sonoran Steel Custom Metal Fabrication L.L.C. Custom Toyota Truck Parts
I don't know if I would have gone with poly but didn't find out about these until after the fact. Likely on the next change.
 
finally wired my rear bumper lights that i installed weeks ago. just need to buy a rocker switch to match my others.
 
Last edited:
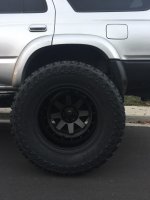
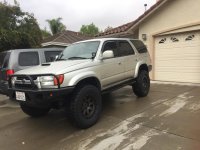
New tires installed. Now it rubs on full lock...hammer time! And will be getting flush mount bolts for the inner fenders from [MENTION=44220]BigFishAllDay[/MENTION] thread
 

Attachments

  • E2514048-3D3D-4E4D-9070-DD00370A727F.jpg
    E2514048-3D3D-4E4D-9070-DD00370A727F.jpg
    134.2 KB · Views: 397
  • FF4316DC-E6A3-4571-972B-ED438D4C94A8.jpg
    FF4316DC-E6A3-4571-972B-ED438D4C94A8.jpg
    133.2 KB · Views: 402
I removed three old tires from the rims today with the Harbor Freight tire changer, cost about $40 I believe. I have some winter tires to put on. It took a while to do it and it only costs $100 to get them mounted and balanced by a shop but it's fun to learn how to do it yourself. I also spent $80 on the bubble balancer, I'll have a try at that.

37464898254_19c2e6e316_b.jpg


I had to cut a piece of 2x6 into a circle to provide a clamping surface for ou rims. Also the little peg that sticks up through one of the bolt holes which stops the wheel from spinning as you wrench on it, did some damage to the hole in the rim. I'll have to make a sleeve for it. Next step is to take off the clear coat with some aircraft stripper and then I can mount them on the tires. Sandblasting and painting can come later.
 
Status
Not open for further replies.

Members online

Forum statistics

Threads
278,316
Messages
3,554,120
Members
248,016
Latest member
Advally Service

Trending content

Back
Top