What Did You Do To Your 3rd Gen Today?

Status
Not open for further replies.
One door done
80 mil Noico

rsCDUyZ.jpg
 
Replaced old stock antenna

I changed out my 19 year old not working antenna for a 14 inch black flexible antenna from advanced auto parts. Also picked up a loaner tool from advanced auto as well (steering wheel puller) which I'll be starting over the weekend.
 
Big day today. Replaced rear hatch latch that failed two weeks ago. Then thing got interesting...

Pulled the intake. Replaced all 6 fuel injectors, fuel pressure regulator and fuel supply and return lines.

Then continued by assault on tensioner bolts. Alternator bolt bit the dust. Won’t be finishing this job today. Bummer.

Cut a hole in the time belt cover. Installed the auto tensioner. And dropped in the brand new TRD supercharger I’ve been staring at in a box for three months. Still have to torque it down. And finish putting other pieces together.

Can’t wait to turn the key next week.

New ac system and a supercharger. Big week indeed
 
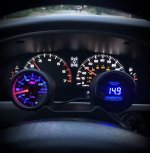
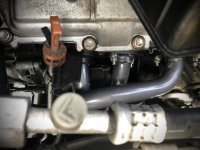
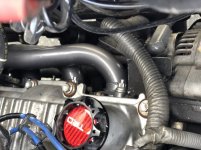
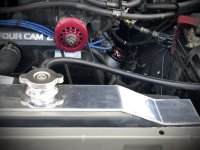
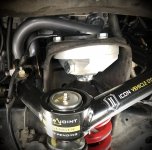
Picked up from Torfab today. Professional. Clean work. Reasonable labor. Had the following installed:

-TRD headers
-Remflex header gaskets
-ARP Exhaust manifold studs
-URD crank pulley
-Champion radiator
-Reseal valve cover
-Icon delta joint UCA
-Innovate wideband
-Boost gauge
 

Attachments

  • F355AA6A-7AFC-4750-850B-458DC288FBAF.jpg
    F355AA6A-7AFC-4750-850B-458DC288FBAF.jpg
    118.9 KB · Views: 313
  • A4B2182D-7565-428E-AE54-95B84F77E028.jpg
    A4B2182D-7565-428E-AE54-95B84F77E028.jpg
    126.5 KB · Views: 326
  • 222F7F94-A198-433C-B01A-4FD0A2F57DE4.jpg
    222F7F94-A198-433C-B01A-4FD0A2F57DE4.jpg
    129.9 KB · Views: 333
  • A72ACCC7-AE48-46BA-AD1F-4821066A2D3D.jpg
    A72ACCC7-AE48-46BA-AD1F-4821066A2D3D.jpg
    128.3 KB · Views: 314
  • 1757C596-018B-4F46-AE02-D71DF04C5C21.jpg
    1757C596-018B-4F46-AE02-D71DF04C5C21.jpg
    124.9 KB · Views: 319
Last edited:
Busy day for fluids on my '01. Drain/fill (M1 75W90) both DIFFs, the transfer case and the mini-ATF (only drain pan - ~5 qts), or as I like to call it, the TTM Special. :D

Fluids all looked good and the rear diff was the only one I'd consider somewhat dirty. I bought my T4R in Oct. 2018 and this is the first time I've changed these fluids.

Did not need to even raise the car and I was able to fill everything w/o using a pump. Dropping the spare tire (good time to check its PSI) makes it very easy to fill the rear diff. I used 1 qt. bottles. Transfer case was a little harder but still not bad using the 1 qt. bottle.

But, I do not like the front DIFF. Between having to remove the two skid plates and then the recessed drain/fill plugs (right Timmy?), I'm glad this is not a common maintenance item. Also, I was able to fill the front DIFF by using a 3 foot section of clear tubing and dropping it down from above and then letting gravity do its thing as I emptied the bottle into the tube.

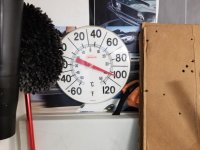
I'll close with this. 112 here today. Here's the temp in my garage at about 5PM as I was in the middle of this very productive T4R day. It's a dry heat. You know, like an oven. :D :D


Eddie
 

Attachments

  • 05292020-temp.jpg
    05292020-temp.jpg
    120.5 KB · Views: 316
Last edited:
Getting everything ready for the f150 tank swap tomorrow. Laid out the wiring, going to do a wiring upgrade as well. I'll use the stock power and ground to activate a relay which will then feed the fuel pump a clean 12v+ feed. It basically supplies a clean as in the fuel pump is the only load on that curcuit supply. Its amazing how much the voltage flucuates to the fuel pump. Only mod left is to cut up the filler neck and extend the wiring. Also ordered the brake line fittings and braided hoses for the rear disc conversion. Probably will tackle the rear caliper rebuilding tomorrow or Sunday.

Also today laid out the wiring, thermo switch, fan and bigger trans cooler for a new trans cooler (b&m one is ok, but I want a better one with a fan lol). Today I also painted the snorkel dust cap hammer tone black (looks like cast iron) much better then the faded black.

 
Tack welded the slip joint on the steering column. Made a world of difference, and went much faster than I thought! Now I can feel the difference in the poly rack bushings haha.
 
Yesterday I installed new inner and outer tie rods along with new boots. New denso plugs and wires. New denso air filter and wix fuel filter. Lastly Monroe ceramic pads and brembo blank rotors.

Waiting on several oem parts to arrive to fix my valve cover leak.

Suspension wise waiting on Bilstein 5100s all around. OME 906 rear springs arrived. Waiting on oem lbj. Excited!
 
eBay.

There is a set there now (or was a couple days ago), but the seller has lost his mind on price IMO. IIRC > $250.

I happen to find these (under the related listings section eBay displays; I suspect one of my search words was missing from listing) with a make offer. I did. He took it and I'm a happy DIY-er.

Good luck,

Eddie


Where did you get them?
 
Installed new upper & lower ball joints (well passenger side upper, ran out of time to do drivers side) in my daughters 96 w/ 298k. Her boyfriend had bought MasterPro from O'Reillys, hopefully they arent complete junk. They did have zerks in them.
I did notice that the outer tie rod ends seem awfully sloppy. Is it best to do inners at the same time? What brands do you all recommend.
 
Status
Not open for further replies.

Members online

Forum statistics

Threads
278,316
Messages
3,554,120
Members
248,016
Latest member
Advally Service

Trending content

Back
Top