
You are using an out of date browser. It may not display this or other websites correctly.
You should upgrade or use an alternative browser.
You should upgrade or use an alternative browser.
What did you do with your 4runner today?
- Thread starter NorthGa4R
- Start date
 I also have one in my Tundra...
LOSTR4
Member
I forgot the attachments...I threw one of these in to dual as an additional "cup holder" though, it's meant for Hydroflasks and Nalgene bottle-sized vessels...great outfit and they can customize your bags if you state it's for a truck [emoji14] I also have one in my Tundra...
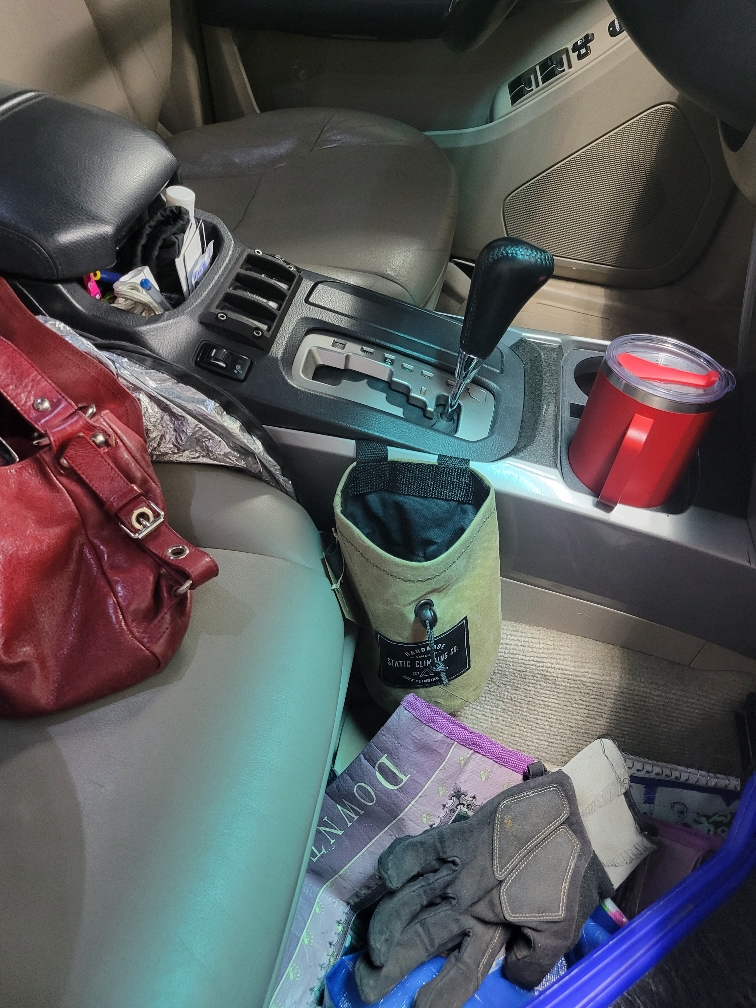
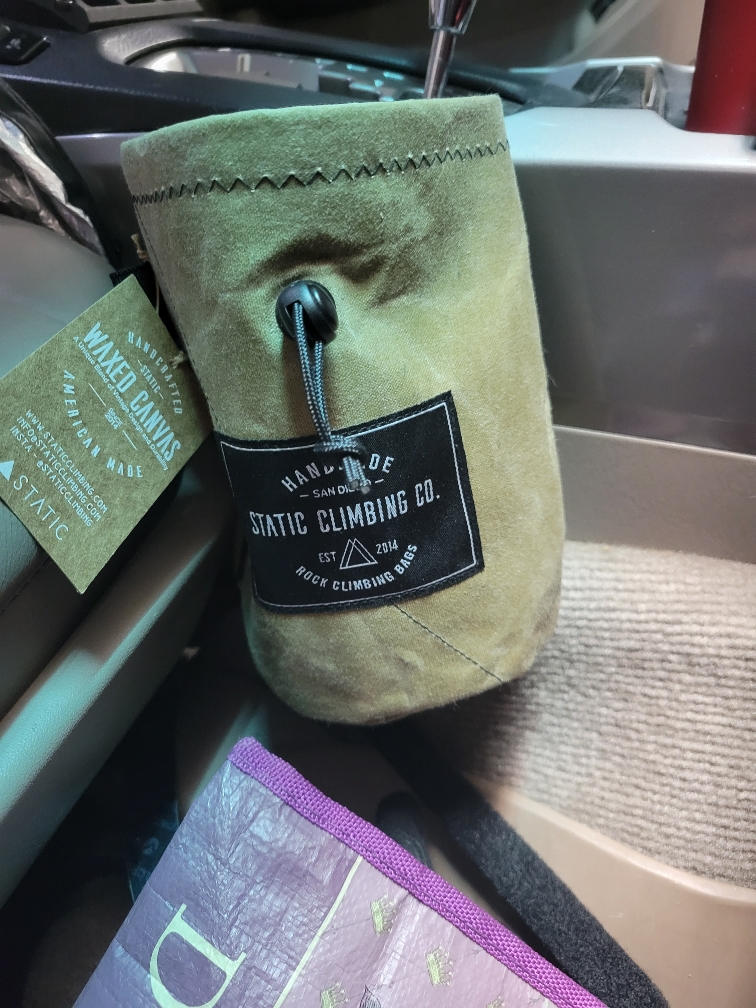
Sent from my SM-G991U using Tapatalk
I replaced some of the evap hoses as they were cracked and very rigid. After seeing the ends, it is no surprise they practically fell off. Interestingly, the new part didn't have the evap diagnostic port as part of it. Not sure what kind of use-case it offered, but I'll keep it in my old parts box.
<a href="https://ibb.co/pnYdTdj"><img src="https://i.ibb.co/pnYdTdj/new-evap-hose.png" alt="new-evap-hose" border="0"></a> <a href="https://ibb.co/c3KqqR2"><img src="https://i.ibb.co/c3KqqR2/evap-line.jpg" alt="evap-line" border="0"></a>
<a href="https://ibb.co/pnYdTdj"><img src="https://i.ibb.co/pnYdTdj/new-evap-hose.png" alt="new-evap-hose" border="0"></a> <a href="https://ibb.co/c3KqqR2"><img src="https://i.ibb.co/c3KqqR2/evap-line.jpg" alt="evap-line" border="0"></a>

Bluesky 07
Senior Member
Started removing the clear protective film from the bottom of the doors, which had torn and began peeling in places (at left in pic). Used a heat gun, which worked nicely once I figured out the ideal temperature. Too hot and it basically melts, not enough and it’s really tough to peel. If you get it just right, it becomes flexible and peels reasonably well (at right in pic). Still took half an hour plus to do one door.

Bluesky 07
Senior Member
This was a while back but I just got the writeup done. Installed aftermarket full-spray washer nozzles. The swap itself couldn't be easier. Results? I'd say 4.5 stars out of 5 b/c with the replacement sprayers, there's a delay, kind of a pulse, when you trigger the switch that squirts out a little washer fluid onto the hood (see video below), then the full spray comes out and covers the windshield. Does the job nicely once it gets going but the fluid on the hood may bother some users. Some pics and notes:
Here's what you get, the nozzles, gaskets, and a screwdriver for adjustments.

It comes oriented vertically, like this:

Use the small flat-head screwdriver to rotate it 90° so it's horizontal and also tilt it up as far as possible (it's not tilted up yet in this pic).

Side by side:

Disconnect the hose on the underside of the hood, then remove by compressing the tabs using something that won't scratch the paint. This shows the nozzle partially out during removal.

To install, just press the new washer down into the hole through the new gasket until the tabs lock then reconnect the hose. Make sure the brass nozzle is fully tilted up and check it now and again b/c it's not hard to move it, for example if you're wiping down the hood after a car wash, etc.
Spray:
Leftovers, probably not any worse than with the factory nozzles:

Here's what you get, the nozzles, gaskets, and a screwdriver for adjustments.
It comes oriented vertically, like this:
Use the small flat-head screwdriver to rotate it 90° so it's horizontal and also tilt it up as far as possible (it's not tilted up yet in this pic).
Side by side:
Disconnect the hose on the underside of the hood, then remove by compressing the tabs using something that won't scratch the paint. This shows the nozzle partially out during removal.
To install, just press the new washer down into the hole through the new gasket until the tabs lock then reconnect the hose. Make sure the brass nozzle is fully tilted up and check it now and again b/c it's not hard to move it, for example if you're wiping down the hood after a car wash, etc.
Spray:
Leftovers, probably not any worse than with the factory nozzles:
Last edited:

Hi-desertT4R
Member
This was a while back but I just got the writeup done. Installed aftermarket full-spray washer nozzles. The swap itself couldn't be easier. Results? I'd say 4.5 stars out of 5 b/c with the replacement sprayers, there's a delay, kind of a pulse, when you trigger the switch that squirts out a little washer fluid onto the hood (see video below), then the full spray comes out and covers the windshield. Does the job nicely once it gets going but the fluid on the hood may bother some users. Some pics and notes:
Here's what you get, the nozzles, gaskets, and a screwdriver for adjustments.
It comes oriented vertically, like this:
Use the small flat-head screwdriver to rotate it 90° so it's horizontal and also tilt it up as far as possible (it's not tilted up yet in this pic).
Side by side:
Disconnect the hose on the underside of the hood, then remove by compressing the tabs using something that won't scratch the paint. This shows the nozzle partially out during removal.
To install, just press the new washer down into the hole through the new gasket until the tabs lock then reconnect the hose. Make sure the brass nozzle is fully tilted up and check it now and again b/c it's not hard to move it, for example if you're wiping down the hood after a car wash, etc.
Spray:
Leftovers, probably not any worse than with the factory nozzles:
I’ve been wanting to do this for a while. Just got these nozzles ordered last night.
I also ordered new 5th gen CV boots. My inner left has failed 3 times now. I’m hoping that this style, along with the boot stretch install method helps. I should probably just replace the entire axle.
mikepridge
New member
New pioneer head unit double din Bluetooth looks sick!
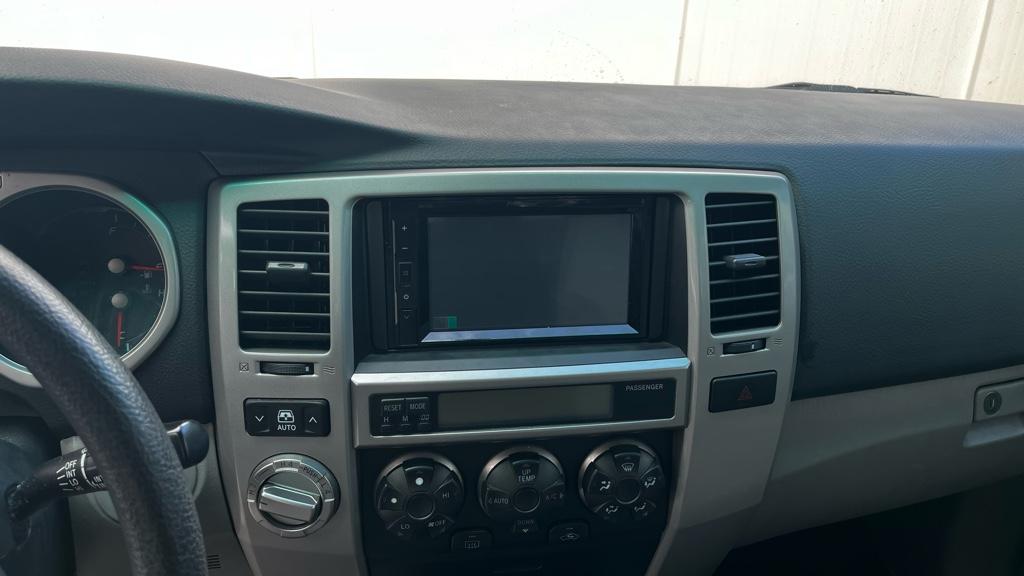
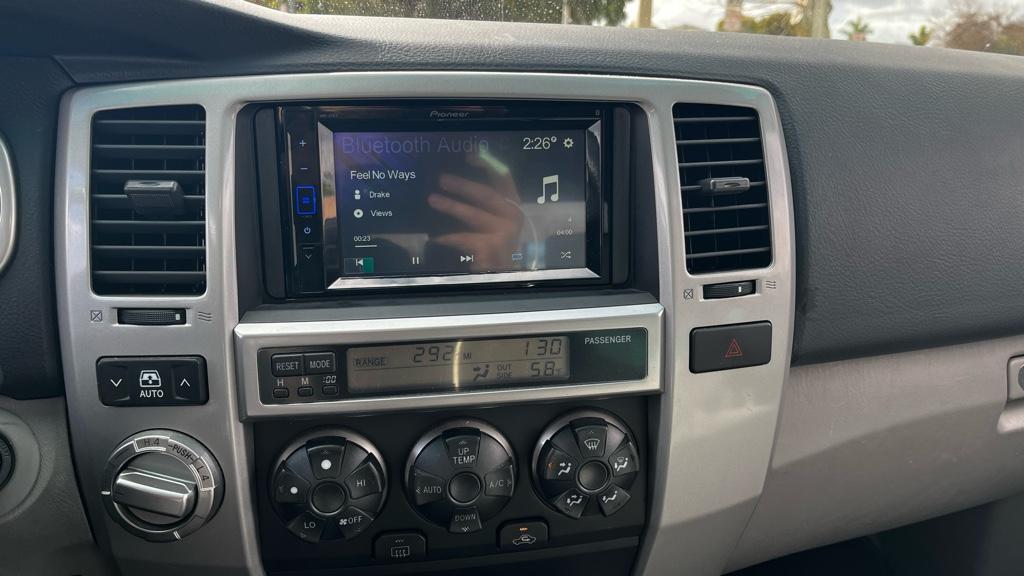
Sent from my iPhone using Tapatalk
Sent from my iPhone using Tapatalk
I'm thinking of rerouting when I have to replace, tired of feeling the exhaust on my leg. Does it help at all with the blow-back when the rear window is opened a little and you accelerate hard? I would like a little better sound, but don't want the the whole neighborhood to hear me coming. Any thought will help. Thanks.
Sorry for the delay in response! I 100% agree. It’s nice not having it blow right on you if you’ve got the truck running and are loading up. I think it helps with blow back. Although I only really noticed the exhaust if I was sitting in traffic with my window all the way down and it was windy out. Haven’t noticed it since! I’m not too loud with my 50 and no rear resonator, just enough purr/growl but not obnoxious and won’t blow anyone away.
I don't get on here much anymore since my job has started blocking this site. But, in the last two weeks this I've pretty much changed the appearance of my 05. This is what I've done. I removed all the cladding and had it painted. It was faded pretty badly. This helped the overall looks immensely. Then I was lucky enough to get the black TRD Pro wheels I've been wanting, while Toyota had them on sale. Paid $143 each and picked them up so no shipping. Including tax I ended up paying $619 for the set of 4. Got them installed and it caused me to decide to go ahead and black the runner out. I bought two matte black TRD Off Road emblems and put them on the B pillars. Then I plasti dipped all of the original emblems including the Toyota one on the rear hatch. Then I painted the grille matte black. So now she's totally blacked out and you can call me a poser if you want for the TRD Off Road emblems. They look really good though. And lastly, on my box system in the back: some of you may remember when I built it I posted some pics on here. I had 1 TRD Off Road sticker left over from where I just put one on my Tundra. So I took that leftover one and placed it on the very back end of my box so you see it when the hatch is open. It really dressed it up. Looks really good. Sorry no pics at the moment. IF I can find the time I'll post them. I really love the way it looks now.
Next up: I've got my Tundra for sale so when/if it sells, I'm gonna take a little bit of the proceeds and replace the spacer lift I'm running with a real lift and I'm gonna replace my upper control arms with JBA and get it realigned. And maybe a little later I want to get a hidden mount and put a winch on it. I don't have the figures but I'm sure at this point I've got considerably more invested in her since I bought her than what I paid for her to begin with. (But I did but her really cheap).
Next up: I've got my Tundra for sale so when/if it sells, I'm gonna take a little bit of the proceeds and replace the spacer lift I'm running with a real lift and I'm gonna replace my upper control arms with JBA and get it realigned. And maybe a little later I want to get a hidden mount and put a winch on it. I don't have the figures but I'm sure at this point I've got considerably more invested in her since I bought her than what I paid for her to begin with. (But I did but her really cheap).


Hi-desertT4R
Member
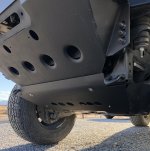

originalg00kster
New member
Installed and wired up the roof rack LED bars.


nice work!
This also answered my question about the DAC button...it does light up!
Does anyone know if there is a bulb in the DAC button? Mine seems to have burnt out or something. The DAC button works and lights up on the dash when I press on it. Just not lit up when its in its slot.

shiftmx
Member
Installed and wired up the roof rack LED bars.
What roof rack is this?
What roof rack is this?
Roof Rack XPro Toyota 4Runner 2004-2009/4th Generation | IMUR4WD
IMUR 4WD is the company.
OopsIBrokeIt
Member
nice work!
This also answered my question about the DAC button...it does light up!
Does anyone know if there is a bulb in the DAC button? Mine seems to have burnt out or something. The DAC button works and lights up on the dash when I press on it. Just not lit up when its in its slot.
Remove the button from the console, then look at the side of the switch near the top. You'll see a small circular thing that looks just like the climate control bulb holders. It twists maybe a quarter turn then pops out and you can replace the bulb.
originalg00kster
New member
Remove the button from the console, then look at the side of the switch near the top. You'll see a small circular thing that looks just like the climate control bulb holders. It twists maybe a quarter turn then pops out and you can replace the bulb.
No way?! so there is a bulb? Thank you sir! I gotta order a new bulb now.
shiftmx
Member
Thanks! How do you like it? It looks really low profile more than any other rack I've seen. Have you put some weight on it to see how it holds up yet?
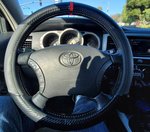
steering wheel cover
Good Morning all
As trivial as this modification is, I dig it.. LOL
picture upload sites
$15 , amazon
Good Morning all
As trivial as this modification is, I dig it.. LOL
picture upload sites
$15 , amazon
Bluesky 07
Senior Member
I installed switched engine bay lighting on my ’07 Sport a few months ago and finally got a chance to finish the write-up. Thanks to everyone who has posted on how to do this; I've tried to find the exact thread that gave me the idea and guidance and my best guess for credit is [MENTION=200736]ElectroBoy[/MENTION], who has a nice write-up in the 5th Gen section.
Here’s how I did it; as with everything, YMMV.
Materials:
LED strip (Amazon)
Switch (Amazon) (Amazon's pic shows 5 switches but you can order just one.)
Wire wrap (Harbor Freight)
Electrical wire (~16 gauge)
Ring connector
Your choice of splice connector
Wire stripper
3/4“ keyhole bit

I didn’t want the LED strip to turn on automatically so I added a rocker switch. Mounting it here on the radiator shroud looked like the most convenient place.

Use a small, regular bit to drill a pilot hole then go to the ¾” keyhole bit to make the opening. Smooth the edges with sandpaper or a file, something I hadn’t done yet when I took the pic.

The installed switch looks clean.

Here's where to place the strip. Wipe the metal down first with alcohol on a rag to help ensure the best adhesion.

Run the wires through the wrap then route the wrap under the hood pad. I brought it out at the driver's side rear corner and used a zip tie to secure it there, then tucked and/or zip tied it along the inside top of the fender up to where the wires connect to the switch, battery, and ground.

The switch prongs, from left to right in this pic, are:
1. Left, dark colored: ground
2. Middle: Battery (constant 12V power)
3. Right: Red wire from the LED strip

It's been a minute so forgive me if this is off, but a black wire and a red wire come off the LED strip and - IIRC - this is how everything connects using the prong numbers listed above. Figuring it out is easy enough if this isn't exact:
1. Run a ground wire off the dark-colored switch prong, splice the black one from the LED strip to it, and connect it with the ring connector to the ground bolt as shown below.
2. Constant 12V goes to the battery; in my case, a Blue Sea Systems fuse box.
3. Connect the red wire from the LED strip to this prong.


Done. This mod is way up there in usefulness and bang for the buck.


Here’s how I did it; as with everything, YMMV.
Materials:
LED strip (Amazon)
Switch (Amazon) (Amazon's pic shows 5 switches but you can order just one.)
Wire wrap (Harbor Freight)
Electrical wire (~16 gauge)
Ring connector
Your choice of splice connector
Wire stripper
3/4“ keyhole bit
I didn’t want the LED strip to turn on automatically so I added a rocker switch. Mounting it here on the radiator shroud looked like the most convenient place.
Use a small, regular bit to drill a pilot hole then go to the ¾” keyhole bit to make the opening. Smooth the edges with sandpaper or a file, something I hadn’t done yet when I took the pic.
The installed switch looks clean.
Here's where to place the strip. Wipe the metal down first with alcohol on a rag to help ensure the best adhesion.
Run the wires through the wrap then route the wrap under the hood pad. I brought it out at the driver's side rear corner and used a zip tie to secure it there, then tucked and/or zip tied it along the inside top of the fender up to where the wires connect to the switch, battery, and ground.
The switch prongs, from left to right in this pic, are:
1. Left, dark colored: ground
2. Middle: Battery (constant 12V power)
3. Right: Red wire from the LED strip
It's been a minute so forgive me if this is off, but a black wire and a red wire come off the LED strip and - IIRC - this is how everything connects using the prong numbers listed above. Figuring it out is easy enough if this isn't exact:
1. Run a ground wire off the dark-colored switch prong, splice the black one from the LED strip to it, and connect it with the ring connector to the ground bolt as shown below.
2. Constant 12V goes to the battery; in my case, a Blue Sea Systems fuse box.
3. Connect the red wire from the LED strip to this prong.
Done. This mod is way up there in usefulness and bang for the buck.
Last edited:
Similar threads
- Replies
- 15
- Views
- 4K


