What did you do with your 4runner today?

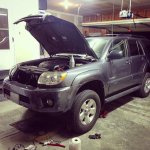
Finally installed the rest of the skids! Unfortunately I snapped off bolt head on the frame cross support mount on the trans cross member. Gotta figure out how to heat that nut in the crossmember and get the remaining bolt shank out :(

For another day...
 

Attachments

  • image.jpg
    image.jpg
    123 KB · Views: 812
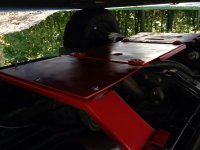
Started on my drawer system! It's in the beginning stages, but it's coming along. My idea was to have 2 drawers and be able to incorporate a sub too. So, many design calls for the left drawer to be approximately 20"x9.5"x32" and the right drawer will be 20"x9.5"x20" and the sub box behind it. Here's what i have so far.

a00ed377fe520f134a52669bf0feea0a.jpg


a033b0fe32836c98e6843b96f3297eb0.jpg


13b9ffdde517a423608e815076ca3ddb.jpg


I hope to be finished by the end of the week
 
Took the 4runner camping:
1. The trunk is a great place to sleep.
2. Avoid mud with the stock tires. I got stuck and it was hilarious. It was great getting to use the center diff lock.
3. How the heck can I get the truck to not smell like a camp fire? Febreze fabric freshener is no match for this one.
 
Started on my drawer system! It's in the beginning stages, but it's coming along. My idea was to have 2 drawers and be able to incorporate a sub too. So, many design calls for the left drawer to be approximately 20"x9.5"x32" and the right drawer will be 20"x9.5"x20" and the sub box behind it. Here's what i have so far.

a00ed377fe520f134a52669bf0feea0a.jpg


a033b0fe32836c98e6843b96f3297eb0.jpg


13b9ffdde517a423608e815076ca3ddb.jpg


I hope to be finished by the end of the week

Looking good! This is one my to do list, hopefully i can tackle this over winter. Are you planing on carpeting the drawers or painting them?
 
Looking good! This is one my to do list, hopefully i can tackle this over winter. Are you planing on carpeting the drawers or painting them?

I am planning on painting the outside of the drawers and doing some type of textured finish on the inside. The top and sides of the whole system will be covered with grey carpet.
 
Finished the HVAC controls on my dash for the wood swap. I took it all apart and put it back together so I got a tight fitment.
n2DyDaP.jpg

5LpQimJ.jpg
 
This

So if any of you live in the rust belt you may appreciate this a bit. My Runner is in grate shape with 155K on the clock and I have started the battle with rust. because it is rearing its filthy head. My hatch has started rusting through in one particular spot. All of the shops around quoted me $600 plus with no gauranty of stoping the rust.

So I did what any poor person would do and did it my self. I can't guaranty that it wont come back but I bet I bought a few years of life for my runner.


This is the problem.
<a href="http://s1322.photobucket.com/user/Moosejuice6912/media/20141005_165958_zps43a09955.jpg.html" target="_blank"><img src="http://i1322.photobucket.com/albums/u574/Moosejuice6912/20141005_165958_zps43a09955.jpg" border="0" alt="Problem area photo 20141005_165958_zps43a09955.jpg"/></a>

This is what I found inside. It seems the sound deadening material is holding salt and moisture against the rear of the hatch.
<a href="http://s1322.photobucket.com/user/Moosejuice6912/media/20141005_165721_zpsdd682e3c.jpg.html" target="_blank"><img src="http://i1322.photobucket.com/albums/u574/Moosejuice6912/20141005_165721_zpsdd682e3c.jpg" border="0" alt="Making the hatch rust photo 20141005_165721_zpsdd682e3c.jpg"/></a>

Ready for primer.
<a href="http://s1322.photobucket.com/user/Moosejuice6912/media/20141005_175019_zpsa2037642.jpg.html" target="_blank"><img src="http://i1322.photobucket.com/albums/u574/Moosejuice6912/20141005_175019_zpsa2037642.jpg" border="0" alt="Before primer photo 20141005_175019_zpsa2037642.jpg"/></a>

Primed
<a href="http://s1322.photobucket.com/user/Moosejuice6912/media/20141005_175441_zps77190ae3.jpg.html" target="_blank"><img src="http://i1322.photobucket.com/albums/u574/Moosejuice6912/20141005_175441_zps77190ae3.jpg" border="0" alt="After photo 20141005_175441_zps77190ae3.jpg"/></a>

Rubberized undercoating so when the rust continues I wont have any holes to look at and drive me crazy.
<a href="http://s1322.photobucket.com/user/Moosejuice6912/media/20141005_180851_zps122dd496.jpg.html" target="_blank"><img src="http://i1322.photobucket.com/albums/u574/Moosejuice6912/20141005_180851_zps122dd496.jpg" border="0" alt="Undercoating photo 20141005_180851_zps122dd496.jpg"/></a>

I am not sure if i am going to keep the bar at the top silver or not I may paint it black as well and leave the emblem chrome.
<a href="http://s1322.photobucket.com/user/Moosejuice6912/media/20141005_191045_zps2ecde77d.jpg.html" target="_blank"><img src="http://i1322.photobucket.com/albums/u574/Moosejuice6912/20141005_191045_zps2ecde77d.jpg" border="0" alt="Finished photo 20141005_191045_zps2ecde77d.jpg"/></a>


I have a few more things to do before winter hits but that is it for today.
Cheers
Maineiac
 
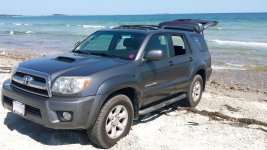
Backed up my phone and found some pics from a beach day at Long Beach in Plymouth MA.
 

Attachments

  • 20140826_124215.jpg
    20140826_124215.jpg
    141 KB · Views: 705
Was back home to Michigan for a wedding yesterday and some bird hunting today. While staying with my parents (who have a garage) I decided to change out my front and rear diff fluids and grease all the fittings in my '08 SR5 4x4. I was only required to purchase a grease gun and a large/deep impact socket set. While dropping the spare tire, I grabbed the cable which had a sharp piece of wire exposed and got me bleeding pretty good. Gloves went on immediately. Transmission fluid might be next as I'm getting a little bit of a thump when I shift from park but I'm going to wait until I've got another chance to do so in a garage.

Next purchase will most definitely be an impact wrench. Yes, definitely an impact wrench. It feels really good to get stuff done, even better when you are doing that work yourself. Now I just need to figure out which bulb to replace so that I can see my HVAC controls at night.
 

Attachments

  • 10178113_10101586779159248_3462578832837192698_n copy.jpg
    10178113_10101586779159248_3462578832837192698_n copy.jpg
    89.5 KB · Views: 635
Last edited:
Finished the HVAC controls on my dash for the wood swap. I took it all apart and put it back together so I got a tight fitment.

I still can't get over on how good that looks. Link to the place you got it? How difficult is it to install? I imagine all that is left are the door panels and center console? Pics when you're done!! Sorry for all the questions, really cool.
 
Last edited:
I still can't get over on how good that looks. Link to the place you got it? How difficult is it to install? I imagine all that is left are the door panels and center console? Pics when you're done!! Sorry for all the questions, really cool.

All good! I am glad people are liking it.

The wood I got is called 3M Dinoc and I bought it at this site called metrorestyling.com. Here are some of the color choices:

Wood Grain Vinyl Film - 3M Di-Noc & Avery

It's affordable too, a 4ftx2ft roll is 60 dollars I think. I strongly recommend getting a lot extra because installation is very easy to screw up and it will likely take a fair amount of practice. I chose Bubinga Gloss vinyl and its a great color. Don't get the birds eye maple because it's orange (I tried it and it sucked) or any colors with grain that is like straight lines because you have to stretch the vinyl a bit when you're working with it so the curly woodgrains are better. You will need a heat gun, scalpel, and a vinyl squeegee (they offer them on metrorestyling when your order vinyl).

For the HVAC controls I dismantled the whole unit and unplugged the 3 control knobs from the circuit board as well as popped out the defrost and recirc buttons, so I could access all of the holes. It was only like 8 screws and super easy actually.

The Center console is next, we shall see how it goes!
 
Went out yesterday to go fishing.

10665887_10152695421325412_7461667356514819906_n.jpg


subsequently we had too much fun on the roads we never put our rods in the water.

1239978_10152695421815412_945654951983952707_n.jpg


4runner problems :driving:
 
Installed some Raamat on the driver's side front & rear doors. I had done the passenger's side and tailgate about 2 years ago.

A quick test drive and it sounds a bit quieter. The doors sure shut more solidly now.
 
where'd you get the brake lines? are the front and rear or just rear?

FYSA, you will need to modify your mounting bracket (the one near the gas tank) to fit the ends of the two new center lines to get them to sit flush so that you can slide a clip in to secure it. All of the others fit with no issues.

Modified hole top:
photo2_zpse627d9bb.jpg~original


photo3_zpsec4d966e.jpg~original


Both modified:
photo1_zps55203c34.jpg~original
 
Last edited:

Members online

Forum statistics

Threads
278,316
Messages
3,554,111
Members
248,016
Latest member
Advally Service

Trending content

Back
Top