What did you do with your 4runner today?

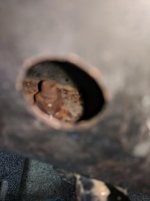
New sway bar bushings. Was a pain in the ass because the front driver side bolt, the weld that holds the nut inside broke. So it was just spinning. Cut the bolt, drove home from my friend's house with only one bolt on... which was really dumb. The bracket bent, obviously.

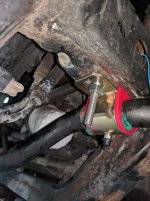
Went to the hardware store, they didn't have rivet nuts. So I bought a bolt and nut and figured if I put the bolt inside it would be a lot easier than lining the nut up perfectly inside and trying to hold it still.

Took like 10 seconds. Gripped well enough inside that a finger on the bolt head was enough.

Terrible photo of broken nut weld:
IMG_20180929_135231.jpg

New solution:
IMG_20180929_162838.jpg
 

Attachments

  • IMG_20180929_162838.jpg
    IMG_20180929_162838.jpg
    120.9 KB · Views: 368
  • IMG_20180929_135231.jpg
    IMG_20180929_135231.jpg
    50.1 KB · Views: 358
New tires. Went from 275/70/17 BFG KO to 255/80/17 cooper st maxx
09567847f364b1cbcca265429b14f88a.jpg
83ac097bf1b21ece7990a1cc61a00ebb.jpg


Sent from my iPhone using Tapatalk
 
Last edited:
Also paired a flipkey that I bought from someone here. Wasn't sure it would work because the ID on it didn't match my remote, but it worked. Only took two tries doing the remote programming song and dance.
 
New tires. Went from 275/70/17 BFG KO to 255/80/17 cooper st maxx
09567847f364b1cbcca265429b14f88a.jpg
83ac097bf1b21ece7990a1cc61a00ebb.jpg


Sent from my iPhone using Tapatalk

did you know you can request them to use the stick on wheel weights instead of the one they hammer on?

looks like you need a new coat of paint for the wheels.
 
Installed new upper/lower oil pans. Engine and old pans looked super clean. NOT a one day project, still another couple hours of work before it moves under it's own power.

Backstory: Passenger diff bracket broke after my skid took a hard hit and contacted the bracket. The diff rotated up and damaged both oil pans. Approx 3 days of labor (multiple people working) so far pulling the old pans and reinstalling the new ones. Not an easy job without pulling the engine on the V8.

To remove w/out pulling the engine, have to drop front diff and remove the steering rack. Tight even with doing that. Replacing tie rods on both sides and both drive shafts while I have everything torn apart.

Those of you who wheel your 03-05's, consider upgrading your passenger side diff bracket, Toyota released a redesigned stronger version in '06.
Front Diff Support comparison - Toyota 120 Platforms Forum
 
Finished up the plug job today.
3fecf1459332b6005929c4f7f3a4627f.jpg


8c8bc46b045c00bf972ab8e7e414ee0d.jpg


ce912935d7feb4f792e0939522d556f0.jpg

Cleaned up the coil packs.

d2256101e1aa17b5f339b0ff49b3c2f2.jpg

104c5207fee7f143896e0448a5ceb722.jpg

Replaced the old hardware while I was at it. Looks out a place but that’s okay. I’ll eventually dive deeper once it’s cooler out.

185de0c559097bc877a22b35a470d2f8.jpg

Was also able to use the extra fender washers to secure the air box plate properly.


Sent from my iPhone using Tapatalk
 
did you know you can request them to use the stick on wheel weights instead of the one they hammer on?


looks like you need a new coat of paint for the wheels.


I didn’t know there was a difference with the wheel weights. It’s plasti-dip and it needed to be redone before the new tires were put on. Trying to decide whether to reapply the gray, go with black, or go back to stock. Decisions decisions.


Sent from my iPhone using Tapatalk
 
I washed mine today. It was cloudy and muggy most of the day. Then this afternoon the sun came out and the humidity dried up a bit. Felt like the perfect time to wash my 4runner.

44972145432_69b9568019_c.jpg


30084015977_9be50617db_c.jpg
 
Installed my HAM radio, will poste more pics soon.
51ab1378008b0d0ab341ad7de75655f6.jpg


Sent from my Fire Phone using Tapatalk


looks like you almost accidentally put her in 4th. i have had my truck 2 mos and did the same thing twice with my knee or hand while starting my ride.
sweet radio!
 
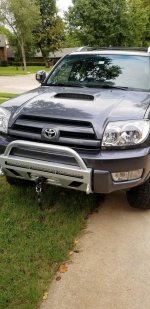
Technically did it Saturday but my dad and I installed my C4 Fab low pro bumper and Smittybilt winch.
 

Attachments

  • 20180929_165940.jpg
    20180929_165940.jpg
    140.2 KB · Views: 312
Good progress - nav computer delete and TOO recovery points

Finally took care of a few minor tasks:
  • applied KevianClean Interior Defense throughout
  • cleaned inside of windows using Stoner Invisible Glass
  • installed switch inside center console next to AC outlet to prevent full-time dual-USB charger port from draining battery during long absences
  • finally identified source of occasional loud clunk as loose GPS antenna banging against the windshield, will need to attach properly
On Saturday, I finally found the time to make a fairly minor but useful mod that I had been planning to do for quite a while: converting the space occupied by the OEM navigation computer/DVD drive to usable storage.

I followed Castulucci's excellent instructions. The only additional observations I had have to do with the large mushroom-head clip in the upper rear corner of the panel. To remove it, it helps to pop out the taillight access panel and squeeze the tips of the clip together while pulling it out. To put it back, first open the clip by holding the head in one hand and the tips in the other and pulling; then insert as deeply as possible and push the head back in.

IMG_20180929_160535

IMG_20180929_162444

The resulting storage space is about 28x19x7cm. I will try to put an appropriately sized rectangular plastic container in there and bolt it down. This should be fine for soft, large enough items such as safety vests, straps, etc. I should eventually attach a short strap to the inside of the cover to make it easier to pull it open.

I found the list price of the navigation computer (part number 8684133060) quite amusing...

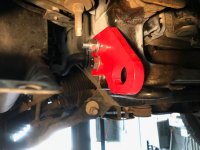
This morning, my mechanic installed the Treaty Oak recovery points I received and painted earlier this summer. I really like how they turned out.
WhatsApp Image 2018-10-01 at 10.11.46.jpeg

I had to order a 1/2" cobalt drill bit and an M12 x 1.25 thread tap ahead of this installation. The official instructions are here.
 

Attachments

  • WhatsApp Image 2018-10-01 at 10.11.46.jpeg
    WhatsApp Image 2018-10-01 at 10.11.46.jpeg
    84 KB · Views: 351
how was the install on this?

Honestly not that bad. Bumper removal and replacement is stupid easy. The worst part was cutting the bumper cover. We had to use a coping saw because we didn't have anything powered with a large enough cutting wheel. The other PITA part was getting the winch mounted to the C4 bumper. The bumper has two holes in the front that you can get into with a 5/8 socket but the back mounting holes you have to go at with an open ended wrench and if you have anything other than small hands or alien-like fingers, holding the bolt there to line up with the nut in the winch is a challenge. You have to tip the bumper/winch on its side and put force against the bumper in one direction while force the opposite direction on the winch so it's flush while one guy holds the bolt and the other tries to get it started with the open ended wrench.

The other thing I will say is in C4s instructions in here they mention how the bumper cover is attached with push-clips on the top where the grille meets the bumper-that black section. When I saw that I cut them from underneath. In retrospect I do not recommend that. Instead, use the brackets they attach to in order to trace them from the top and pop them up like you would any other. Because my local hardware store didn't have any and its damn near impossible to go back in through the top like they are OEM. I reused some that were removed during the process and mounted them from the bottom up, so I am hoping they stay.

Otherwise the process is pretty straightforward and painless. When the hood is open you can see right down to the winch and light wiring, and there is a hole next to the drivers side headlight that you can run the winch wiring around the battery to take up slack and hook it up.

I still need to wire up all my lights but I bought the buttons that have the OEM look and fit in the holes on the dash by the center locker and 115V so I need to take some time and figure out how to connect the lighting wires to the buttons properly.

But it was all easier than replacing my suspension with the OME coils and 5100s.

I do want to add that the quality of the bumper C4 makes is superb. I will admit that I don't have anything to compare it to, but with how precise everything fit I have to give them two thumbs up. Even my powdercoat guy complimented their work as he had an easy time coating it.
 
Last edited:
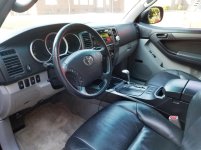
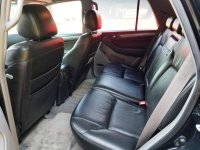
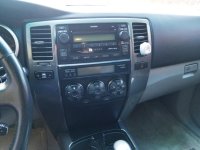
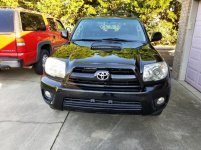
Detailed my interior of my 2007 Sport. LOOK, my sport has leather..!! :cool:
 

Attachments

  • 20181001_165008.jpg
    20181001_165008.jpg
    132.3 KB · Views: 312
  • 20181001_165027.jpg
    20181001_165027.jpg
    131.8 KB · Views: 305
  • 20181001_165119.jpg
    20181001_165119.jpg
    135.9 KB · Views: 313

Members online

Forum statistics

Threads
278,316
Messages
3,554,113
Members
248,016
Latest member
Advally Service

Trending content

Back
Top