What did you do with your 4runner today?

replaced my lca with 1AA lca bought off amazon.
glad to announce that the infernal thunking sound plus floating feeling on my runner is gone. wooohooooooooooo.
it appears the last shop that installe new bushings in one of the arms a couple of years ago did a poor job, as the bushing was found to be moving freely in the housing
 
Painted the center piece on the hatch to match the grill.

aufWhT4.jpg


lZKaqBW.jpg
 
Had an afternoon that reminded me why I bought this truck.

C5akduOl.jpg


DcViQyvl.jpg


21vjAGBl.jpg


Location is FS Road 333 & vicinity here in north Georgia. The Land Cruiser belongs to Dave Greenspan of trailsoffroad.com.
 
Last edited:
They don't make it easy at the dealerships. Some are better than others of course. These are old trucks now.


Same here, duplicated key with chip from my local True Value for around the price you mentioned. Also a standard all metal key with no chip for maybe $5. Cheap insurance. I assume they would cut a key that I brought in the blank for but just a guess.

I was complaining about this very thing to a locksmith, and they just laughed. It's a BS excuse. If they made the keys out of anything harder than the pieces inside the locks, the lock would wear out before the key did. I'm sure there are exceptions, but your run of the mill Toyota is not going to have anything other than a key with a mixture of relatively soft metal, e.g. brass. Even if it's a cheap, non-OEM copy.
 
Touched up my skid plates with some new paint, washed allllll the mud out of my frame, and replaced my cracked rain guards. She needed a little love!
 
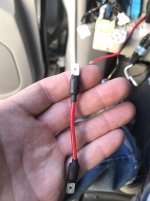
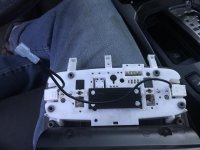
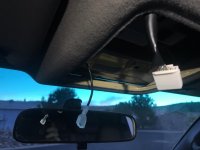
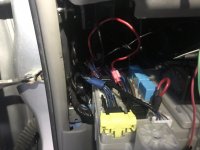
Today I did a few things to my Runner

-Did the map light mod.
Toyota 4Runner Maplight Mod

-did the 12V+ constant power for the auxiliary plugs (cigarette lighter)
Toyota 4Runner Constant Full Time 12V Power Outlet Mod

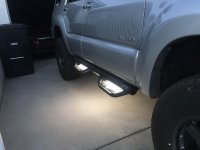
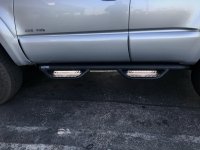
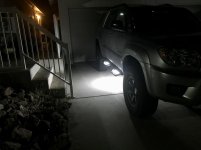
-Finished up my courtesy step lighting. I added led strip lighting to my tube steps and one underneath that I tied in to go on/off with the door or keyless remote (same as the inside lights do). I used the footwell mod. Instructions and ran the wires from there. I plan on doing the footwell mod. addition at some point. I didn’t add a 3 way switch as I didn’t think I’d want them, but think I may add some soon, just need to figure out where to put them as I’m out of space.
Toyota 4Runner Footwell Led Lighting Mod

Here’s a link to the led strips I used. I used a 12” strip on each step and another strip underneath the tube on the bottom between the steps for a total of 6.
Amazon.com: PryEU Daylight White 6000K LED Strip Lights 12V Waterproof for Auto Car Truck Boat Motorcycle Interior Lighting 12'' 30CM 2835 SMD UL Listed Pack of 4: Home Improvement

I just did all these in one shot since they all require the disassembly. Super happy with it. Just a note..... don’t listen to your Neighbor when he tell you to just ground the ground to the frame ground. Otherwise you’ll realize after it’s all back together that the trigger must actually be the ground as the lights won’t turn off unless you push lock..... AND then you’ll have to do it twice :wow:
 

Attachments

  • 6A29C5CA-7749-4246-A46E-411AAF19BE7E.jpg
    6A29C5CA-7749-4246-A46E-411AAF19BE7E.jpg
    124.9 KB · Views: 306
  • 5A734D89-8CE9-447C-BD33-8358C34345F9.jpg
    5A734D89-8CE9-447C-BD33-8358C34345F9.jpg
    127.8 KB · Views: 339
  • 37D519EA-2D8B-425C-89F2-1507413F5C16.jpg
    37D519EA-2D8B-425C-89F2-1507413F5C16.jpg
    122.6 KB · Views: 309
  • 9167C73F-040E-4DCE-A1AF-182AD756C0C8.jpg
    9167C73F-040E-4DCE-A1AF-182AD756C0C8.jpg
    120.9 KB · Views: 310
  • D404B0EF-CF3A-4E4F-BCF2-3A60CCB6DFC8.jpg
    D404B0EF-CF3A-4E4F-BCF2-3A60CCB6DFC8.jpg
    129.5 KB · Views: 304
  • A4471FF8-CDE2-437E-BFEF-2AA90D850D49.jpg
    A4471FF8-CDE2-437E-BFEF-2AA90D850D49.jpg
    130.8 KB · Views: 214
  • B31D8357-0573-42E7-971C-17115C718DA6.jpg
    B31D8357-0573-42E7-971C-17115C718DA6.jpg
    85.9 KB · Views: 212
Last edited:
What did you use to cut them? I’m planning to chop mine too and am always interested in how others approach the same task.

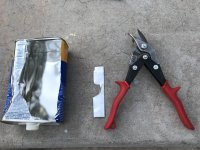
I used a silver sharpie to make the outline then used a Dremel with a right angle attachment and a cutoff wheel then sanded it down until it was decently smooth and flush.

In retrospect I could have followed the existing break, but it wouldn't have been flush (and the bottom most tab mount woulda been cut off).
 
Last edited:
I used a silver sharpie to make the outline then used a Dremel with a right angle attachment and a cutoff wheel then sanded it down until it was decently smooth and flush.

In retrospect I could have followed the existing break, but it wouldn't have been flush (and the bottom most tab mount woulda been cut off).

Thanks, I plan to do the same to mark it but was thinking jigsaw to make the cut. Any thoughts on how well that might work?
 
Thanks, I plan to do the same to mark it but was thinking jigsaw to make the cut. Any thoughts on how well that might work?

Should work.

Might try a utility knife if you have one, take it slow and do a couple passes. I've trimmed some of my plastic this way.

Yeah this works too, I cut some of my inner fender in wheel wheel to beat back the pinch weld this way (and to clear room for the BMC).
 
Last edited:
Today I did a few things to my Runner

-Finished up my courtesy step lighting. I added led strip lighting to my tube steps and one underneath that I tied in to go on/off with the door or keyless remote (same as the inside lights do). I used the footwell mod. Instructions and ran the wires from there. I plan on doing the footwell mod. addition at some point. I didn’t add a 3 way switch as I didn’t think I’d want them, but think I may add some soon, just need to figure out where to put them as I’m out of space.


I just did all these in one shot since they all require the disassembly. Super happy with it. Just a note..... don’t listen to your Neighbor when he tell you to just ground the ground to the frame ground. Otherwise you’ll realize after it’s all back together that the trigger must actually be the ground as the lights won’t turn off unless you push lock..... AND then you’ll have to do it twice :wow:

Those step lights are bright. What did you use for them?
 
4th Gen Today

Moved it out of the driveway so I could get my mower out and mow the grass. Then I washed, waxed it, cleaned up the XD Series rims and threw away all the trash in the interior. Then I used it to power a 12V pump to press up the tires on 3 bicycles.
 
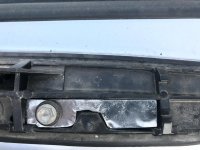
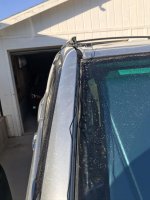
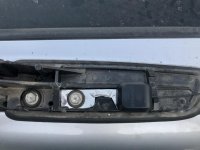
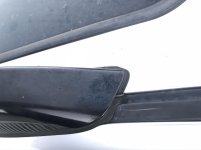
Installed my Sirius XM hidden antenna. Could have drilled a hole and dropped it down through the bottom and made it completely hidden but barely noticeable as is so I guess it will do. Only listened for a couple hours but reception seems great so far.

Tore into it and couldn’t find my piece of thin sheet metal so had to get a little creative lol. Magnet sticks just fine.
 

Attachments

  • 8DBBC9CE-6424-450C-B551-98139239EAAD.jpg
    8DBBC9CE-6424-450C-B551-98139239EAAD.jpg
    138.3 KB · Views: 469
  • 0A3D02C7-716F-40FD-926E-7965C3A1B786.jpg
    0A3D02C7-716F-40FD-926E-7965C3A1B786.jpg
    132.6 KB · Views: 478
  • 3F6F3723-C43F-4C25-8139-7E0EDA9B6708.jpg
    3F6F3723-C43F-4C25-8139-7E0EDA9B6708.jpg
    130.7 KB · Views: 490
  • 5D2990F9-4A9A-4A72-947B-0C31498ECF9B.jpg
    5D2990F9-4A9A-4A72-947B-0C31498ECF9B.jpg
    132.1 KB · Views: 470
  • 90713A9C-2B40-4B52-A958-0014603BB7E9.jpg
    90713A9C-2B40-4B52-A958-0014603BB7E9.jpg
    123.1 KB · Views: 463
Im generally not a fan of smoked out headlights (and taillights) on a light colored rig, but you pulled it off. Looks GREAT with the black Satoshi grill.
:trophy:

Thanks, I really appreciate that! I originally wanted to just do a darker chrome, but I ended up going black since I have other black accents around the truck.
 

Members online

No members online now.

Forum statistics

Threads
278,316
Messages
3,554,112
Members
248,016
Latest member
Advally Service

Trending content

Back
Top