Window Weatherstripping Replacement

chitown616

New member
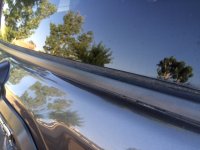
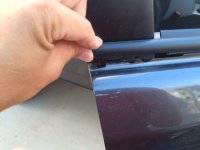
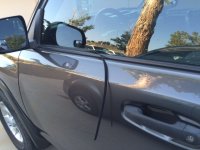
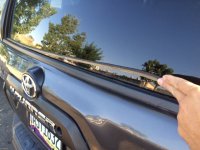
Outer door window weatherstripping is failing on my 2011 Trail. Thats life in AZ I guess, sun has been pretty harsh on them. Took it to the stealership and they claimed it is an "trim accessory" not covered under warranty. Figures. Wanted $600 parts and labor to replace it. I laughed and laughed and laughed!! Then left.

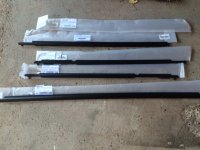
Found the parts online for about $36 apiece, a little more for the rear window. Just got in today and ready to install. I figure it is pretty straightforward, but.....Anyone have any experience replacing these yet?? If so...tips on install please!!

I know there are a bunch of threads on how to replace the weatherstripping on 4Gen and earlier, but I have found none for the 5th Gen so far.

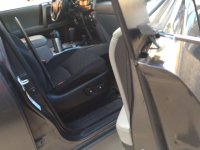
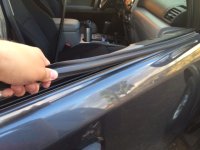
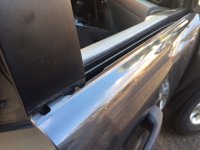
Heres some photos of whats going on.
 

Attachments

  • IMG_0477.JPG
    IMG_0477.JPG
    104.5 KB · Views: 35,515
  • IMG_0478.JPG
    IMG_0478.JPG
    116.5 KB · Views: 38,456
  • IMG_0479.JPG
    IMG_0479.JPG
    103.1 KB · Views: 33,424
Register to hide this ad
Sorry can't help you with the install. I had mine replaced by the dealer about a year ago for $100 if I remember right. I want to say it only took them about 20 minutes to replace. Im in south Texas and my 4runner sits outside all the time.
 
Outer door window weatherstripping is failing on my 2011 Trail. Thats life in AZ I guess, sun has been pretty harsh on them. Took it to the stealership and they claimed it is an "trim accessory" not covered under warranty. Figures. Wanted $600 parts and labor to replace it. I laughed and laughed and laughed!! Then left.

Found the parts online for about $36 apiece, a little more for the rear window. Just got in today and ready to install. I figure it is pretty straightforward, but.....Anyone have any experience replacing these yet?? If so...tips on install please!!

I know there are a bunch of threads on how to replace the weatherstripping on 4Gen and earlier, but I have found none for the 5th Gen so far.

Heres some photos of whats going on.

We did a tutorial on door panel removal which is relevant here. Once the panels are off the weatherstripping simply pulls off the panel. You can put the new weatherstripping on the door first and then the panel- easier that way! (found out later). I also have a link to removal of the hatch panel, same deal with the weatherstripping.

Just check out the links and they will get you started...just ignore the other stuff, lol.


Door panel removal 5th Gen


Rear hatch panel removal
 
There's really no need to remove any panels. Run the windows down and pry them up from the outer shell. I used a putty knife wrapped in tape. Use the replacement as a guide and pry up near the clips. Once one area is up you can pull them out by hand. Install is simply pushing them down, just be sure to adjust the forward/rear fit before you push it on..

Be prepared for the rubber pad on the lift gate latch to turn to mush next, at least that was the sequence on mine.

Toyota's rubberized parts aren't what they used to be. I also have an 02 4Runner and 07 FJ that still have all the original stuff in perfect condition.
 
Thanks all! Antman I think that is the process for the inner window weatherstripping! Which will probably be next on the list. Deep.. you are correct.

After an adult beverage and looking at the new pieces I gave it a shot, figuring there was only 1 clip that was actually holding in. 30 min later all 5 outer weatherstripping pieces were done. $600 my as* Findlay Toyota Flagstaff. This really could not be any easier. You just have to be careful when removing not to scratch the paint on your door.

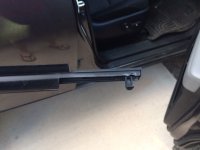
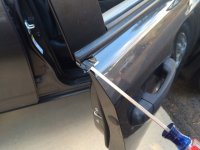
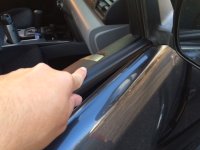
Here is the process......In order of photos.....

1)Buy parts...
Front Drivers- 75712-35011
Front Passen- 75711-35011
Rear Drivers- 75721-35011
Rear Passen - 75722-35011
Rear Hatch- 68292-35041
2)Locate the clip on the specific part you are replacing and locate it on the one thats on the truck.
3)PRY UP CAREFULLY. I used a standard screwdriver wrapped in duct tape. Deep a plastic putty knife is a good idea. THIS IS THE PART TO BE CAREFUL WITH. You can scratch your paint pretty easily if you are not careful. Use your fingernail to get the weatherstrip piece up, then use your tool to go under it and keep going up. You will probably break the plastic clip off, but you thats okay. Just use pressure and get it up and off.
4)Grab the now loose piece, and start working it out of the channel it is in by the mirror, once that is done you can pull it straight up and back.
5)Throw the broken piece at your neighbor.
6)Clean off any left over plastic crap.
7)Start installing the new piece with the end in the mirror channel first. Then working it down until the clip os in its home. Press down firmly over the entire length to ensure a tight fit.
8) REPEAT!! The rear doors have 2 clips and the hatch window has none. The hatch you will end up mutilating, but thats okay. It installs as easy as the others.
9) Enjoy adult beverage and your work!!!
 

Attachments

  • IMG_0502.JPG
    IMG_0502.JPG
    116.4 KB · Views: 32,835
  • IMG_0504.JPG
    IMG_0504.JPG
    68.1 KB · Views: 32,466
  • IMG_0505.JPG
    IMG_0505.JPG
    92.9 KB · Views: 33,934
  • IMG_0506.JPG
    IMG_0506.JPG
    87.6 KB · Views: 31,822
  • IMG_0507.JPG
    IMG_0507.JPG
    97.2 KB · Views: 41,826
  • IMG_0508.JPG
    IMG_0508.JPG
    93.5 KB · Views: 33,304
  • IMG_0509.JPG
    IMG_0509.JPG
    85.9 KB · Views: 35,016
  • IMG_0510.JPG
    IMG_0510.JPG
    78.5 KB · Views: 32,652
Last edited:
Yeah super easy to replace the belt moldings took about 10 min to get them all done. I did mine earlier this year. :nerd:
 
OP - glad to hear you were successful. As a fellow Arizonan, I'll recommend one more step that you may wish to add to your process.

10) Apply Armorall Protectant to newly installed weather strips minimum twice a year (then repeat adult beverage and Armorall as required).

I've followed this routine with cars that I have owned 15 years, in the Southern Arizona sun, with great success.
 
Where did you order them from? I'm in Vegas and mine look the same as yours did. Thanks for posting all the info!
 
Thanks a ton, I posted almost the same question a couple of days ago, I'm replacing every single one on mine. Cheapest price for all that I've found is Camelback Toyota http://parts.camelbacktoyota.com/ The free shipping (for orders over $150) makes it the best option. My total was $179 for all 5 parts, and it was $11 cheaper than the closest competitor.
 
Last edited:
Glad you figured it out, was going to say it's really easy to do.

Bonus Tip for all you guys, if the windows are squeaking a bit when going up/down. It wouldn't hurt to take those outer strips off, clean the glass very well and lightly wipe down the felts on the outer strip. I've found dust/debris can get caught in the felt and squeak. :)
 
Just replaced mine today, it was just as easy as you guys said. Just a tip, I mentioned being a T4R.org guy on my online order with Camelback and the number magically changed to $162.35 for all 5 parts. Thanks for the help all.
 
Thanks guys. I got mine from toyotapartsestore.com

They were the same price. $179 for all 5. Good deal from camelback Toyota at 162!!!

NMJack- I will definitely try the ArmorAll trick. I really could not believe these went to crap so quick. I have a 2006 Saturn vue that sits outside all the time too and has no problem with these. At least for a 40K truck they should cover these under warranty.

ALSO- I tried to get them to replace my headlight bezels for the hazing TSB. They denied that too, said only applies for 3 years 36K. Was not impressed with my service visit that day.
 
Be prepared for the rubber pad on the lift gate latch to turn to mush next, at least that was the sequence on mine.

Part number: 84840-35010

Just bought it, going to replace it cause my rubber pad is mush as well, and it was only $35 off amazon!

Front Drivers- 75712-35011
Rear Hatch- 68292-35041

time to replace these as well. Not doing em all right now with money allotted for xmas cheer. but i will continue to replace as they deteriorate.

this thread is great! maybe a maintenance sticky? [MENTION=66316]1engineer[/MENTION]?
 
Last edited:
Part number: 84230-35010

Just bought it, going to replace it cause my rubber pad is mush as well, and it was only $20.


time to replace these as well. Not doing em all right now with money allotted for xmas cheer. but i will continue to replace as they deteriorate.

this thread is great! maybe a maintenance sticky? [MENTION=66316]1engineer[/MENTION]?

http://www.toyota-4runner.org/5th-gen-t4rs/110839-5th-gen-maintenance-documentation-reference.html You can find this link in the "New Guy" sticky.
 
i guess i was hoping this would be referenced in the location you linked. this is going to become more and more common to replace the belt molding (aka window weatherstripping) as the 5th gens age.

Hey, nothing is stopping someone from adding it to that thread lol. The majority of people here want but are not willing to give. Present company excepted of course.
 
Front Passenger on ebay

I have needed to replace front driver window rubber for a while now. Appears someone tried to get a coat hanger in to break in. Just found the piece on ebay for $48.78 and free shipping. This was the cheapest I have seen for the single part and wanted to share here. Search the part # 75712-35011 and you will see it.

Hoping it hasn't allowed enough water to get down in the door to damage anything. Anyone know if that is likely?
 

Members online

Forum statistics

Threads
278,306
Messages
3,554,045
Members
248,016
Latest member
Advally Service

Trending content

Back
Top