
You are using an out of date browser. It may not display this or other websites correctly.
You should upgrade or use an alternative browser.
You should upgrade or use an alternative browser.
YETIX Build and Adventure Thread aka Travels with Savanna
- Thread starter YetiX
- Start date


YetiX
New member
nice low profile platform. I like how you decided to just keep your tooling down there... I honestly hate having my toolbox in the back of my rig and this is a great alternative. Might have to copy you!
You totally should. It'll revolutionize your 4Runner experience! :cheers:
YetiX
New member
Treaty Oak Offroad Front Recovery Points
I wanted more-substantial recovery points up front (until I get my C4 lo-pro bumper), so I ordered a set of front recovery points from [MENTION=144682]Kfog375[/MENTION] at Treaty Oak Offroad. LINK The recovery points are made from Heavy Duty A572-50 steel.
For the 2006-2009 4Runners, you have to cut off the front tie-down hooks. 10 minutes with an angle grinder and a bit of black spray paint and they're gone.

To install the recovery points, you need to loosen all the radiator bolts (no need to actually un-hook any hoses or anything) and lift the radiator up. In this picture, you can see how the radiator is resting on a short piece of 2x4. This gives you room to get the bolts in.
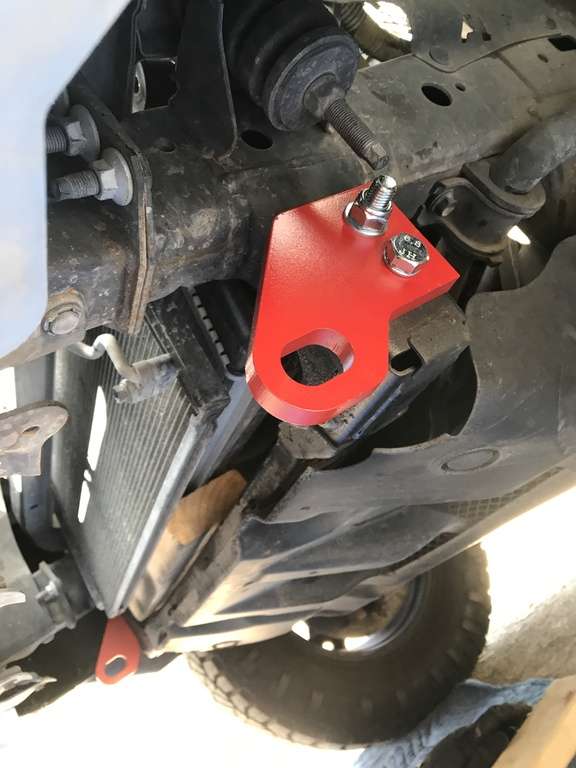
I painted mine red to confuse the Jeep crowd. :lol:
And the finished result:

I also bought the Load Equalizing Bridle to better distribute any force across the frame rails. LINK
Luckily, I haven't had to use them yet but I'm sure that when I do they do the job.
I wanted more-substantial recovery points up front (until I get my C4 lo-pro bumper), so I ordered a set of front recovery points from [MENTION=144682]Kfog375[/MENTION] at Treaty Oak Offroad. LINK The recovery points are made from Heavy Duty A572-50 steel.
For the 2006-2009 4Runners, you have to cut off the front tie-down hooks. 10 minutes with an angle grinder and a bit of black spray paint and they're gone.
To install the recovery points, you need to loosen all the radiator bolts (no need to actually un-hook any hoses or anything) and lift the radiator up. In this picture, you can see how the radiator is resting on a short piece of 2x4. This gives you room to get the bolts in.
I painted mine red to confuse the Jeep crowd. :lol:
And the finished result:
I also bought the Load Equalizing Bridle to better distribute any force across the frame rails. LINK
Luckily, I haven't had to use them yet but I'm sure that when I do they do the job.
Last edited:
YetiX
New member
Corral Canyon 10/14/17
My daughter had never been off-road and wanted to see what all the fuss was about. There's a local off-road area called Corral Canyon that I've ridden dirt bikes at a bunch of times, but never in a 4x4 so we decided to check that out.
I had just bought an Instant Air Supply kit so I quickly screwed the quick fists to a board and then the board to the deck so we'd be able to air down. Gotta love being able to just randomly screw stuff down.

Off we went. Our plan was to go out to the Los Pinos fire overwatch and then check out Espinoza Trail to see if we could do it with Devin's stock Lexus. If we couldn't do Espinoza, we'd just go check out some of the easier trails around the area.
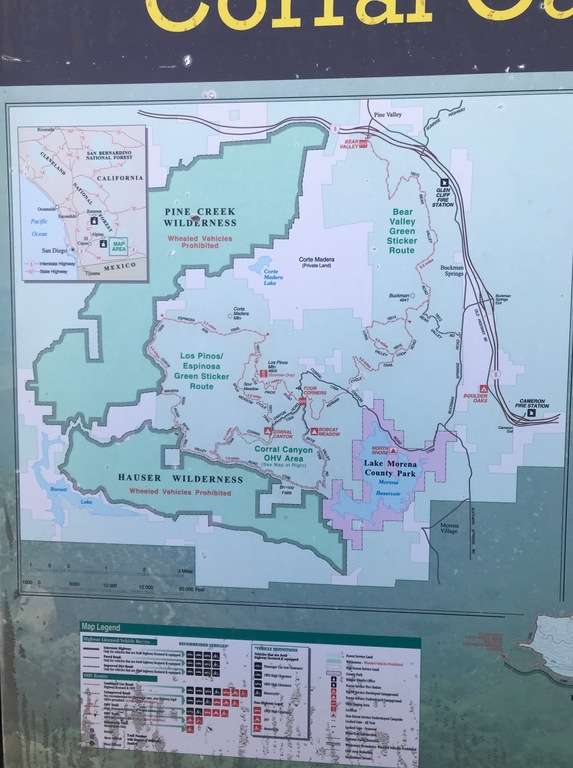
The Corral Canyon map. We staged at Four Corners.
First we went out Los Pinos Road to the fire overwatch. Los Pinos is an easy road/trail so it was perfect to ease my nervous daughter into going off-road.
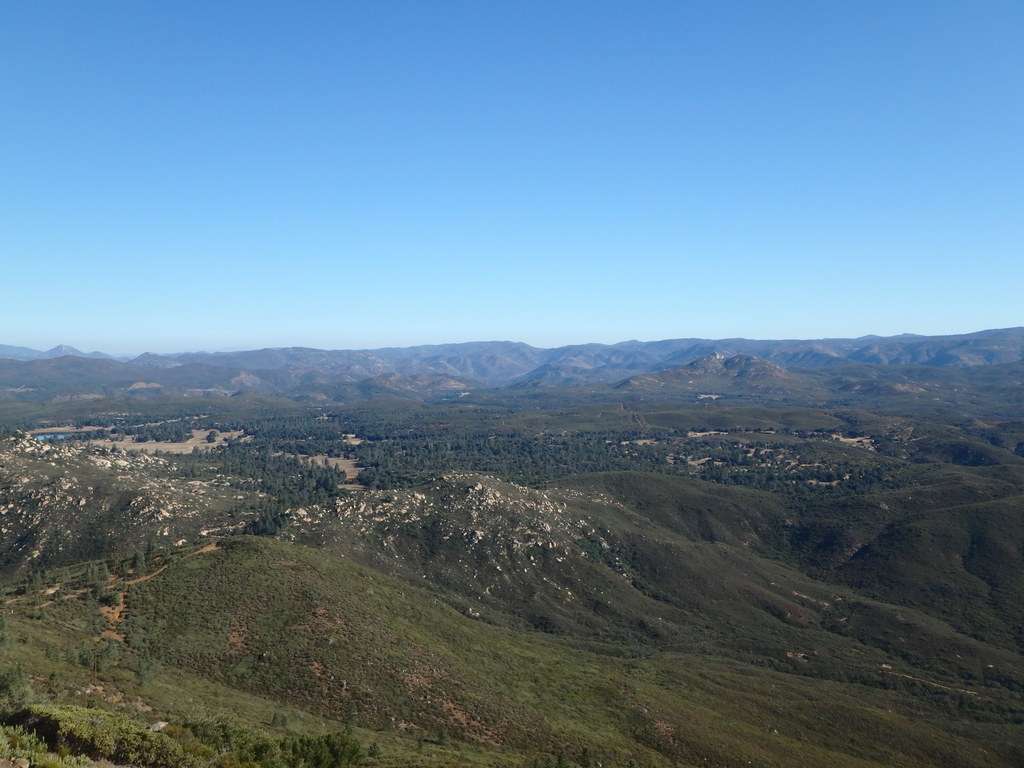
You can see the fire tower off in the distance . . .

It was a beautiful clear day and the views were amazing.

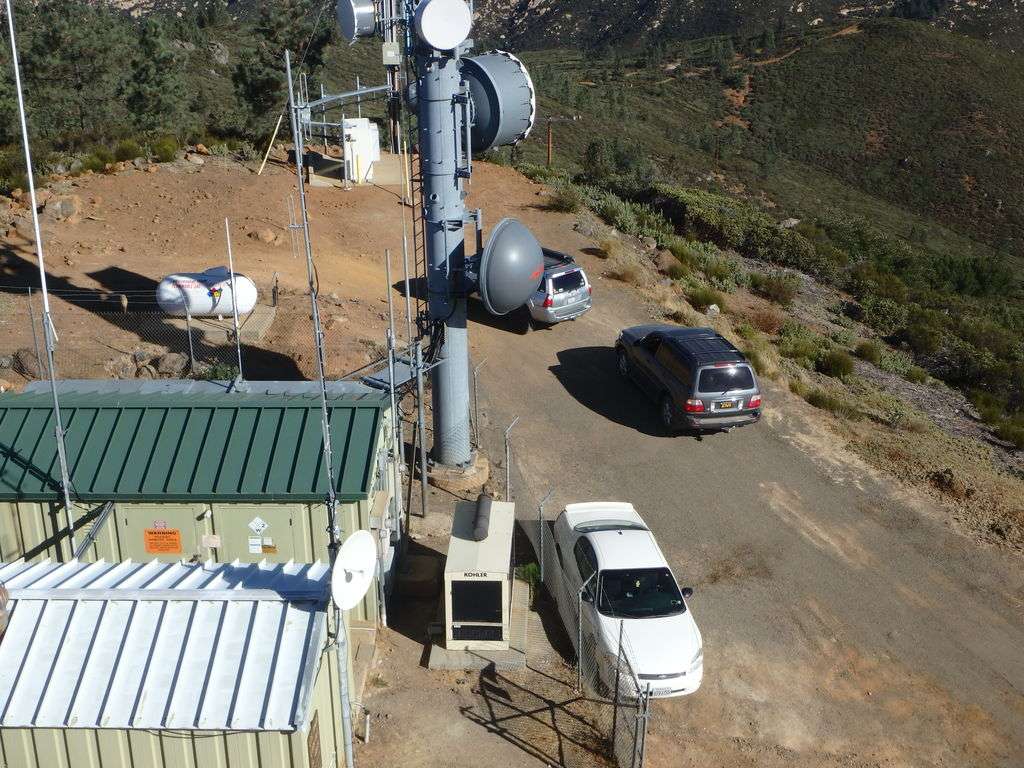
The rigs from the top of the tower:
We then went out the top part of Espinoza which was beautiful . . .

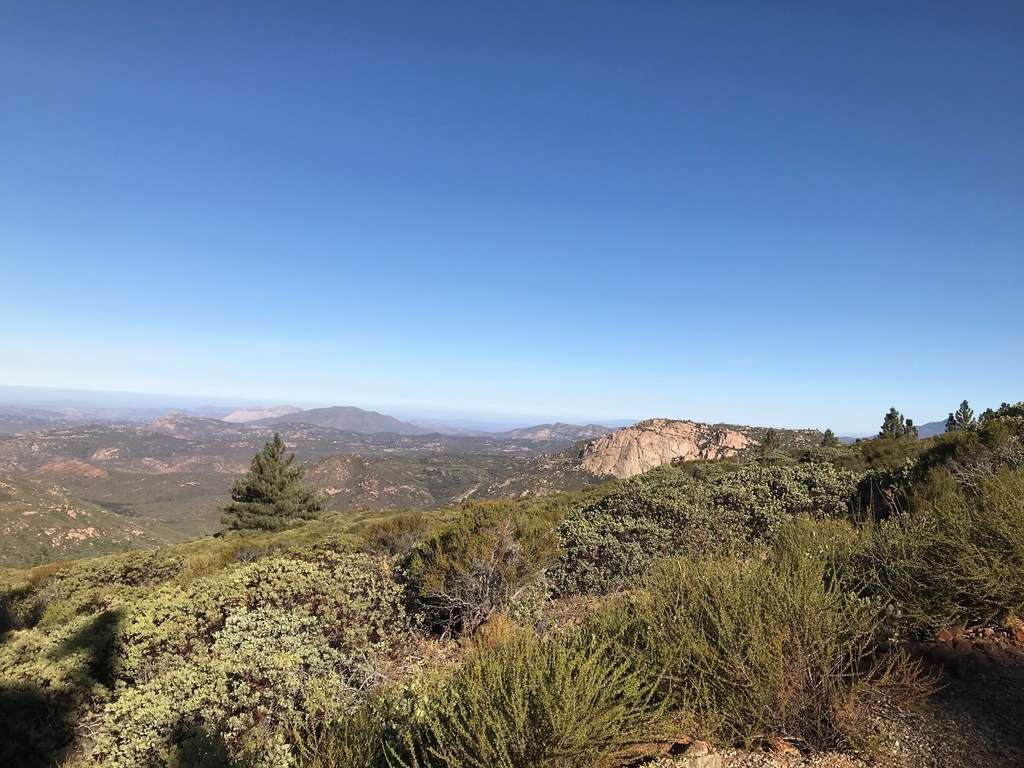
When we hit the top of the first difficult section (sorry, forgot to take pictures) we realized that we could probably get through, but Devin's Lexus would have the hurt put on it. Since his wife would probably divorce him, we decided that turning around was a good idea. Little did we know . . .
We went back to Four Corners, the parking lot/staging area, looked at the map and decided to take Skye Valley Road to Corral Canyon Road back to Four Corners and then get some lunch. It would be an easy trail and I remember there being great views from when I used to ride dirt bikes out here. If we had stayed on the trail that might have been the case . . .
On the way out, we hit a granite slab and did a little playing around.
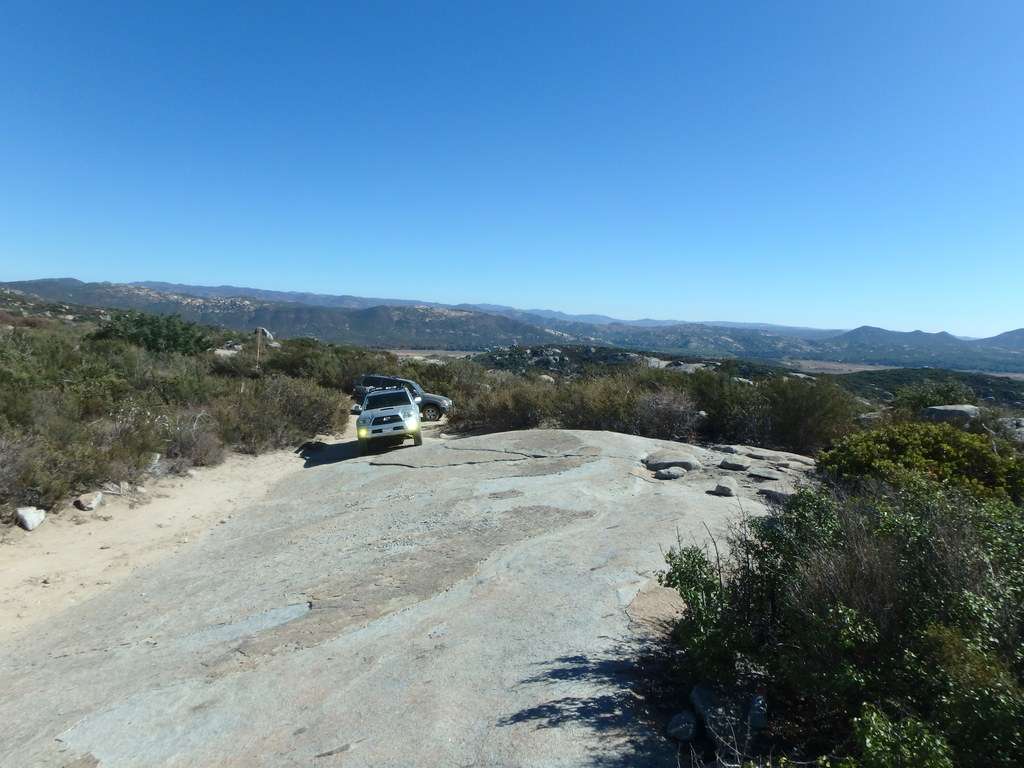
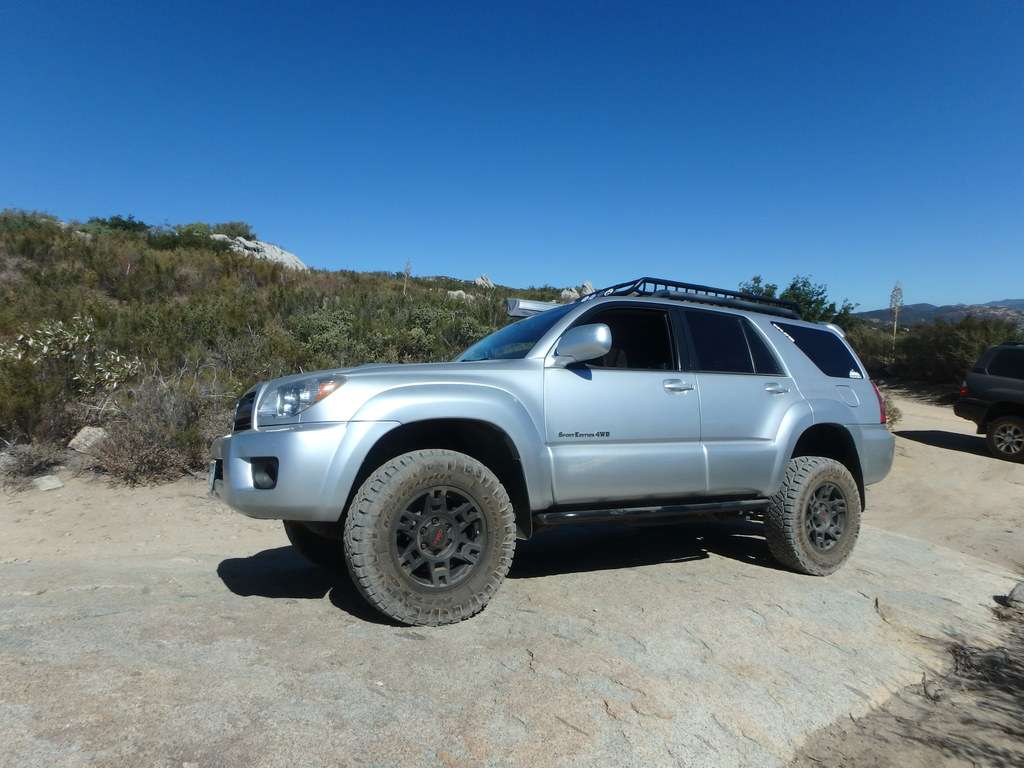
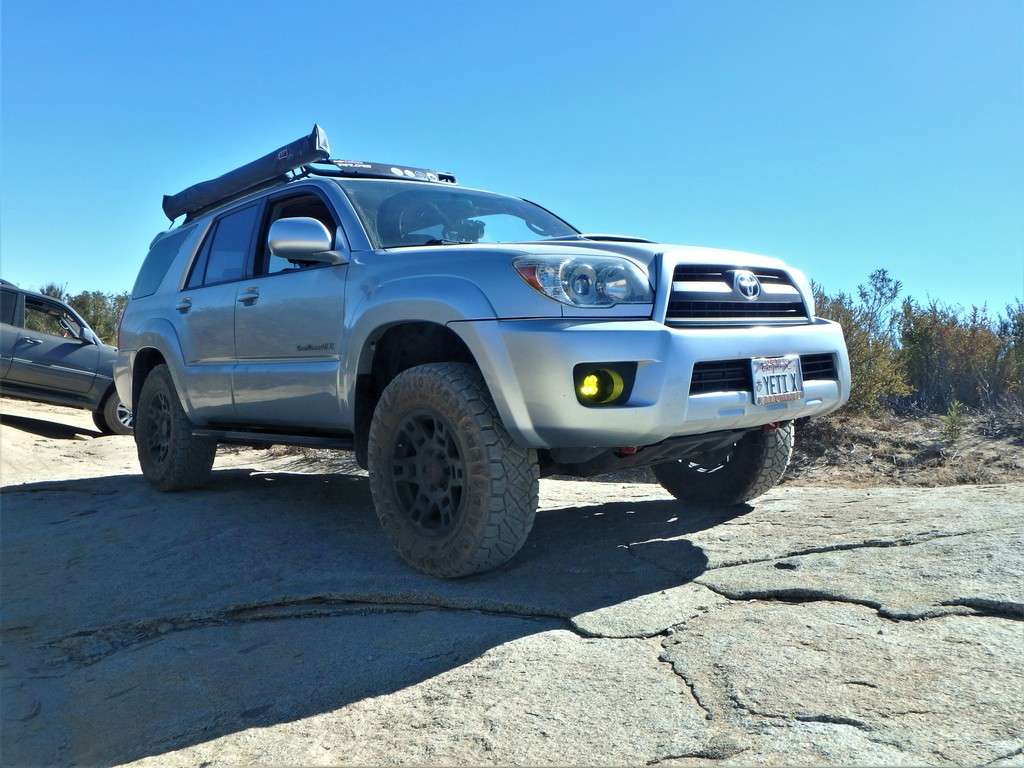
The kid on a rock:

One of the awesome views of Barrett Lake:
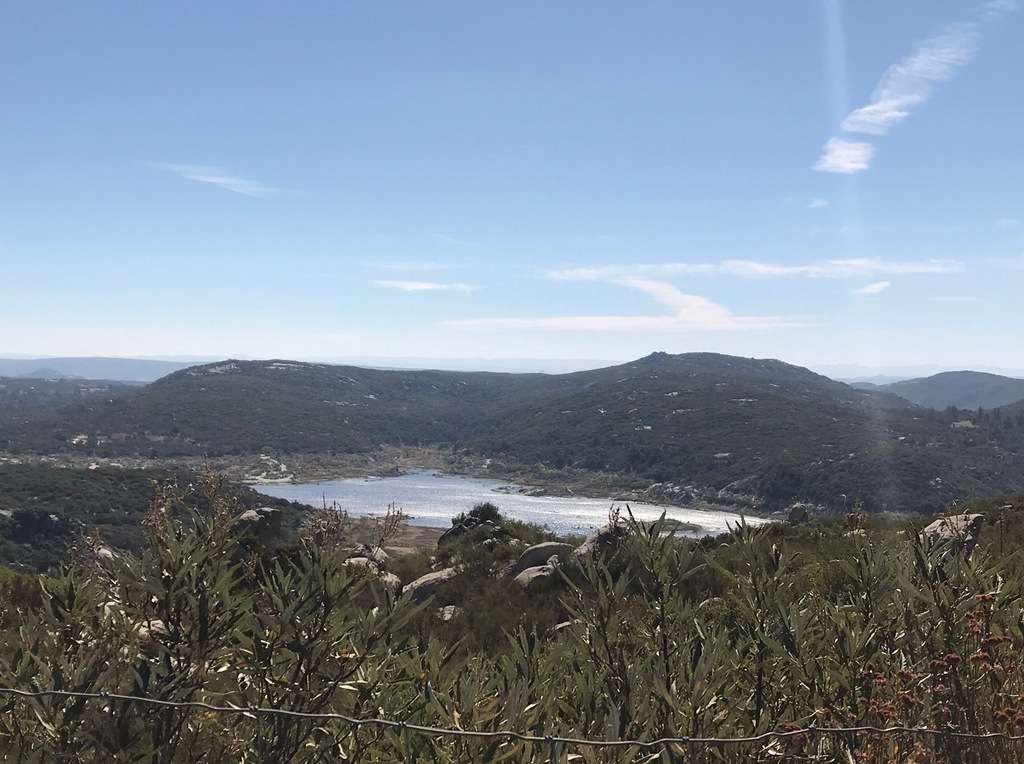
I should have realized that if we were seeing Barrett Lake, we were not where we were supposed to be. But I didn't. Oops.
A random picture of Devin's Lexus before things went sideways . . .
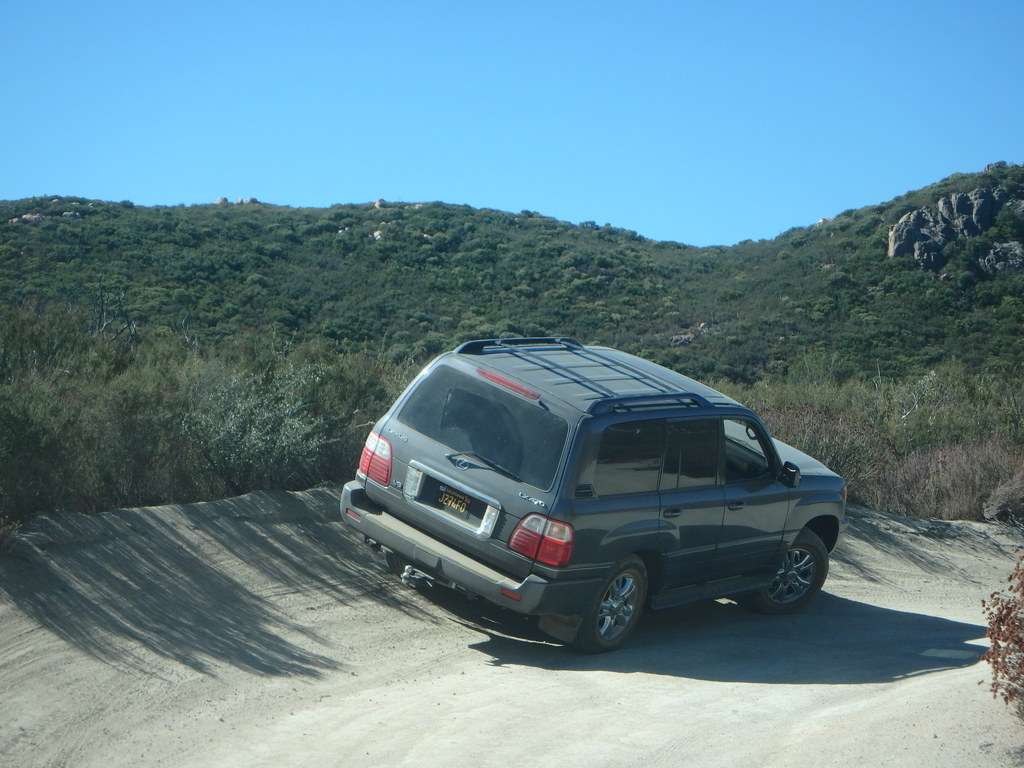
So this is where I stopped taking pictures (unfortunately). The trail started getting a little steeper, rockier, and narrower, but I kept expecting us to pop out at Four Corners any minute. (I didn't bring my GPS because I, like the idiot I can be, thought I knew the area well-enough it wasn't necessary.)
Pro Tip: When you're on a trail that is so narrow the branches start scraping up your rig and guys on dirt bikes look at you like you're an idiot, you probably are and you're not where you're supposed to be. :lol:
This is the only shot we have from this area. It was taken by Devin at the only spot wide enough for him to look back. It's a LOT steeper and rockier than it looks and my driver's side back wheel is about a foot in the air! The kid was not happy.
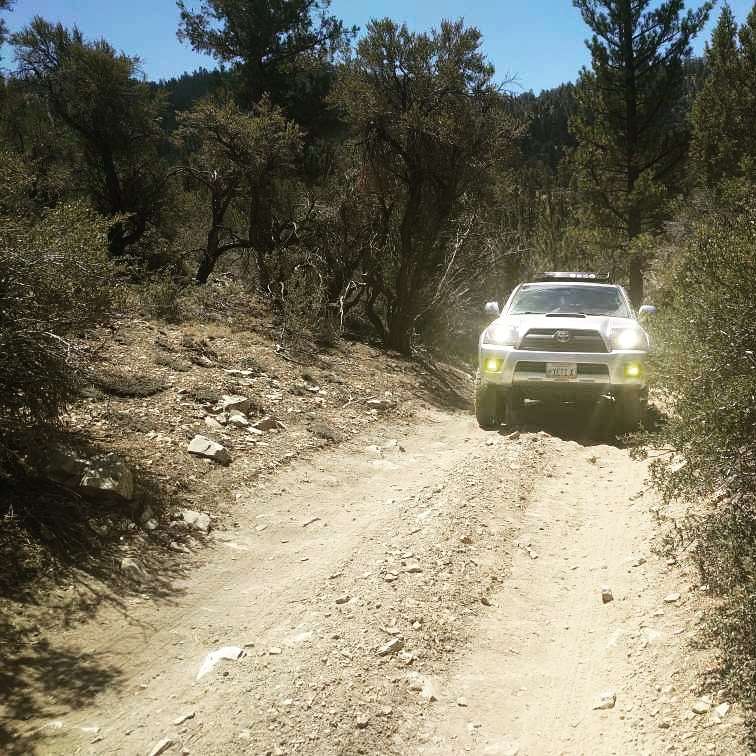
So we ended up on this narrow, rocky and rutted trail, both in 4 Lo and locked. We kept going because a) there really wasn't anywhere to turn around and b) we thought we were getting closer to Four Corners. Anyways, short story long, we had missed our turn onto Corral Canyon Trail and kept going onto Corte Madera and then Espinosa Trail. Yep, the Espinosa Trail we had decided was too technical for our merry band. Oops.
We finally got to an open area with a trail sign, only to learn we were about 1/4 mile from where we had turned around earlier on Espinosa and that we could not go forward from there as there were some big ass rocks. (Good thing we turned around earlier) SO we had no choice but to turn around and go back through the rough terrain we had just finished.
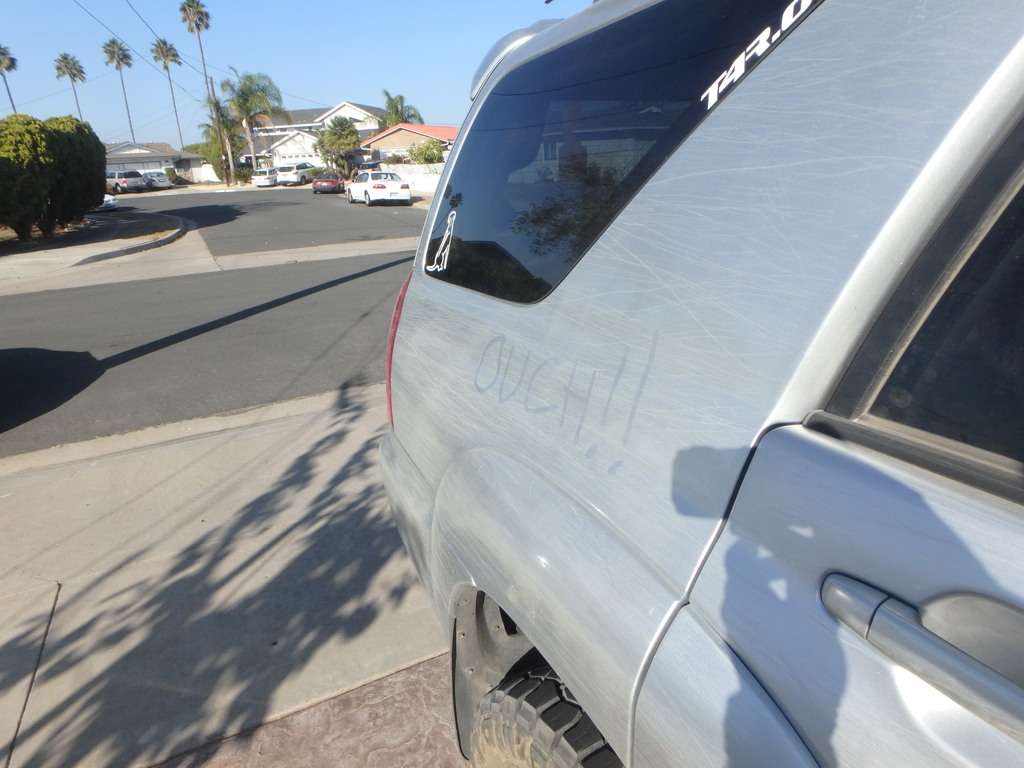
After a much-longer than anticipated day on the trail, we finally got back to Four Corners and then went to get lunch at about 3:45. We ended up having a lot of fun and stretching the 4Runner's legs more than I had to date. Both of our rigs were scratched up with lots of trail pinstripes from the Manzinita bushes that lined the trail. Needless to say, Devin's wife was NOT happy when he got home.
Here's a sample of the pinstriping I got:
And here's a close-up of the map to show where we screwed up:

All in all, it was a fun day, but a bit more than we had intended to bite off. It's not an adventure until someone gets lost, right??
My daughter had never been off-road and wanted to see what all the fuss was about. There's a local off-road area called Corral Canyon that I've ridden dirt bikes at a bunch of times, but never in a 4x4 so we decided to check that out.
I had just bought an Instant Air Supply kit so I quickly screwed the quick fists to a board and then the board to the deck so we'd be able to air down. Gotta love being able to just randomly screw stuff down.
Off we went. Our plan was to go out to the Los Pinos fire overwatch and then check out Espinoza Trail to see if we could do it with Devin's stock Lexus. If we couldn't do Espinoza, we'd just go check out some of the easier trails around the area.
The Corral Canyon map. We staged at Four Corners.
First we went out Los Pinos Road to the fire overwatch. Los Pinos is an easy road/trail so it was perfect to ease my nervous daughter into going off-road.
You can see the fire tower off in the distance . . .
The rigs from the top of the tower:
We then went out the top part of Espinoza which was beautiful . . .
When we hit the top of the first difficult section (sorry, forgot to take pictures) we realized that we could probably get through, but Devin's Lexus would have the hurt put on it. Since his wife would probably divorce him, we decided that turning around was a good idea. Little did we know . . .
We went back to Four Corners, the parking lot/staging area, looked at the map and decided to take Skye Valley Road to Corral Canyon Road back to Four Corners and then get some lunch. It would be an easy trail and I remember there being great views from when I used to ride dirt bikes out here. If we had stayed on the trail that might have been the case . . .
On the way out, we hit a granite slab and did a little playing around.
One of the awesome views of Barrett Lake:
I should have realized that if we were seeing Barrett Lake, we were not where we were supposed to be. But I didn't. Oops.
A random picture of Devin's Lexus before things went sideways . . .
So this is where I stopped taking pictures (unfortunately). The trail started getting a little steeper, rockier, and narrower, but I kept expecting us to pop out at Four Corners any minute. (I didn't bring my GPS because I, like the idiot I can be, thought I knew the area well-enough it wasn't necessary.)
Pro Tip: When you're on a trail that is so narrow the branches start scraping up your rig and guys on dirt bikes look at you like you're an idiot, you probably are and you're not where you're supposed to be. :lol:
This is the only shot we have from this area. It was taken by Devin at the only spot wide enough for him to look back. It's a LOT steeper and rockier than it looks and my driver's side back wheel is about a foot in the air! The kid was not happy.
So we ended up on this narrow, rocky and rutted trail, both in 4 Lo and locked. We kept going because a) there really wasn't anywhere to turn around and b) we thought we were getting closer to Four Corners. Anyways, short story long, we had missed our turn onto Corral Canyon Trail and kept going onto Corte Madera and then Espinosa Trail. Yep, the Espinosa Trail we had decided was too technical for our merry band. Oops.
We finally got to an open area with a trail sign, only to learn we were about 1/4 mile from where we had turned around earlier on Espinosa and that we could not go forward from there as there were some big ass rocks. (Good thing we turned around earlier) SO we had no choice but to turn around and go back through the rough terrain we had just finished.
After a much-longer than anticipated day on the trail, we finally got back to Four Corners and then went to get lunch at about 3:45. We ended up having a lot of fun and stretching the 4Runner's legs more than I had to date. Both of our rigs were scratched up with lots of trail pinstripes from the Manzinita bushes that lined the trail. Needless to say, Devin's wife was NOT happy when he got home.
Here's a sample of the pinstriping I got:
And here's a close-up of the map to show where we screwed up:
All in all, it was a fun day, but a bit more than we had intended to bite off. It's not an adventure until someone gets lost, right??
Next up, Pismo Beach for the USMC Birthday and Veterans' Day . . .
Last edited:
YetiX
New member
Pismo Beach, CA 11/10/17
This post is going to be mostly just pictures. There wasn't really any technical driving or anything like that.
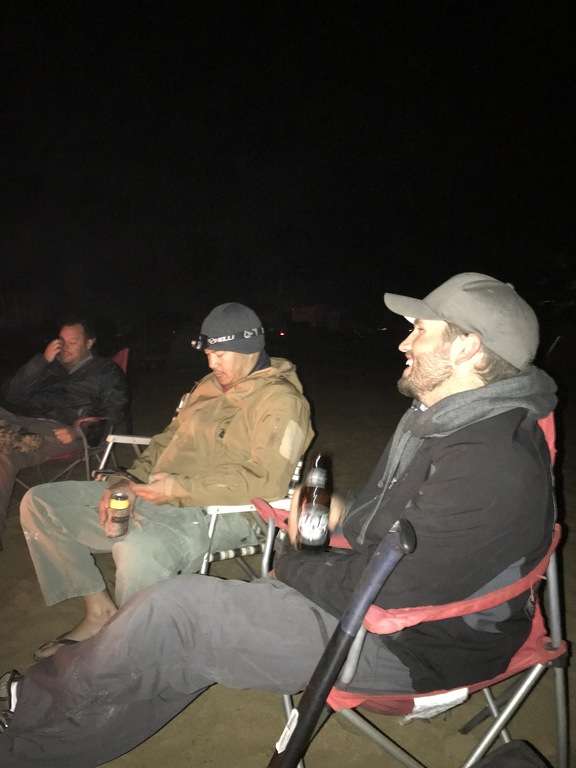
Since the annual Turf and Surf event fell on the weekend of the USMC Birthday and Veterans' Day in 2017, a couple of Marine buddies and I decided to go. We partnered up with a group of guys from Trail Crew and Overland Labs and had an awesome weekend. We hung out and drank beer, manned a checkpoint for the poker run, and checked out some really cool rigs. So, onto the photos.
This is my friend Nick's rig. It's based on a Ford Ranger platform but the only parts remaining are the frame and drivetrain. He fabricated the rest himself! He is an EMT so there's a heavy bent towards EMT gear as you can see. Thankfully, we did not need his EMT skills over the weekend.
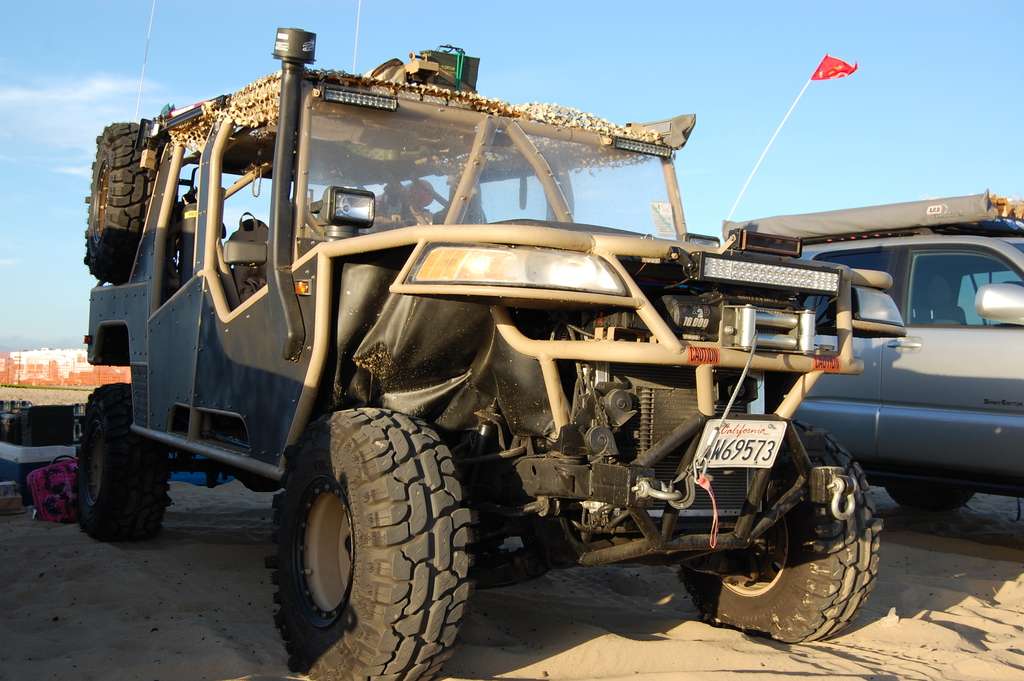
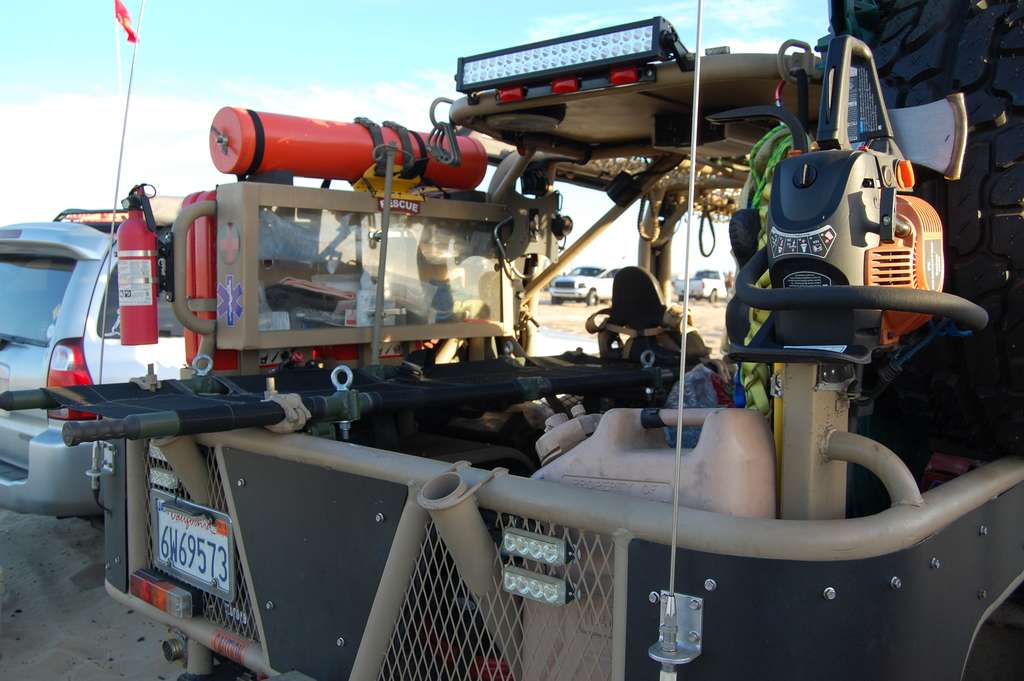
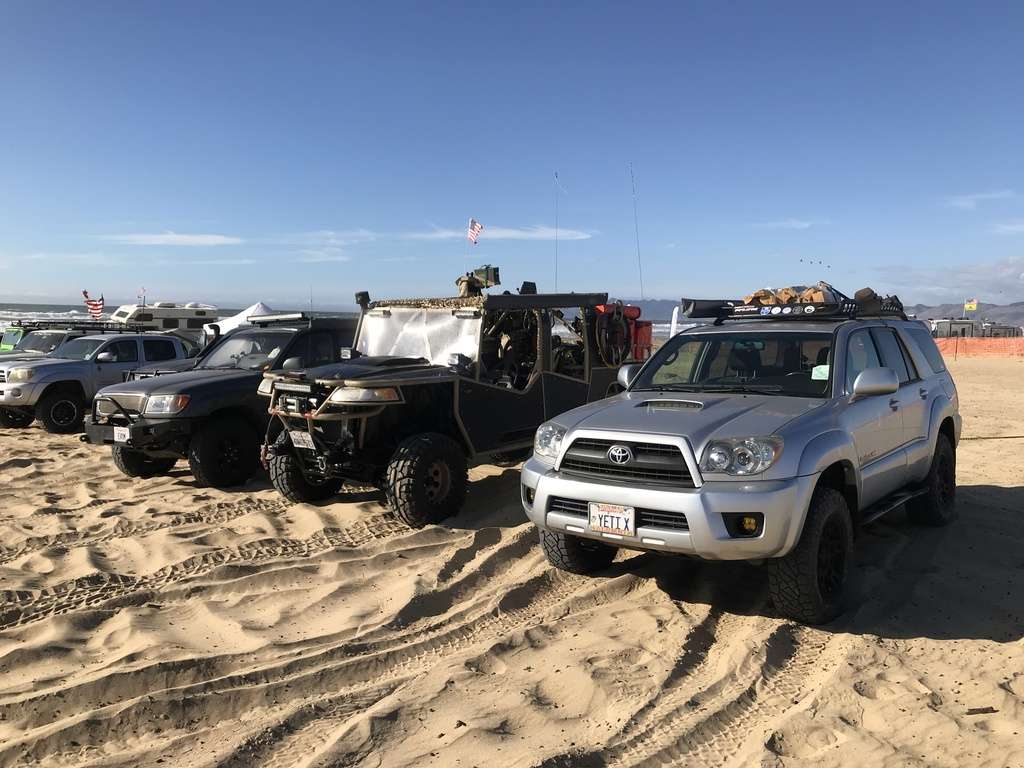
Here are my 4Runner, Nick's Ranger, and my USMC buddy Kevin's Land Cruiser:
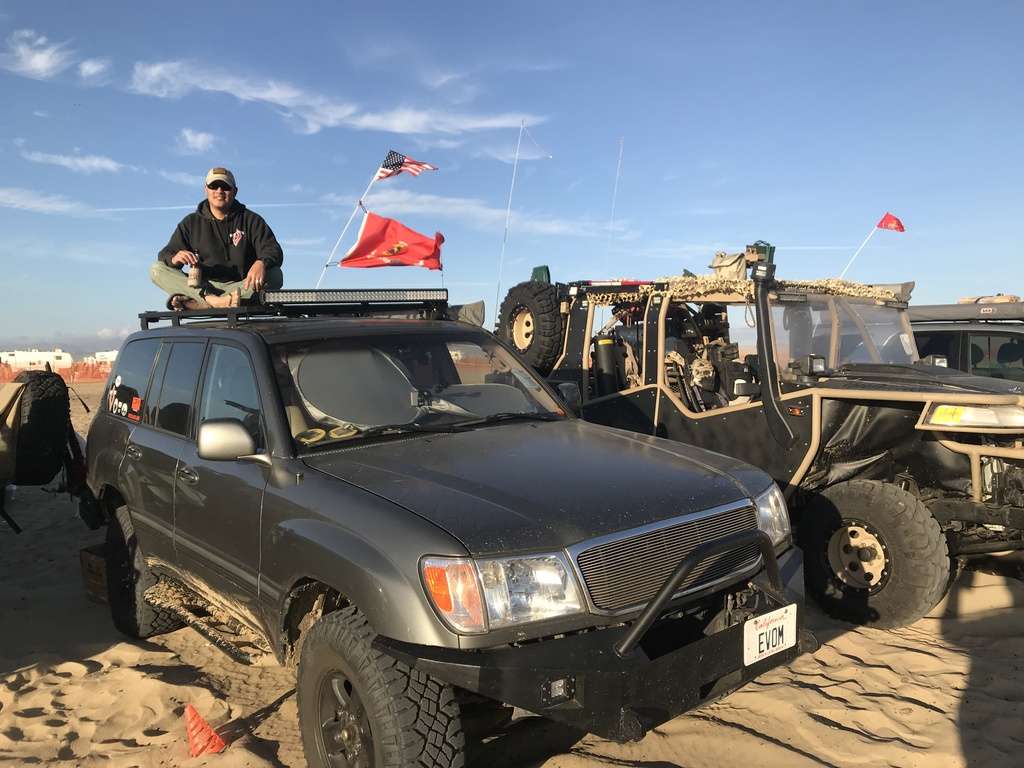
Kevin on top of his Land Cruiser. Nick and Kevin fabricated the bumpers and everything else on Kevin's Land Cruiser. I really wish I lived closer to them.
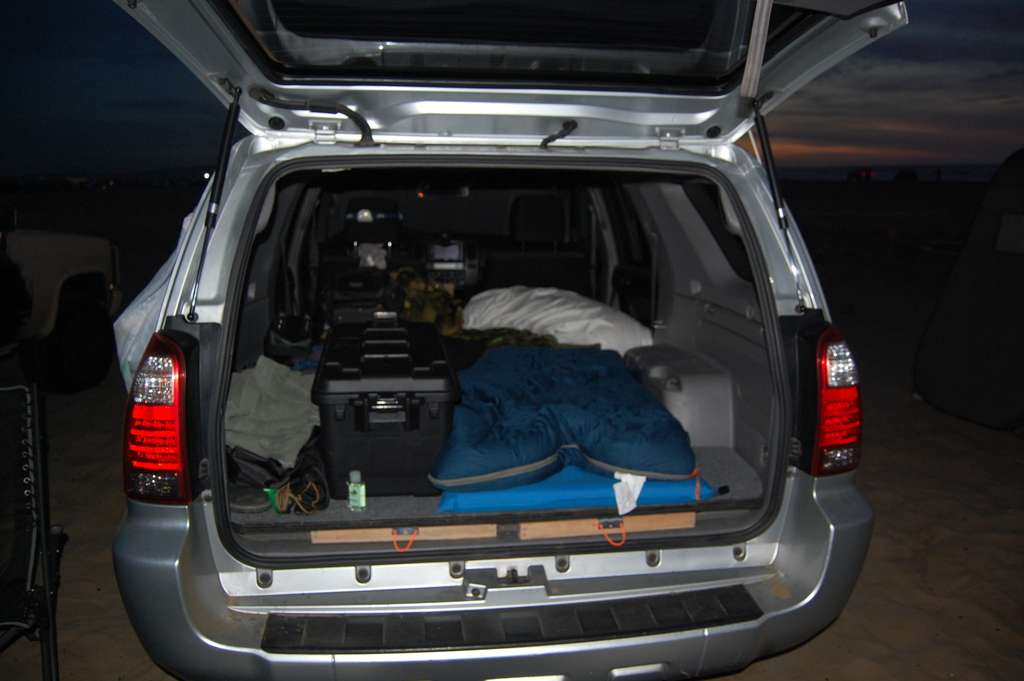
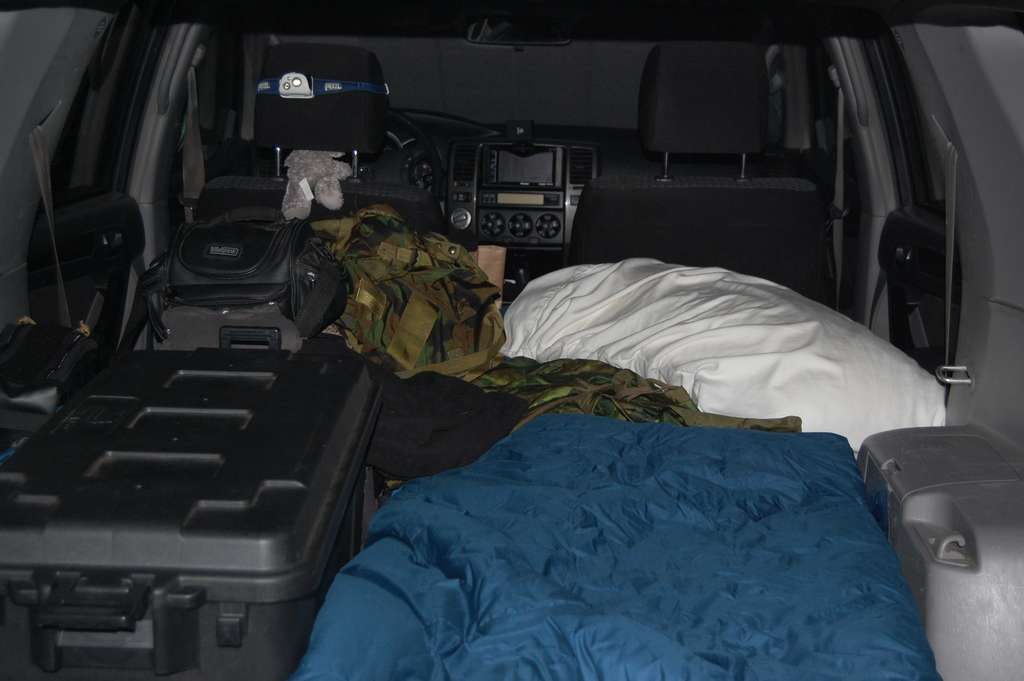
My home for the weekend:
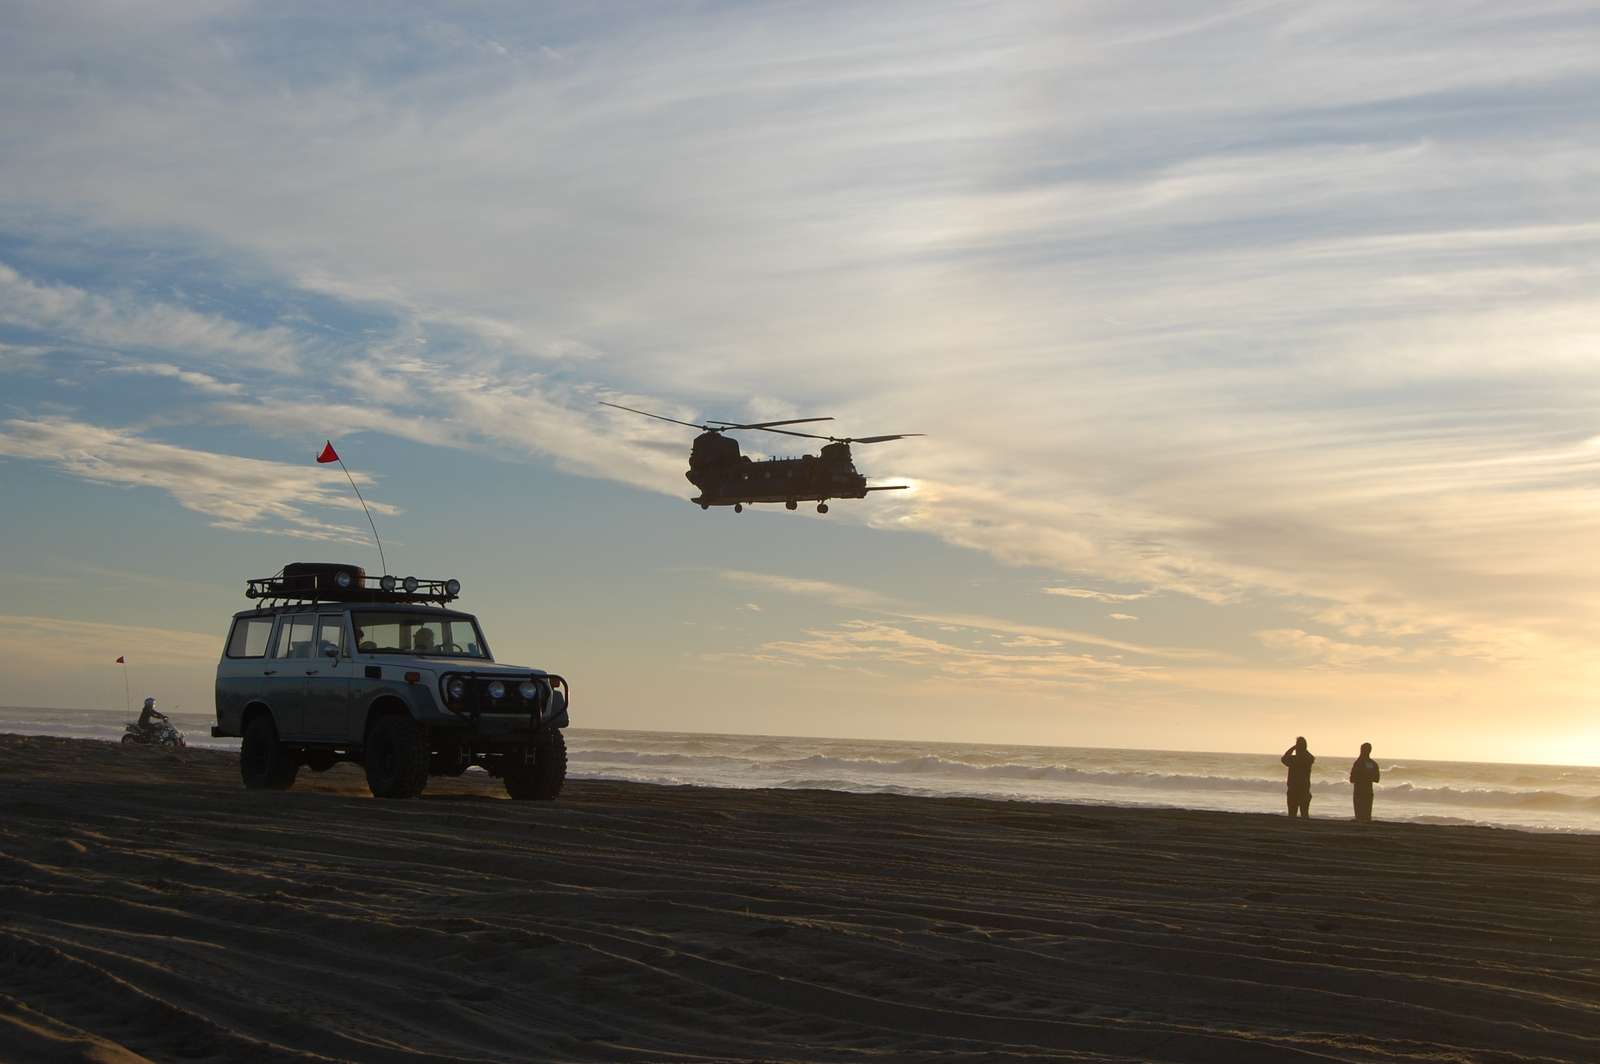
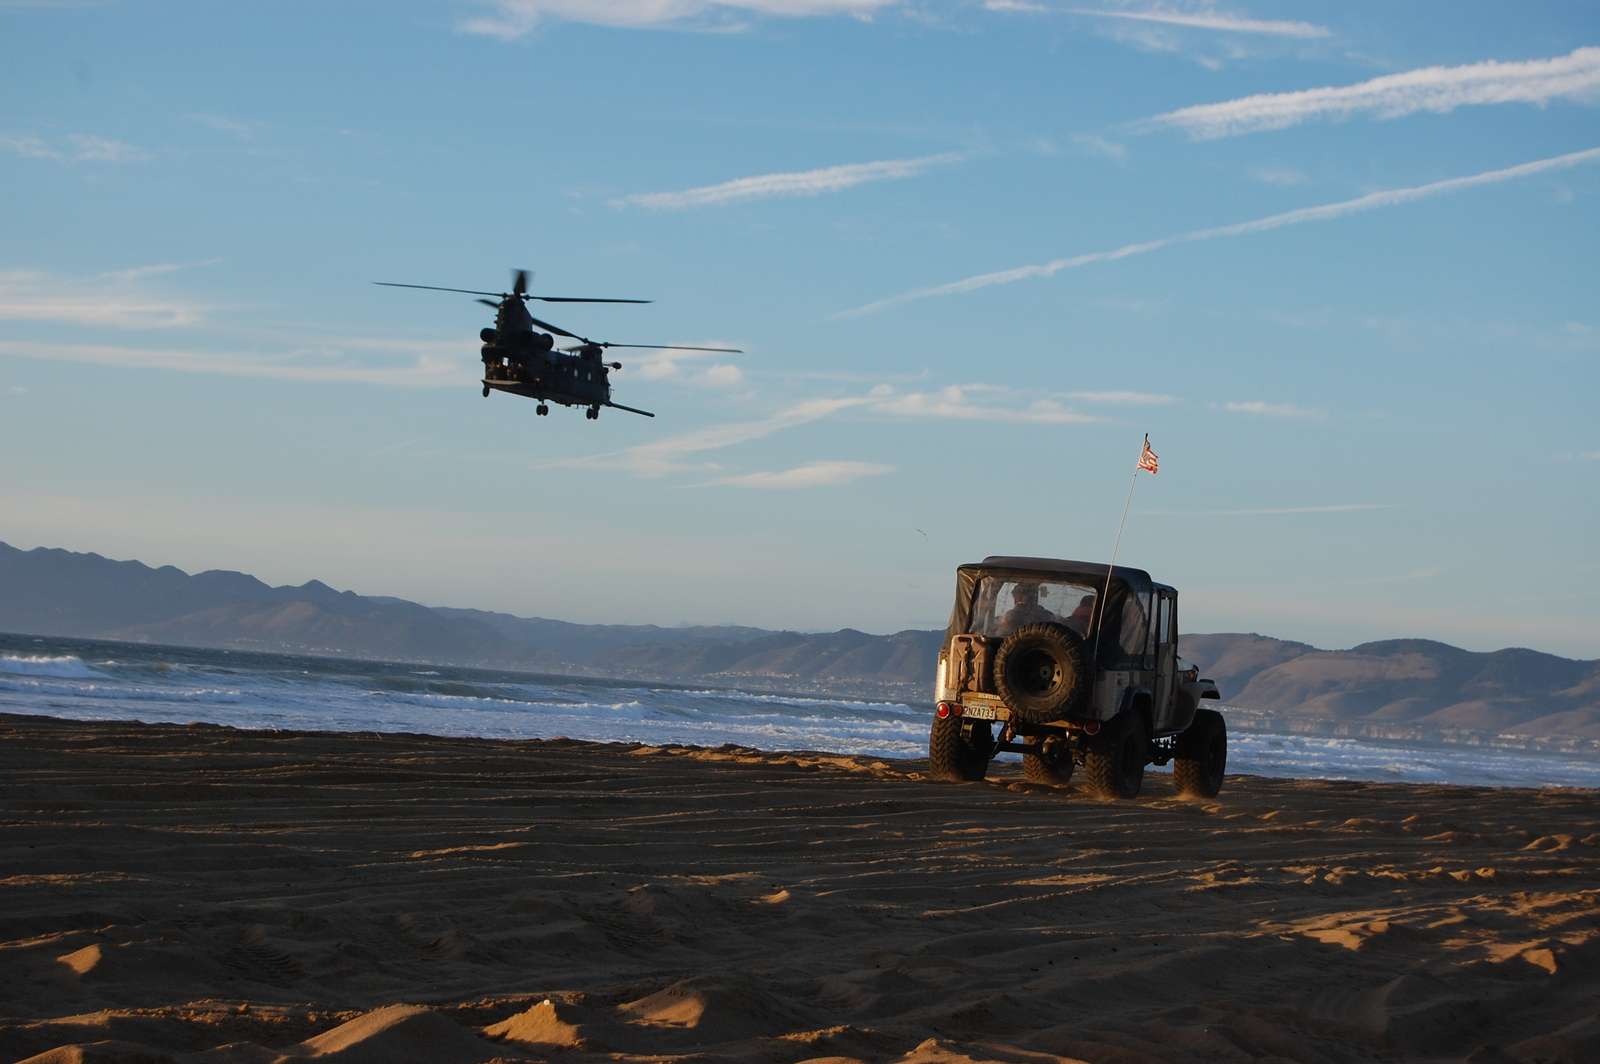
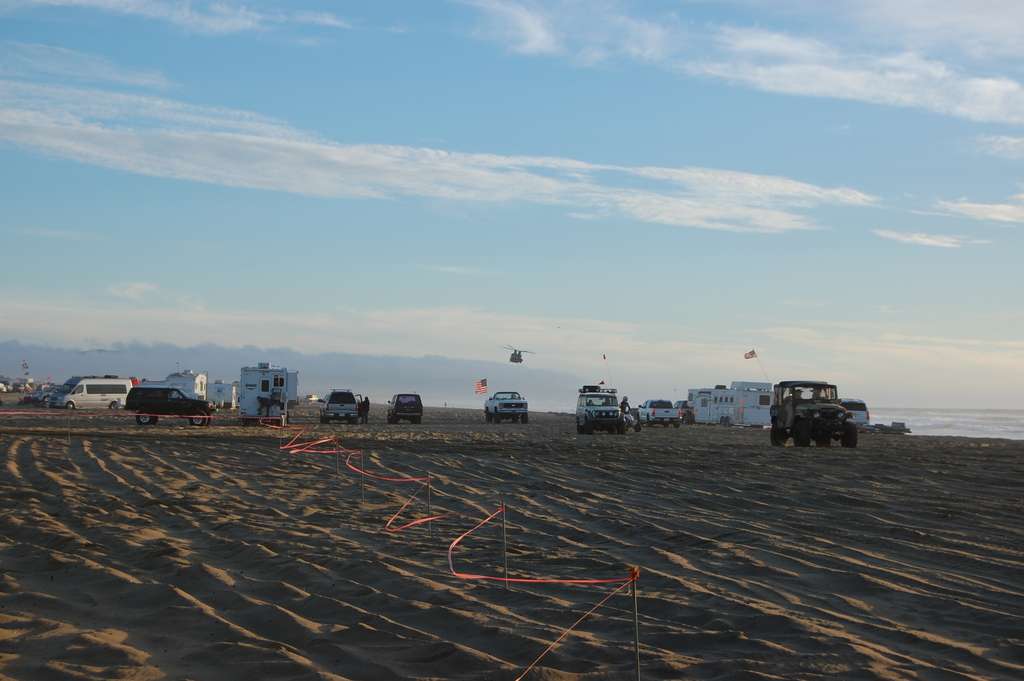
Right as the sun was dropping, a CH-47 Chinook did a very low flyover and I happened to have the good camera handy and got these two amazing pictures (sorry they're so big but . . . well awesome)
Some more sunset and beer drinking pictures
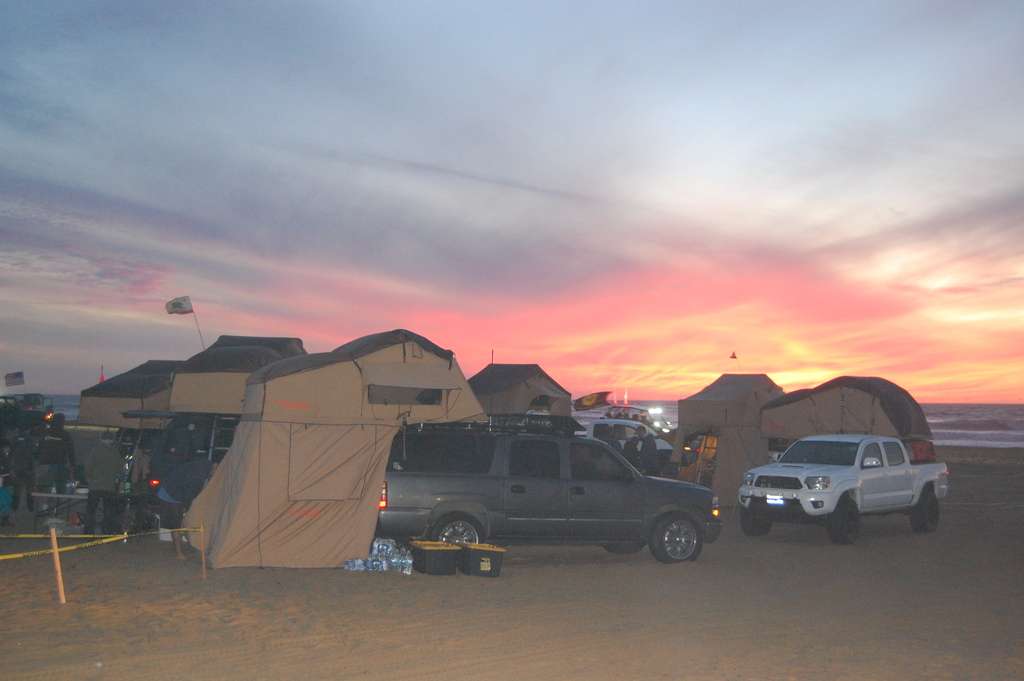
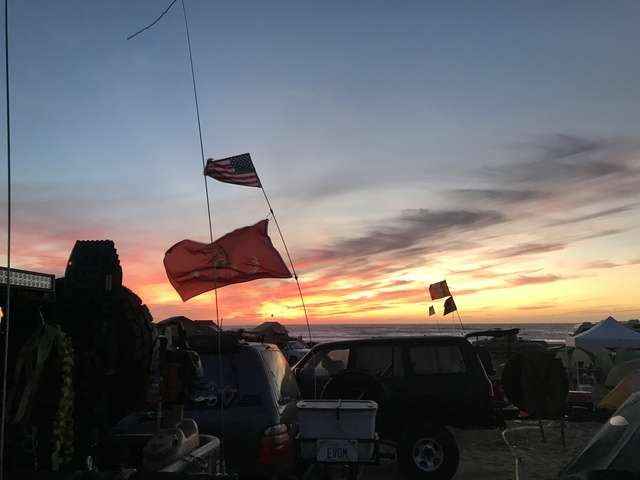
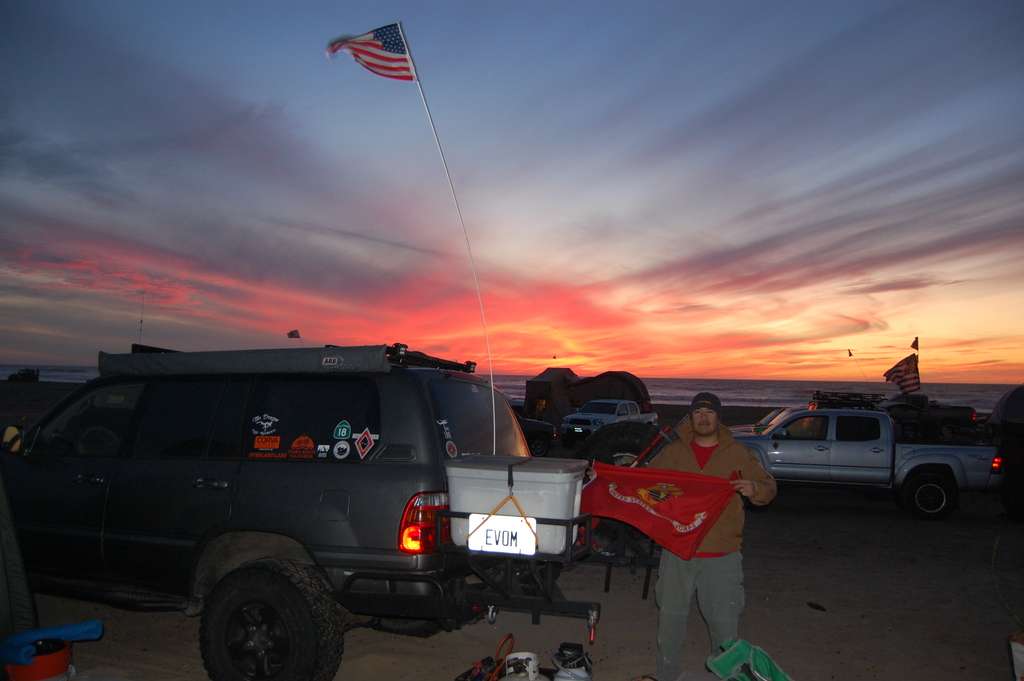
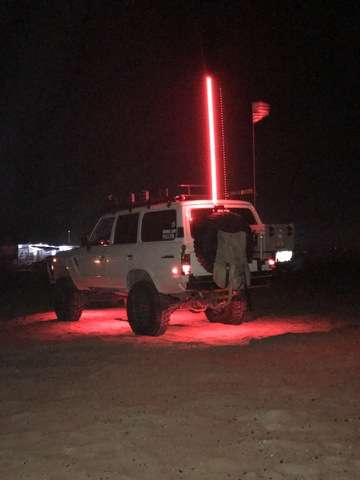
And a bunch of pictures from the poker run

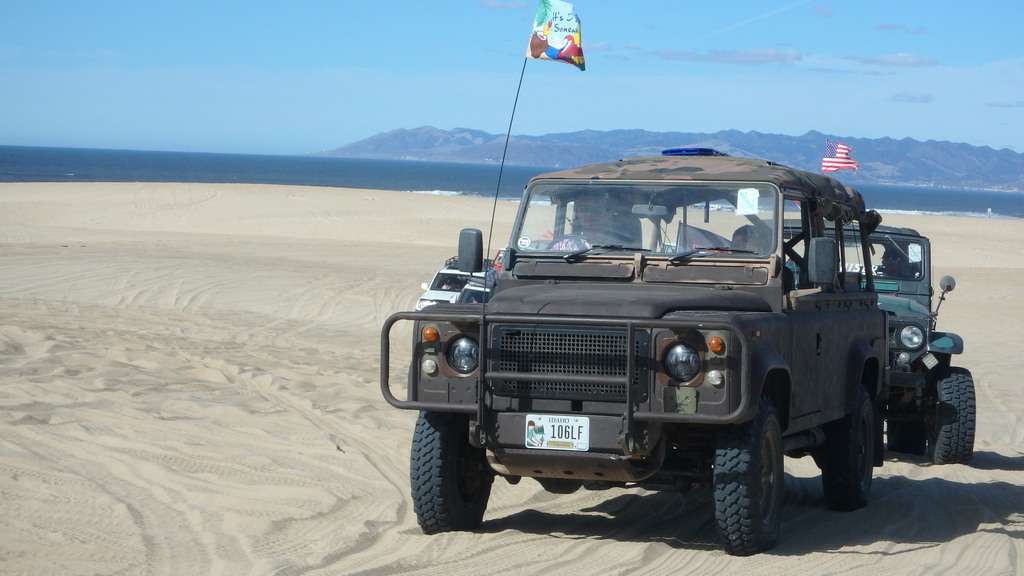
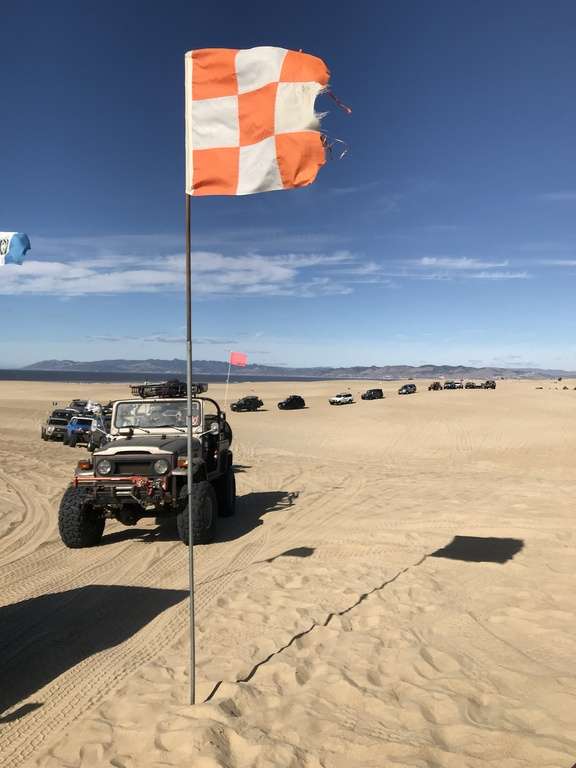
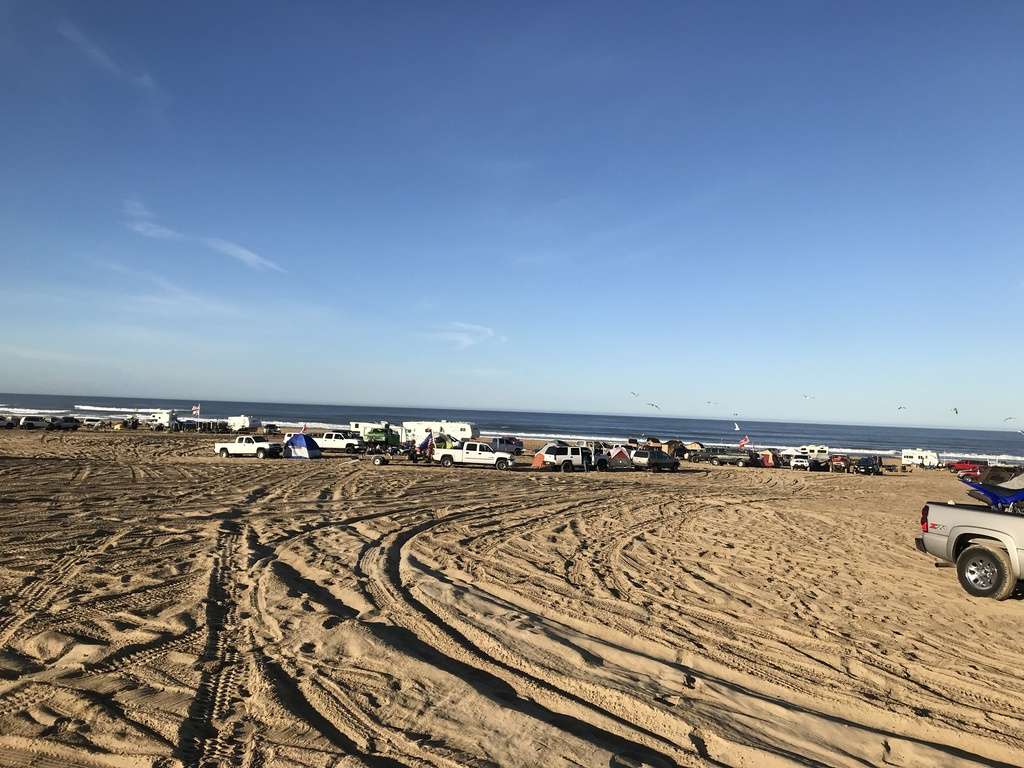

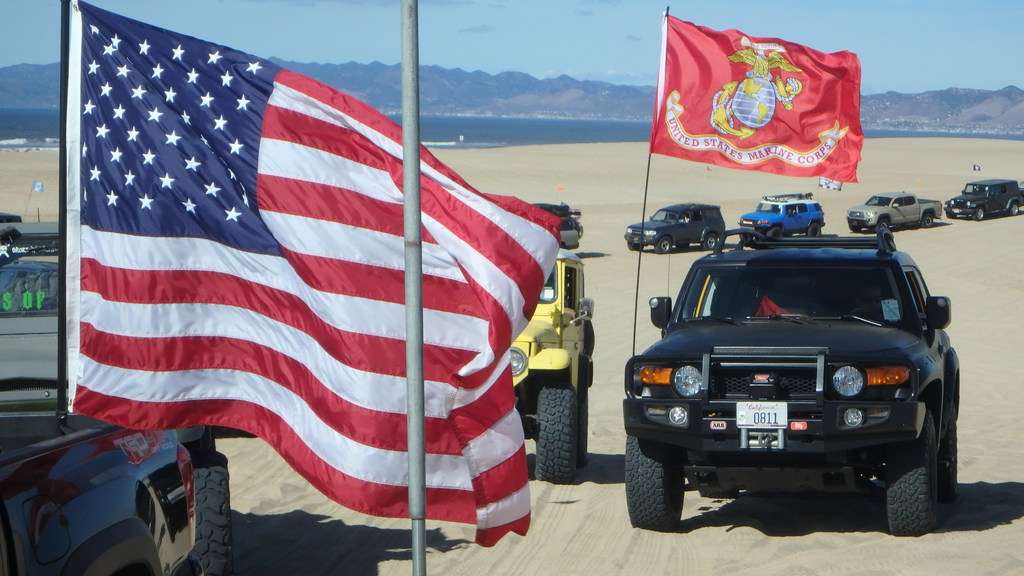
This post is going to be mostly just pictures. There wasn't really any technical driving or anything like that.
Since the annual Turf and Surf event fell on the weekend of the USMC Birthday and Veterans' Day in 2017, a couple of Marine buddies and I decided to go. We partnered up with a group of guys from Trail Crew and Overland Labs and had an awesome weekend. We hung out and drank beer, manned a checkpoint for the poker run, and checked out some really cool rigs. So, onto the photos.
This is my friend Nick's rig. It's based on a Ford Ranger platform but the only parts remaining are the frame and drivetrain. He fabricated the rest himself! He is an EMT so there's a heavy bent towards EMT gear as you can see. Thankfully, we did not need his EMT skills over the weekend.
Here are my 4Runner, Nick's Ranger, and my USMC buddy Kevin's Land Cruiser:
Kevin on top of his Land Cruiser. Nick and Kevin fabricated the bumpers and everything else on Kevin's Land Cruiser. I really wish I lived closer to them.
My home for the weekend:
Right as the sun was dropping, a CH-47 Chinook did a very low flyover and I happened to have the good camera handy and got these two amazing pictures (sorry they're so big but . . . well awesome)
Some more sunset and beer drinking pictures
And a bunch of pictures from the poker run

bombventure
New member
Here's a sample of the pinstriping I got:
+1 for the beauty marks!
Mine has a couple deep ones that can’t be buffed out unfortunately, but I guess it gives character? Haha
I can relate to the unhappy daughter situation as well. My 4yr old doesn’t necessarily like the drives up into the mountains where we tend to go hiking a lot, cause there’s usually a cliff off to one side.
Sounds like you had a good time nonetheless! Great pictures too Yeti!
YetiX
New member
+1 for the beauty marks!
Mine has a couple deep ones that can’t be buffed out unfortunately, but I guess it gives character? Haha
I can relate to the unhappy daughter situation as well. My 4yr old doesn’t necessarily like the drives up into the mountains where we tend to go hiking a lot, cause there’s usually a cliff off to one side.
Sounds like you had a good time nonetheless! Great pictures too Yeti!
Thank you! Fortunately, that trip did not turn her off of off-roading. Last month we did a two night camping trip to Big Bear which I'll be writing about soon! We got tricked into trying a Black Diamond trail, now that was gnarly.
Abe_Froman
New member
[MENTION=87816]Baja Designs[/MENTION] makes amazing lights which I've been using for years on all of my motorcycles. Baja Designs makes kits for the 5th Gen 4Runner as well as a number of Tacoma and Tundra models, but no love for the 4th Gen. Or so I thought . . .
I saw a 4th Gen with Baja Designs fog lights on Instagram so I contacted Chris at Baja Designs to see how I could make this a thing on my 4Runner. Turns out Chris has a 4th Gen and he had done this as well. Since Baja Designs is in north San Diego County, I took a long lunch and headed up to meet with Chris and see how to do it. Turns out it's very simple...
Parts used
Baja Designs Part No. 447103 - Tundra/Tacoma Fog Light Kit
Baja Designs Squadron Pro Lights - more on this...
Drill and bits
Black spray paint
Painters tape
Cold beer. I used a Sculpin IPA.
First, let's discuss the lights themselves. The Squadron lights come in three levels of lumens, clear or amber lens, and with different lenses depending on how you want your light pattern. The Squadrons come in Racer, Pro, and Sport editions. The Racer has 4,300 lumens and a lens designed specifically to throw the light a long distance, the Pro puts out 4,900 lumens and is for close/middle/distance driving (depending on the lens), and the Sport puts out 2,260 lumens.
If you want to use your lights the same way you use the stock fog lights, i.e. you want to use them on the street and don't want to blind oncoming drivers, get the Sports. I wanted mine to be as bright as possible for off-road use only (or when there's no oncoming traffic) so I went with the Pro lights. Because I wanted more contrast in dusty or foggy conditions, I went with the amber lens and I chose the Driving/Combo lens which has two spot lights for distance and two driving lights which put the light out at a 42° pattern for cornering, for a nice blend of both near and distance lighting.
I do not have pictures of installing the mounting kit onto the lights, but it's very simple. You need to remove the bezel from the Squadron lights using a 4mm (I think) hex wrench and replace it with the mount kit bezel.
So let's get to the install . . .
First, you need to remove the stock fog lights. I got under the rig and disconnected the fog lights from their harness. Then it's simple to remove the outer bezel which is held in place by a tab on each side. Once you release one tab, the bezel can just be pulled out from the front. There are two bolts, one on each side, which hold the fog light in place. Once removed, you're left with an empty fog light pocket which looks like this:
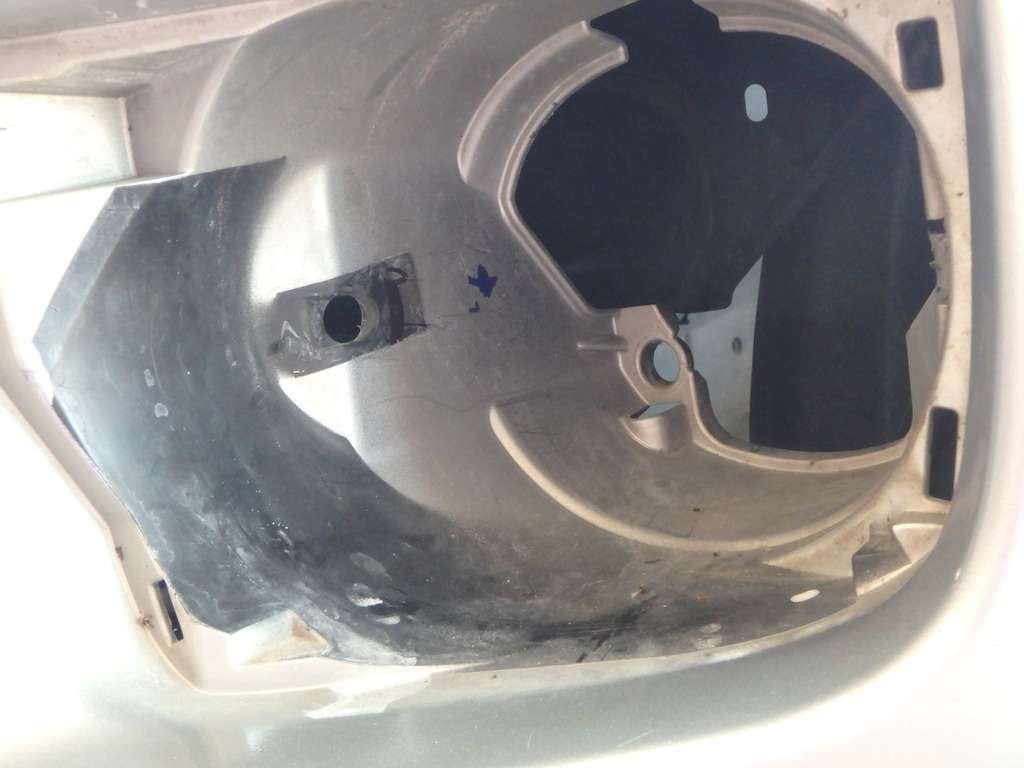
You can see one of the holes where the bolt goes that holds the stock light in place. If you bolted the lights in using the stock holes, the lights would be angled waaaaay out to the outside. To correct this, you need to drill a new hole back about 1 1/4". This is a shot of the Squadron Pro light with the mount kit installed, showing how far back to drill the hole.
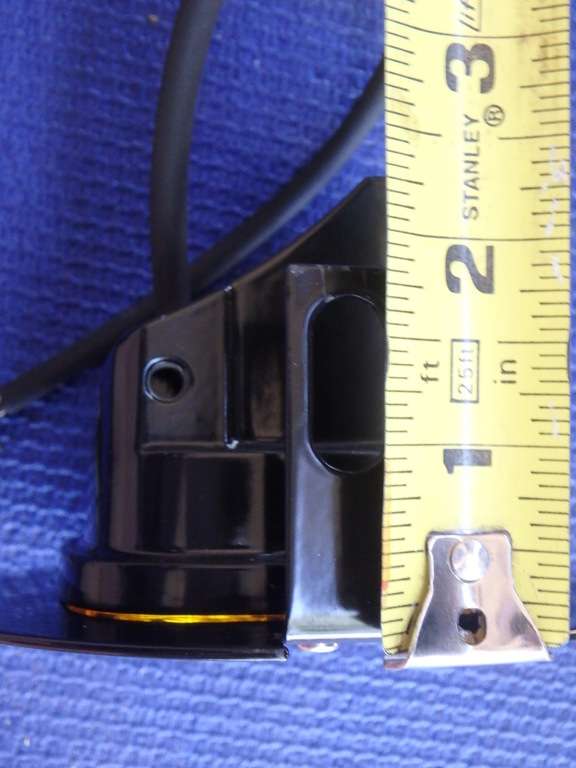
In the picture above, you can see where I made a mark in the pocket to drill the hole, and in this picture I have drilled the hole:
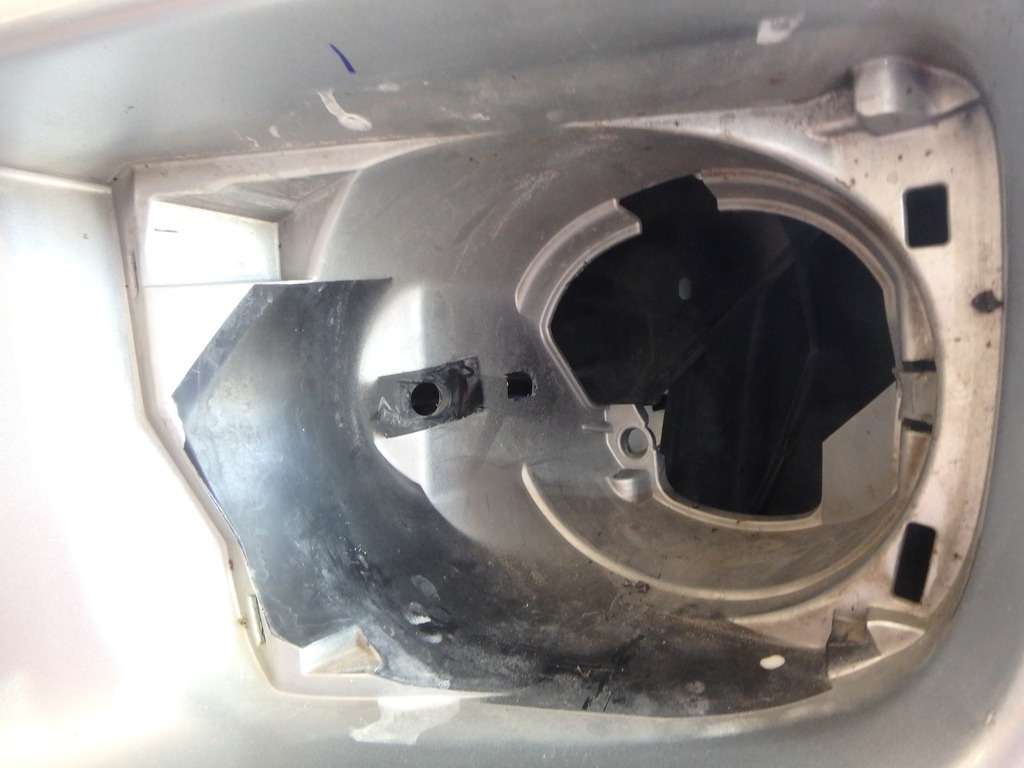
The mounting brackets have little clips that the bolts go into. I found they kept moving around and popping off when I stuck the lights in the pockets, so I used painters tape to hold the clips in place until I could put the bolts in:
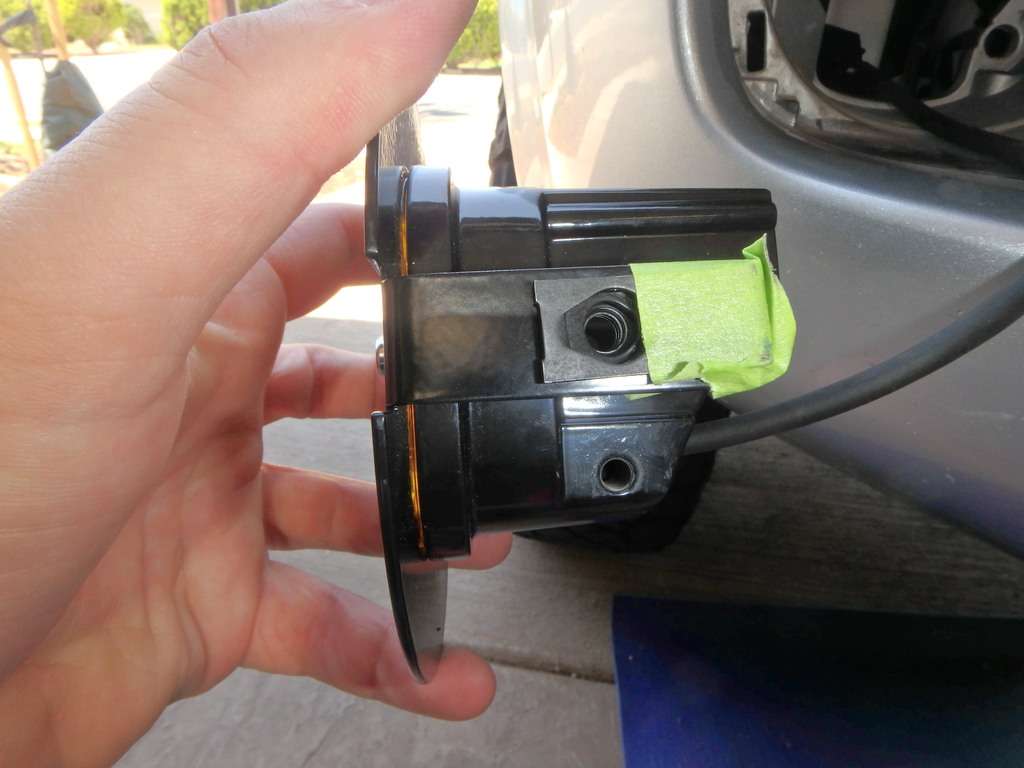
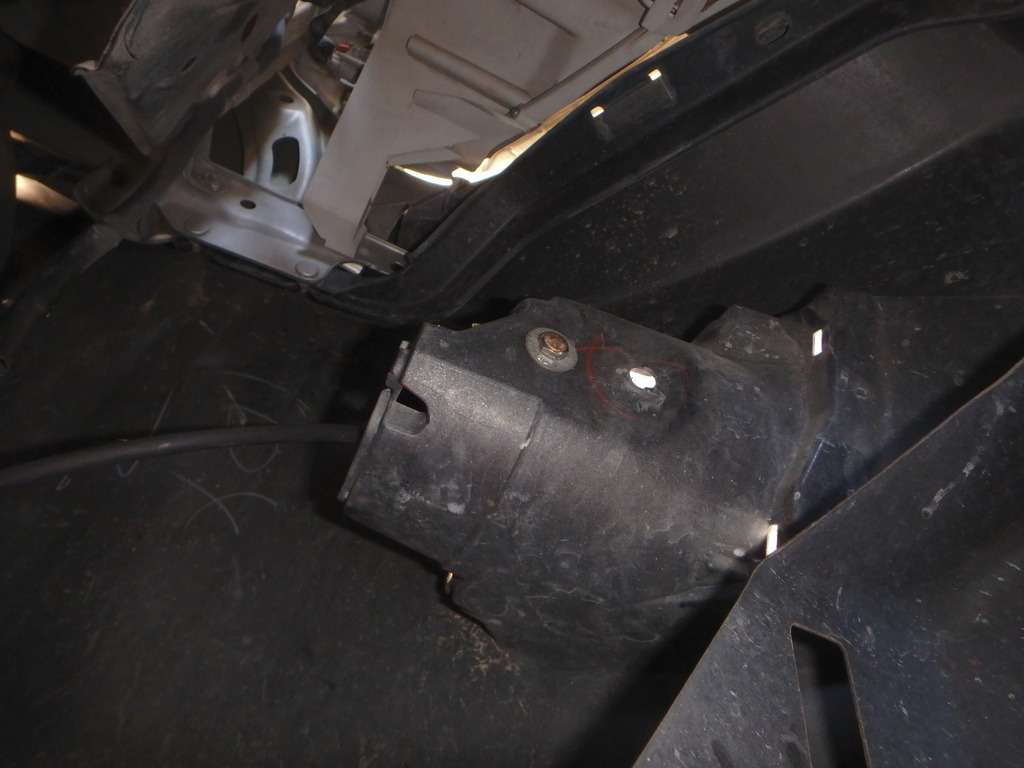
From underneath, you can see how the lights bolt into the pocket and the old unused hole:
When the lights are installed, they look like this:
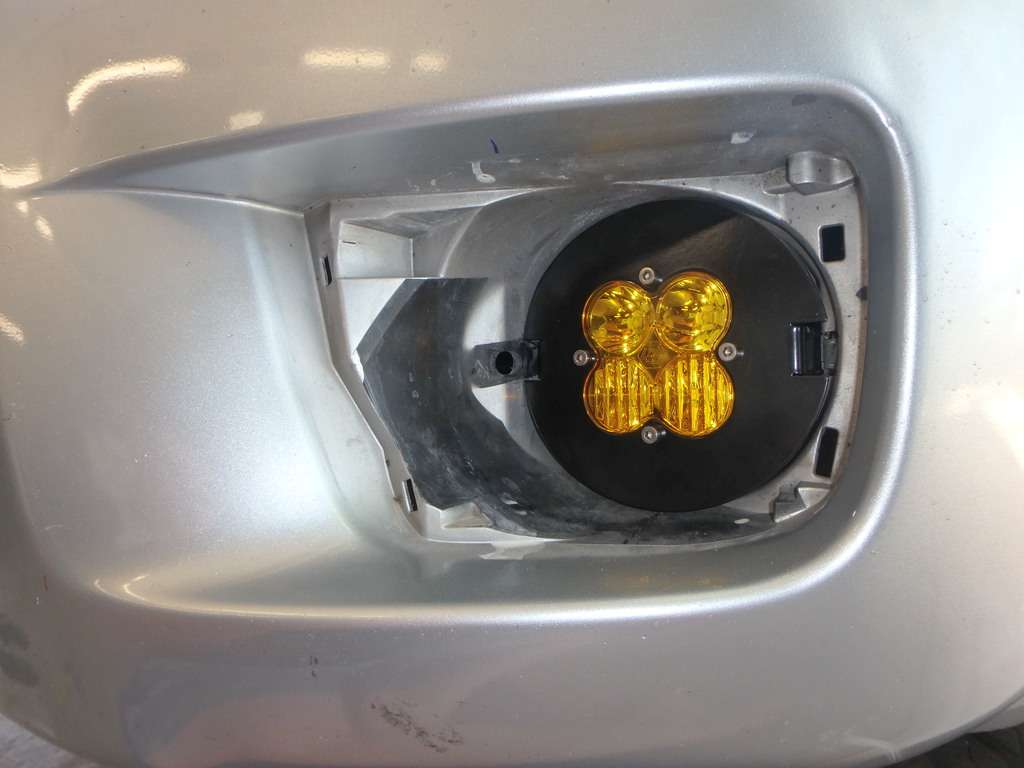
However, when I put the outer bezel back in, I noticed that there was a lot of silver showing which was not acceptable:
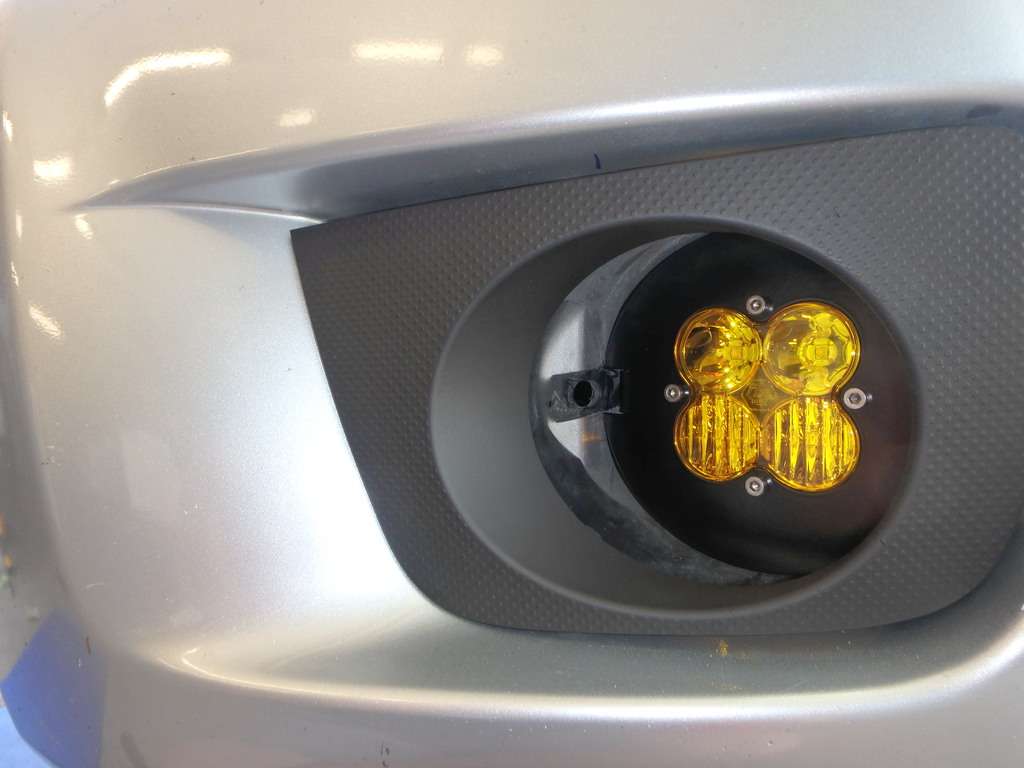
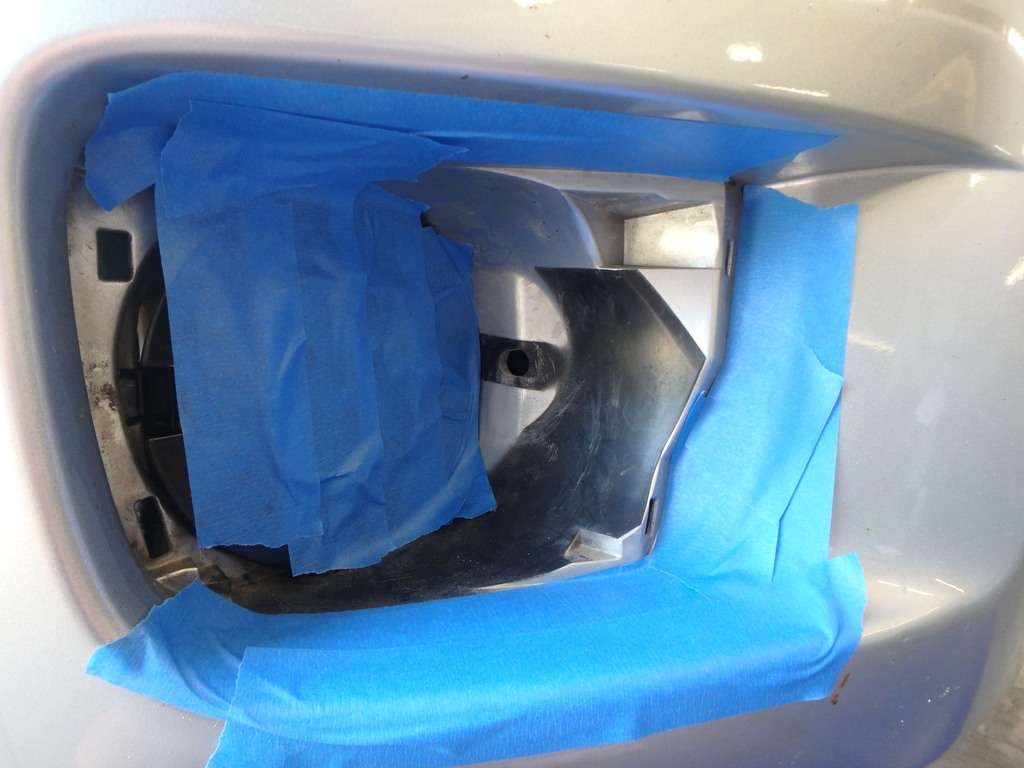
So I removed the outer bezel, masked everything off, and spray painted the pocket all black:
With the final result looking like this:
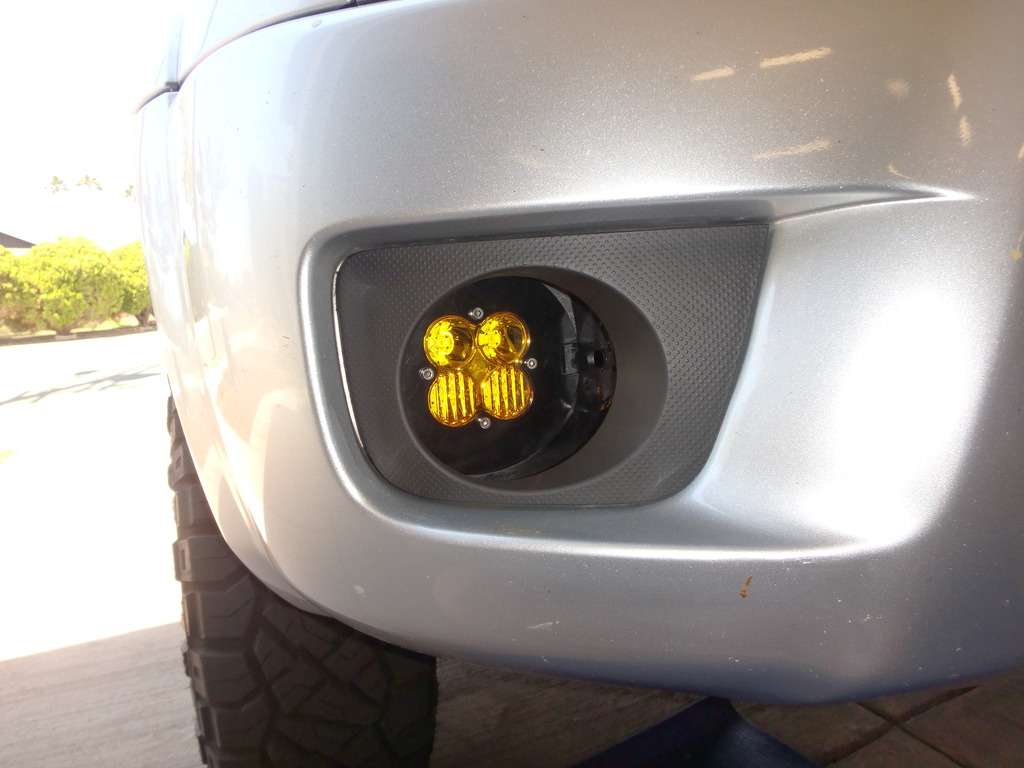
(The flash makes it look uneven, but it looks great in person.)
The mounting kit comes complete with an adapter which allows the Baja Designs lights to be hooked up to the Toyota fog light harness, which is what I did since I wanted to control them from the stock fog light switch on the turn signal stalk. I had to reverse the polarity of the wires which was no big deal, I just pressed the little tabs to release the wires from the Deutsch connectors and reversed them. All done:

The final step for me was to do the "Independent Fog Light Modification" so that I can turn the fog lights on anytime the key is on. This way I can turn on just the fog lights, and the fogs stay on when the high-beams come on. Here they are turned on without the headlights being on which is great for visibility off road:
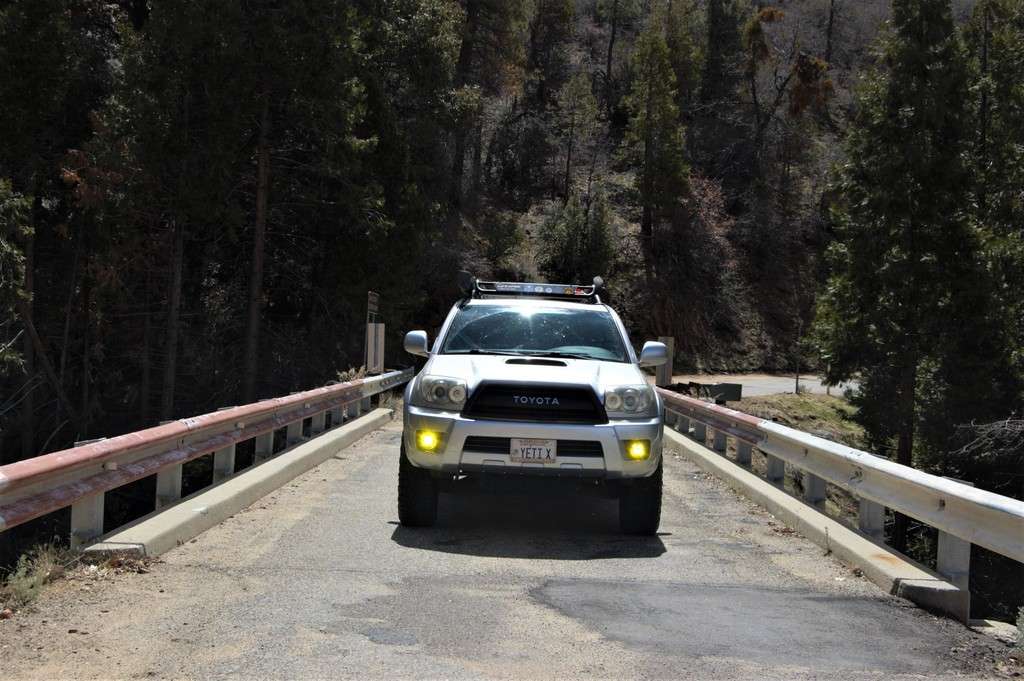
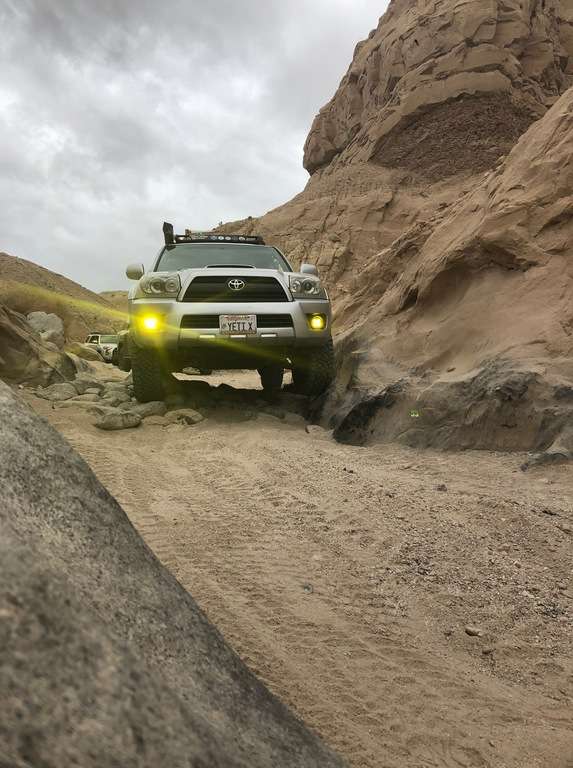
I could not be happier with the results. The lights are amazingly bright and turn night into day. The amber lens provides high contrast and the combo lens is really nice in twisty tight trails.
Please let me know if you have any questions!
Thanks for sharing! This is exactly what I've been looking for!
YetiX
New member
Thanks for sharing! This is exactly what I've been looking for!
Glad it helped!
YetiX
New member
Front Suspension
So, shortly after I bought my 4Runner I ditched the long-shot stock XREAS suspension in favor of Bilstein 5100's. I had had these on my prior 4Runner and they were fine, but they're not ideal. I always felt they lacked rebound damping, especially in the rear, and were unduly harsh on hard hits (like rocks in the trail). I did a lot of research into what I wanted to upgrade to and looked at King, Fox, Icon, OME, etc. Because I'm not building a hard-core rockcrawler or long-travel rig and I drive a LOT of miles on road for work, I wanted something mild-but-capable and low maintenance. I wzs seriously considering OME when I read this article on Expedition Portal: Did Bilstein Just Make the Ultimate 4Runner Suspension
Two other things sold me on this set-up: 1) Bilstein's lifetime warranty, and 2) Bilstein is here in San Diego so I could go check things out and talk to the guys. After talking to the guys at Bilstein, I ordered up a set of 6112's with the plan of getting the rear shocks in a month or two to spread the pain.
I also knew I wanted to replace my UCA's. One of the issues I was having with the 5100's and the stock UCA's was that I could not get my camber to factory specs, and the dreaded "5100 Clunk" which is caused, I believe, by the UCA hitting the spring. I was considering a number of UCA's when I saw that SPC Racing had a "Black Friday" sale on their UCA's. After some research, I concluded the SPC had issues with earlier versions of these but that those issues had largely been resolved, so I went ahead and placed my order for the 25480's.
LINK.
I had the 6112's and SPC UCA's installed at the same time and then took the 4Runner to get an alignment. That weekend, December 2, 2017, I went out to Anza Borrego with Devin and another friend, Ken, in his 5th Generation to test out the new suspension. Ken has a 2015 Trail and he had upgraded his suspension to the 6112/5160 combo.


All I can say is, "H0ly sh!t, what a difference!!" There were more than a few whoops and dips where I cringed, expecting the front end to slam into the bump-stops and there was . . . nothing. The suspension felt sooo much better through slow AND fast paced terrain. Overall, I am very pleased with the 6112/SPC front end combination.
A few pictures from Anza:
The Three Amigos.


And the drop-off we decided not to go down as it was getting late:

So, shortly after I bought my 4Runner I ditched the long-shot stock XREAS suspension in favor of Bilstein 5100's. I had had these on my prior 4Runner and they were fine, but they're not ideal. I always felt they lacked rebound damping, especially in the rear, and were unduly harsh on hard hits (like rocks in the trail). I did a lot of research into what I wanted to upgrade to and looked at King, Fox, Icon, OME, etc. Because I'm not building a hard-core rockcrawler or long-travel rig and I drive a LOT of miles on road for work, I wanted something mild-but-capable and low maintenance. I wzs seriously considering OME when I read this article on Expedition Portal: Did Bilstein Just Make the Ultimate 4Runner Suspension
Two other things sold me on this set-up: 1) Bilstein's lifetime warranty, and 2) Bilstein is here in San Diego so I could go check things out and talk to the guys. After talking to the guys at Bilstein, I ordered up a set of 6112's with the plan of getting the rear shocks in a month or two to spread the pain.
I also knew I wanted to replace my UCA's. One of the issues I was having with the 5100's and the stock UCA's was that I could not get my camber to factory specs, and the dreaded "5100 Clunk" which is caused, I believe, by the UCA hitting the spring. I was considering a number of UCA's when I saw that SPC Racing had a "Black Friday" sale on their UCA's. After some research, I concluded the SPC had issues with earlier versions of these but that those issues had largely been resolved, so I went ahead and placed my order for the 25480's.
LINK.
I had the 6112's and SPC UCA's installed at the same time and then took the 4Runner to get an alignment. That weekend, December 2, 2017, I went out to Anza Borrego with Devin and another friend, Ken, in his 5th Generation to test out the new suspension. Ken has a 2015 Trail and he had upgraded his suspension to the 6112/5160 combo.
All I can say is, "H0ly sh!t, what a difference!!" There were more than a few whoops and dips where I cringed, expecting the front end to slam into the bump-stops and there was . . . nothing. The suspension felt sooo much better through slow AND fast paced terrain. Overall, I am very pleased with the 6112/SPC front end combination.
A few pictures from Anza:
The Three Amigos.
Next up, more armor!!

ryananderson05
New member
I would not mind hearing more about your grill with TOYOTA across the center bar.

YetiX
New member
I would not mind hearing more about your grill with TOYOTA across the center bar.
I'll do a more detailed write up in a little while, but it's basically a Satoshi with the TOYOTA from a 70's Land Cruiser.
I just read your entire build thread on my lunch break which made my diy ham and cheese really more enjoyable. great pics your thread is like an adventure memoir. I have a 3rd and 5th gen 4runner so I rarely look at 4th gens and now I am a subscriber. great job.
Thanks, I appreciate the kind words! I will be adding quite a bit soon including a couple of my favorite mods and a really cool overnite trip I did. This weekend I'm going up to Big Bear again, can't wait.
YetiX
New member
Skid Plates, Icon rear shocks, and Rad Rubber splash Guards
A friend of mine owns(?) Rocksteady Motorsports in San Diego and let me know they were going to be making aluminum skid plates for the 4th Gen. I got the first set of production plates which includes the engine skid, transfer skid, and transmission skid, plus a cross-member (steel). LINK The skid plates are all made from 1/4" aluminum and come with all needed hardware. Rocksteady also does powder coating in house, although I chose to leave mine in bare aluminum.
I wanted aluminum as I will not be doing (hopefully) any rock-crawling so the lighter weight of aluminum appealed to me. These things are very beefy and I have tested all three plates since they were installed almost a year ago and they have stood up to the abuse very well.


I have since spray painted the front of the engine plate flat black since I thought it stood out too much.
I also installed a set of Icon 2.0" rear shocks with remote reservoirs to replace the 5100's. Swapping them out was incredibly easy, I didn't even remove the wheels.

I feel like they were just a little stiffer than the Bilstein 5100's they replaced. Not a huge difference, but notable.
Finally, when I swapped in the 6112's and SPC UCA's, I noticed my splash guards were beat to hell and one was missing. I decided to get a set of the heavy-duty guards from Rad Rubber Designs. They fit perfectly and are much sturdier than the oem guards and they came with all the fasteners needed. Very nice!


After that, it was time for a family trip to Oregon!! . . .
A friend of mine owns(?) Rocksteady Motorsports in San Diego and let me know they were going to be making aluminum skid plates for the 4th Gen. I got the first set of production plates which includes the engine skid, transfer skid, and transmission skid, plus a cross-member (steel). LINK The skid plates are all made from 1/4" aluminum and come with all needed hardware. Rocksteady also does powder coating in house, although I chose to leave mine in bare aluminum.
I wanted aluminum as I will not be doing (hopefully) any rock-crawling so the lighter weight of aluminum appealed to me. These things are very beefy and I have tested all three plates since they were installed almost a year ago and they have stood up to the abuse very well.
I have since spray painted the front of the engine plate flat black since I thought it stood out too much.
I also installed a set of Icon 2.0" rear shocks with remote reservoirs to replace the 5100's. Swapping them out was incredibly easy, I didn't even remove the wheels.
I feel like they were just a little stiffer than the Bilstein 5100's they replaced. Not a huge difference, but notable.
Finally, when I swapped in the 6112's and SPC UCA's, I noticed my splash guards were beat to hell and one was missing. I decided to get a set of the heavy-duty guards from Rad Rubber Designs. They fit perfectly and are much sturdier than the oem guards and they came with all the fasteners needed. Very nice!
After that, it was time for a family trip to Oregon!! . . .

blackoutt
New member
Love my Rock Steady skid plates! They've seen some nice abuse and no issues whatsoever. Great customer service too!
One question I have for you from the fog light post above I noticed you do not have the orange DRL in the corner of your headlights? How do I get rid of those? I haven't had any success with the e-brake procedure to turn them off, maybe I'm doing it wrong.
One question I have for you from the fog light post above I noticed you do not have the orange DRL in the corner of your headlights? How do I get rid of those? I haven't had any success with the e-brake procedure to turn them off, maybe I'm doing it wrong.
YetiX
New member
Some 4Runners do not have DRL's. It has to do with the flasher relay. You can, from my understanding, swap the relay to the non-DRL one. The relay is located behind the fuse box in the driver's side footwell.Love my Rock Steady skid plates! They've seen some nice abuse and no issues whatsoever. Great customer service too!
One question I have for you from the fog light post above I noticed you do not have the orange DRL in the corner of your headlights? How do I get rid of those? I haven't had any success with the e-brake procedure to turn them off, maybe I'm doing it wrong.
I also have let the little orange parking light bulbs burn out and not replaced them. I should but I keep forgetting to pick up new bulbs.
I wanted more-substantial recovery points up front (until I get my C4 lo-pro bumper), so I ordered a set of front recovery points from [MENTION=144682]Kfog375[/MENTION] at Treaty Oak Offroad. LINK The recovery points are made from Heavy Duty A572-50 steel.
For the 2006-2009 4Runners, you have to cut off the front tie-down hooks. 10 minutes with an angle grinder and a bit of black spray paint and they're gone.
To install the recovery points, you need to loosen all the radiator bolts (no need to actually un-hook any hoses or anything) and lift the radiator up. In this picture, you can see how the radiator is resting on a short piece of 2x4. This gives you room to get the bolts in.
I painted mine red to confuse the Jeep crowd. :lol:
And the finished result:
I also bought the Load Equalizing Bridle to better distribute any force across the frame rails. LINK
Luckily, I haven't had to use them yet but I'm sure that when I do they do the job.
Would you say it'd be redundant to have the Treaty Oak recovery points and the C4 Lo Pro bumper?
On another note, I was just in San Diego two weekends ago for a bachelor party. Fun stuff being that close to TJ.
YetiX
New member
Would you say it'd be redundant to have the Treaty Oak recovery points and the C4 Lo Pro bumper?
On another note, I was just in San Diego two weekends ago for a bachelor party. Fun stuff being that close to TJ.
I always say you can never have too many recovery points. That said, I don't know if the Treaty Oak recovery points are compatible with the C4 Lo-Pro bumper, it may mount to the same location on the frame rail. :noidea:
YetiX
New member
Family Road Trip to Oregon - 2017
My in-laws have a house on a lake near Florence, Oregon that we go to once or twice a year. With me, my wife, the kid, and two Rhodesian Ridgebacks, it's a full 4Runner. In the past, I simply bolted our Thule storage box to the cross-bars, but with the Rola rack, I had to figure out something new. Enter Baja Rack's storage box mounts. LINK While they're perfect once they're installed, installing them on a rack that is already mounted on the vehicle (especially one as low as mine) is a big pain in the ass. Baja Rack should really weld the nuts to the bottom plates, installation would be SO MUCH easier. (I did email them to make that suggestion...)
What ended up making this work was using painters tape to hold the nuts in place while I got the bolts through...


With the box mounted up, we were ready to hit the road!!

I am obligated to make home-made clam chowder ever trip, this trip's batch was one of the best!

A few shots of the lake from the house . . .


Of course we took some trips in the 4Runner . . .


including a trip to the University of Oregon so the kid could see the campus (she loved it):

And, of course, the pups had a blast running on the beach (it was cold af) and snuggling on the couch next to the fire and watching the ducks on the lake.


Overall, it was a very relaxing trip and we made it home in time for New Year's Eve!
Next up, a RAM mount for my tablet . . .
My in-laws have a house on a lake near Florence, Oregon that we go to once or twice a year. With me, my wife, the kid, and two Rhodesian Ridgebacks, it's a full 4Runner. In the past, I simply bolted our Thule storage box to the cross-bars, but with the Rola rack, I had to figure out something new. Enter Baja Rack's storage box mounts. LINK While they're perfect once they're installed, installing them on a rack that is already mounted on the vehicle (especially one as low as mine) is a big pain in the ass. Baja Rack should really weld the nuts to the bottom plates, installation would be SO MUCH easier. (I did email them to make that suggestion...)
What ended up making this work was using painters tape to hold the nuts in place while I got the bolts through...
With the box mounted up, we were ready to hit the road!!
I am obligated to make home-made clam chowder ever trip, this trip's batch was one of the best!
A few shots of the lake from the house . . .
Of course we took some trips in the 4Runner . . .
including a trip to the University of Oregon so the kid could see the campus (she loved it):
And, of course, the pups had a blast running on the beach (it was cold af) and snuggling on the couch next to the fire and watching the ducks on the lake.
Overall, it was a very relaxing trip and we made it home in time for New Year's Eve!
Next up, a RAM mount for my tablet . . .
YetiX
New member
RAM Mount for a Tablet
I had seen a number of 5th Gen. guys who mounted tablets in their 4Runners but none in any 4th Gens. This was a very easy mod to do and the results are great!
PARTS
RAM Plate with Ball Part# RAM-B-347U
RAM 3" arm Part# RAM-B-201U
RAM X-Grip mount for Tablet Part# RAM-HOL-UN8BU
Stainless steel M4 bolts and nuts (x 4)
Random Delrin scrap I had lying around
Alesmith San Diego Pale Ale .394
I started by deciding where I wanted it. I wanted the tablet to be easily seen, but out of the way. After playing around with different locations, I decided I wanted it to sit even with the A/C controls and out of the way of the cup holders. I then pulled the silver trim piece which surrounds the vertical stack. I placed the RAM ball mount on the back side of the trim piece to make sure I would have enough space and then drilled the four holes about an inch below the hazard light switch:


Looks like I got it right:

I had some plastic plates lying around that used to be a console organizer. I traced the plate size onto the plastic, cut it out with tin snips and then drilled matching holes:

Then I bolted the plate and backing in place with the M4 bolts and nuts:


Then I replaced the trim piece and re-connected all the switches. BOOM.

And here's the (almost) finished result:


I have since painted all of the bolt heads black just to make things blend in better.
It's now been about 10 months since I did this project and I've had quite a few trips using the mount. The tablet remains very stable off-road and has never moved. Running Gaia GPS, the tablet is in the perfect location and works perfectly. The only thing I will do in the future is put a USB power point directly below the RAM ball so I don't have wires going everywhere.
Next up, a couple of local trips . . .
I had seen a number of 5th Gen. guys who mounted tablets in their 4Runners but none in any 4th Gens. This was a very easy mod to do and the results are great!
PARTS
RAM Plate with Ball Part# RAM-B-347U
RAM 3" arm Part# RAM-B-201U
RAM X-Grip mount for Tablet Part# RAM-HOL-UN8BU
Stainless steel M4 bolts and nuts (x 4)
Random Delrin scrap I had lying around
Alesmith San Diego Pale Ale .394
I started by deciding where I wanted it. I wanted the tablet to be easily seen, but out of the way. After playing around with different locations, I decided I wanted it to sit even with the A/C controls and out of the way of the cup holders. I then pulled the silver trim piece which surrounds the vertical stack. I placed the RAM ball mount on the back side of the trim piece to make sure I would have enough space and then drilled the four holes about an inch below the hazard light switch:
Looks like I got it right:
I had some plastic plates lying around that used to be a console organizer. I traced the plate size onto the plastic, cut it out with tin snips and then drilled matching holes:
Then I bolted the plate and backing in place with the M4 bolts and nuts:
Then I replaced the trim piece and re-connected all the switches. BOOM.
And here's the (almost) finished result:
I have since painted all of the bolt heads black just to make things blend in better.
It's now been about 10 months since I did this project and I've had quite a few trips using the mount. The tablet remains very stable off-road and has never moved. Running Gaia GPS, the tablet is in the perfect location and works perfectly. The only thing I will do in the future is put a USB power point directly below the RAM ball so I don't have wires going everywhere.
Next up, a couple of local trips . . .
Similar threads

- Replies
- 2
- Views
- 6K

- Replies
- 0
- Views
- 293

- Replies
- 0
- Views
- 2K
- Replies
- 2
- Views
- 4K
Forum statistics
Trending content
-

-

-
-
-
Thread 'Fixed: Dead Instrument Cluster in 2003 Toyota 4Runner (Corrosion Issue)'
- TheSpeakGeek
Replies: 9